1. Introduction
This manual provides detailed instructions for the assembly, operation, and maintenance of your Golpart Freestanding Portable Wardrobe Rack, Model EA_423-424. This heavy-duty, versatile storage solution is designed to organize your clothing and accessories efficiently, offering adjustable shelves and detachable hanging bars to suit various storage needs. Please read this manual thoroughly before assembly and use to ensure proper installation and safe operation.
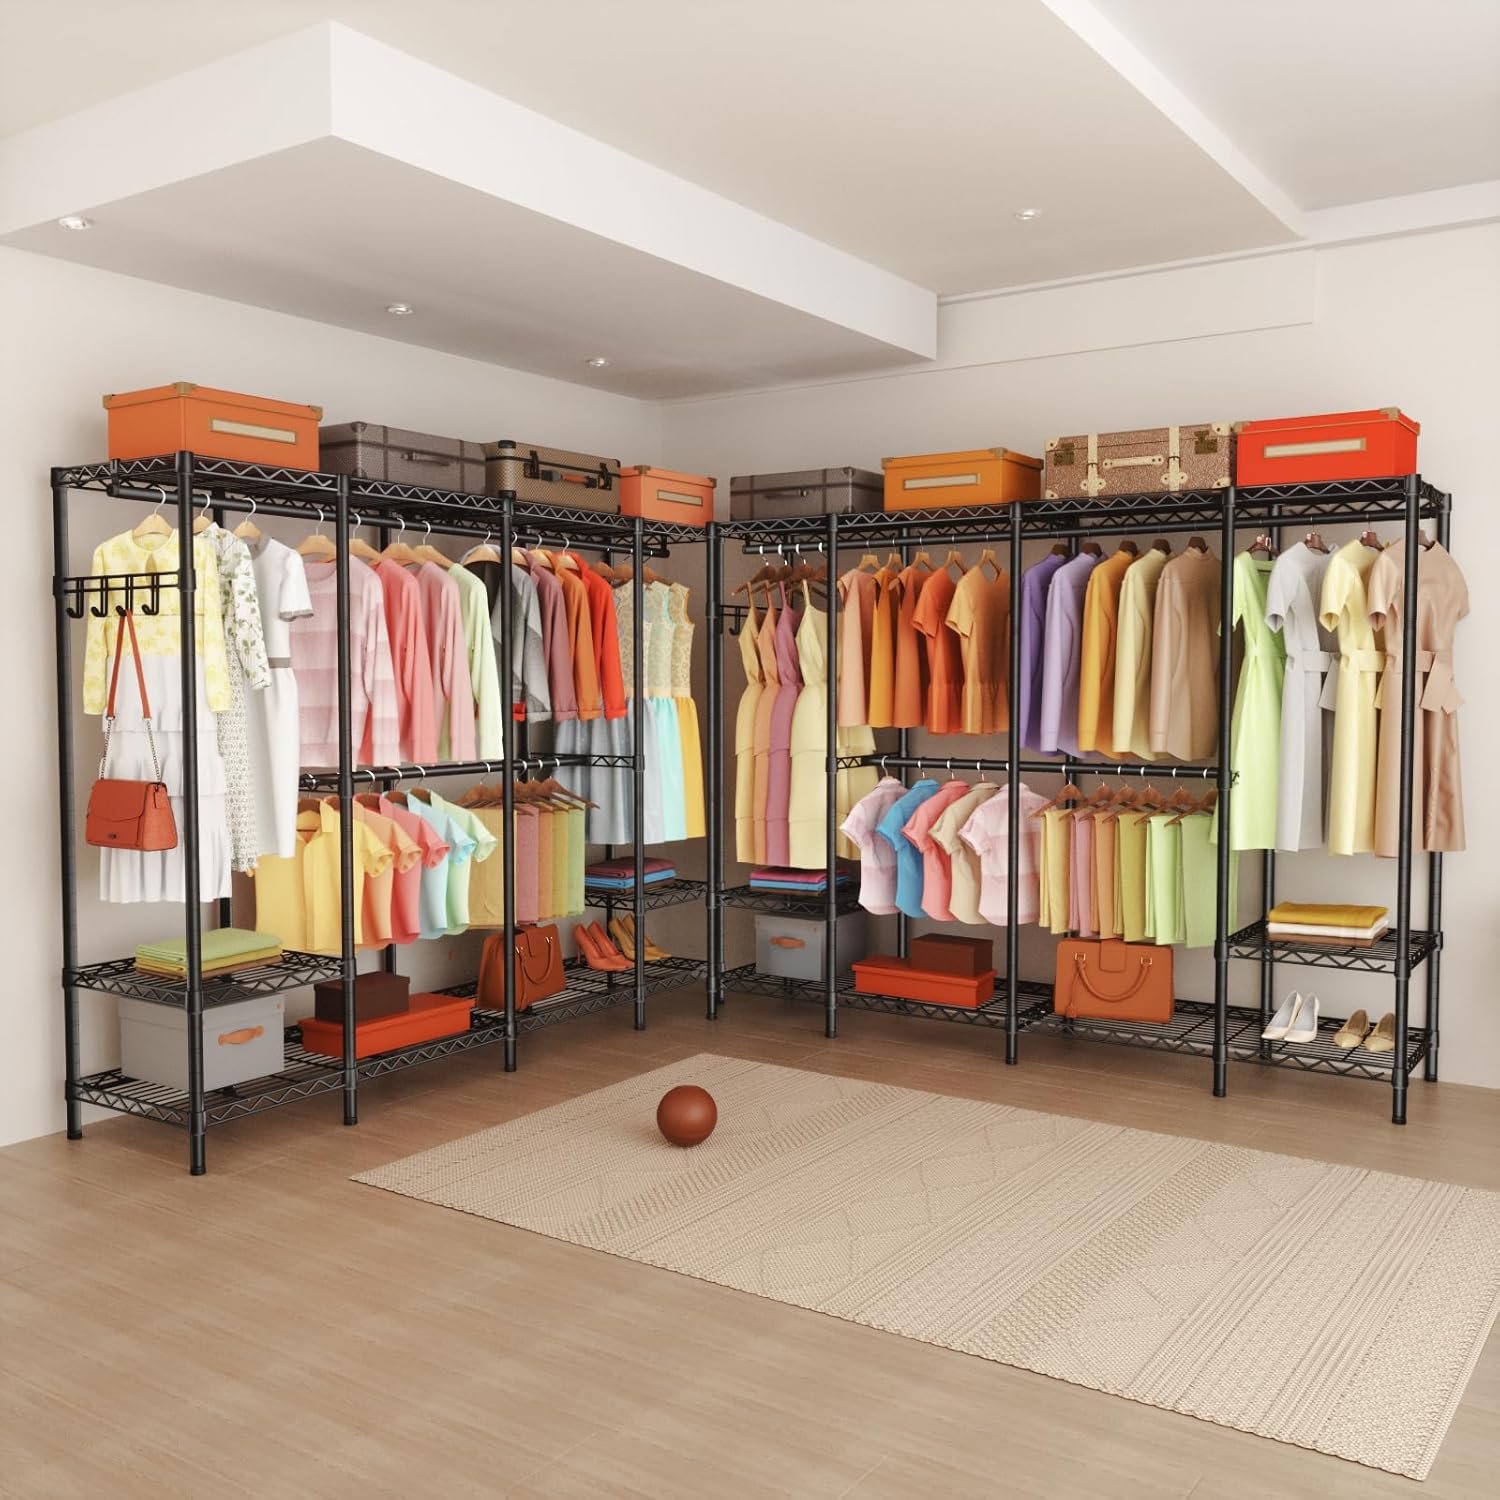
Image 1.1: Fully assembled Golpart Wardrobe Rack, demonstrating its large storage capacity and versatile design.
2. Important Safety Information
To prevent injury or damage to the product, always follow these safety guidelines:
- Read all instructions carefully before assembly and use.
- Assemble the unit on a flat, stable, and clean surface.
- Ensure all parts are securely fastened before placing items on the rack.
- Do not exceed the maximum load capacity of 985 lbs. Distribute weight evenly across shelves and hanging bars.
- Keep children and pets away from the assembly area.
- Do not climb on or hang from the rack.
- Periodically check all connections to ensure they remain tight.
3. Package Contents
Before beginning assembly, unpack all components and verify that all parts are present and undamaged. Refer to the parts list provided in your product packaging for a complete inventory. If any parts are missing or damaged, do not proceed with assembly and contact customer support.
4. Setup and Assembly
Assembly is designed to be straightforward. Follow these steps carefully:
- Prepare the Area: Choose a clean, flat, and spacious area for assembly.
- Install Plastic Clips: Attach the plastic clips to the poles at the desired shelf heights. Ensure the flange of the clip fits securely into the groove on the pole. Follow the arrow directions (upwards) indicated on the plastic clip.
- Understand Clip Gap: Note that a small gap between the two halves of the plastic clip is a structural design feature, not a quality flaw. This design ensures the shelf is anchored firmly once installed.
- Assemble Wire Shelves: Carefully slide the wire shelves down onto the installed plastic clips. Ensure all four sleeves of the shelf fit snugly onto the pole. The end of the shelf with a notch should face downward.
- Adjust Shelf Height: The wire shelves can be adjusted up and down to customize your storage space. To adjust, remove the shelf, reposition the plastic clips, and re-install the shelf.
- Install Hanging Bars: Attach the detachable hanging bars between the poles as needed. These can be positioned to accommodate garments of various lengths.
- Configure Layout: The rack supports multi-type installations. It can be set up in an L-shape for small spaces like corners or bedrooms, or in a straight-lined shape for larger areas such as walk-in closets or cloakrooms.

Image 4.1: Detailed assembly steps for the Golpart Wardrobe Rack, illustrating clip installation, shelf assembly, and height adjustment.
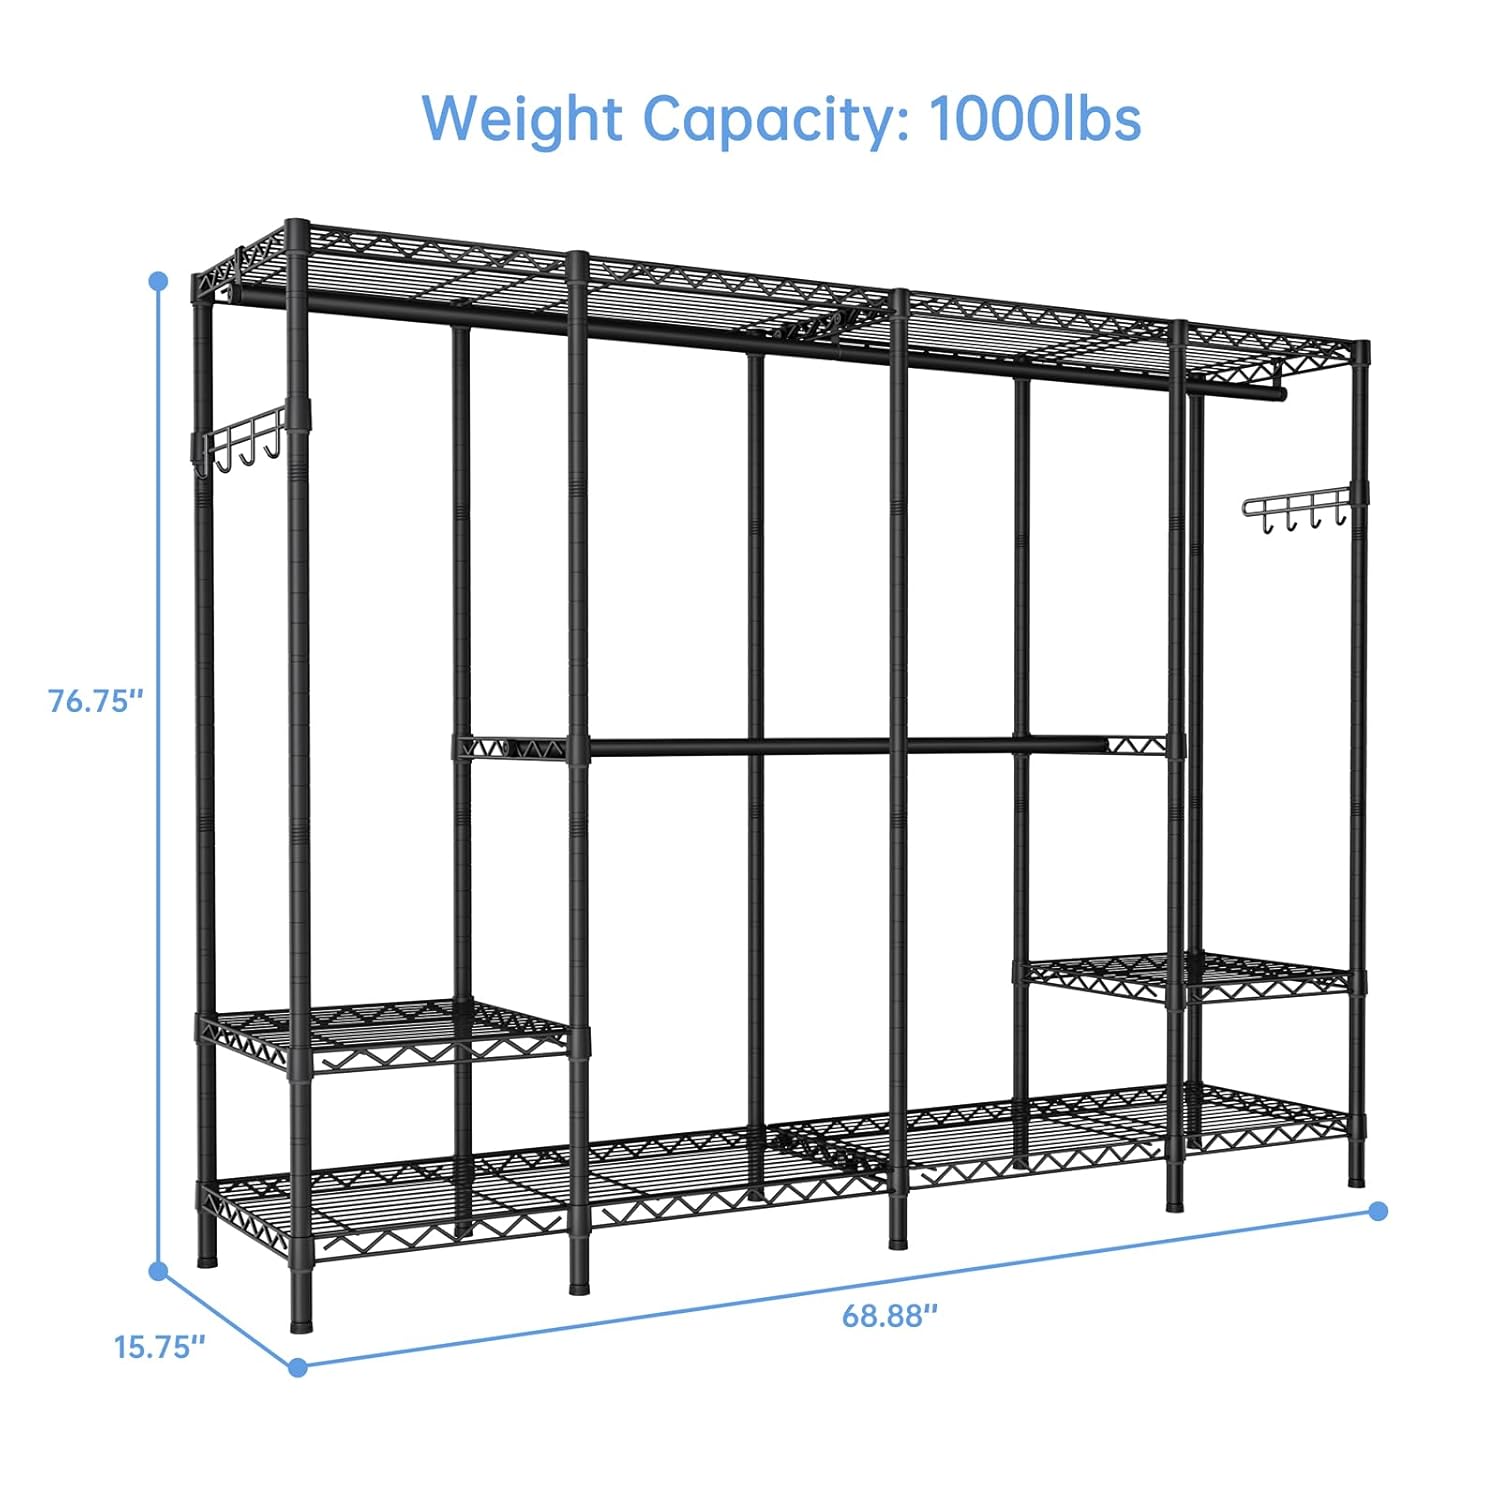
Image 4.2: Dimensional overview of the Golpart Wardrobe Rack, including its overall size and stated weight capacity.
5. Operating Instructions
Your Golpart Wardrobe Rack is designed for versatile storage. Utilize the features as follows:
- Hanging Garments: Use the two detachable hanging bars to hang clothes. The bars can be positioned at different heights to accommodate various garment lengths, from shirts to long dresses.
- Shelf Storage: The six height-adjustable shelves provide ample space for folded clothes, shoes, bags, storage boxes, and other accessories. Adjust the shelves to create custom compartments.
- Load Capacity: The rack has a maximum load capacity of 985 lbs. To ensure stability and longevity, distribute the weight evenly across all shelves and hanging bars. Avoid concentrating heavy items in one area.
- Configuration: Take advantage of the L-shape or straight-lined configurations to best fit your available space and storage requirements.
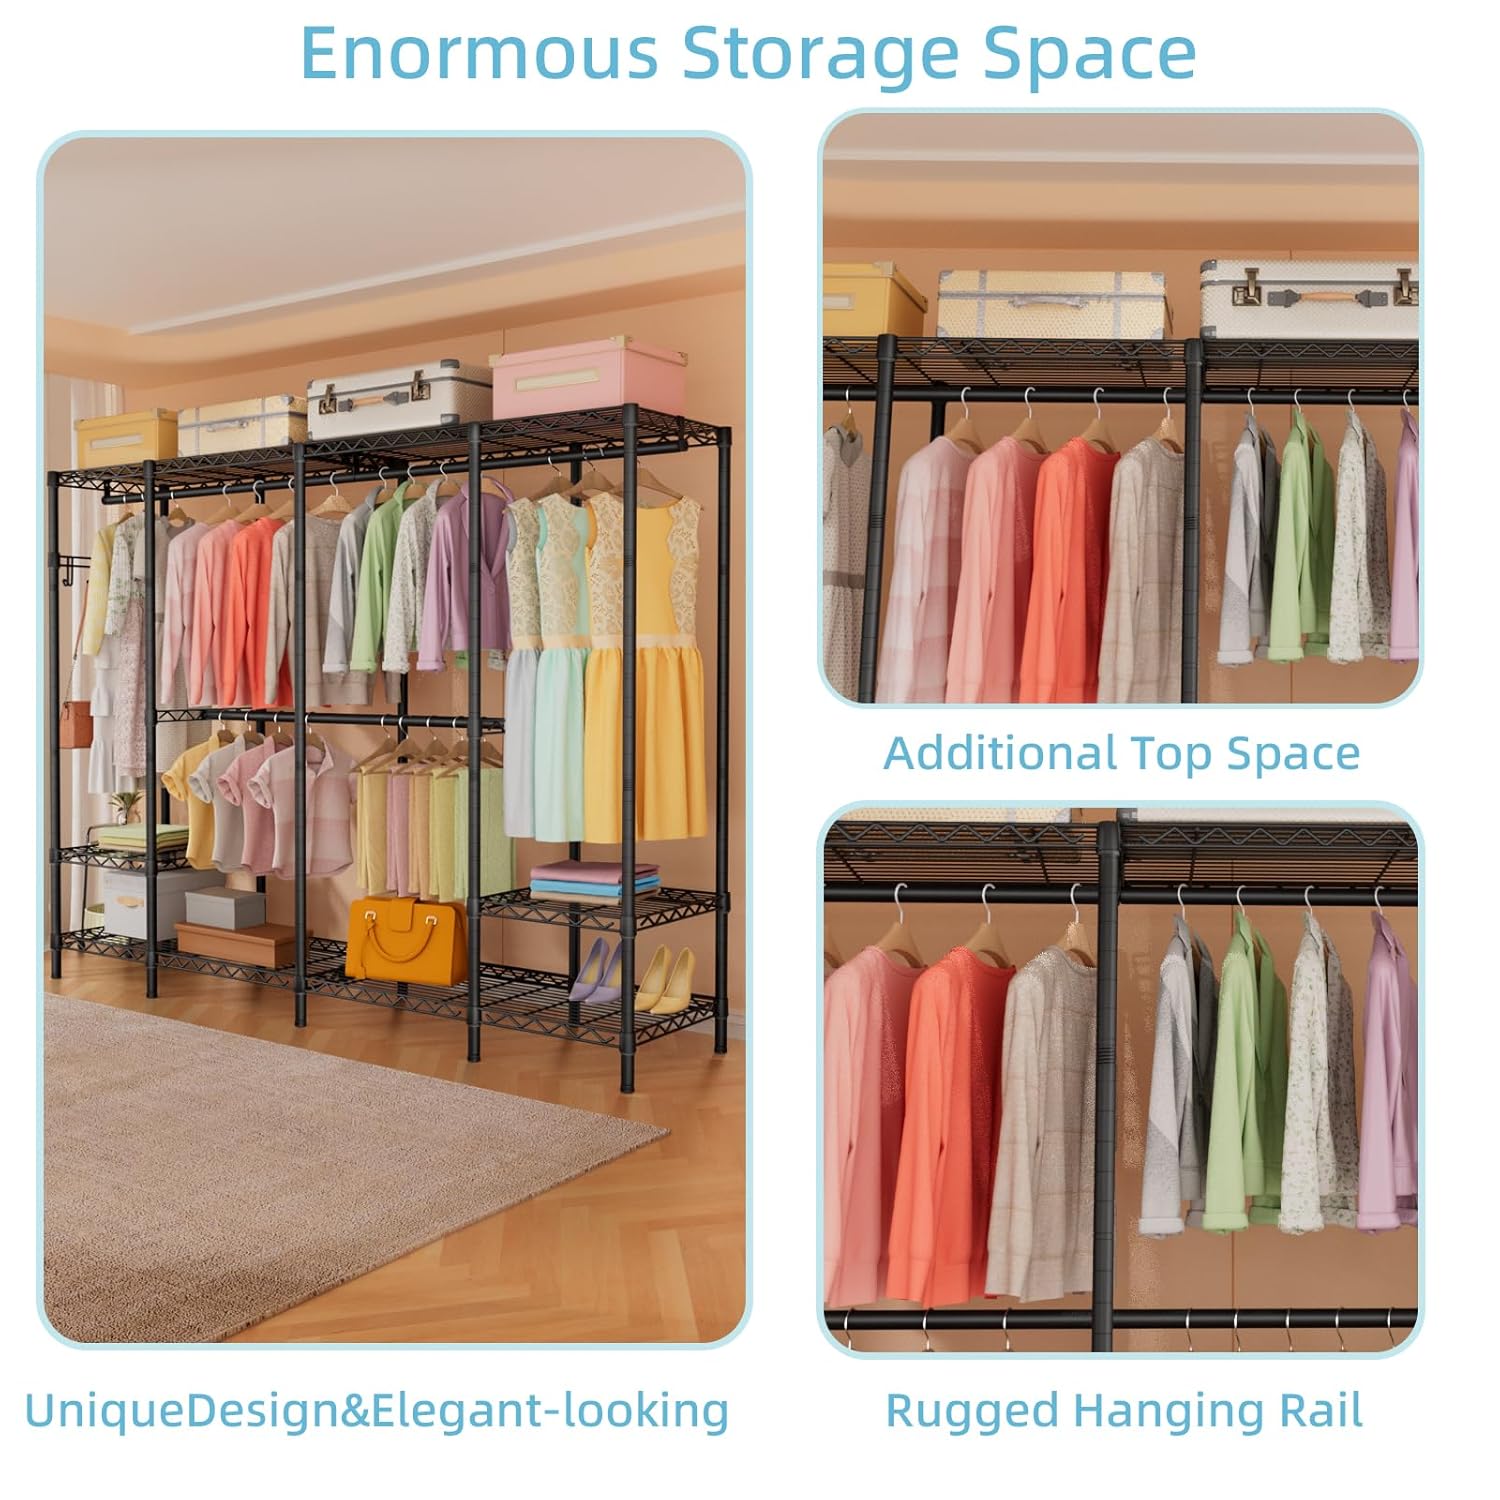
Image 5.1: Examples of the wardrobe rack's storage capacity and rugged hanging rails.
6. Care and Maintenance
Proper care will extend the life of your wardrobe rack:
- Cleaning: Wipe the metal surfaces with a soft, damp cloth. For stubborn dirt, a mild soap solution can be used, followed by wiping with a clean, dry cloth. Avoid abrasive cleaners or harsh chemicals, as they may damage the finish.
- Inspection: Periodically inspect all connections, screws, and clips to ensure they are tight and secure. Re-tighten if necessary.
- Weight Distribution: Always ensure weight is distributed evenly to prevent stress on any single part of the rack.
7. Troubleshooting
- Problem: The rack feels unstable or wobbly.
- Solution: Ensure the rack is assembled on a completely flat and level surface. Verify that all poles are fully inserted into their connectors and that all plastic clips and shelves are securely fastened. Check that the maximum load capacity of 985 lbs has not been exceeded, and that weight is distributed evenly.
- Problem: Difficulty installing or adjusting shelves.
- Solution: Re-check the orientation of the plastic clips; ensure the flange is correctly seated in the pole's groove and the arrow points upwards. Make sure the shelf sleeves align perfectly with the clips before sliding the shelf down. If adjusting, ensure clips are fully open before repositioning.
- Problem: Missing or damaged parts.
- Solution: Do not proceed with assembly. Refer to the package contents list and contact Golpart customer support immediately for replacement parts.
8. Specifications
| Model Number | EA_423-424 |
| Dimensions (L x W x H) | 68.9" x 15.7" x 77" (175 cm x 40 cm x 195.6 cm) |
| Maximum Load Capacity | 985 lbs (446.7 kg) |
| Material | High-quality Metal |
| Color | Black |
| Item Weight | 18.14 kg (40 lbs) |
| Assembly Required | Yes |
9. Warranty Information
This Golpart Wardrobe Rack is covered by a standard manufacturer's warranty. Please refer to the warranty card or documentation included with your purchase for specific details regarding coverage, duration, and terms and conditions. Keep your proof of purchase for warranty claims.
10. Customer Support
For any questions, assistance with assembly, missing parts, or troubleshooting, please contact Golpart customer support. You can typically find contact information through your retailer or by visiting the official Golpart website. Please have your model number (EA_423-424) and proof of purchase ready when contacting support.


