
Introduction
Thank you for choosing the Enventor 900W Corded Impact Drill. This manual provides essential information for the safe and efficient operation, maintenance, and troubleshooting of your new tool. Please read it thoroughly before use and keep it for future reference.
Safety Information
Always prioritize safety when operating power tools. Refer to the comprehensive safety guidelines provided in the official safety information PDF document. This document contains critical warnings and instructions to prevent electric shock, fire, and serious injury.
For detailed safety instructions, please consult the Safety Information (PDF).
Package Contents
Verify that all items are present in your package:
- 1 x Enventor 900W Impact Drill
- 1 x Auxiliary Handle
- 1 x Depth Gauge
- 1 x Chuck Key
- 8 x Screwdriver Bits
- 3 x Flat Bits
- 9 x Twist Drill Bits
- 5 x Hole Saw Blades
- 1 x Mandrel
- 1 x Chamfer Drill Bit
- 1 x Bit Extension Holder
- 4 x Nut Driver Bits
- 1 x Screw Assortment Kit
- 1 x Carrying Case
- 1 x User Manual

Figure 1: All components included in the Enventor 900W Impact Drill kit.
Product Overview
Familiarize yourself with the different parts of your Enventor 900W Impact Drill:

Figure 2: Labeled components of the Enventor 900W Impact Drill.
Setup
1. Attaching the Auxiliary Handle and Depth Gauge
- Loosen the auxiliary handle clamp.
- Slide the auxiliary handle onto the front of the drill.
- Insert the depth gauge into the hole on the auxiliary handle.
- Adjust the handle to a comfortable position and the depth gauge to the desired drilling depth.
- Tighten the clamp securely.

Figure 3: Attaching the 360° adjustable auxiliary handle.
2. Installing Drill Bits
- Ensure the drill is unplugged from the power source.
- Use the chuck key to loosen the 13mm metal chuck jaws by turning it counter-clockwise.
- Insert the desired drill bit into the chuck, ensuring it is centered.
- Tighten the chuck jaws firmly with the chuck key by turning it clockwise. Ensure the bit is secure to prevent slippage during operation.
Operating Instructions
1. Powering On and Off
Connect the drill to a suitable power outlet. To start the drill, press the variable speed trigger. To stop, release the trigger. For continuous operation, press the lock button while the trigger is depressed, then release the trigger. To disengage the lock, press the trigger fully and release it.

Figure 4: Speed control and lock button.
2. Selecting Drilling Mode (2-in-1 Function)
The Enventor 900W Impact Drill offers two modes: standard drilling and impact drilling. Use the 2-in-1 function switch located on top of the drill to select the appropriate mode:
- Drilling Mode: For wood, metal, plastics, and other soft materials.
- Impact Drilling Mode: For concrete, masonry, and other hard materials.

Figure 5: Switching between drilling and impact drilling modes.
3. Adjusting Speed and Direction
- Variable Speed: The drill features a variable speed trigger (0-3000 RPM). Apply more pressure to the trigger for higher speeds. The speed regulation knob allows for pre-setting the maximum speed.
- Forward/Reverse Switch: Use the forward/reverse switch near the trigger to change the rotation direction for drilling or removing screws.
4. Drilling Applications
The drill is suitable for various materials with specific maximum drilling capacities:
- Wood: Up to 25mm
- Concrete: Up to 13mm
- Metal: Up to 10mm
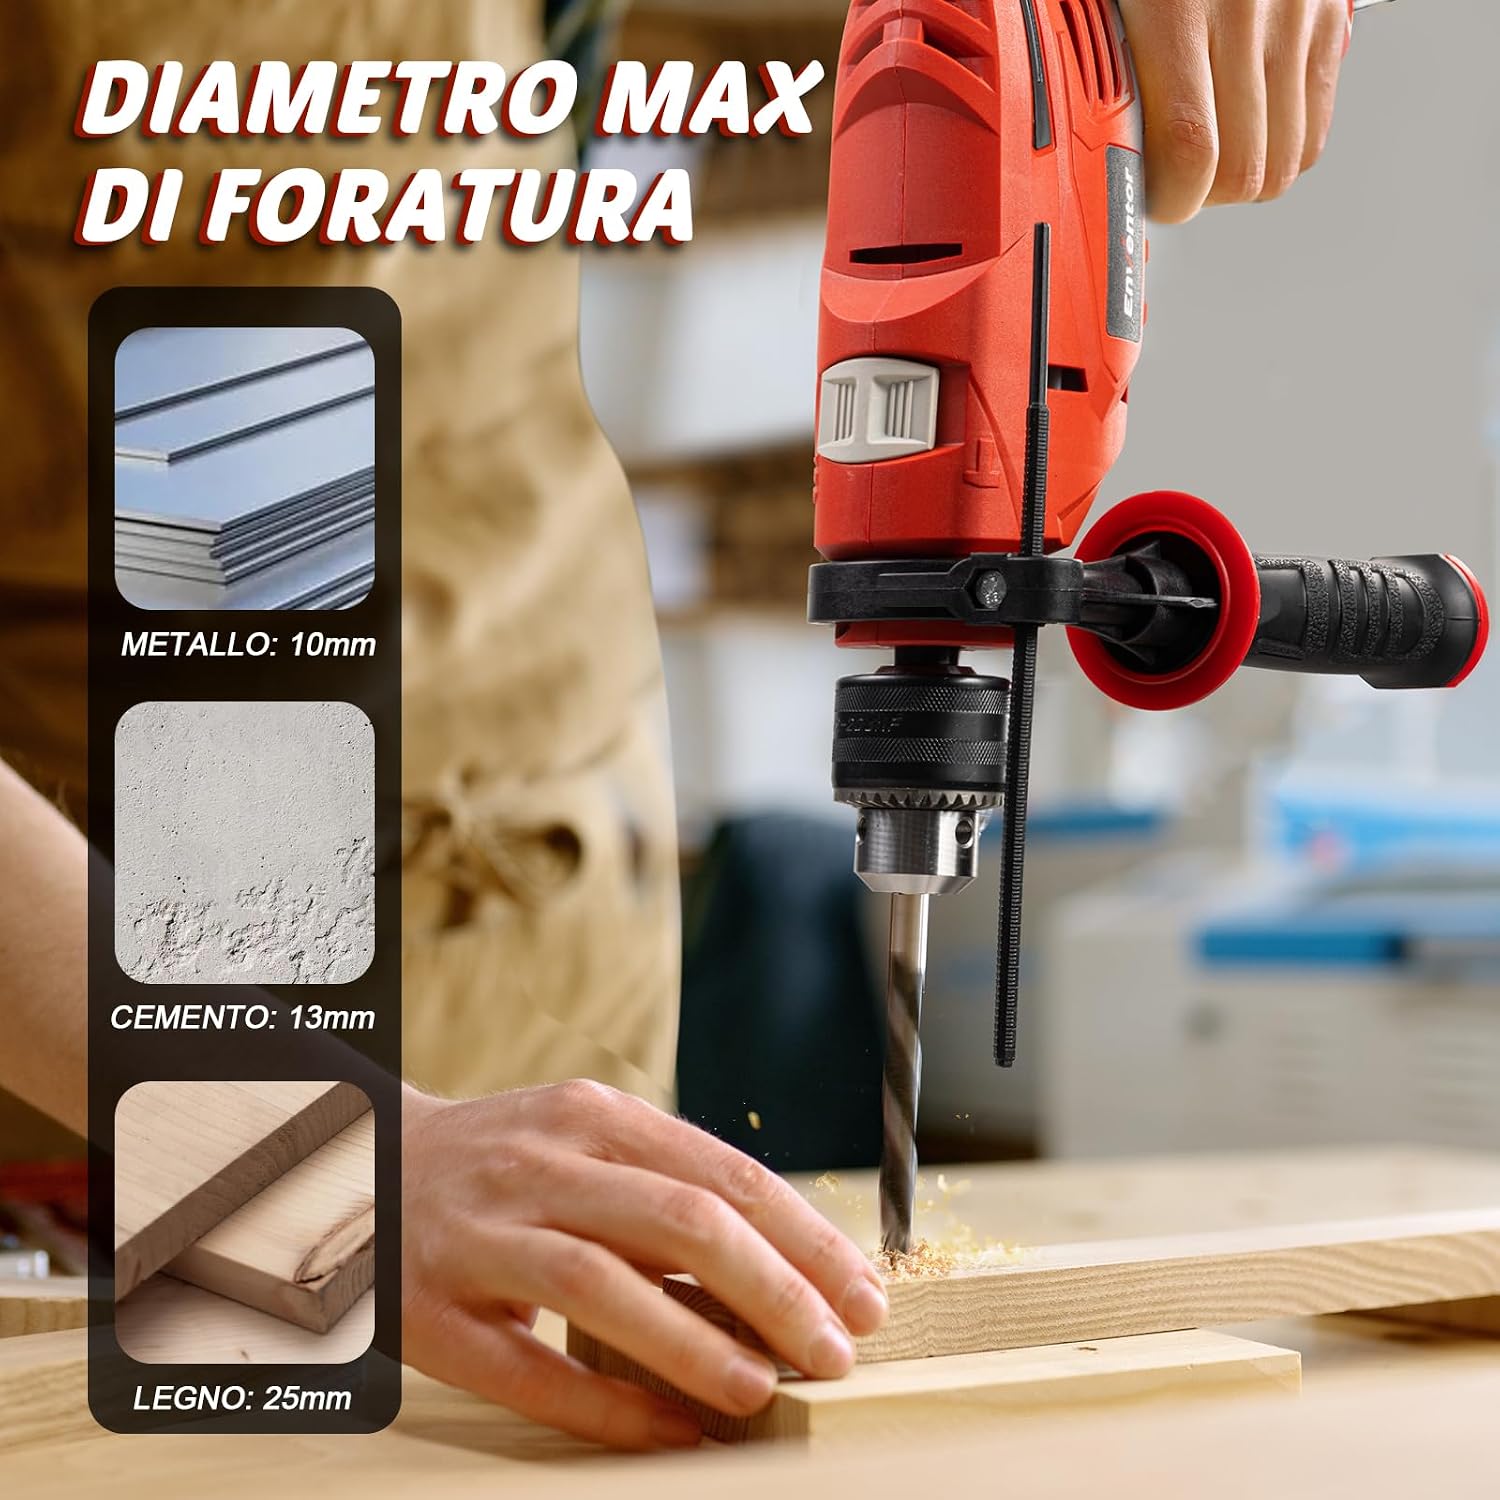
Figure 6: Maximum drilling capacities for different materials.

Figure 7: Drill in various applications.
Maintenance
Regular maintenance ensures the longevity and optimal performance of your drill.
- Cleaning: After each use, unplug the drill and clean the exterior with a damp cloth. Use compressed air to clear dust from ventilation openings.
- Chuck Maintenance: Periodically clean the chuck jaws to ensure proper grip on drill bits.
- Cord Inspection: Regularly inspect the power cord for any signs of damage. Do not use the drill if the cord is damaged.
- Storage: Store the drill and its accessories in the provided carrying case in a dry, secure place, away from children.
Troubleshooting
If you encounter issues with your drill, refer to the following common problems and solutions:
| Problem | Possible Cause | Solution |
|---|---|---|
| Drill does not start | No power supply; Damaged power cord; Faulty switch | Check power connection; Inspect cord for damage; Contact customer support |
| Bit slips in chuck | Chuck not tightened sufficiently; Dirty chuck jaws; Worn drill bit shank | Tighten chuck firmly with key; Clean chuck jaws; Replace drill bit |
| Overheating | Blocked ventilation; Prolonged heavy use | Clear ventilation openings; Allow drill to cool down; Reduce load |
| Reduced drilling performance | Dull or incorrect drill bit; Incorrect speed/mode selection | Replace or sharpen bit; Use appropriate bit for material; Select correct mode and speed |
If the problem persists after attempting these solutions, please contact Enventor customer support.
Specifications
| Feature | Detail |
|---|---|
| Brand | Enventor |
| Model Number | WD60190 |
| Power Source | Corded Electric |
| Max Power | 900 Watts |
| Voltage | 230 Volts (AC) |
| Amperage | 7.5 Amperes |
| Max Rotation Speed | 3000 Revolutions per minute (RPM) |
| Number of Speeds | 1 (Variable) |
| Max Chuck Size | 13 Millimeters |
| Special Features | 2-in-1 Function (Drill/Impact Drill) |
| Wood Drilling Capacity | 2.5 Centimeters (25mm) |
| Metal Drilling Capacity | 10 Millimeters |
| Concrete Drilling Capacity | 13 Millimeters |
| Item Dimensions (L x W x H) | 31.5L x 28.4W x 9.3H cm |
| Color | Red |
| Country of Origin | China |

Figure 8: Product dimensions and weight.
Warranty and Support
Enventor products are designed for reliability and performance. For warranty information, technical support, or service inquiries, please refer to the contact details provided with your purchase documentation or visit the official Enventor website.
Keep your purchase receipt as proof of purchase for any warranty claims.
