
1. Introduction
Thank you for choosing the eSynic Wearable Electric Breast Pump. This device is designed to provide a comfortable and efficient breast milk expression experience for nursing mothers. Its hands-free, portable design allows for discreet and convenient use at home or on the go. Please read this manual thoroughly before first use to ensure proper operation, maintenance, and safety.
2. Important Safety Information
Please observe the following safety precautions to prevent injury or damage to the device:
- Always inspect all components for damage before each use. Discard and replace any damaged parts.
- Ensure all parts are clean and dry before assembly and use.
- Do not immerse the motor unit in water or other liquids. Clean with a damp cloth only.
- Keep the device out of reach of children.
- Use only the provided charging cable and adapter.
- Do not use the pump while bathing or showering.
- If you experience pain or discomfort during pumping, reduce the suction level or stop using the device and consult a healthcare professional.
- This device is for personal use only and should not be shared.
- Store the pump in a clean, dry place when not in use.
3. Product Components
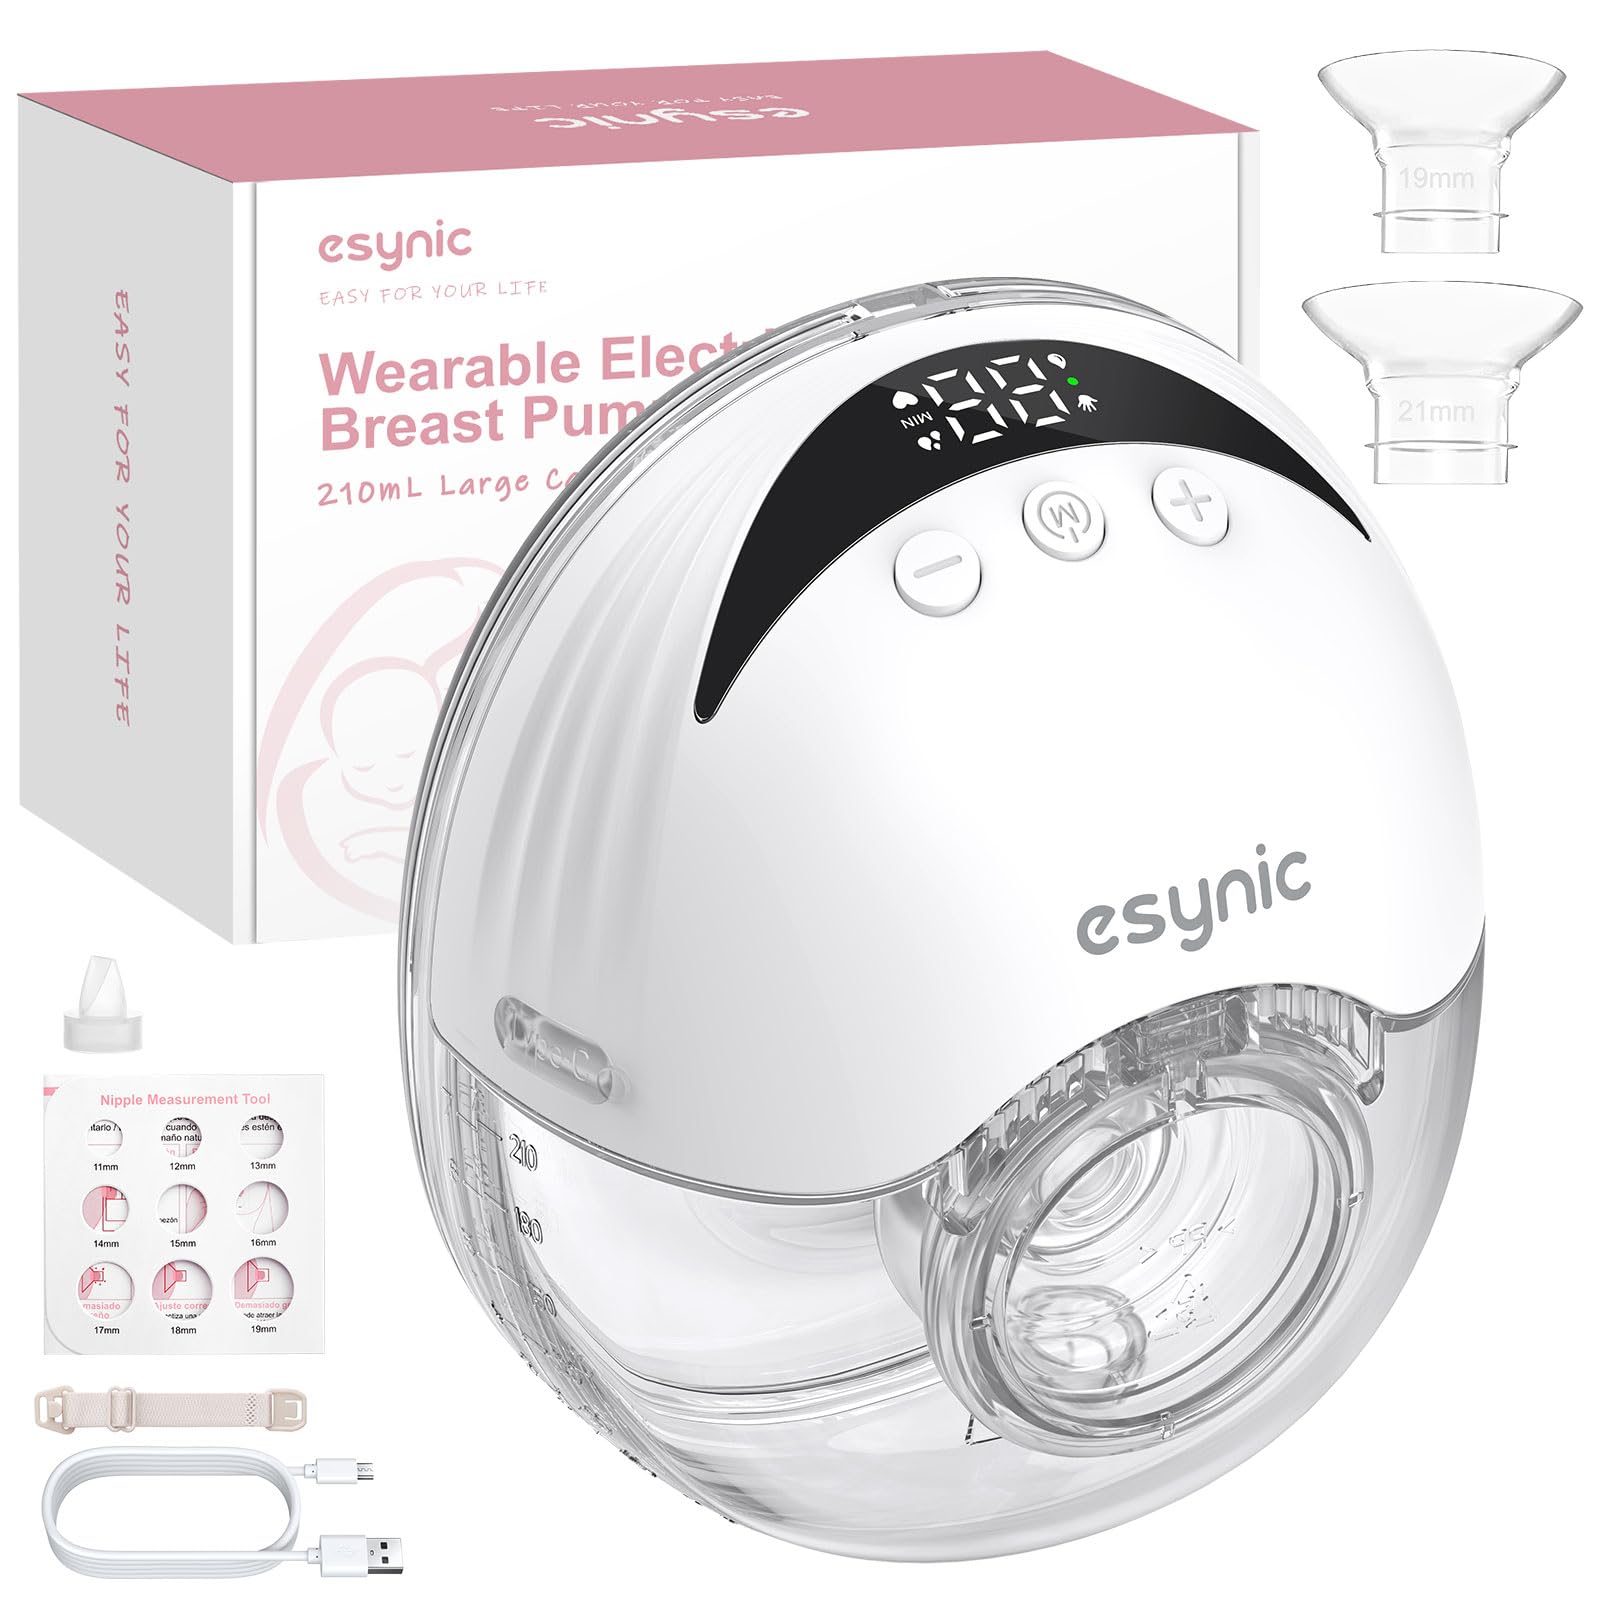
The eSynic Wearable Electric Breast Pump consists of several key components:
- Motor Unit: The main control unit with LED display and buttons.
- Breast Flange: The part that comes into contact with the breast. Includes 24mm, 21mm, and 19mm sizes.
- Milk Collector Cup: 210ml capacity for collecting expressed milk.
- Silicone Diaphragm: Creates a closed system for hygienic pumping.
- Valve: Controls milk flow into the collector cup.
- USB Type-C Charging Cable: For recharging the internal battery.
4. Setup and Assembly
4.1 First Use and Cleaning
Before using the breast pump for the first time, and after each subsequent use, all parts that come into contact with breast milk (flange, milk collector cup, silicone diaphragm, valve) must be cleaned and sterilized.
- Disassemble all parts of the pump.
- Wash all disassembled parts (except the motor unit) in warm soapy water. Use a soft brush for thorough cleaning.
- Rinse thoroughly with clean water.
- Sterilize the parts by boiling them in water for 5 minutes or using a steam sterilizer.
- Allow all parts to air dry completely on a clean surface or use a clean cloth.
- Wipe the motor unit with a damp cloth. Do not submerge.
4.2 Assembly
Assemble the pump as follows:
- Insert the valve firmly into the bottom of the milk collector cup.
- Place the silicone diaphragm onto the top of the milk collector cup, ensuring a tight seal.
- Attach the breast flange to the milk collector cup, making sure it clicks securely into place. Choose the appropriate flange size (24mm, 21mm, or 19mm) for your comfort and milk flow.
- Align the motor unit with the assembled milk collector cup and press down firmly until it is securely attached. The upgraded design allows for easy attachment without precise alignment.
4.3 Charging the Battery
The pump is equipped with a 1200mAh rechargeable lithium battery.
- Before first use, fully charge the pump for approximately 2.5 hours.
- Connect the USB Type-C charging cable to the charging port on the motor unit and plug the other end into a compatible USB power adapter (DC5V1A recommended).
- The LED display will indicate charging status. When the power indicator turns red, the battery is low and requires charging.
- A full charge provides approximately 150 minutes of operation, or 6-8 pumping sessions of 20 minutes each.
5. Operating Instructions
5.1 Wearing the Pump
Once assembled and charged, position the breast pump correctly:
- Place the assembled pump directly onto your breast, ensuring your nipple is centered in the flange tunnel.
- Ensure a good seal between the flange and your skin to prevent air leakage and maintain suction.
- Wear the pump inside your nursing bra for hands-free operation. The lightweight design (260g) ensures comfort.
5.2 Power On/Off and Mode Selection
- Power On: Press and hold the power button on the motor unit. The LED display will light up.
- Mode Selection: The pump features 4 modes:
- Massage Mode: Gentle, rapid suction to stimulate milk let-down.
- Expression Mode: Slower, stronger suction for efficient milk expression.
- Auto Mode: Cycles through massage and expression patterns.
- Lactation Mode: (Details not explicitly provided, but typically a combination or specific pattern for milk flow).
- Adjusting Suction Level: Each mode has 12 adjustable suction levels. Use the '+' and '-' buttons on the motor unit to increase or decrease the suction intensity to your comfort level.
- Automatic Shut-off: The pump will automatically shut off after 20 minutes of continuous operation.
- Power Off: Press and hold the power button to turn off the pump manually.
5.3 After Pumping
- Carefully remove the pump from your breast.
- Separate the motor unit from the milk collector cup.
- Pour the expressed milk into a suitable storage container. The anti-overflow design helps prevent spills during this process.
- Disassemble all parts that came into contact with milk and clean them according to the "Cleaning & Maintenance" section.
6. Cleaning and Maintenance
Proper cleaning and maintenance are crucial for hygiene and the longevity of your breast pump.
- After Each Use: Disassemble and clean all parts that come into contact with breast milk (flange, milk collector cup, silicone diaphragm, valve) as described in Section 4.1.
- Motor Unit: Wipe the exterior of the motor unit with a clean, damp cloth. Do not submerge it in water or sterilize it.
- Storage: Store all clean and dry components in a clean, dry place away from direct sunlight and extreme temperatures.
- Inspection: Regularly inspect all parts for wear, tear, or damage. Replace silicone parts (diaphragm, valve) every few months or if you notice a decrease in suction.
7. Troubleshooting
If you encounter issues with your eSynic breast pump, refer to the following common problems and solutions:
| Problem | Possible Cause | Solution |
|---|---|---|
| No suction or weak suction |
|
|
| Pump not turning on |
|
|
| Milk leaking from pump |
|
|
| LED display not working |
|
|
8. Product Specifications
| Feature | Detail |
|---|---|
| Model Number | BY033 |
| Product Dimensions | 18 x 14 x 8 cm |
| Product Weight | 260 g (pump unit), 430 g (package weight) |
| Milk Collector Capacity | 210 ml |
| Flange Sizes Included | 24mm (standard), 21mm, 19mm (inserts) |
| Operating Modes | 4 (Massage, Expression, Auto, Lactation) |
| Suction Levels | 12 levels per mode |
| Max Suction Strength | 280-300 mmHg |
| Display Type | LED Display |
| Battery Type | 1200mAh Rechargeable Lithium Battery |
| Charging Time | Approx. 2.5 hours |
| Operating Time (Full Charge) | Approx. 150 minutes (6-8 sessions of 20 min) |
| Power Input | DC5V1A |
| Power Consumption | 4W |
| Charging Port | USB Type-C |
| Noise Level | Below 55 dB |
| Material Type Free | BPA Free |
| Special Features | Leak-proof design, Automatic 20-minute shut-off, 30-second automatic screen off |
9. Warranty and Support
eSynic products are manufactured with quality and reliability in mind. For specific warranty details, please refer to the warranty card included with your product or visit the official eSynic website. If you experience any issues or have questions regarding your breast pump, please contact eSynic customer support through the retailer where you purchased the product or via the contact information provided on the eSynic brand store page on Amazon.
For further assistance, you may visit the eSynic Brand Store on Amazon.