1. Introduction
This manual provides comprehensive instructions for the installation, operation, and maintenance of your Lorex N800 Series 4K Ultra HD IP Bullet Security Camera System. This system is designed to provide advanced surveillance capabilities with high-resolution video, intelligent motion detection, and active deterrence features, ensuring enhanced security for your property.
2. Key Features
- 4K Ultra HD Resolution: Experience superior clarity with 8MP camera sensors, providing detailed video for effective security monitoring.

Image: Visual comparison highlighting the enhanced detail and sharpness of 4K Ultra HD resolution provided by the Lorex system.
- Smart Motion Detection Plus: Limit notifications to relevant events with advanced detection capabilities, including face detection, person detection, and vehicle detection.
- Active Deterrence: Utilize integrated motion-activated lights and a manually activated siren to effectively deter unwanted visitors from your property.
- 2-Way Audio: Record audio and communicate with individuals near your cameras using the built-in speaker and microphone, enhancing interaction and security.
- Color Night Vision: Benefit from enhanced night time clarity, providing full-color video in low-light conditions.

Image: Comparison illustrating the difference between traditional infrared night vision and the clearer, full-color night vision capability of Lorex cameras.
- Smart Security Lighting: Customize camera lights with 16.7 million color options and assign them to specific modes like "Welcome" or "Panic" for personalized security responses.
- Smart Home Compatibility: Integrate your security system with popular smart home platforms like Amazon Alexa and Google Assistant for convenient hands-free voice control and access to live feeds.
3. Package Contents
Please verify that all the following components are included in your Lorex N800 Series system package:
- Lorex Network Video Recorder (NVR)
- Lorex 4K IP Bullet Cameras (Quantity varies by specific model)
- NVR Power Adapter
- Ethernet Cables
- Mounting Hardware for Cameras
- USB Mouse
- HDMI Cable
- Quick Start Guide

Image: Rear view of the Lorex NVR, displaying multiple Power over Ethernet (PoE) ports for cameras, HDMI and VGA outputs for display, audio ports, and the power input.
4. Setup Instructions
4.1 NVR Initial Connection
- Connect to Monitor: Connect the NVR to a display monitor using an HDMI or VGA cable.
- Connect Mouse: Plug the included USB mouse into an available USB port on the NVR.
- Network Connection: For remote viewing and system updates, connect the NVR to your internet router using an Ethernet cable.
- Power On: Connect the NVR power adapter to the NVR's power input and then plug it into a wall outlet. The NVR will automatically power on.
4.2 Camera Installation and Connection
- Choose Location: Identify optimal outdoor locations for each camera, considering coverage area, potential blind spots, and proximity to power/network if not using PoE.
- Mounting: Use the provided mounting hardware to securely attach each bullet camera to a wall or ceiling. Ensure the mounting surface is stable.
- Connect Cameras to NVR: Connect each IP camera to an available Power over Ethernet (PoE) port on the back of the NVR using Ethernet cables. The cameras will receive both power and data through these cables.
- Adjust Angle: Once mounted, adjust the camera's physical angle and orientation to achieve the desired surveillance view.

Image: Front view of a Lorex bullet camera, highlighting its lens, integrated LED illuminators, and a green operational status indicator.

Image: Side profile of a Lorex bullet camera, illustrating its robust housing, adjustable mounting bracket, and the Lorex brand logo.
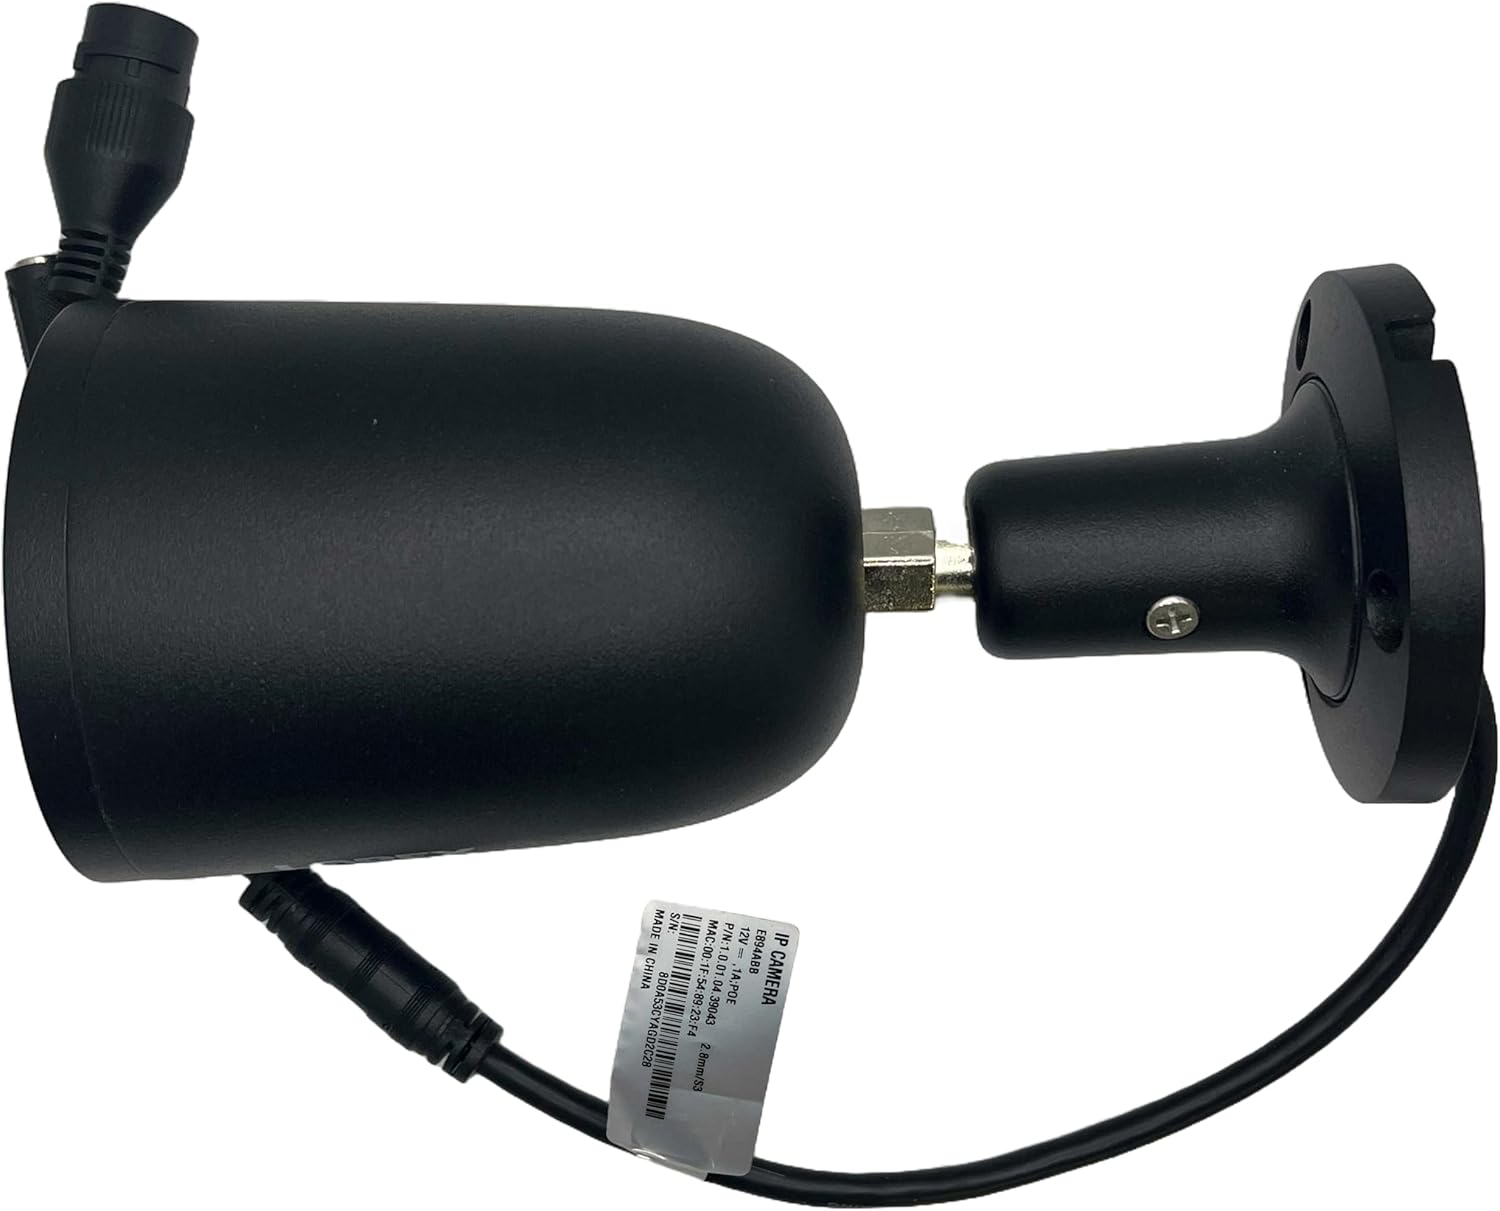
Image: Detailed side view of a Lorex bullet camera, showing the integrated cable for power and data connection, essential for its operation.
5. Operating Instructions
5.1 Accessing Live View and Recordings
- Access the NVR interface directly via the connected monitor and mouse, or remotely through the Lorex mobile application on your smartphone or tablet.
- From the live view, you can monitor all connected cameras simultaneously or select individual camera feeds.
- Review recorded footage by navigating to the playback menu on the NVR or through the mobile app.
5.2 Configuring Smart Motion Detection Plus
- On the NVR interface, navigate to the "Alarm" or "Detection" settings menu.
- Enable "Smart Motion Detection Plus" for each camera.
- Select the specific detection types you wish to enable, such as "Person Detection," "Vehicle Detection," or "Face Detection," to receive more accurate alerts.
- Adjust sensitivity levels and define specific motion detection zones to customize monitoring areas.
5.3 Utilizing Active Deterrence Features
- Configure the motion-activated lights to illuminate automatically when motion is detected within specified zones.
- The siren can be manually activated through the NVR interface or the Lorex mobile application to audibly deter intruders.
5.4 Using 2-Way Audio
- Through the Lorex mobile application, select the camera you wish to communicate through.
- Tap the microphone icon to speak, and your voice will be projected through the camera's speaker.
- Listen to audio captured by the camera's integrated microphone through your mobile device.
5.5 Customizing Smart Security Lighting
- Access the "Smart Security Lighting" settings within the Lorex mobile app.
- Choose from a spectrum of 16.7 million colors for your camera's lights.
- Assign different light modes (e.g., solid, flashing) and colors to specific events or scenarios, such as a "Welcome" light when a familiar person is detected or a "Panic" light during an alert.
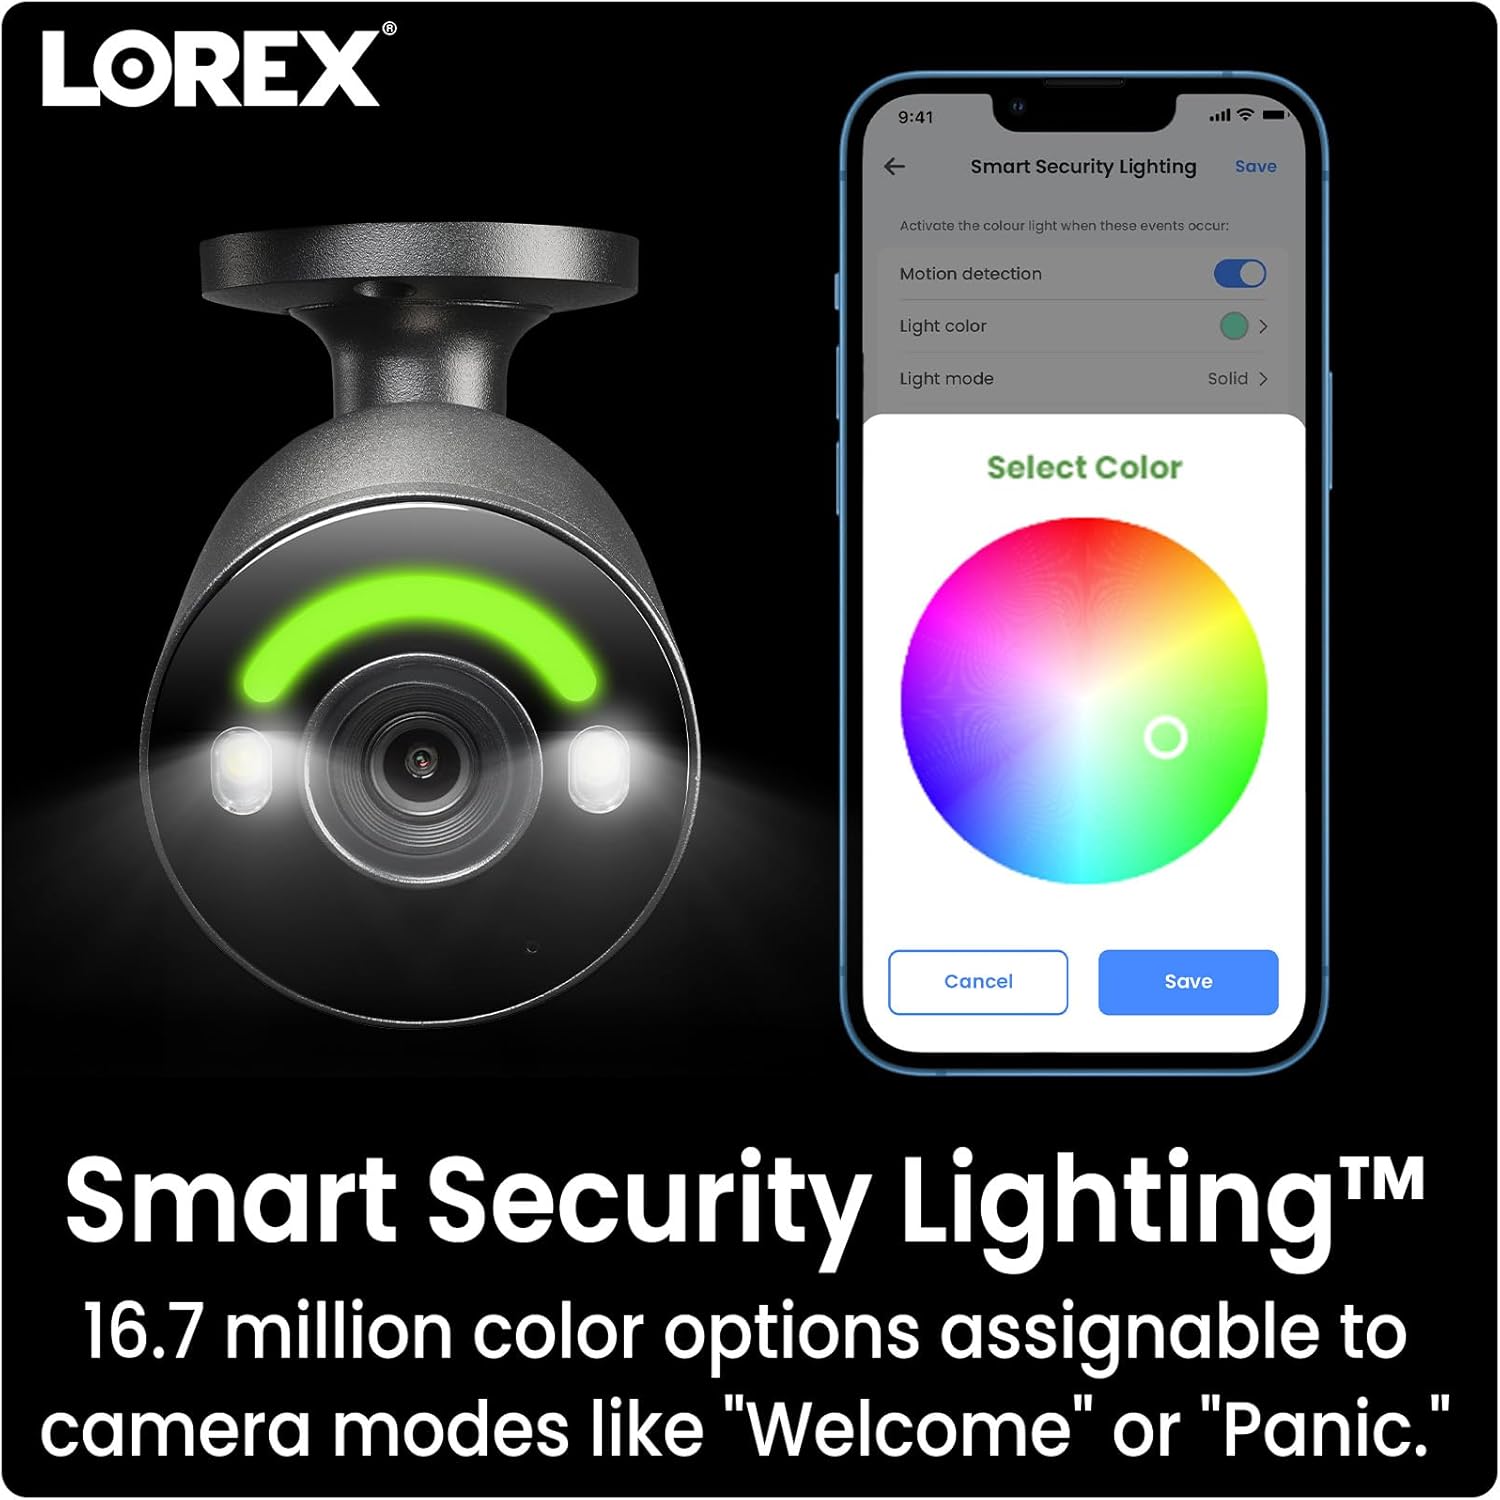
Image: Lorex mobile application interface demonstrating the customization options for Smart Security Lighting, including a color selection wheel and various light modes.
5.6 Smart Home Integration
- To integrate with smart home platforms, follow the instructions provided by Lorex for connecting to Amazon Alexa or Google Assistant.
- Once connected, you can use voice commands to view live camera feeds on compatible smart displays or receive notifications.

Image: A smart display showcasing a live video feed from a Lorex camera, indicating seamless compatibility with Amazon Alexa and Google Assistant for integrated smart home control.
6. Maintenance
- Clean Camera Lenses: Regularly clean the camera lenses with a soft, lint-free cloth to prevent dust and smudges from affecting image clarity. Avoid harsh chemicals.
- Inspect Cables and Connections: Periodically check all Ethernet cables and power connections for any signs of wear, damage, or loose fittings. Secure any loose connections.
- Software and Firmware Updates: Ensure your NVR's firmware and the Lorex mobile application are kept up-to-date. Updates often include security enhancements and new features.
- Monitor Hard Drive Health: Access the NVR's system settings to regularly check the status and health of the internal hard drive to prevent potential data loss.
- Environmental Protection: While cameras are rated for outdoor use, ensure they are installed in locations that minimize direct exposure to extreme weather conditions (e.g., heavy rain, direct sunlight) to prolong their lifespan.
7. Troubleshooting
- No Video Signal from Camera:
- Verify that the NVR is powered on and connected to a display.
- Ensure the Ethernet cable connecting the camera to the NVR's PoE port is securely plugged in at both ends.
- Try connecting the camera to a different PoE port on the NVR to rule out a faulty port.
- Restart the NVR.
- Poor Image Quality:
- Clean the camera lens carefully with a soft cloth.
- Check for any physical obstructions (e.g., spiderwebs, leaves) blocking the camera's view.
- Ensure the camera's resolution settings on the NVR are configured for 4K (8MP).
- Motion Detection Not Triggering or False Alarms:
- Confirm that Smart Motion Detection Plus is enabled and configured correctly for the desired detection types (person, vehicle, face).
- Adjust the motion detection sensitivity settings. Higher sensitivity may detect minor movements, while lower sensitivity may miss some events.
- Review and adjust the defined motion detection zones to exclude areas with constant, irrelevant movement (e.g., swaying trees, busy roads).
- No 2-Way Audio:
- Ensure the audio settings are enabled for the specific camera in the NVR and Lorex app.
- Check that the camera's microphone and speaker are not physically obstructed.
- Verify your mobile device's microphone and speaker are functioning correctly and app permissions are granted.
8. Specifications
| Feature | Specification |
|---|---|
| Video Capture Resolution | 4K (8 Megapixels) |
| NVR Model Series | N800 Series (e.g., N847A6-Z) |
| Camera Model Name | AZN4K2SL-83BB-1 (Example: E894ABB) |
| Brand | Lorex |
| Connectivity Technology | Wired (Ethernet/PoE), Wi-Fi (for NVR network connection) |
| Special Features | Image Sensor, Smart Motion Detection Plus, Active Deterrence, 2-Way Audio, Color Night Vision |
| Recommended Use | Outdoor Security |
| Power Source | Electrical (NVR: 120 Volts, Cameras: PoE) |
| Mounting Type | Wall Mount |
| System Dimensions (L x W x H) | 33.02 x 43.18 x 35.56 cm |
| System Weight | 7.4 kg |
| Components Included | NVR, IP Cameras |

Image: NVR label detailing the model number (N847A6-Z), input voltage, serial number (e.g., NV022408007142), and manufacturing information.

Image: Close-up of an IP camera label, displaying model E894ABB, power specifications (12V, 1A; PoE), and MAC address.
9. Warranty and Support
For detailed warranty information, technical assistance, and access to additional product resources, please visit the official Lorex website. When contacting support, please have your NVR model number (e.g., N847A6-Z) and serial number (e.g., NV022408007142) readily available.
Official Lorex Website: www.lorex.com
Important Safety Notice: The NVR contains a button cell or coin battery. Please refer to the owner's manual for safe handling and disposal instructions to avoid ingestion hazards.

Image: Bottom of the Lorex NVR, showing the base plate with mounting screws and a prominent warning label regarding an ingestion hazard associated with an internal button cell or coin battery.


