
Fockety B0CH9LZGNS
Contents
Digital Alarm Clock User Manual
Model: B0CH9LZGNS
Brand: Fockety
Introduction
Thank you for purchasing the Fockety Digital Alarm Clock. This versatile device offers a clear display of time, temperature, and humidity, along with alarm and timer functions. Its magnetic suction design allows for flexible placement, including on refrigerators, tables, or walls. This manual provides detailed instructions for setup, operation, and maintenance to ensure optimal performance of your new alarm clock.
Safety Information
- Keep the device away from water and high humidity environments.
- Avoid exposing the device to direct sunlight or extreme temperatures.
- Do not attempt to disassemble or repair the device yourself. Refer to qualified personnel for service.
- Use only the specified battery type (CR2032) for replacement.
- Keep batteries out of reach of children.
Package Contents
- 1 x Digital Alarm Clock (with built-in CR2032 battery)
- 1 x English Instruction Manual
Product Overview
Familiarize yourself with the various parts of your digital alarm clock.

Figure 1: Back Panel Layout
- MODE Button: Used to switch between time, alarm, and timer modes, and to confirm settings.
- UP Button: Used to adjust values upwards during setting, or to switch between 12/24 hour format.
- MAX/MIN Button: Displays maximum and minimum temperature/humidity readings.
- °C/°F Button: Toggles between Celsius and Fahrenheit temperature display.
- Magnetic Suction: Two strong magnets for attaching to metallic surfaces.
- Wall Mounting Hole: For hanging the clock on a wall.
- CR2032 Button Cell Battery Compartment: Houses the power source.
- Bracket/Support Legs: Fold-out stand for tabletop placement.
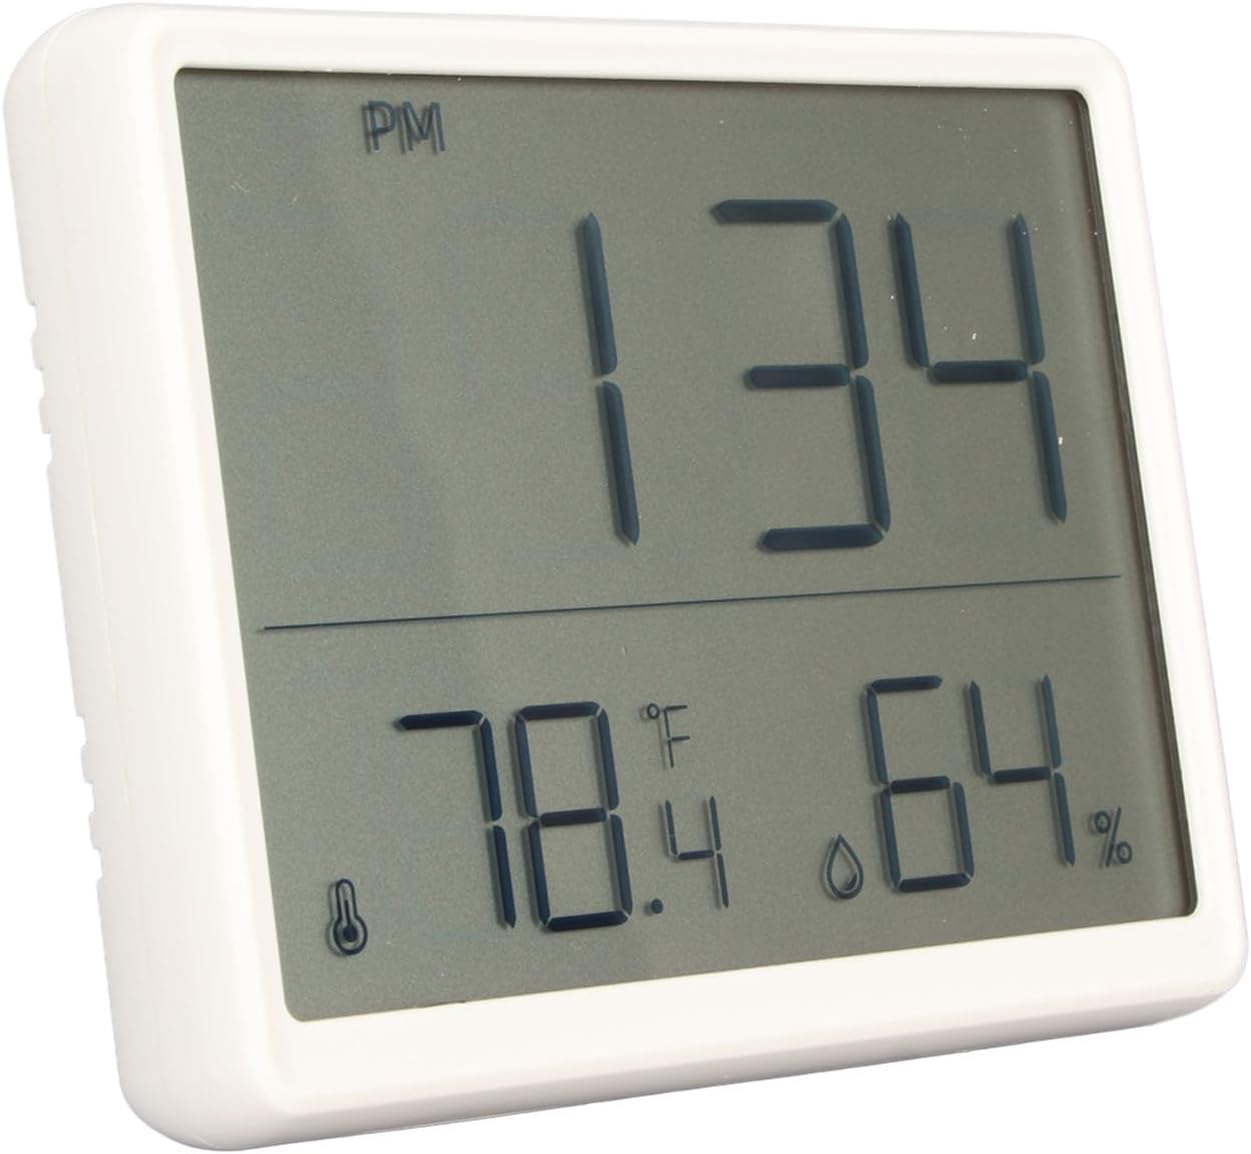
Figure 2: Front Display
The large LCD screen clearly shows the current time, temperature, and humidity levels. An "PM" indicator appears for afternoon hours in 12-hour format.
Setup
Battery Installation
The clock comes with a CR2032 button cell battery pre-installed. If the display is dim or not working, you may need to replace the battery.
- Locate the battery compartment on the back of the clock (refer to Figure 1).
- Use a small coin or screwdriver to gently twist the battery cover counter-clockwise to open.
- Remove the old CR2032 battery.
- Insert a new CR2032 battery with the positive (+) side facing up.
- Replace the battery cover and twist clockwise to secure it.
Placement Options
Your clock offers three convenient placement options:
- Tabletop: Extend the integrated support legs on the back of the clock to stand it upright on any flat surface.

Figure 3: Tabletop Placement
- Magnetic Suction: The clock features strong magnets on its back, allowing it to be firmly attached to metallic surfaces like refrigerators or whiteboards.

Figure 4: Magnetic Suction

Figure 5: Clock on Refrigerator
- Wall Mount: Use the integrated wall mounting hole on the back to hang the clock on a nail or screw.
Operating Instructions
Setting Time and Date
- Press the MODE button repeatedly until the time display starts flashing.
- Use the UP button to adjust the hour.
- Press MODE again to move to minutes, then use UP to adjust.
- Continue pressing MODE to cycle through year, month, and day, adjusting each with the UP button.
- Press MODE one last time to confirm all settings and return to normal display.
Setting the Alarm
- From the normal time display, press the MODE button once to enter alarm setting mode. The alarm time will flash.
- Use the UP button to set the desired alarm hour.
- Press MODE again to move to alarm minutes, then use UP to adjust.
- Press MODE to confirm the alarm time.
- To activate or deactivate the alarm, press the UP button while in alarm setting mode (after setting the time but before exiting). An alarm icon will appear on the display when activated.
Using the Timer Function
This clock also features a basic timer function.
- Press the MODE button repeatedly until the timer display appears (usually showing 00:00).
- Use the UP button to set the desired countdown time (hours, minutes, seconds).
- Press MODE to start the countdown.
- To pause/resume the timer, press MODE.
- To reset the timer, press and hold the MODE button while the timer is paused or finished.
Temperature and Humidity Display
The clock continuously displays the current temperature and humidity.
- °C/°F Switch: Press the °C/°F button on the back of the clock to toggle between Celsius and Fahrenheit temperature units.
- MAX/MIN Readings: Press the MAX/MIN button to view the highest and lowest temperature and humidity recorded since the last reset. Press again to return to current readings. To clear MAX/MIN records, press and hold the MAX/MIN button.
12/24 Hour System Switch
While in normal time display mode, press the UP button to switch between 12-hour (with AM/PM indicator) and 24-hour formats.
Maintenance
- Cleaning: Wipe the clock with a soft, dry cloth. Do not use abrasive cleaners or immerse in water.
- Battery Replacement: Replace the CR2032 battery when the display becomes dim or unresponsive. Refer to the "Battery Installation" section under Setup.
- Storage: If storing the clock for an extended period, remove the battery to prevent leakage.
Troubleshooting
| Problem | Possible Cause | Solution |
|---|---|---|
| Display is blank or dim. | Battery is dead or low. | Replace the CR2032 battery. |
| Time/Date is incorrect. | Not set correctly or reset after battery change. | Follow "Setting Time and Date" instructions. |
| Alarm does not sound. | Alarm is not activated or volume is too low (if applicable). | Ensure alarm is activated (alarm icon visible). Check for any volume settings (this model may not have volume control). |
| Temperature/Humidity readings seem inaccurate. | Device placed in an area with extreme temperature fluctuations or direct sunlight. | Relocate the clock to a stable environment away from direct heat sources or drafts. |
Specifications
| Model: | B0CH9LZGNS |
| Brand: | Fockety |
| Display Type: | Digital LCD |
| Power Source: | 1 x CR2032 Button Battery (240mAh) |
| Functions: | Time, Date, Alarm, Timer, Temperature (°C/°F), Humidity, MAX/MIN records |
| Dimensions (Approx.): | 9.3 x 1.5 x 7.3 cm / 3.7 x 0.6 x 2.9 inches |
| Mounting Options: | Tabletop (stand), Magnetic, Wall Mount |

Figure 6: Product Dimensions
Warranty and Support
For warranty information or technical support, please refer to the seller's policy on the platform where you purchased this product. Keep your purchase receipt as proof of purchase.
For general inquiries or further assistance, you may contact the manufacturer, Fockety, through their official channels if available, or the retailer's customer service.
Ask a question about this manual
Ask about setup, troubleshooting, compatibility, parts, safety, or missing instructions. Manuals+ will review the question and use this page’s manual context to help answer it.