
1. Introduction
This manual provides detailed instructions for the safe and effective use of your Cable Matters All-In-One Modular Ethernet Crimping Tool. This versatile tool is designed for creating custom-length Ethernet cables using various connector types, including Cat5, Cat6, Cat6A, Cat7, and Cat8 shielded and unshielded RJ45 connectors, as well as pass-through connectors.
The tool integrates cutting, stripping, and crimping functions into a single unit, streamlining the cable termination process for network professionals and DIY enthusiasts.
2. Safety Information
Please read and understand all safety instructions before operating this tool. Failure to follow these instructions may result in injury or damage to the tool.
- Sharp Blades: The tool contains sharp cutting and stripping blades. Handle with care to prevent cuts. Keep fingers clear of all cutting and crimping areas during operation.
- Eye Protection: Always wear appropriate eye protection when using this tool to guard against flying debris.
- Proper Use: Use the tool only for its intended purpose of cutting, stripping, and crimping Ethernet cables and connectors. Do not attempt to use it on live electrical wires.
- Storage: Store the tool in a dry, secure place, out of reach of children.
3. Setup
Before first use, ensure the tool is properly prepared.
- Unlocking the Safety Latch: The tool features a safety latch to keep it closed when not in use. To open the tool, press the lock button to release the latch.
- Inspection: Visually inspect the tool for any signs of damage or wear. Ensure all blades are securely in place and sharp.

Figure 3.1: Unlocking the safety latch before use. Press the lock button to release.
4. Operating Instructions
This section details the steps for cutting, stripping, and crimping Ethernet cables.

Figure 4.1: Overview of the modular RJ45 crimping tool's functions.
4.1. Wire Stripping
- Insert the cable into the designated stripping slot.
- Gently squeeze the handles and rotate the tool around the cable jacket to score it.
- Remove the tool and pull off the stripped jacket, exposing the twisted pairs.
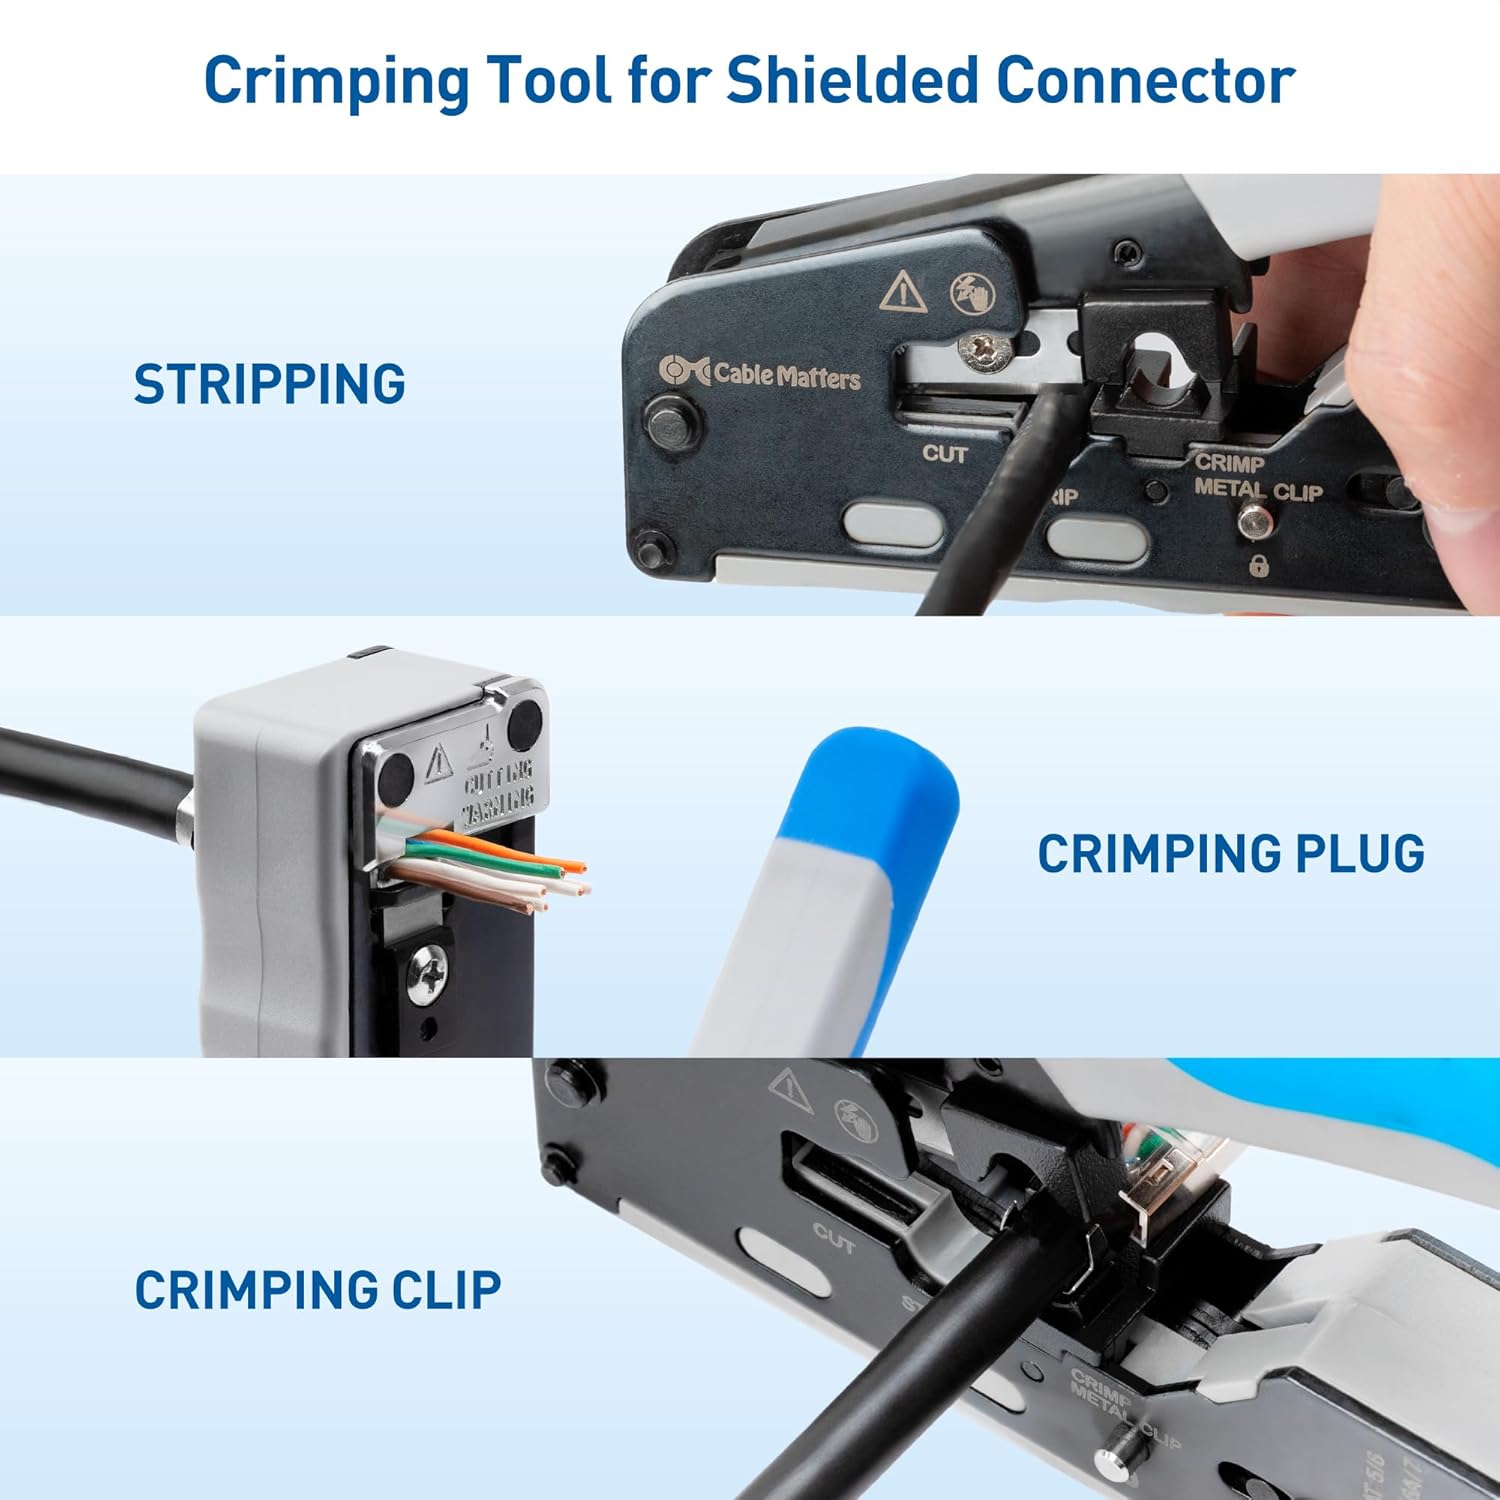
Figure 4.2: Demonstrating wire stripping with the tool.
4.2. Wire Cutting
- After stripping, untwist and straighten the individual wires.
- Align the wires in the desired order (e.g., T568A or T568B standard).
- Insert the aligned wires into the cutting slot.
- Squeeze the handles firmly to cut the wires to the appropriate length for the connector.
4.3. Crimping Pass-Through Connectors
This tool is optimized for pass-through connectors, simplifying wire termination.
- After stripping and arranging wires, carefully insert them into the pass-through RJ45 connector, ensuring each wire passes completely through the front of the connector.
- Insert the connector with the wires into the appropriate crimping slot (8P for Cat5/6/7/8).
- Squeeze the handles firmly and steadily until the crimping cycle is complete. The tool will simultaneously seat the pins and trim the excess wires protruding from the front of the connector.

Figure 4.3: Crimping a pass-through connector. Ensure the RJ45 connector is fully inserted and held steady for a clean cut.
4.4. Crimping Standard RJ45 Connectors
- After stripping and arranging wires, trim them to the correct length (typically about 1/2 inch or 1.25 cm from the jacket).
- Carefully insert the wires into the standard RJ45 connector, ensuring each wire reaches the front of its channel.
- Insert the connector into the appropriate crimping slot (8P for Cat5/6/7/8).
- Squeeze the handles firmly until the crimping cycle is complete, seating the pins into the wires.
4.5. Crimping Shielded Connectors (with Dovetail Clip)
For shielded Ethernet cables and connectors that feature a metal dovetail clip for grounding, this tool includes a dedicated crimping mechanism.
- After crimping the RJ45 plug as described above, position the connector so that its metal dovetail clip aligns with the tool's 'CRIMP METAL CLIP' slot.
- Squeeze the handles to crimp the metal clip, securing it to the cable's shield for proper grounding.
Figure 4.4: Crimping the metal clip of a shielded connector.
4.6. Switching Crimp Type (8P/6P)
The tool features an adjustable switch to accommodate different connector sizes.
- 8P Slot: Used for 8-position RJ45 connectors (Cat5, Cat6, Cat7, Cat8).
- 6P Slot: Used for 6-position RJ11/RJ12 connectors (Cat6A, Cat7).
To switch between 8P and 6P crimping, use a small screwdriver to adjust the internal mechanism as shown in the figure below. This allows the tool to properly crimp connectors with or without a notch.

Figure 4.5: Adjusting the crimping die for 8P or 6P connectors.
5. Maintenance
Regular maintenance ensures the longevity and optimal performance of your crimping tool.
- Cleaning: After each use, remove any wire scraps or debris from the cutting and crimping areas. A small brush or compressed air can be used.
- Blade Replacement: The cutting and stripping blades are consumable parts. If cuts become ragged or stripping is ineffective, the blades may need replacement. The tool is designed for durability and includes a spare cutting blade and stripper blade for convenience. Refer to the manufacturer's instructions for specific blade replacement procedures.
- Lubrication: Periodically apply a light machine oil to the pivot points and moving parts to ensure smooth operation.
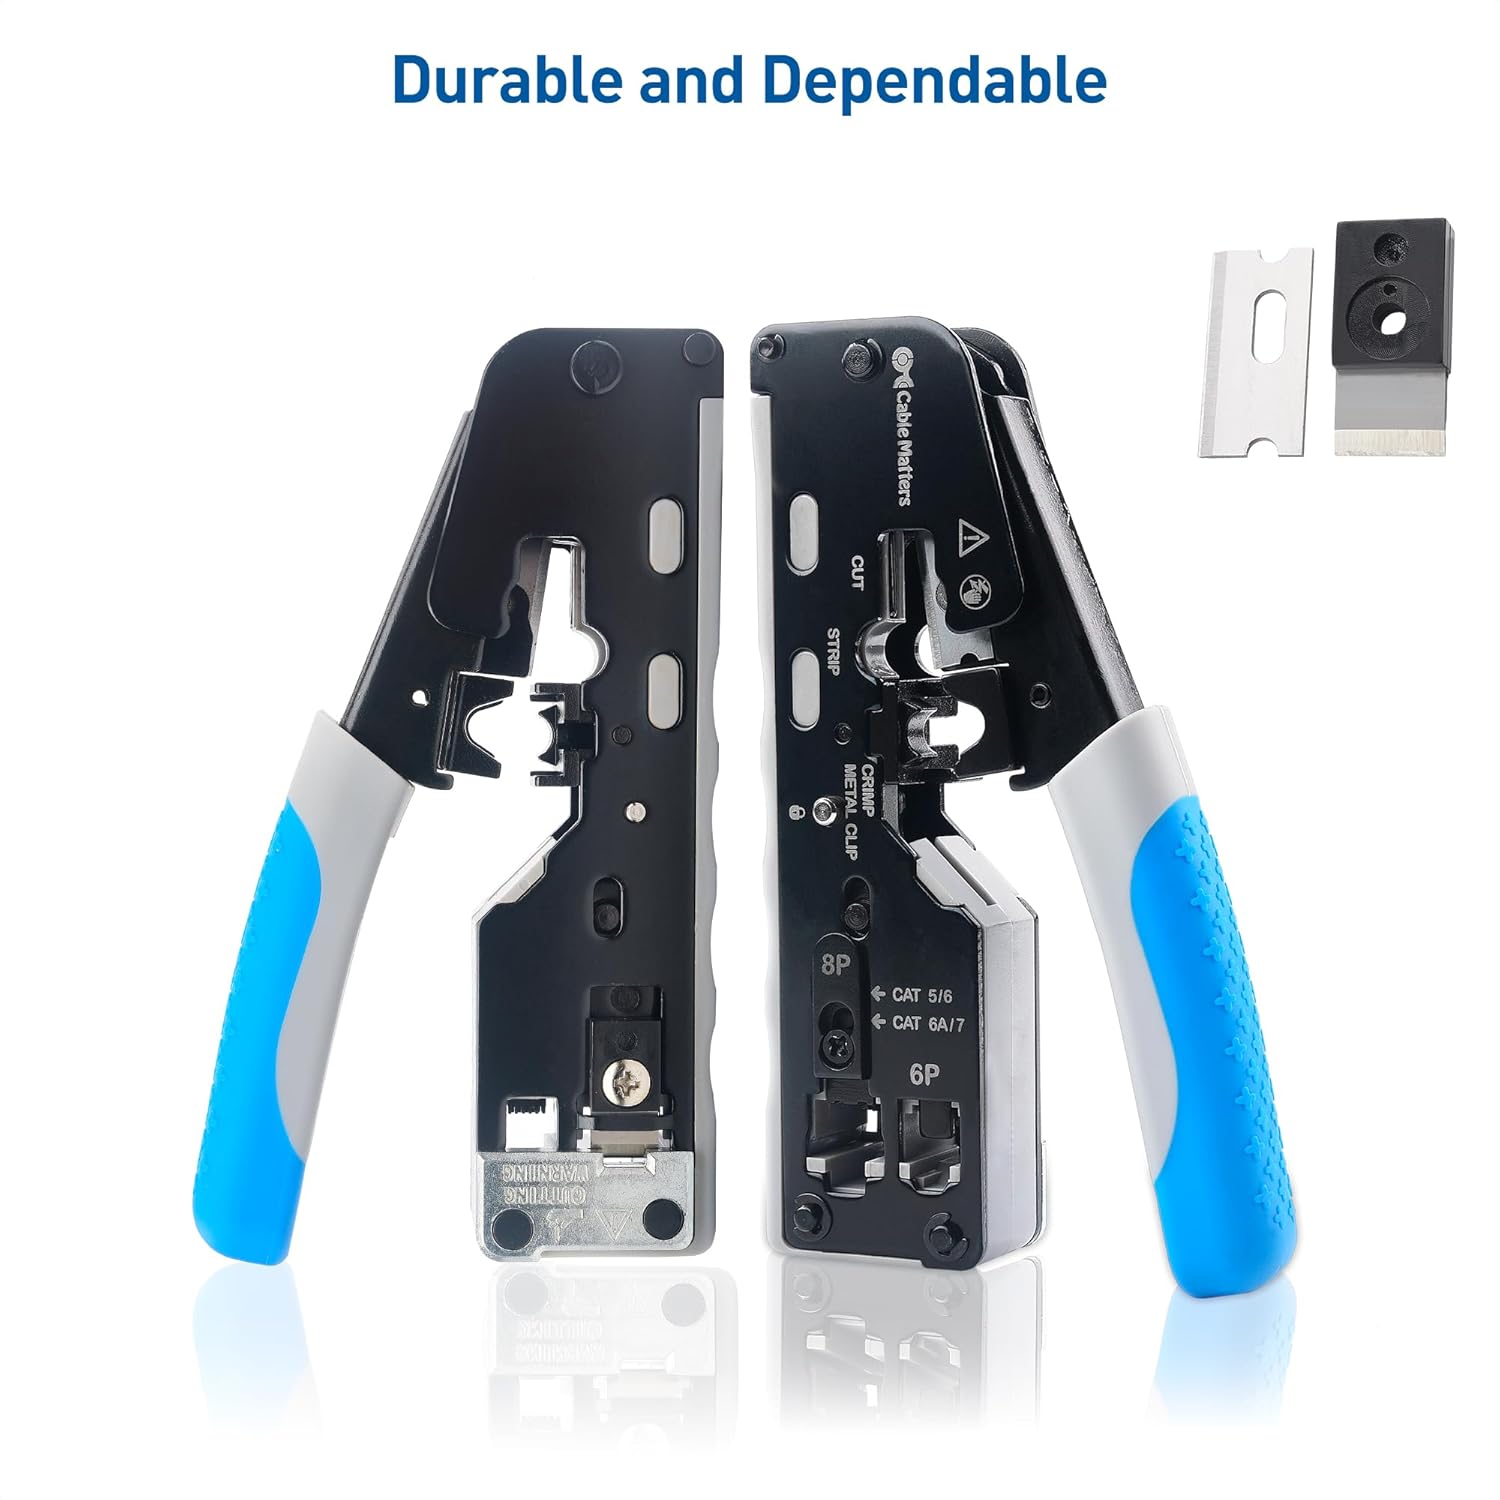
Figure 5.1: The crimping tool with spare blades.
6. Troubleshooting
If you encounter issues while using the crimping tool, consider the following common problems and solutions:
- Poor Cuts or Incomplete Trimming (Pass-Through Connectors):
- Ensure the RJ45 connector is fully inserted into the crimping slot and held steady during the crimping action.
- Verify that the cutting blade is sharp and free of debris. Replace if dull.
- Inconsistent Crimps:
- Check that the correct crimping slot (8P or 6P) is selected for your connector type.
- Ensure the wires are fully seated in the connector before crimping.
- Difficulty Stripping Cable Jacket:
- Ensure the cable is correctly positioned in the stripping slot.
- The stripping blade may be dull and require replacement.
7. Specifications
| Feature | Specification |
|---|---|
| Brand | Cable Matters |
| Model Number | 180124 |
| Color | Black |
| Item Weight | 0.37 Kilograms (13.1 ounces) |
| Handle Material | Metal |
| Grip Type | Ergonomic |
| Product Dimensions | 5.2 x 2.56 x 0.91 inches |
| Power Source | Hand Powered |
| Included Components | Case, Spare Blades |
| Compatibility | Cat5, Cat6, Cat6A, Cat7, Cat8 shielded Ethernet connectors (Pass-through and Standard RJ45) |
8. Support Information
For further assistance, product information, or to explore other Cable Matters products, please visit the official Cable Matters website or contact customer support.
Online Resources: Cable Matters Store on Amazon