
1. Important Safety Instructions
Please read all instructions carefully before using the food dehydrator. Retain this manual for future reference.
- Always ensure the appliance is unplugged from the power outlet before cleaning, assembling, or disassembling parts.
- Do not immerse the main unit, cord, or plug in water or other liquids.
- This appliance is for household use only. Do not use outdoors.
- Supervise children closely when the appliance is in use.
- Do not operate the dehydrator if the cord or plug is damaged, or if the appliance malfunctions or has been damaged in any manner.
- Ensure proper ventilation around the dehydrator during operation. Do not block air vents.
- Do not place the dehydrator on or near a hot gas or electric burner, or in a heated oven.
- Always place the dehydrator on a stable, heat-resistant surface.
- Avoid contact with moving parts.
- Do not use abrasive cleaners or scouring pads when cleaning.
2. Product Overview and Components
The WJYLM Food Dehydrator is designed for efficient and uniform drying of various foods. It features a robust stainless steel construction and precise digital controls.

Figure 2.1: Front view of the WJYLM 16-Tray Food Dehydrator with various fruits and vegetables on the trays.
Key Components:
- Main Unit: Stainless steel housing with integrated heating element and fan.
- Control Panel: Digital touch control for temperature and timer settings.

Figure 2.2: Detailed view of the smart panel touch control for setting temperature and time.
- Stainless Steel Trays (16x): Removable trays for holding food items.
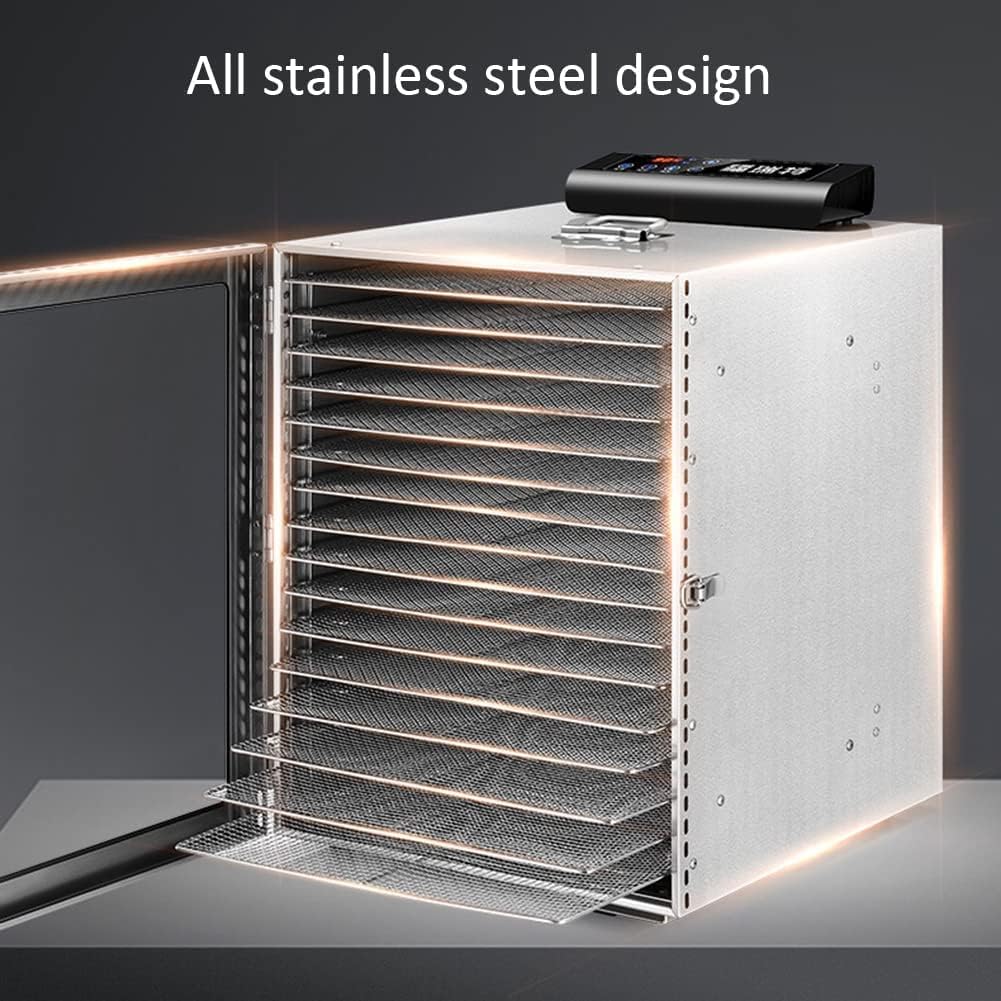
Figure 2.3: The dehydrator showcasing its all stainless steel design with trays partially extended.
- Transparent Door: Allows monitoring of the dehydration process.
- Internal Lighting: For visibility inside the chamber.

Figure 2.4: Interior view of the dehydrator highlighting the internal lighting for clear visibility.
3. Setup and First Use
- Unpacking: Carefully remove the dehydrator and all its components from the packaging. Retain packaging for future storage or transport.
- Initial Cleaning: Before first use, wipe the exterior of the main unit with a damp cloth. Wash all stainless steel trays and the transparent door with warm, soapy water. Rinse thoroughly and dry completely.
- Placement: Place the dehydrator on a stable, flat, and heat-resistant surface. Ensure there is adequate space (at least 15 cm or 6 inches) around all sides of the unit for proper air circulation. Do not place it near heat sources or flammable materials.
- Power Connection: Ensure the power switch is in the "OFF" position before plugging the unit into a grounded electrical outlet. The dehydrator operates on 220V.
4. Operating Instructions
Preparing Food for Dehydration:
- Wash and prepare food items as desired (e.g., slice fruits, vegetables, or meat).
- Ensure slices are uniform in thickness for even drying. The 3cm layer spacing allows for both thick and thin ingredients.

Figure 4.1: Illustration of the 3cm layer spacing between trays, accommodating various ingredient thicknesses.
- Arrange food in a single layer on the trays, ensuring air can circulate freely around each piece. Do not overload trays.
Using the Digital Control Panel:
- Power On: Plug in the dehydrator. Press the Power button (represented by a circle with a vertical line) to turn the unit on.
- Set Temperature: Press the Temperature button (represented by a thermometer icon). Use the + and - buttons to adjust the temperature between 30°C and 90°C (86°F - 194°F).
- Set Timer: Press the Time button (represented by a clock icon). Use the + and - buttons to set the desired drying time, up to 24 hours.
- Start Dehydration: The dehydrator will automatically begin operation after a few seconds of inactivity on the control panel, or you may press the Power button again to confirm and start.
- Monitoring: The transparent door allows you to monitor the drying progress without opening the unit.
- Completion: The dehydrator will automatically shut off once the set time has elapsed.
General Dehydration Guidelines:
Drying times and temperatures vary based on food type, thickness, and desired dryness. Refer to general food dehydration guides for specific recommendations. The 360° heat circulation ensures uniform drying across all 16 trays without the need for rotation.
5. Maintenance and Cleaning
Regular cleaning ensures optimal performance and longevity of your dehydrator.
- Unplug: Always unplug the dehydrator from the power outlet and allow it to cool completely before cleaning.
- Trays and Door: Remove the stainless steel trays and the transparent door. Wash them in warm, soapy water. For stubborn residue, a soft brush may be used. Rinse thoroughly and dry completely before reassembling. These parts are generally dishwasher safe, but hand washing is recommended for longevity.
- Main Unit: Wipe the exterior and interior of the main unit with a damp cloth. Do not use abrasive cleaners, steel wool, or harsh chemicals. Ensure no water enters the control panel or motor area.
- Storage: Store the dehydrator in a clean, dry place when not in use.
6. Troubleshooting
| Problem | Possible Cause | Solution |
|---|---|---|
| Dehydrator does not turn on. | Not plugged in; power outlet issue; power button not pressed. | Ensure the unit is securely plugged into a working 220V outlet. Press the power button. Check circuit breaker. |
| Food not drying evenly. | Trays overloaded; food slices too thick or uneven. | Ensure food is in a single layer with space for air circulation. Slice food uniformly. |
| Unusual noise during operation. | Dehydrator not on a stable surface; foreign object inside. | Place on a flat, stable surface. Unplug and inspect for any obstructions. If noise persists, contact support. |
| Temperature or timer not responding. | Control panel malfunction; temporary glitch. | Unplug the unit for 5 minutes, then plug back in and try again. If issue persists, contact support. |
7. Specifications
| Feature | Detail |
|---|---|
| Product Name | Food Dehydrator Machine |
| Model | 16-Tray 1000W Stainless Steel Food Dehydrator |
| Rated Power | 1000W |
| Rated Voltage | 220V~ |
| Rated Frequency | 50Hz |
| Temperature Adjustment Range | 30°C - 90°C (86°F - 194°F) |
| Timing Duration | Up to 24 hours |
| Body Material | Stainless Steel |
| Operation Method | Touch Control |
| Number of Trays | 16 |
| Shelf Size | 385mm x 280mm (approx. 15.16 in x 11.02 in) Figure 7.1: Dimensions of the stainless steel drying trays. |
| Overall Dimensions (W x D x H) | Approx. 400mm x 425mm x 525mm (15.75 in x 16.73 in x 20.67 in) Figure 7.2: Overall dimensions of the WJYLM Food Dehydrator. |
8. Warranty and Customer Support
WJYLM is committed to providing high-quality products. If you encounter any issues or have questions regarding your food dehydrator, please contact our professional after-sales service team.
Please refer to your purchase documentation for specific warranty terms and conditions, as well as contact information for support.
For general inquiries, you may visit the manufacturer's website or contact the retailer where the product was purchased.