
Introduction
This manual provides detailed instructions for the installation, operation, and maintenance of your Blooy Gauge Set, designed specifically for Pegasus M752 and L52 industrial 4-thread overlock sewing machines. Please read this manual thoroughly before installation and use to ensure proper function and longevity of the components.
Product Overview
The Blooy Gauge Set is a complete replacement kit for key components of your Pegasus industrial overlock machine, ensuring precise stitching and optimal performance. The set includes the following parts:
- Needle Plate: Part Code 202554E
- Presser Foot: Part Code 201230C
- Feed Dog Set: Part Codes 204676-BF + 208078-BF
- Needle Clamp: Part Code 208905
This gauge set is engineered for a gauge size of NG x SW = 2mm x 4mm, suitable for 4-thread overlock applications.
Compatibility
This Blooy Gauge Set is compatible with the following industrial 4-thread overlock sewing machine models:
- Pegasus M752
- Pegasus L52
Ensure your machine is a 4-thread overlock model before attempting installation.
Safety Instructions
- Always disconnect the sewing machine from the power supply before installing, removing, or performing maintenance on any parts.
- Use appropriate tools for installation to prevent damage to the parts or the machine.
- Handle sharp components, such as the needle plate and feed dogs, with care to avoid injury.
- Keep small parts away from children.
- If you are unsure about any installation step, consult a qualified sewing machine technician.
Installation and Setup
Before beginning, ensure your sewing machine is turned off and unplugged. Clear the work area of any fabric or threads. It is recommended to take photos of the existing setup before removal for reference.
1. Removing Existing Components
- Needle Clamp: Loosen the screw holding the needle clamp in place and carefully remove it.
- Needle Plate: Locate the screws securing the needle plate to the machine bed. Unscrew them and lift the needle plate away.
- Presser Foot: Release the presser foot lever and unscrew the presser foot from its shaft.
- Feed Dog Set: The feed dogs are typically located beneath the needle plate. Unscrew the retaining screws and carefully remove the old feed dog components.
2. Installing New Components
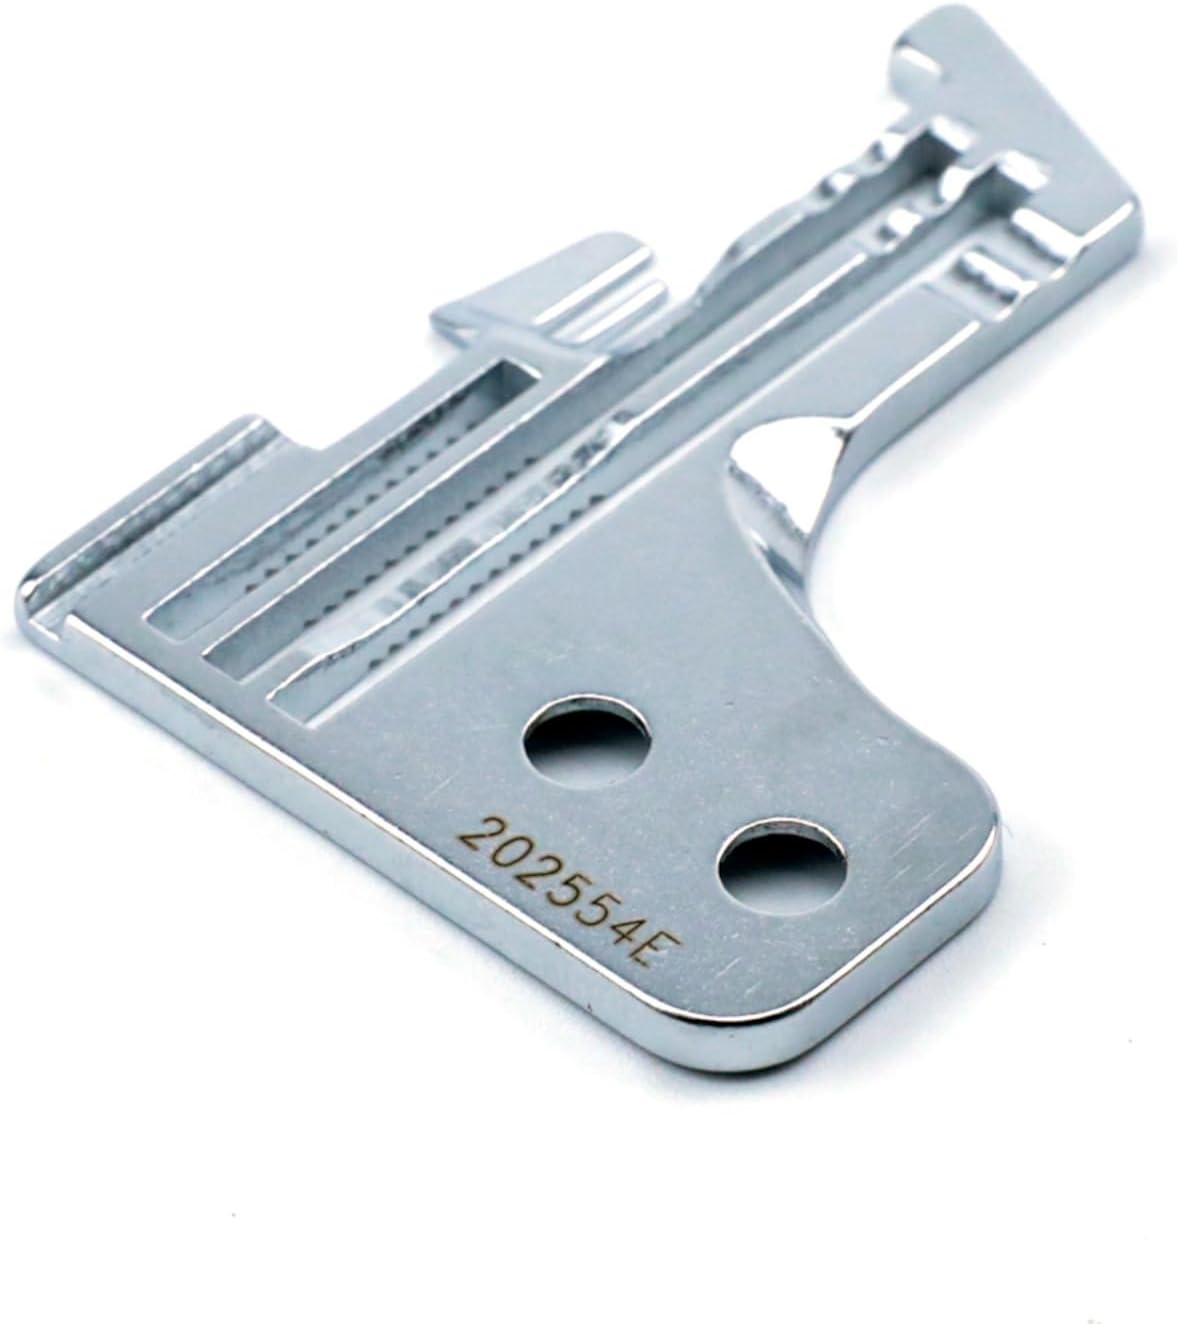
Image: Blooy Needle Plate, Part Code 202554E. This image shows the metallic needle plate with screw holes and thread guides, clearly displaying the part number "202554E".
- Needle Plate (202554E): Position the new needle plate onto the machine bed, aligning the screw holes. Secure it firmly with the appropriate screws. Do not overtighten.

Image: Blooy Presser Foot, Part Code 201230C. This image displays the metallic presser foot with its attachment mechanism and the part number "201230C" visible.
- Presser Foot (201230C): Attach the new presser foot to the presser foot shaft and tighten the screw securely. Ensure it moves freely when the lever is operated.

Image: Blooy Feed Dog Set, Part Codes 204676-BF and 208078-BF. This image shows two metallic feed dog components, one with "204676-BF" stamped on it, featuring serrated edges for fabric feeding.
- Feed Dog Set (204676-BF + 208078-BF): Carefully place the new feed dog components into their respective positions beneath the needle plate. Align the screw holes and secure them with the retaining screws. Ensure the feed dogs are level and move correctly.

Image: Blooy Needle Clamp, Part Code 208905. This image shows a small, metallic needle clamp with a screw for securing the needle.
- Needle Clamp (208905): Reattach the new needle clamp to the needle bar and tighten its screw. Insert new needles appropriate for your fabric and thread, ensuring they are fully seated and facing the correct direction.
3. Post-Installation Check
- Manually turn the handwheel several times to ensure all parts move smoothly without obstruction.
- Check that the needle passes cleanly through the needle plate hole without touching the edges.
- Plug in the machine and perform a test stitch on scrap fabric to verify proper function and stitch quality.
Operation
Once the Blooy Gauge Set is correctly installed, your Pegasus overlock machine should operate with renewed precision. Ensure proper threading according to your machine's specific instructions for 4-thread overlock stitching. Always use high-quality needles and threads suitable for your project.
- Thread Tension: After installation, it may be necessary to adjust the thread tensions to achieve a balanced stitch. Refer to your sewing machine's main manual for guidance on tension adjustments.
- Stitch Length and Differential Feed: These settings should be adjusted based on the fabric type and desired stitch appearance. The new gauge set provides the foundation for consistent stitch formation.
Maintenance
Regular maintenance will extend the life of your gauge set and ensure consistent sewing performance.
- Cleaning: Regularly remove lint and dust from around the needle plate, feed dogs, and presser foot area using a brush or vacuum. Accumulation of lint can affect stitch quality and fabric feeding.
- Inspection: Periodically inspect the needle plate for burrs or nicks, and the feed dogs for wear. Damaged parts can snag fabric or cause skipped stitches.
- Lubrication: Refer to your Pegasus sewing machine's manual for specific lubrication points and schedules. Ensure no oil gets on the feed dog teeth or needle plate surface.
Troubleshooting
If you encounter issues after installing the gauge set, consider the following common problems and solutions:
| Problem | Possible Cause | Solution |
|---|---|---|
| Skipped Stitches | Incorrect needle installation, bent needle, burr on needle plate, incorrect threading. | Re-install needle correctly, replace needle, inspect needle plate for damage, re-thread machine. |
| Fabric Not Feeding Evenly | Lint under feed dogs, worn feed dogs, presser foot not properly adjusted. | Clean feed dog area, inspect feed dogs for wear, adjust presser foot pressure. |
| Thread Breakage | Rough edges on needle plate or presser foot, incorrect tension, poor quality thread. | Inspect parts for damage, adjust thread tension, use quality thread. |
| Noisy Operation | Loose components, lack of lubrication. | Check all screws are tight, lubricate machine as per manufacturer's manual. |
If problems persist, consult your sewing machine's original manual or contact a professional technician.
Specifications
- Brand: Blooy
- Compatible Machine Models: Pegasus M752, L52 (4-Thread Industrial Overlock)
- Gauge Size: NG x SW = 2mm x 4mm
- Included Components & Part Codes:
- Needle Plate: 202554E
- Presser Foot: 201230C
- Feed Dog Set: 204676-BF + 208078-BF
- Needle Clamp: 208905
Warranty and Support
For specific warranty information, please refer to the product packaging or contact your retailer. For technical support or further assistance, please reach out to the Blooy customer service department or your authorized dealer. Always provide the product name and part codes when seeking support.