1. Introduction
This manual provides detailed instructions for the safe and efficient operation, setup, maintenance, and troubleshooting of your WEP 948D III 2-IN-1 ESD Safe Soldering Desoldering Station. Please read this manual thoroughly before using the device to ensure proper function and to prevent damage or injury.
2. Safety Information
Always observe the following safety precautions when operating the WEP 948D III station:
- Electrical Safety: This product is rated for 110-127V USA specifications. Do not connect this iron to a 220V power socket. Ensure the power outlet is properly grounded.
- Heat Hazard: The soldering iron and desoldering gun tips reach very high temperatures. Avoid direct contact with skin or flammable materials. Use heat-resistant surfaces and holders.
- Fumes: Soldering and desoldering produce fumes. Work in a well-ventilated area or use a fume extractor.
- ESD Protection: This is an ESD (Electrostatic Discharge) safe station. Always follow proper ESD procedures when working with sensitive electronic components.
- Children and Pets: Keep the device out of reach of children and pets.
- Maintenance: Disconnect power before performing any maintenance or changing accessories.
3. Package Contents
Verify that all items are present in your package:
- WEP 948D III Desoldering Station & Soldering Station Main Unit
- Soldering Iron Handpiece
- Desoldering Gun Handpiece
- 100% Metallic Soldering & Desoldering Holder
- 3 interchangeable soldering sucker nozzles (1.0mm, 1.2mm, 2.0mm)
- 3 soldering tips (Type-I, B, K)
- 5 Ceramic Filters
- 10 Filtration Adsorbers
- Set of Cleaning Pins
- Solder Residue Storage Chamber
- Vacuum Receptacle Cover
- 2 Solder Residue Filter Springs
- Heat-resistant Silicone Pad (1 Piece)

Image 3.1: All included accessories for the WEP 948D III station, including nozzles, tips, filters, and cleaning tools.
4. Product Overview
The WEP 948D III is a 2-in-1 station combining a soldering iron and a desoldering gun, designed for efficient and precise electronic work.

Image 4.1: The WEP 948D III main unit with connected soldering iron and desoldering gun, along with various accessories.

Image 4.2: A comprehensive view of the WEP 948D III station, highlighting its compact design and dual functionality.
4.1 Main Unit Features
- LCD Display: Shows temperature settings, mode indicators (Sleep, Auto-Shutdown), and calibration values.
- Temperature Controls: Dedicated buttons for adjusting soldering and desoldering temperatures.
- PID Program: Built-in PID temperature control for rapid heat recovery and stability.
- ESD Safe Design: Protects sensitive components from electrostatic discharge.

Image 4.3: The LCD display showing various configurable parameters such as Sleep Mode, Auto-Shutdown, °F/°C Conversion, Digital Temperature Calibration, and Buzzer Prompt.
4.2 Soldering Iron
- 110W heating element for fast heat-up.
- Adjustable temperature range: 392~896°F (200~480°C).
- Detachable handpiece for easy storage and maintenance.
4.3 Desoldering Gun
- Provides fast through-hole component desoldering.
- Adjustable temperature range: 716~896°F (380~480°C).
- Designed to minimize jamming.

Image 4.4: Illustration of the 2-in-1 functionality, showing the soldering iron and desoldering station connected to the main unit with their respective adjustable temperature ranges.
5. Setup
Follow these steps to set up your soldering and desoldering station:
- Unpacking: Carefully remove all components from the packaging.
- Placement: Place the main unit on a stable, heat-resistant surface. Ensure adequate ventilation around the unit.
- Connect Handpieces: Connect the soldering iron and desoldering gun handpieces to their respective ports on the front of the main unit. Ensure connections are secure.
- Holder Assembly: Assemble the metallic soldering & desoldering holder. Place the blue sponge in the designated area and dampen it slightly with water.
- Power Connection: Connect the power cord to the main unit and then to a grounded 110-127V AC power outlet.
6. Operating Instructions
6.1 Power On/Off
Press the main power switch located on the unit to turn it on or off. The LCD display will illuminate upon power-on.
6.2 Soldering Operation
- Temperature Setting: Use the dedicated temperature adjustment buttons for the soldering iron to set the desired temperature (392~896°F). The PID program will quickly bring the iron to the set temperature.
- Pre-heating: Allow the soldering iron to reach the set temperature, indicated on the LCD.
- Soldering: Apply the hot tip to the joint, then introduce solder. Ensure the solder flows smoothly.

Image 6.1: A hand holding the soldering iron, applying heat to a component on a circuit board.

Image 6.2: Close-up of the soldering station controls, showing temperature adjustment, PID program stabilization, and the detachable soldering iron handpiece.
6.3 Desoldering Operation
- Temperature Setting: Use the dedicated temperature adjustment buttons for the desoldering gun to set the desired temperature (716~896°F).
- Pre-heating: Allow the desoldering gun to reach the set temperature. The indicator will turn from red to green when a constant temperature is achieved.
- Desoldering: Apply the desoldering nozzle to the solder joint. Ensure the solder melts completely before pressing the trigger to activate the vacuum. This is a critical step to prevent clogging.

Image 6.3: A hand operating the desoldering gun on a circuit board, removing a component.
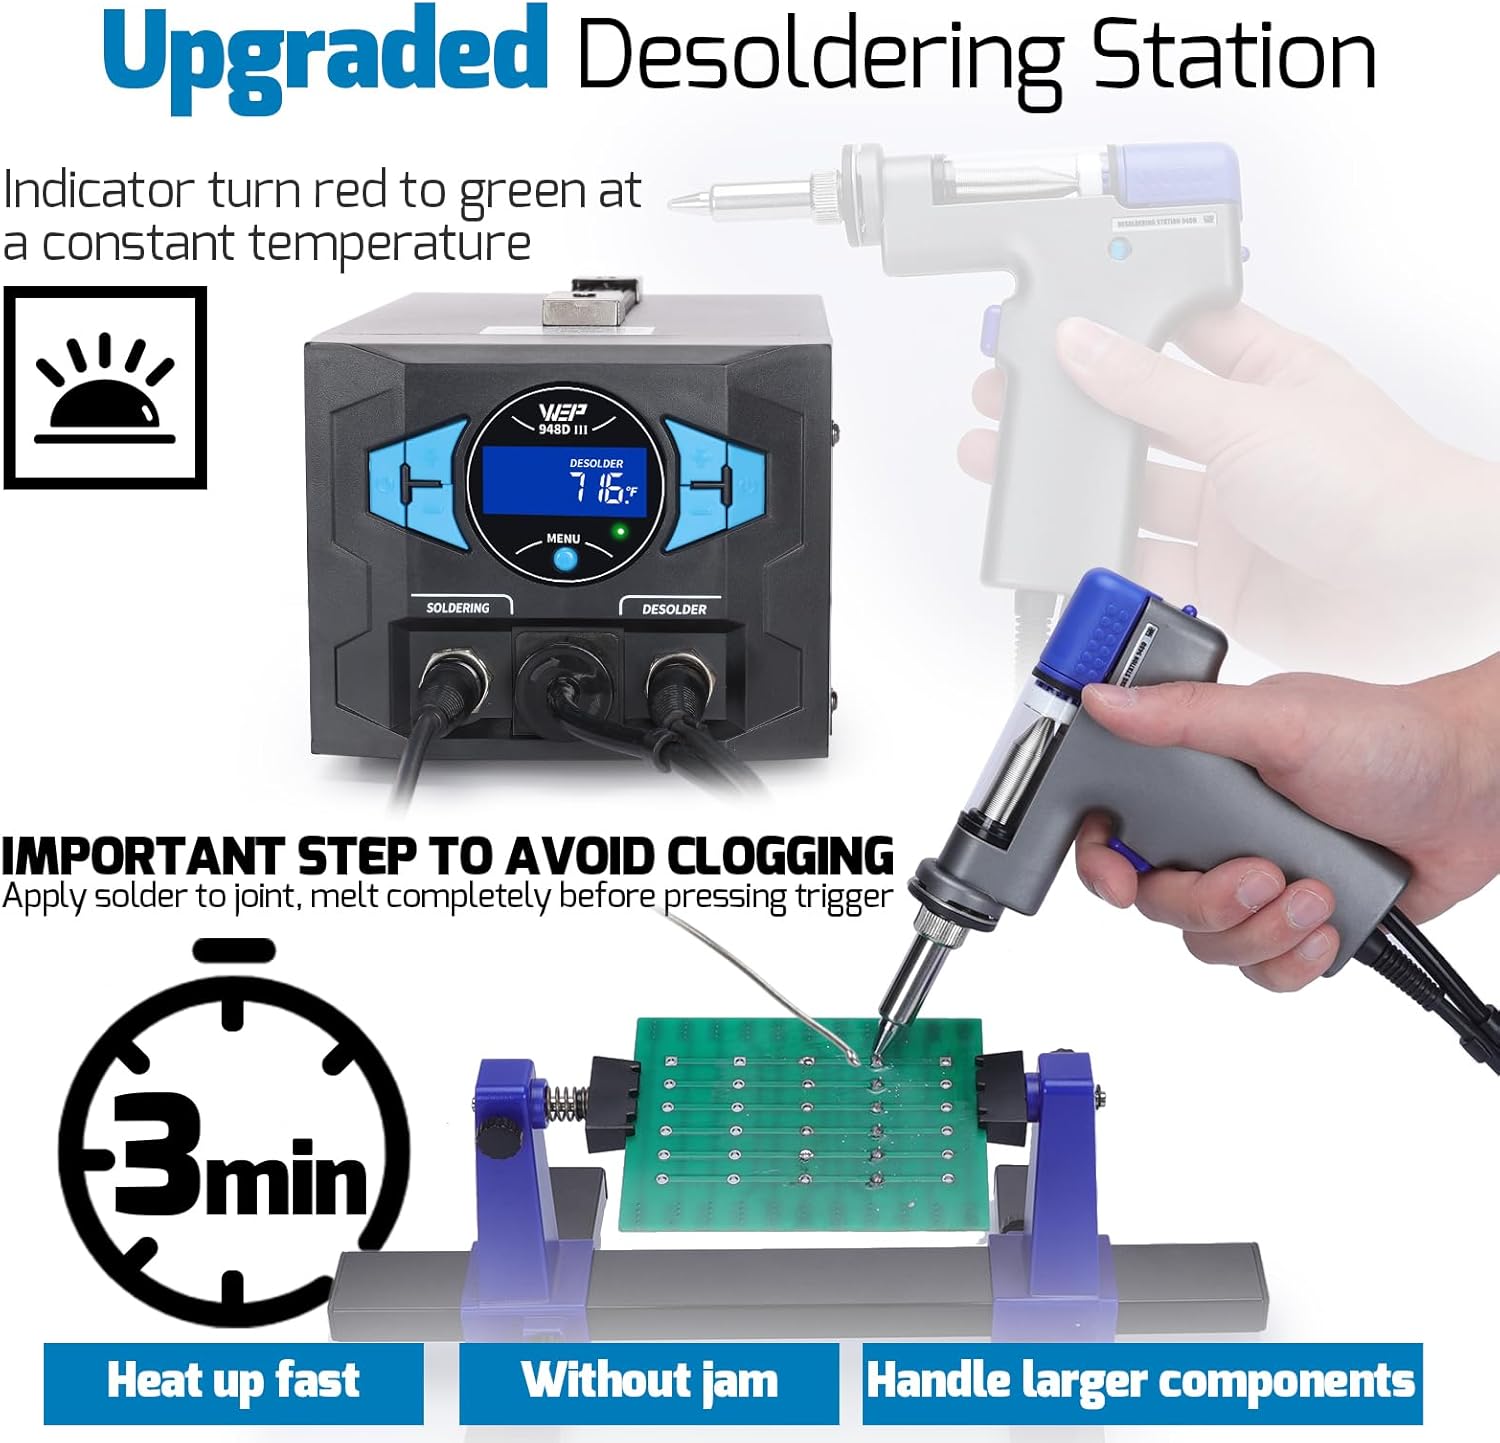
Image 6.4: The upgraded desoldering station, showing the indicator light changing from red to green at constant temperature, and emphasizing the important step to avoid clogging by melting solder completely before triggering the vacuum.
6.4 Advanced Features
- Sleep Mode (SLP): Extends the service life of the heating elements. The station enters sleep mode after a period of inactivity.
- Automatic Shutdown: For enhanced safety, the unit can be configured to automatically shut down after an extended period of inactivity.
- °F/°C Conversion: Easily switch between Fahrenheit and Celsius temperature displays to adapt to different usage preferences.
- Digital Temperature Calibration (CAL): Improves work efficiency by allowing precise calibration of the displayed temperature. Refer to the display for calibration steps.
- Buzzer Prompt: Provides audible feedback for certain operations or status changes.

Image 6.5: The station in Sleep Mode, indicated by 'SLP' on the display, showing the soldering iron resting in its holder.

Image 6.6: The station displaying '---' for Auto-Shutdown, indicating enhanced safety by powering down after inactivity.

Image 6.7: A hand pressing a button to switch the temperature display between Celsius and Fahrenheit.

Image 6.8: The station displaying 'CAL' for Digital Temperature Calibration, with a soldering iron being calibrated using an external temperature meter.
7. Maintenance
Regular maintenance ensures optimal performance and extends the lifespan of your station.
7.1 Cleaning the Soldering Iron
- Wipe the soldering tip on the damp sponge or brass wool regularly to remove excess solder and oxidation.
- Periodically clean the soldering iron handle with a damp cloth.
7.2 Desoldering Gun Cleaning and Filter Replacement
The desoldering gun requires regular cleaning to prevent clogging and maintain vacuum efficiency.
- Empty Solder Residue Chamber: Regularly detach and empty the solder residue storage chamber.
- Clean Filter Spring: Remove and clean the solder residue filter spring. If heavily clogged, use the provided cleaning pins or a heat gun to melt and remove hardened solder.
- Replace Filters: Replace ceramic filters and filtration adsorbers as needed to maintain vacuum performance.
- Nozzle Cleaning: Use the cleaning pins to clear any blockages in the desoldering nozzles.

Image 7.1: Exploded view of the desoldering gun, showing replaceable parts such as the filter spring, filter chamber, heating element, and nozzles, illustrating how to access them for cleaning and replacement.
7.3 Tip and Nozzle Replacement
- Ensure the unit is off and cooled down before changing soldering tips or desoldering nozzles.
- Carefully unscrew and replace the desired tip or nozzle.

Image 7.2: Various types of soldering iron tips (e.g., conical, chisel, knife) for different applications.

Image 7.3: A selection of desoldering nozzles with different diameters (e.g., 0.8mm, 1.0mm, 1.2mm, 2.0mm) for various component sizes.
8. Troubleshooting
If you encounter issues, refer to the following common problems and solutions:
| Problem | Possible Cause | Solution |
|---|---|---|
| Soldering iron not heating | Loose connection, faulty heating element, incorrect temperature setting. | Check connections. Verify temperature setting. If issue persists, contact support. |
| Desoldering gun has weak vacuum or clogs easily | Clogged nozzle, full solder residue chamber, dirty filter spring, worn filters. | Clean nozzle with cleaning pins. Empty solder residue chamber. Clean/replace filter spring and filters. Ensure solder is fully melted before triggering vacuum. |
| Temperature display inaccurate | Needs calibration. | Perform digital temperature calibration as per Section 6.4. |
| Unit displays an error code | Internal fault. | Power cycle the unit. If the error persists, contact technical support. |
9. Specifications
| Feature | Specification |
|---|---|
| Model | WEP 948D-III |
| Display Type | LCD |
| Voltage | 110-127V AC |
| Wattage | 290 watts |
| Soldering Iron Temperature Range | 392~896°F (200~480°C) |
| Desoldering Gun Temperature Range | 716~896°F (380~480°C) |
| Temperature Stability | Excellent, with PID program compensation |
| Product Dimensions | 9.76 x 5.94 x 4.96 inches |
| Item Weight | 6.87 pounds (3.12 kg) |
| Material | Ceramic (heating elements) |
10. Warranty and Support
This WEP 948D III soldering and desoldering tool is covered by a 1-year USA technical support. For assistance, please contact our dedicated team. We offer 24-hour support to address any questions or issues you may encounter.
Please note that the manufacturer is Guangzhou Yihua Electronic Equipment Co., Ltd.


