
1. Introduction
Thank you for choosing the ChunHee Solar Outdoor Motion Sensor Alarm. This device is designed to provide effective security and deterrence for various outdoor environments such as homes, villas, farms, barns, gardens, and orchards. Utilizing solar power, it combines motion detection with a loud alarm and strobe light to deter intruders and unwanted animals. Please read this manual thoroughly before use to ensure proper installation and operation.
2. Product Overview
Familiarize yourself with the components of your ChunHee Solar Outdoor Motion Sensor Alarm.

Image: Contents of the package, showing the solar alarm unit, remote control, USB charging cable, and mounting screws.
2.1. Main Unit Components

Image: Front view of the alarm unit, highlighting the solar panel, loudspeaker, PIR sensor, sound switch, volume control, recording button, microphone, and power button.
- Solar Panel: Charges the internal battery using sunlight.
- Loudspeaker: Emits alarm sounds.
- PIR Sensor: Detects motion within its range.
- Sound Switch: Toggles between different sound options.
- Volume Control: Adjusts the alarm volume.
- Recording Button: Activates the custom sound recording function.
- Microphone: Captures custom sound recordings.
- Power Button: Turns the device on/off and cycles through modes.
2.2. Rear Unit Components
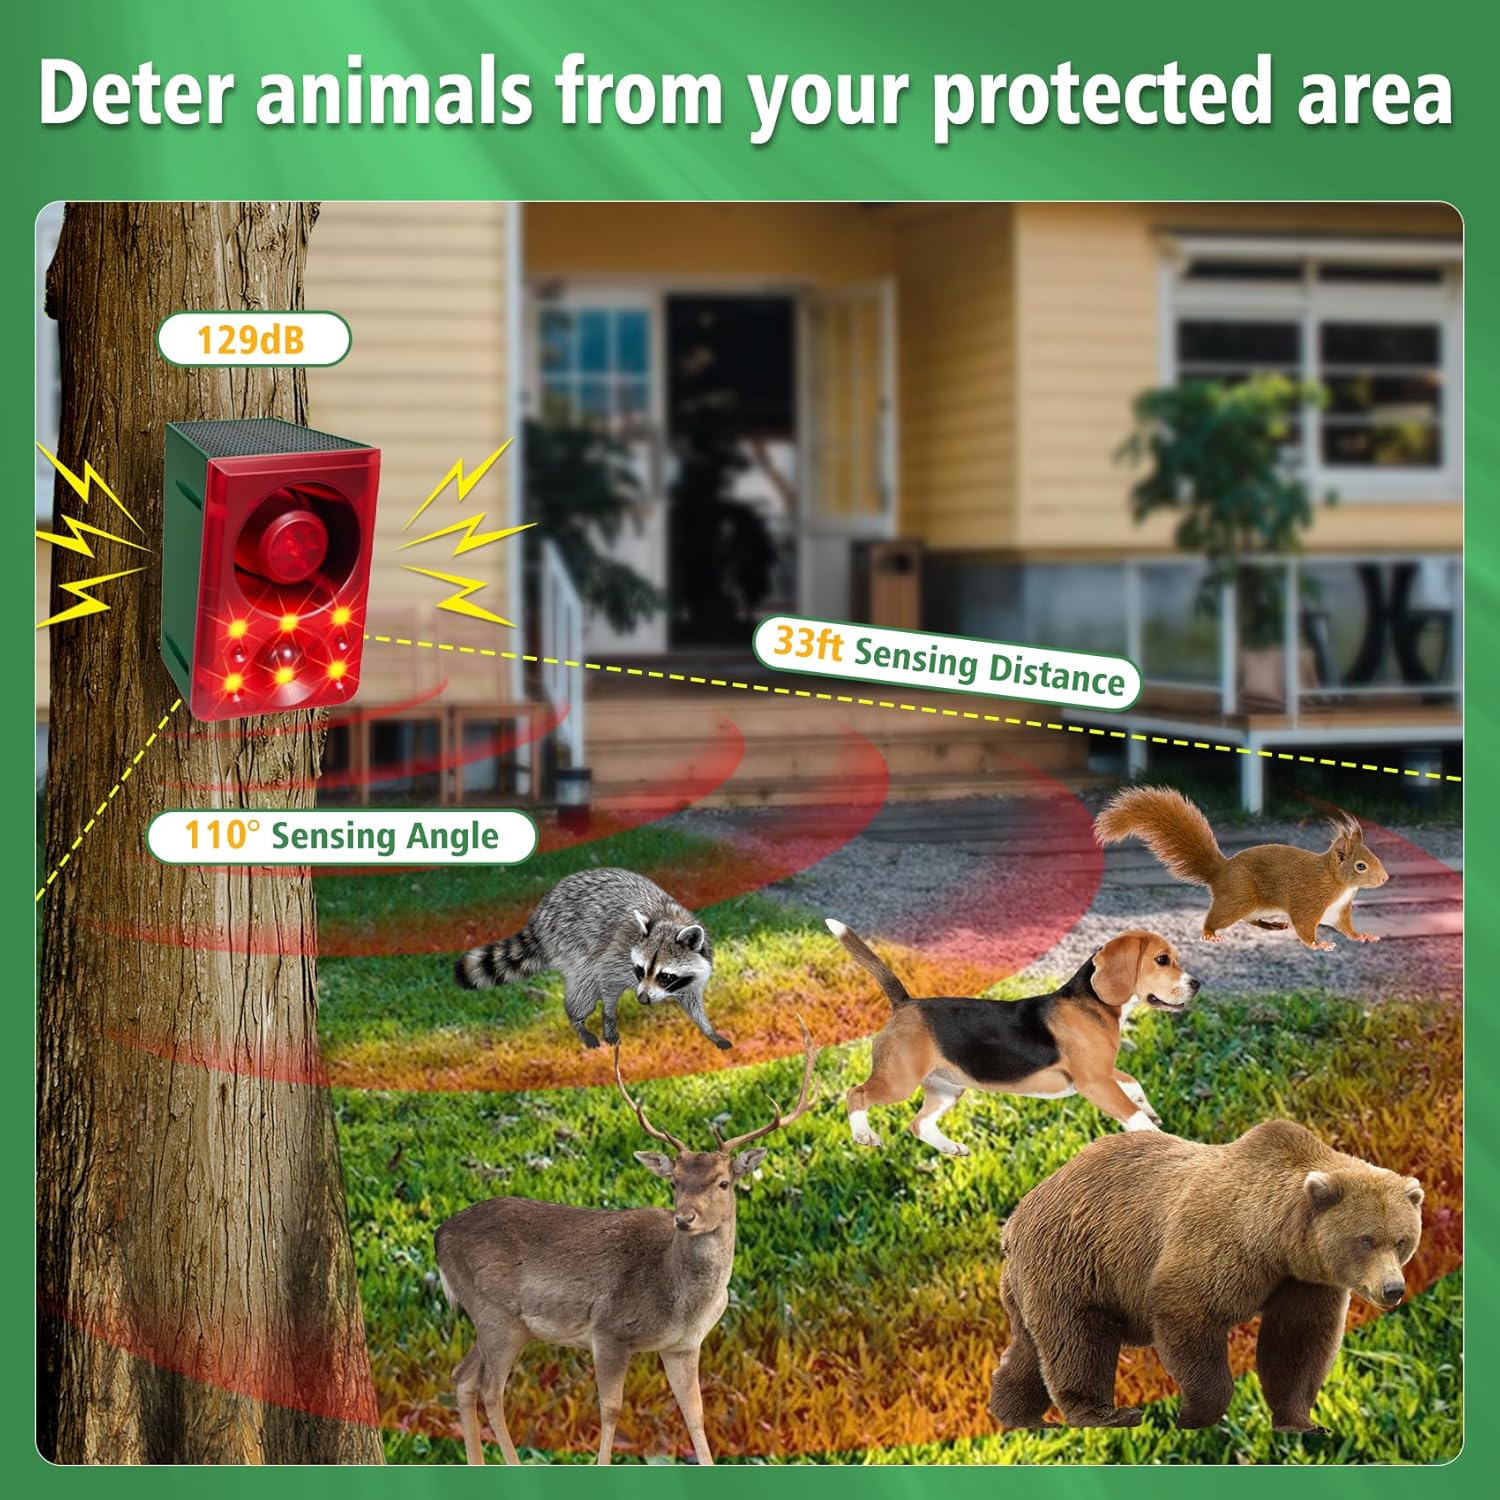
Image: Rear view of the alarm unit, showing the mounting bracket and DC charge port.
- Mounting Bracket: For secure installation on walls, fences, or posts.
- DC Charge Port: For alternative charging using the provided USB cable.
3. Key Features
- Effective Deterrence: Combines a 130dB loud alarm and bright strobe light to deter intruders and animals.
- PIR Motion Detection: 110° sensing angle, detecting movement within 5-8 meters.
- Customizable Sounds: Record your own alarm sound or choose from pre-set options like dog barking and gunshots.
- Adjustable Volume: Allows for volume control to suit different environments and avoid disturbing neighbors.
- Multiple Work Modes: Three distinct operating modes for 24-hour, night-only, or timed cyclic operation.
- Solar Powered: Environmentally friendly and energy-efficient, converting light energy into electricity.
- Weatherproof Design: IP65 rated ABS housing ensures durability against storms, snow, and extreme heat.
- Easy Installation: Designed for simple mounting in various outdoor locations.
4. Setup & Installation
4.1. Initial Charging
Before initial use, ensure the solar alarm is fully charged. Place the device under direct sunlight for at least one day. Alternatively, use the provided USB cable and a DC5V ≤1A charger to charge the device for less than 2 hours via the DC charge port.

Image: Illustration of solar charging and DC charging methods for the alarm unit.
4.2. Mounting Location
Choose a location that receives ample direct sunlight for optimal solar charging. The device should be mounted where its PIR sensor can effectively cover the desired protection area (5-8 meters sensing distance, 110° sensing angle). Ensure the mounting surface is stable and secure.

Image: Diagram showing the sensing angle and distance of the motion sensor alarm in an outdoor setting.
4.3. Installation Steps
- Mark the desired mounting points on the wall, fence, or post using the device's mounting bracket as a guide.
- Drill pilot holes if necessary.
- Secure the alarm unit using the provided screws.
- Ensure the device is firmly attached and the solar panel is facing upwards to receive sunlight.
5. Operating Modes
The device features three operating modes, selectable via the power button or remote control. Press the power button repeatedly to cycle through the modes.

Image: Illustration of the three selectable working modes for the alarm.
- Mode A (24H Motion Sensor Sound & Flash Alarm): The alarm will activate with both sound and strobe light whenever motion is detected, day or night.
- Mode B (Night Motion Sensor Sound & Flash Alarm): The alarm will activate with both sound and strobe light only when motion is detected during nighttime hours.
- Mode C (Night Sound & Flash Alarm Every 5 Minutes): The alarm will activate with sound and strobe light every 5 minutes during nighttime hours, regardless of motion detection. This mode is suitable for continuous deterrence.
The default alarm sounds are gunshot and dog barking. You can also set your own recording.
5.1. Custom Sound Recording
- Press the recording button once; the red LED light will illuminate.
- Speak into the microphone to record your desired sound or words.
- Press the recording button again to save the recording.
- The maximum recording time is 20 seconds. The device will automatically stop recording after 20 seconds.
- New recordings will overwrite previous content.
5.2. Volume Adjustment
Use the volume control knob on the unit or the volume buttons on the remote control to adjust the alarm's loudness. The alarm offers up to 130dB sound output.

Image: Visual representation of the alarm's sound options and adjustable volume levels.
6. Charging Methods
The ChunHee Solar Outdoor Motion Sensor Alarm is primarily solar-powered, but also supports DC charging.
- Solar Charging: The integrated solar panel charges the internal battery when exposed to sunlight. Charging efficiency may vary based on weather conditions and seasons. For best results, ensure the device is placed in direct sunlight for more than 4 hours daily.
- DC Charging: For faster charging or during prolonged periods of low sunlight, use the provided USB cable with a DC5V ≤1A charger. The DC charge port is located on the rear of the unit.
The device is designed to work 24 hours a day, even in cloudy or rainy weather, by storing energy through weak sunlight. This eliminates the need for frequent battery replacement.
7. Maintenance
- Cleaning: Regularly wipe the solar panel with a soft, damp cloth to remove dust, dirt, or debris that may hinder charging efficiency.
- Battery: The device uses a built-in rechargeable battery. No user replacement is required under normal operating conditions.
- Remote Control Battery: If the remote control becomes unresponsive, replace its internal battery. Remember to remove the battery isolation piece from the bottom of the remote before first use.
- Placement: Ensure the PIR sensor is not obstructed by foliage or other objects that could cause false triggers or block detection.
8. Troubleshooting
| Problem | Possible Cause | Solution |
|---|---|---|
| Device not turning on or holding charge. | Insufficient solar charging; low battery. | Ensure the solar panel receives direct sunlight for several hours. Use DC charging via USB cable to fully charge the device. |
| Motion sensor not triggering alarm. | Incorrect mode selected; sensor obstructed; object out of range. | Verify the device is in Mode A or Mode B. Clear any obstructions from the PIR sensor. Adjust placement to ensure target is within 5-8 meter range and 110° angle. |
| Alarm sound is too low or not playing. | Volume set too low; sound switch off. | Adjust the volume using the control knob or remote. Check the sound switch setting. |
| Remote control not working. | Battery isolation tab still in place; remote battery depleted. | Remove the plastic isolation tab from the remote's battery compartment. Replace the remote battery if necessary. |
| Animals not deterred immediately. | Animals may need time to adapt to the deterrent. | Some animals may not respond immediately; it may take between two and four weeks to see results. Ensure proper placement and consistent operation. |
9. Specifications
- Brand: ChunHee
- Model: B0CGXFSRP7
- Power Source: Solar Powered (with DC charging option)
- Motion Sensor: PIR (Passive Infrared)
- Sensing Angle: 110°
- Sensing Distance: 5-8 meters (approx. 16-26 feet)
- Alarm Volume: Up to 130dB
- Waterproof Rating: IP65
- Product Dimensions: 5"L x 3"W x 5"H (approximate)
- Material: ABS Housing
10. Warranty & Support
ChunHee products are designed for reliability and performance. For specific warranty details, please refer to the warranty card included with your product or contact ChunHee customer support. If you encounter any issues or have questions regarding your Solar Outdoor Motion Sensor Alarm, please contact our customer service team for assistance.
Contact Information: Please visit the official ChunHee website or refer to your product packaging for the most up-to-date customer support contact details.
11. Product Videos
11.1. Product Overview and Use Cases
Video: This video provides a comprehensive overview of the ChunHee Solar Motion Sensor Alarm, demonstrating its features, components, and various applications in gardens, farms, orchards, and warehouses. It highlights how the device deters both animals and human intruders using its strobe light and realistic animal sounds.
11.2. Nighttime Animal Deterrence Demonstration
Video: This short video demonstrates the alarm's effectiveness at night, showing a deer being startled by the strobe light and sound, then quickly leaving the area. This illustrates the device's ability to deter nocturnal animals.
11.3. Daytime Animal Deterrence Demonstration
Video: This short video shows the alarm activating in a daytime setting, deterring a fox from approaching a fenced area. It highlights the immediate response of the alarm to motion detection.