1. Product Overview
The Loupusuo L02 MAX Smart Toilet is designed to provide a luxurious and hygienic bathroom experience. It integrates advanced features such as automatic lid operation, intelligent flushing, customizable cleaning modes, and temperature controls for enhanced comfort and convenience.

Figure 1: Loupusuo L02 MAX Smart Toilet
Key features include:
- Automatic Operation: The lid automatically opens upon approach and closes for flushing when you move away.
- Multifunctional Cleaning: Offers front and rear washing, adjustable water pressure and temperature, pulsating spray patterns, and lady care washing.
- Comfort Features: Heated seat with adjustable temperature, warm air dryer with adjustable temperature, and a soft night light.
- Intuitive Controls: Operable via an included remote control, side rotational knob, and touch keys. LED display shows real-time settings.
- Energy Saving: Functions stop automatically when not in use.
- Power Outage Flush: Equipped with a backup flush function for power failures.
- Aromatherapy: Features a slot for aromatherapy tablets to keep the air fresh.
2. Setup and Installation
Proper installation is crucial for the optimal performance and longevity of your smart toilet. Please follow these steps carefully.
2.1 Pre-Installation Checklist
- Ensure your bathroom has a standard 12-inch rough-in.
- Verify that the ground is horizontal and the sewer line is unblocked.
- Confirm water pressure is over 0.14Mpa and flow rate is over 18L/min.

Figure 2: Included Installation Components
2.2 Installation Steps
- Clean the ground around the drain hole and ensure it is dry.
- Install the angle valve onto the water supply line, wrapping thread seal tape around the interface for a secure fit.
- Drain residual water from the angle valve before proceeding.
- Insert the water flow restrictor into the outlet of the angle valve with the small end inside.
- Install the expansion screws into the floor flange.
- Mount the wax ring flange at the drain hole.
- Carefully place the smart toilet over the flange, aligning the screws with the bottom of the toilet.
- Install the flat washer and nut to secure the toilet to the floor.
- Connect the braided tube to the angle valve and tighten it, ensuring the tube is not bent.
- Open the angle valve to the maximum and check for any water leaks.
- Plug the power cord into a suitable outlet.
2.3 Installation Video Guide
Video 1: Detailed Toilet Installation Guide
This video provides a step-by-step visual guide for installing your Loupusuo Smart Toilet, ensuring a smooth setup process.
3. Operating Instructions
Your Loupusuo Smart Toilet offers multiple ways to control its advanced features, including automatic functions, a remote control, and a side knob.
3.1 Automatic Functions

Figure 3: Automatic Features Overview
- Auto Open & Close: The lid automatically opens when you approach and closes when you move away.
- Off-Seat Flushing: The toilet automatically flushes when you move away from the seat after use.
- Foot Sensor Operation: A foot sensor allows for hands-free lid opening and closing.
Video 2: Smart Toilet Auto Open/Close Demonstration
This video illustrates the automatic lid and flushing features of the smart toilet.
3.2 Remote Control Operation
The included remote control provides comprehensive command over all smart toilet functions.

Figure 4: Remote Control and Side Knob
- Cleaning Modes: Select from rear wash, front wash, lady care wash, powerful wash, and sliding massage wash. Adjust water temperature and pressure.
- Temperature Control: Adjust heated seat temperature, water temperature for washing, and dryer temperature.
- Night Light: Turn the integrated night light on or off for convenience in low light conditions.
- Flushing: Initiate flushing directly from the remote.
Video 3: Luxury Smart Toilet Features Overview
This video demonstrates various features controlled by the remote, including cleaning modes and temperature adjustments.
3.3 Side Rotational Knob
The side rotational knob provides quick access to essential functions:
- Rotate for hip cleaning or feminine cleaning.
- Press once for easy operation.
- Long press for specific functions like hip cleaning.
3.4 LED Digital Display
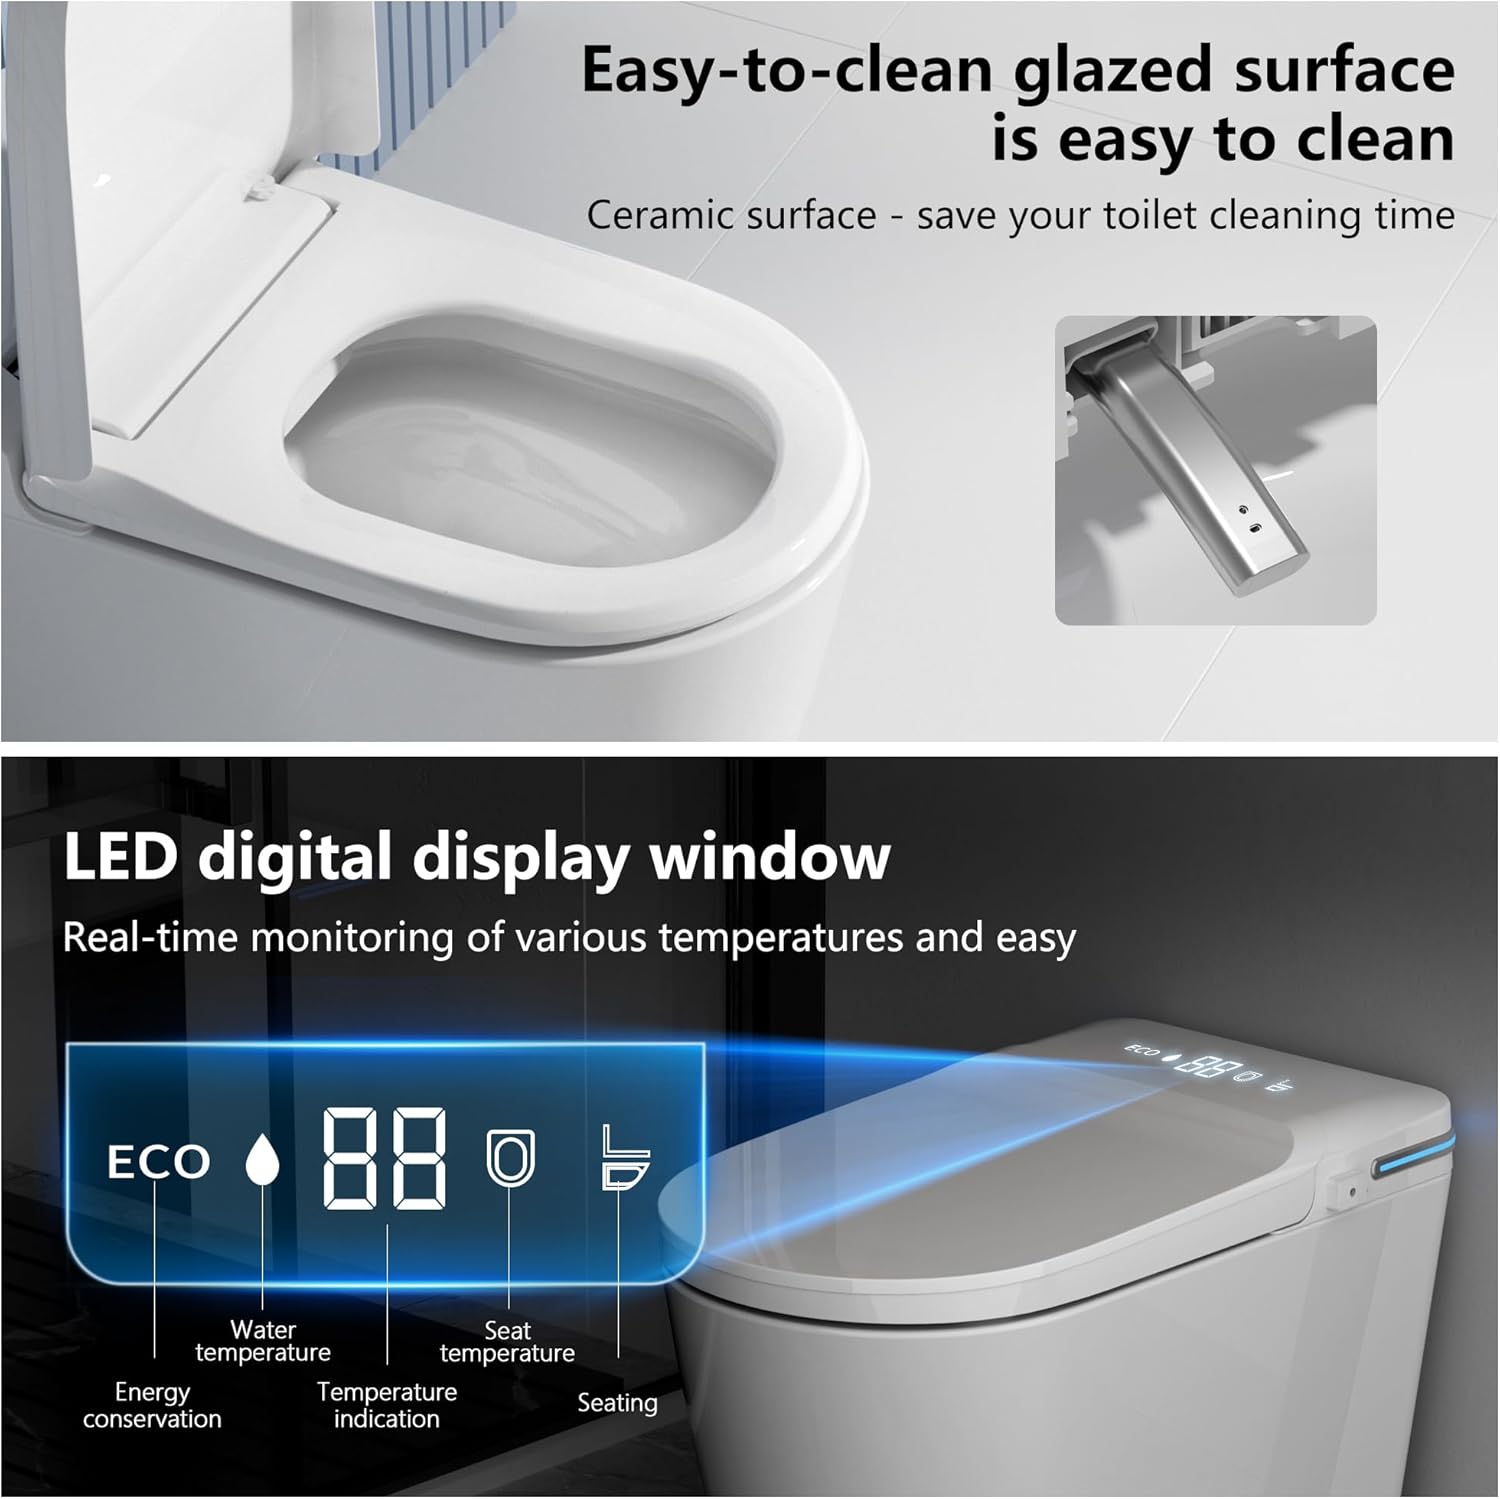
Figure 5: LED Digital Display
The LED display shows real-time information such as water temperature, seat temperature, and drying temperature, allowing for precise monitoring of settings.
4. Maintenance
Regular maintenance ensures the longevity and hygienic performance of your smart toilet.
- Nozzle Self-Cleaning: The bidet nozzle performs a self-cleaning function before and after each use.
- Easy-to-Clean Surface: The ceramic surface is glazed for easy cleaning, saving time on maintenance.
- Aromatherapy Tablets: The smart toilet features a slot for aromatherapy sticks. To replace, press the side button to remove the device, open the top cover, add new fragrant beads, close the lid, and reinsert into the toilet.
5. Troubleshooting
If you encounter any issues with your smart toilet, please refer to the following common troubleshooting tips:
- No Power/Functions Not Responding: Ensure the power cord is securely plugged in and the outlet is active. Check the backup battery connection for power outage flushing.
- Remote Control Not Responding: Perform the code matching process by long-pressing the feminine washing button on the remote until flashing lights appear, then turn on the toilet's power supply.
- Water Leaks: Check all connections, especially the angle valve and braided tube, to ensure they are tightened correctly.
- Insufficient Water Pressure: Verify the angle valve is fully open and the water flow restrictor is correctly installed.
- Lid Not Opening/Closing Automatically: Ensure the foot sensor area is clear and clean.
For persistent issues or problems not listed here, please contact Loupusuo customer support.
6. Specifications
| Feature | Specification |
|---|---|
| Model Number | W01C |
| Style | L02 MAX |
| Color | L02 MAX |
| Material | Ceramic (Toilet), Polypropylene (Seat) |
| Item Weight | 88 Pounds |
| Product Dimensions | 26.77 x 20.87 x 0.99 inches |
| Installation Type | Floor Mounted |
| Rough-in | 12 inches |
| First Available Date | August 31, 2023 |
7. Warranty and Support
Loupusuo is committed to providing high-quality products and excellent customer service. For any warranty claims, technical support, or inquiries regarding your L02 MAX Smart Toilet, please contact our customer support team through the official Loupusuo store or your purchase platform.
Please retain your proof of purchase for warranty validation.


