1. Introduction
This manual provides comprehensive instructions for the installation, operation, and maintenance of your JUJIANG PKM-C026 Automatic Single Swing Gate Opener. Please read this manual thoroughly before installation and use to ensure safe and efficient operation. This system is designed for medium-duty single swing gates up to 770 lbs in weight or 16 feet in length.
2. Safety Information
Important Safety Instructions:
- Read and follow all warnings and instructions before installation and use.
- Ensure the gate operates smoothly and freely by hand before installing the opener.
- Keep the manual for future reference.
- Periodic checks of the opener are required to ensure safe operation.
- Do not allow children to play with or operate the gate opener.
- Keep hands and feet clear of the gate's path during operation.
- In case of power outage, use the manual release key to operate the gate.
- This product is designed for outdoor use and is rated IP55 for water and dust resistance.

Image: Safety warning signs included with the gate opener, advising caution around moving gates.
3. Package Contents
The JUJIANG PKM-C026 Automatic Single Swing Gate Opener kit includes the following components:
- Gate Opener Actuator (1 unit)
- Control Box with Smart Chip (1 unit)
- Remote Controls (2 units)
- Mounting Hardware Set (brackets, bolts, nuts, washers)
- Manual Release Key (1 unit)
- Detailed Installation Instructions (User Manual)
- Safety Warning Signs
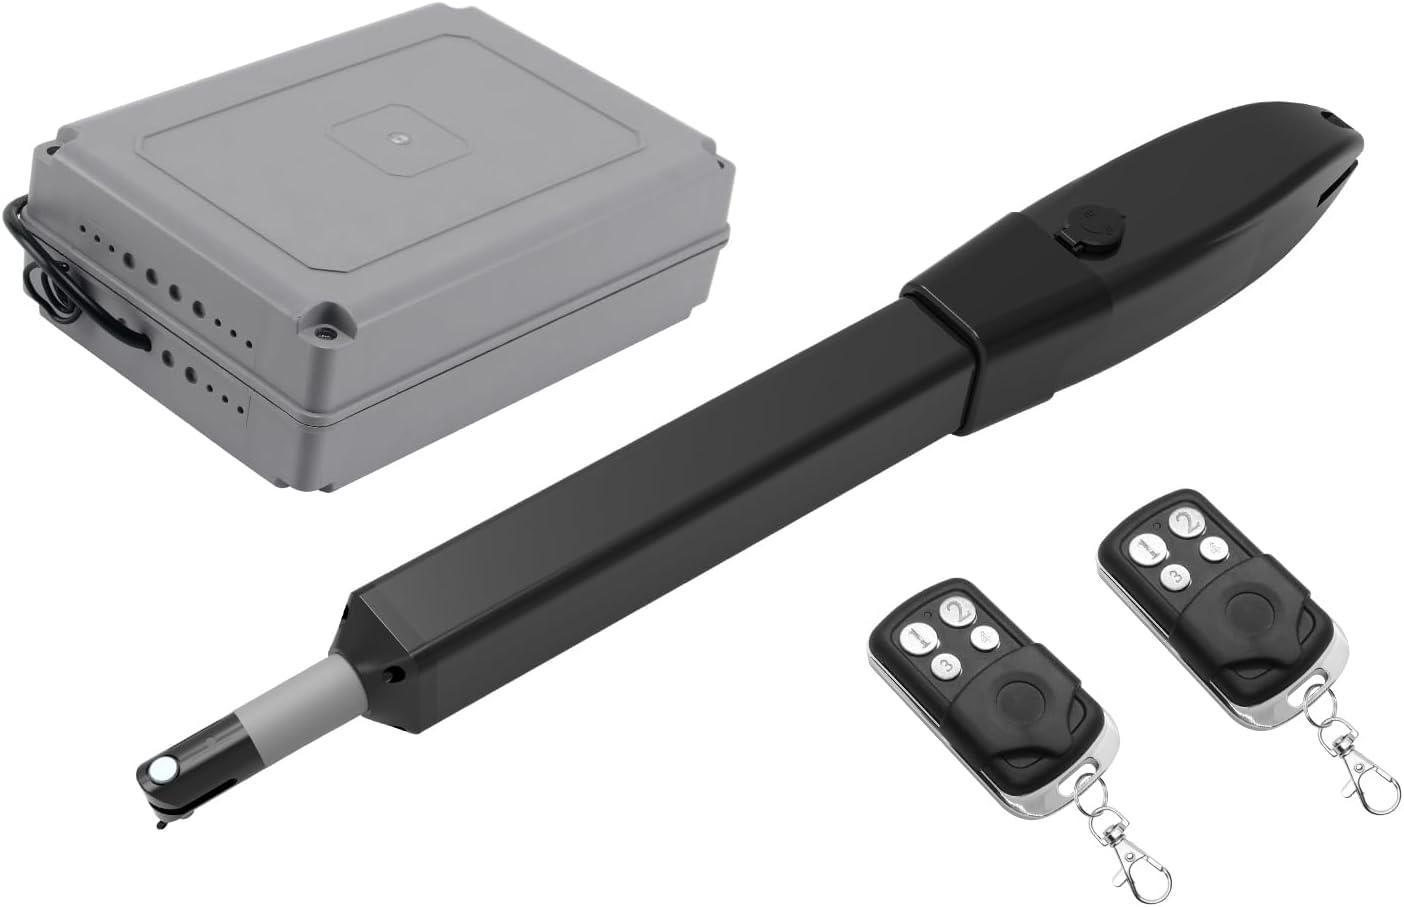
Image: Overview of the JUJIANG PKM-C026 gate opener kit, including the actuator, control box, and two remote controls.
4. Specifications
| Feature | Specification |
|---|---|
| Model Number | PKM-C026 |
| Motor Power | 60W |
| Max Gate Weight | 770 lbs (350 KG) |
| Max Gate Length | 16 ft (5 M) |
| Power Supply | 110V AC (main), 24V battery (backup, not included), Solar panel (not included) |
| Remote Control Range | Up to 100 ft |
| IP Rating | IP55 (Waterproof & Dustproof) |
| Operating Temperature | -7°F to 131°F |
| Material | Stainless Steel, Die-casting Aluminum Arm |

Image: Diagram illustrating customizable opening options (Push-to-Open and Pull-to-Open) and a weight/length compatibility chart for gates.
5. Installation
The installation process may vary depending on your gate's condition and type. The following steps provide a general guide. Refer to the detailed user manual included in your package for specific measurements and advanced configurations.
5.1 Tools Needed
- Power Drill
- Tape Measure
- Open End Wrenches or Adjustable Wrenches
- Wire Strippers
- Locking Pliers
- Level
- Hacksaw or Heavy Duty Bolt Cutters (if needed for gate modification)
5.2 Pre-Installation Check
Before beginning installation, ensure your gate can open and close smoothly and freely by hand without any obstruction. The gate should not bind or drag.
5.3 Mechanical Installation Steps
- Assemble the Rear Post Bracket and Post Pivot Bracket: Securely attach the two parts of the rear bracket using the provided bolts, washers, and nuts.
- Assemble the Front Post Bracket and Post Pivot Bracket: Similarly, assemble the front bracket components.
- Attach the Brackets to the Actuator Arm: Connect the assembled brackets to the gate opener actuator arm using the provided pins and clips.
- Determine Mounting Positions:
- Temporarily position the gate opener with the attached brackets on your gate and gate post.
- Ensure the actuator arm is level when the gate is closed.
- Mark the drilling points for both the front and rear brackets on the gate and post.
- Use a level to verify the correct alignment.
- Secure the Brackets: Drill pilot holes at the marked positions and securely fasten the brackets to the gate and gate post using appropriate bolts and hardware.
- Connect the Actuator to the Brackets: Attach the gate opener actuator to the installed brackets using the provided pins.
- Test Manual Operation: Release the clutch on the actuator (using the manual release key) to allow manual movement of the gate. Ensure the gate can open and close freely by hand. This confirms correct bracket positioning.
Video: Detailed installation guide for the JUJIANG PKM-C026 Swing Gate Opener, demonstrating mechanical assembly and mounting steps.
5.4 Wiring and Power Supply
The gate opener supports multiple power supply modes:
- Type 1: AC Electricity Only: Connect the control box to a 110V AC municipal electricity source.
- Type 2: AC Electricity with Backup Batteries: Connect to 110V AC and add 24V batteries (not included) for backup power.
- Type 3: Solar Panel with Batteries: Use solar panels and a solar charge controller (not included) to charge 24V batteries (not included).
Ensure all wiring connections are secure and follow the diagrams in the full user manual. Connect the actuator to the motor2 terminal if using a single gate opener. The "1" key on the remote controls motor2.

Image: Visual representation of different power supply configurations, including AC power, AC with backup batteries, and solar power with batteries.
6. Operating Instructions
6.1 Remote Control Operation
Your JUJIANG PKM-C026 comes with two remote controls. The remote has a maximum operating distance of up to 100 feet and can support up to 120 remotes.
- Press the designated button on the remote control to open or close the gate.
- The "1" key controls the single gate opener (motor2).

Image: A hand holding a remote control, demonstrating the automatic gate opening function from a distance.
6.2 Manual Release
In case of a power outage or system malfunction, you can manually operate the gate:
- Locate the manual release key slot on the actuator.
- Insert the manual release key and turn it to disengage the clutch.
- You can now open or close the gate by hand.
- To re-engage the automatic function, turn the key back and remove it.
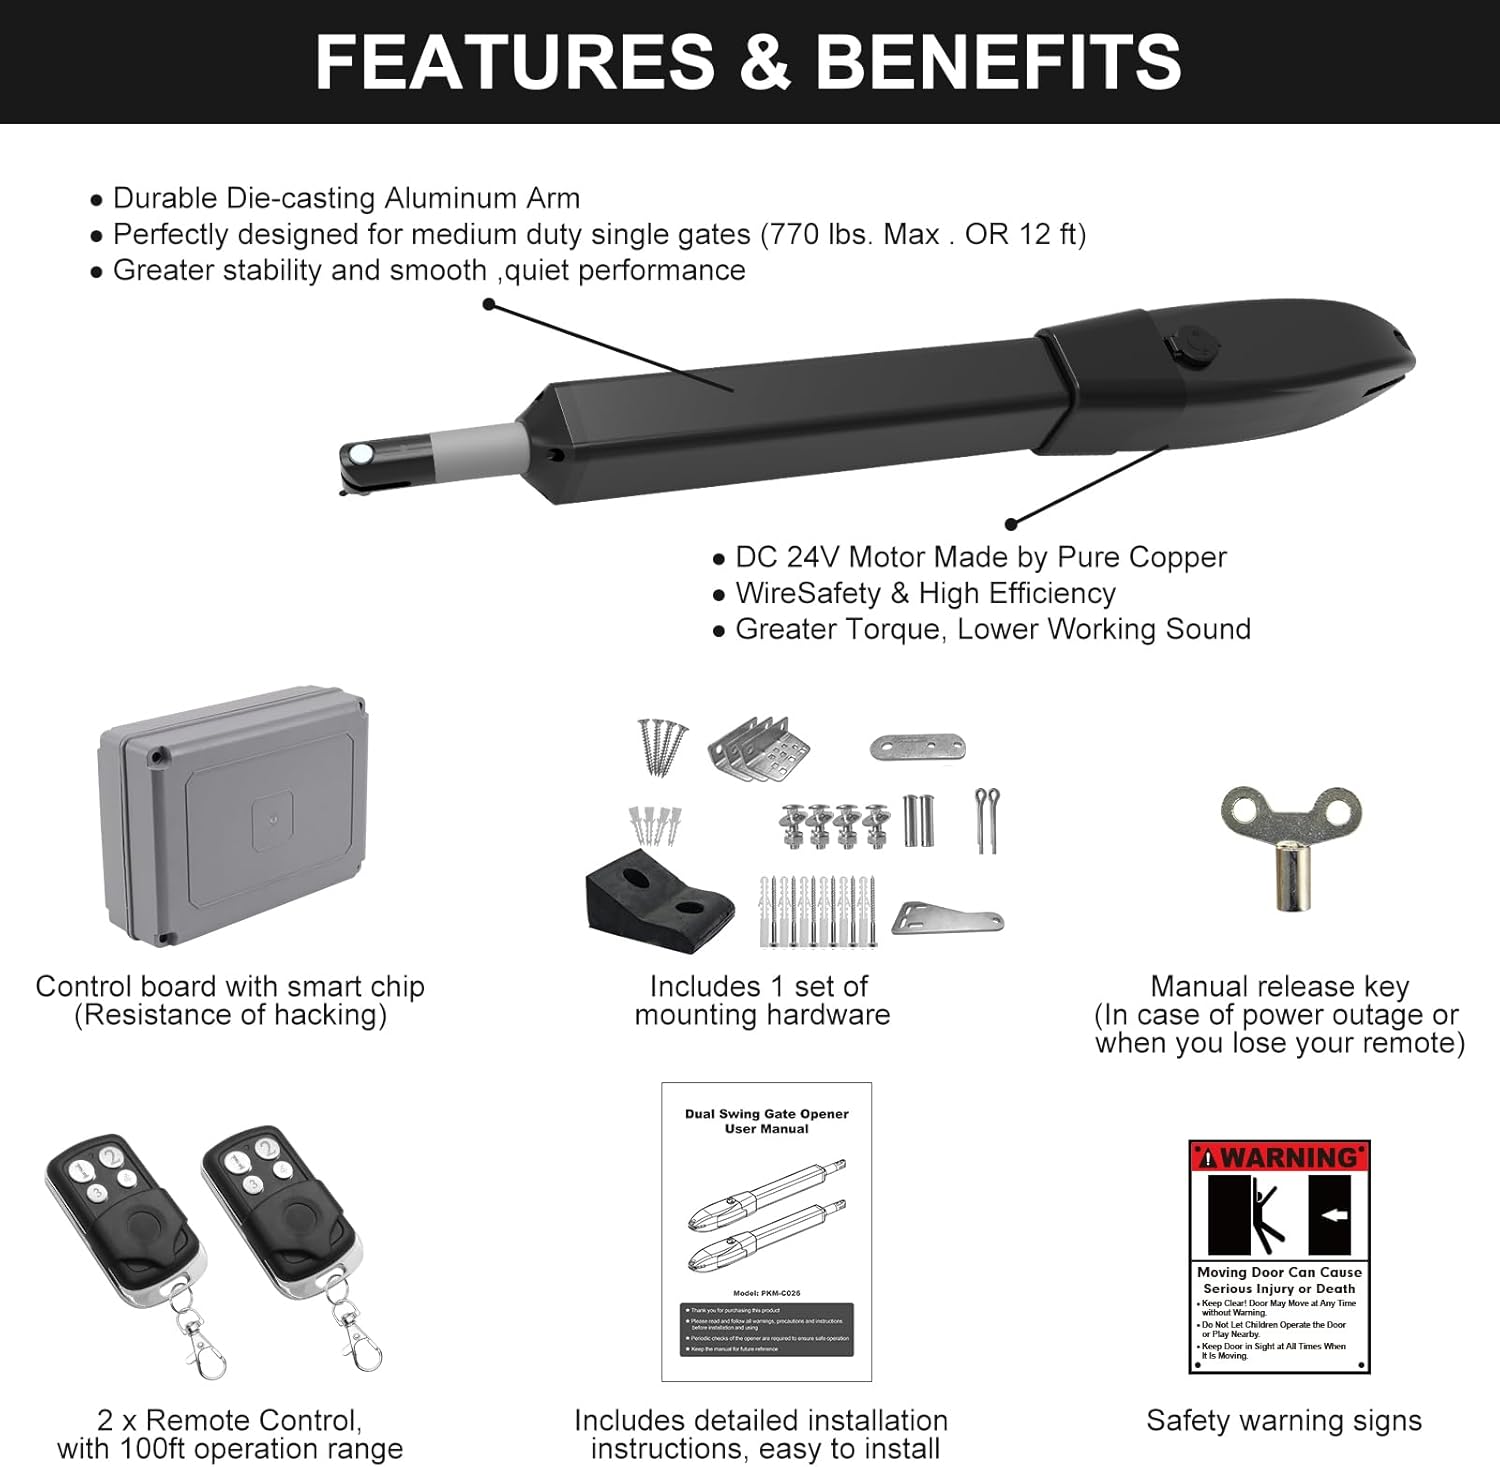
Image: A close-up of the manual release key, used for disengaging the gate opener's clutch during power outages.
7. Maintenance
Regular maintenance ensures the longevity and optimal performance of your gate opener:
- Monthly: Check the gate's hinges and moving parts for any signs of wear or damage. Lubricate as necessary.
- Quarterly: Inspect the mounting hardware for tightness. Ensure all electrical connections are secure and free from corrosion.
- Annually: Test the safety stop-and-reverse feature by placing an obstruction in the gate's path during operation. The gate should stop or reverse upon contact.
- Keep the area around the gate and opener clear of debris, especially in harsh weather conditions.

Image: The gate opener installed on a gate, demonstrating its ability to function reliably in various weather conditions, including snow.
8. Troubleshooting
If you encounter issues with your gate opener, refer to the following common problems and solutions:
| Problem | Possible Cause | Solution |
|---|---|---|
| Gate does not respond to remote. | Dead remote battery, remote out of range, power issue to control box. | Replace remote battery, move closer to gate, check power connections. |
| Gate stops or reverses unexpectedly. | Obstruction in gate path, safety sensor issue, gate binding. | Remove obstruction, clean/align safety sensors, check gate for smooth manual operation. |
| Gate opens/closes partially. | Limit switch settings incorrect, low power. | Refer to manual for limit switch adjustment, check power supply. |
| Motor makes noise but gate doesn't move. | Clutch disengaged, mechanical obstruction, motor issue. | Engage clutch with manual release key, remove obstruction, contact support if motor issue persists. |

Image: An automatic gate demonstrating its safety feature by stopping when a person walks through, highlighting obstacle detection.
9. Warranty and Support
JUJIANG provides a 12-month warranty for this product, along with lifetime technical support. For any questions, assistance, or to claim warranty service, please contact JUJIANG customer service. They offer a 30-day worry-free exchange and return policy.
For further assistance, please visit the JUJIANG Store on Amazon.


