Introduction
Thank you for choosing the KoolMore MDF-1GD-13C-WH Commercial One Glass Door Display Upright Freezer Merchandiser. This manual provides essential information for the safe and efficient operation, installation, and maintenance of your new freezer. Please read this manual thoroughly before installation and operation to ensure proper use and to prevent damage to the unit or injury to yourself.
Safety Information
Always follow basic safety precautions when using this appliance to reduce the risk of fire, electric shock, or injury. This unit is ETL Listed and ETL Sanitation certified, ensuring compliance with safety and sanitation standards.
- Electrical Safety: Ensure the unit is connected to a grounded 115 Volts, 60 Hz, single-phase power supply. Do not use extension cords.
- Ventilation: Maintain adequate clearance around the unit for proper air circulation.
- Placement: Place the unit on a strong, level surface capable of supporting its weight (approximately 394 pounds empty, plus contents).
- Proposition 65 Warning: This product can expose you to chemicals including Di(2-ethylhexyl)phthalate (DEHP), which is known to the State of California to cause cancer and birth defects or other reproductive harm. For more information go to www.P65Warnings.ca.gov.
- Service: All service should be performed by a qualified technician.
Setup
1. Unpacking and Inspection
Carefully remove all packaging materials. Inspect the freezer for any shipping damage. Report any damage immediately to the carrier and your dealer. Do not discard packaging until the unit has been inspected and is operational.
2. Placement
This unit is designed for freestanding installation. Ensure the location has sufficient space for the door to open fully and for proper ventilation. Avoid placing the unit in direct sunlight or near heat-generating appliances. Maintain at least 4 inches of clearance from walls and other objects for optimal performance.
3. Leveling
The freezer comes with pre-installed casters for easy movement. Once in its final position, ensure the unit is level to prevent door misalignment and ensure proper drainage. Use a level and adjust the casters if necessary.
4. Electrical Connection
Connect the freezer to a dedicated 115 Volts, 60 Hz, single-phase, grounded electrical outlet. Do not use adapter plugs or extension cords. Ensure the circuit can handle the unit's power requirements.
5. Shelf Installation
The freezer includes 4 adjustable shelves. Install them by inserting the shelf clips into the desired slots on the interior pilasters and then placing the shelves onto the clips. Ensure shelves are level and securely seated before loading products.

Figure 1: Interior view showing shelf support rails for easy installation.
6. Initial Cleaning
Before first use, clean the interior and exterior of the freezer with a mild soap and water solution. Rinse thoroughly and dry with a soft cloth. Do not use abrasive cleaners or solvents.
7. Initial Power-On
After connecting to power, turn on the main power switch located on the control panel. Allow the freezer to operate empty for at least 2-4 hours to reach its stable operating temperature before loading products.

Figure 2: Control panel featuring the power switch, light switch, and digital temperature display.
Operating Instructions
1. Temperature Control
The freezer is equipped with a digital temperature controller. The current internal temperature is displayed on the screen. To adjust the set temperature, refer to the specific instructions for the Dixell controller model, typically involving pressing the 'SET' button and using the up/down arrows.
2. Interior Lighting
The interior LED lighting is controlled by a separate light switch on the control panel (refer to Figure 2). Turn the switch ON to illuminate the interior for product display and OFF when not needed to conserve energy.
3. Loading the Freezer
Load products evenly on the shelves, ensuring not to block the internal air vents or overload the shelves. Proper air circulation is crucial for maintaining consistent temperatures throughout the cabinet. Avoid placing hot items directly into the freezer.

Figure 3: The freezer merchandiser fully stocked with frozen goods, demonstrating optimal product display.
Maintenance
1. Regular Cleaning
- Interior: Clean the interior regularly with a mild, non-abrasive cleaner and warm water. Remove shelves for thorough cleaning. Rinse and dry completely.
- Exterior: Wipe down the exterior surfaces with a soft cloth and mild detergent.
- Condenser Coils: The condenser coils, located at the bottom rear of the unit, should be cleaned every 30-60 days. Unplug the unit before cleaning. Use a stiff brush or vacuum cleaner to remove dust and debris. This is critical for efficient operation.
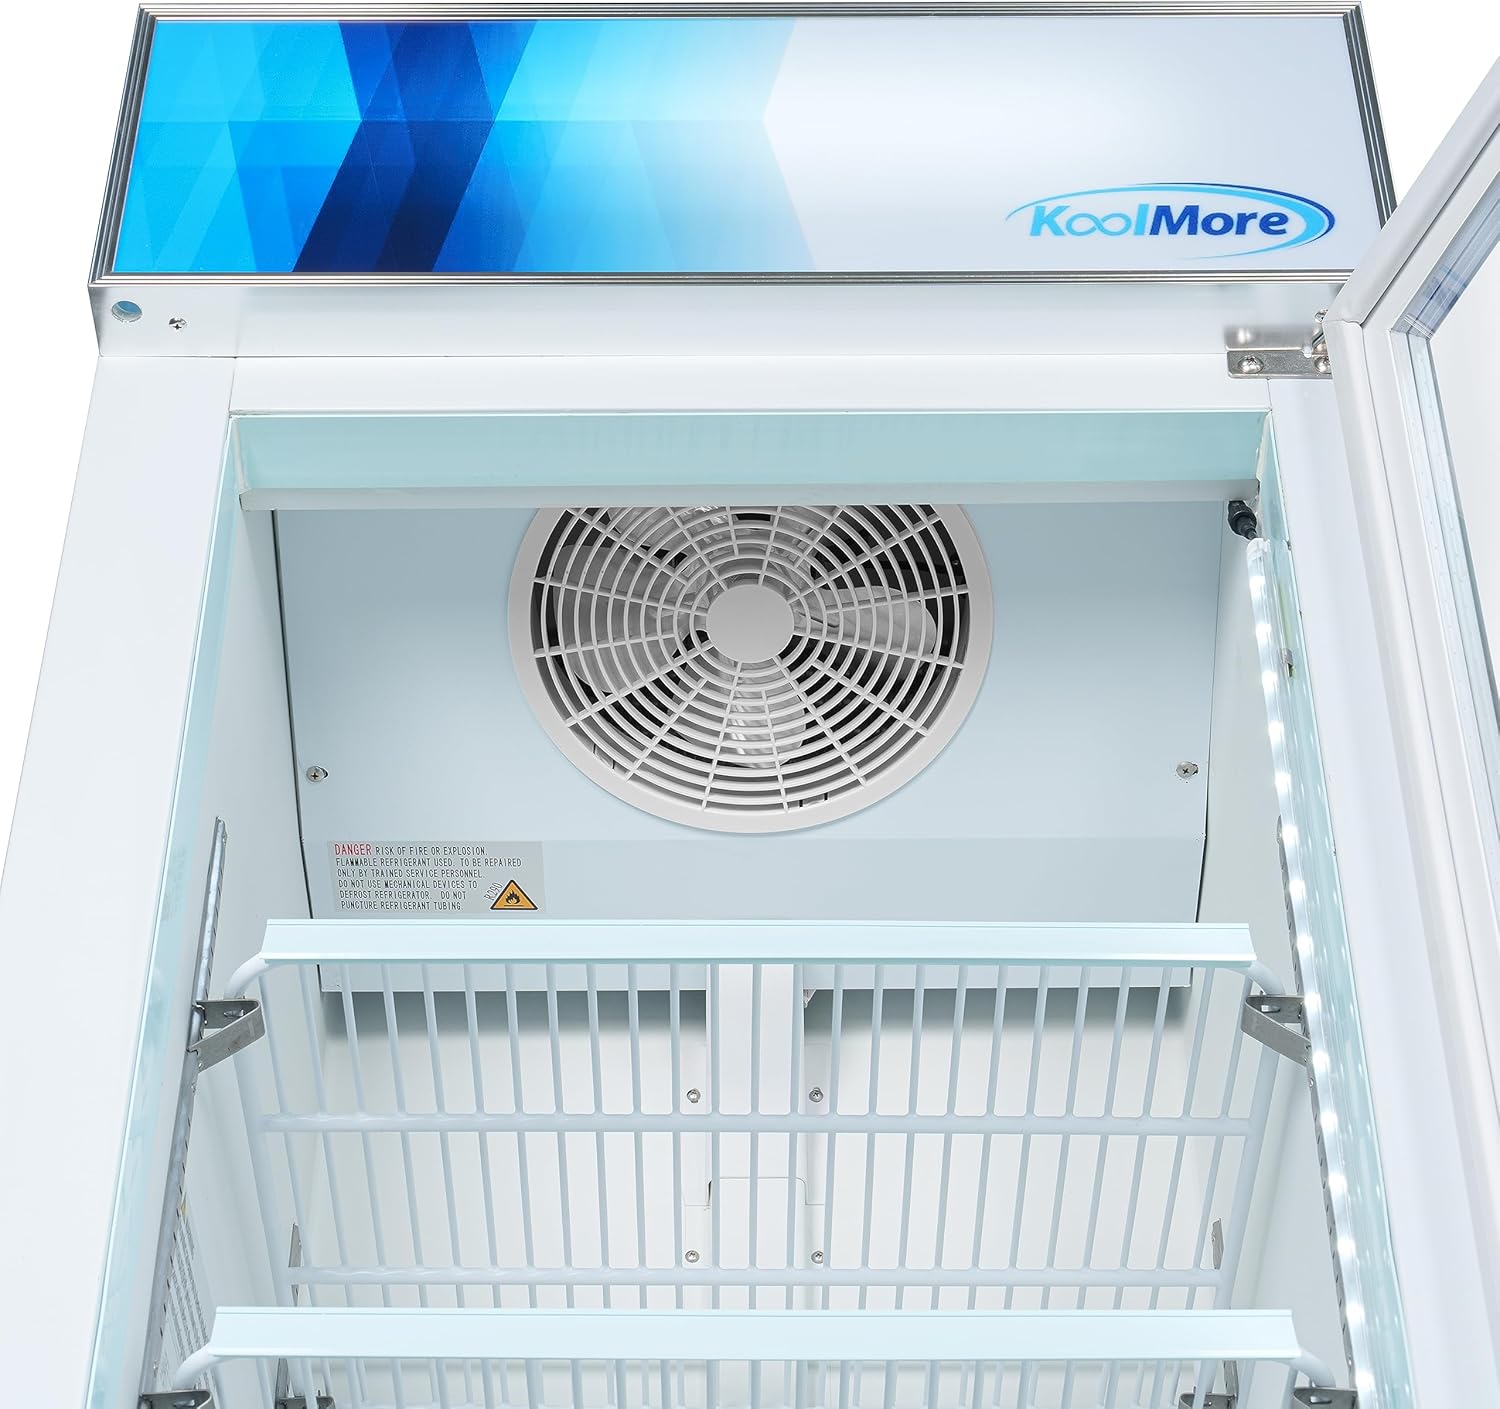
Figure 4: Top interior view, highlighting the fan and evaporator area which should be kept clear for optimal performance.
2. Defrosting
This unit features an automatic defrost system. However, if excessive ice buildup occurs, manual defrosting may be necessary. To manually defrost, turn off the unit, remove all products, and leave the door open. Once defrosted, clean and dry the interior before restarting.
3. Door Seal Inspection
Regularly inspect the door gasket for cracks or tears. A damaged gasket can lead to air leaks, increased energy consumption, and poor cooling performance. Clean the gasket with warm water and mild soap.

Figure 5: Detail of the door handle and magnetic seal, important for maintaining internal temperature.
Troubleshooting
Before contacting service, review the following common issues and solutions:
| Problem | Possible Cause | Solution |
|---|---|---|
| Freezer not operating | No power to unit; Power switch off; Circuit breaker tripped. | Check power supply; Ensure power switch is ON; Reset circuit breaker. |
| Temperature too high | Dirty condenser coils; Door not closing properly; Excessive door openings; Overloaded with warm products. | Clean condenser coils; Check door gasket and hinges; Reduce door openings; Allow warm products to cool before loading. |
| Excessive noise | Unit not level; Loose components; Fan motor issue. | Level the unit; Check for loose parts; Contact service if fan noise persists. |
| Excessive condensation/ice buildup | Door gasket damaged; High humidity environment; Door left open. | Inspect and replace gasket if necessary; Ensure door closes completely; Reduce humidity if possible. |
If the problem persists after attempting these solutions, please contact customer support.
Specifications
| Feature | Detail |
|---|---|
| Model Number | MDF-1GD-13C-WH |
| Capacity | 13 cu. ft. |
| Dimensions (D x W x H) | 26.2" x 27.2" x 80.3" |
| Item Weight | 394 pounds |
| Voltage | 115 Volts |
| Power Source | Corded Electric |
| Installation Method | Freestanding |
| Door Material Type | Glass (Double-Paned Tempered) |
| Included Components | 1 Merchandiser Refrigerator, 4 Shelves |
| Certification | ETL Listed; ETL Sanitation |

Figure 6: Product dimensions for planning installation space.
Warranty Information
The KoolMore MDF-1GD-13C-WH Commercial Display Upright Freezer Merchandiser comes with a standard warranty:
- 1-Year Parts and Labor: Covers defects in materials and workmanship for one year from the date of purchase.
- 5-Year Compressor: Covers the compressor for five years from the date of purchase.
Please retain your proof of purchase for warranty claims. For detailed terms and conditions, refer to the warranty card included with your product or contact KoolMore customer support.
Customer Support
For technical assistance, parts, or warranty inquiries, please contact KoolMore customer support. Have your model number (MDF-1GD-13C-WH) and purchase date ready when contacting support.
Visit the KoolMore Store on Amazon for more information: KoolMore Store


