Important Safety Instructions
Please read all instructions carefully before using the Morpilot HS007 Milk Frother. Retain this manual for future reference.
- Do not immerse the power base or cord in water or other liquids.
- Ensure the voltage rating matches your local power supply before connecting.
- Always place the frother on a stable, flat, heat-resistant surface.
- Keep out of reach of children. This appliance is not intended for use by persons with reduced physical, sensory or mental capabilities, or lack of experience and knowledge, unless they have been given supervision or instruction concerning use of the appliance by a person responsible for their safety.
- Unplug from the outlet when not in use and before cleaning. Allow to cool before putting on or taking off parts, and before cleaning the appliance.
- Do not operate any appliance with a damaged cord or plug, or after the appliance malfunctions or has been damaged in any manner.
- Do not use outdoors.
- Do not place on or near a hot gas or electric burner, or in a heated oven.
- Avoid contact with moving parts.
- Do not use attachments not recommended by the appliance manufacturer.
- Do not overfill the milk frother beyond the MAX fill line to prevent overflow.
- When using the hot milk function, ensure the metal coil on the whipper is removed.
- The glass frother jug is designed for hand washing or dishwasher use, but the power base must not be submerged.
Product Overview
The Morpilot HS007 is a versatile 4-in-1 automatic milk frother designed to create various milk preparations for your beverages. It features a glass jug for visibility and easy cleaning, along with multiple frothing modes.

Image: Morpilot HS007 Milk Frother, showing the main unit with glass jug, handle, power button, and mode indicators.
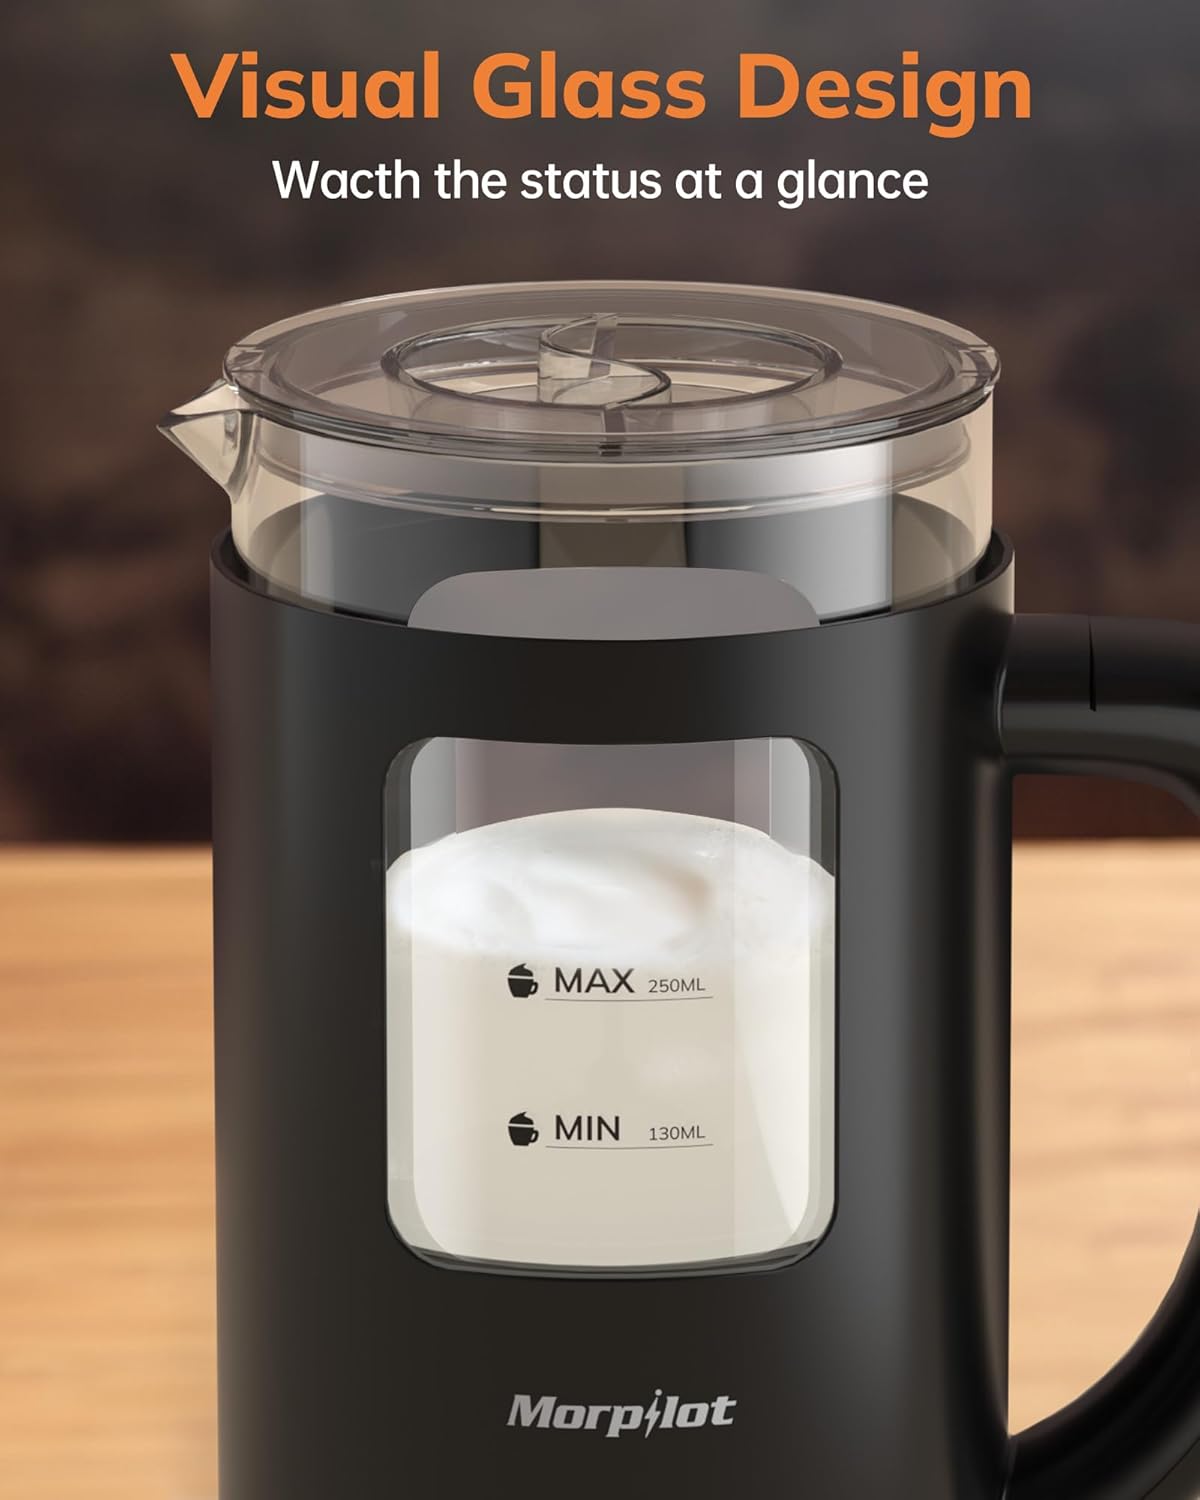
Image: Close-up of the Morpilot HS007 Milk Frother's transparent glass jug, highlighting the MAX and MIN fill lines for milk, allowing users to monitor the frothing process.
Components:
- Glass Frother Jug: Transparent jug with MAX/MIN fill lines.
- Lid: Transparent lid for the frother jug.
- Power Base: Contains heating element and control electronics.
- Whisk (with metal coil): Used for frothing milk.
- Whisk (without metal coil): Used for heating milk without frothing.
- Cleaning Brush: For easy cleaning of the jug and whisk.
- Power Button/Mode Selector: Single button to cycle through functions.
- Mode Indicator Lights: Red, Blue, Purple, Green lights indicating selected mode.
Setup
Before first use, please follow these steps:
- Unpack all components and remove any packaging materials.
- Wash the glass frother jug, lid, and whisks with warm soapy water. Rinse thoroughly and dry. The glass jug is dishwasher safe.
- Wipe the power base with a damp cloth. Do not immerse the power base in water.
- Place the power base on a dry, stable, and heat-resistant surface.
- Ensure the correct whisk is inserted into the bottom of the frother jug for your desired function (frothing or heating).
- Place the frother jug onto the power base.
- Plug the power cord into a suitable electrical outlet.
Operating Instructions
The Morpilot HS007 features a single button for selecting four different modes. Each mode is indicated by a specific color light.

Image: Morpilot HS007 Milk Frother displaying the four mode options: Hot Dense Foam (Red), Cold Foam (Blue), Hot Milk (Purple), and Hot Airy Foam (Green).
General Operation Steps:
- Pour milk into the frother jug. Ensure the milk level is between the MIN (130ml) and MAX (250ml) fill lines for frothing, or up to the MAX (600ml) line for heating without frothing (if using the appropriate whisk).
- Place the lid securely on the jug.
- Press the power button repeatedly to cycle through the desired modes. The indicator light will change color.
- The frother will start automatically after selecting a mode.
- The appliance will automatically shut off when the process is complete.
- Carefully remove the jug from the base and pour the frothed or heated milk.
Specific Mode Functions:
1. Hot Dense Foam (Red Light)
This mode creates rich, thick hot milk foam, ideal for cappuccinos.
- Whisk: Use the whisk with the metal coil.
- Milk Level: Fill milk between MIN and MAX (250ml) frothing lines.
- Activation: Press the power button once. The indicator light will turn red.

Image: Illustration of the Hot Dense Foam mode, showing the red power button indicator and the whisk with a metal coil, resulting in a cup of dense frothed milk.
2. Cold Foam (Blue Light)
This mode produces cold milk foam, perfect for iced coffees and other cold beverages.
- Whisk: Use the whisk with the metal coil.
- Milk Level: Fill milk between MIN and MAX (250ml) frothing lines.
- Activation: Press the power button twice. The indicator light will turn blue.

Image: Illustration of the Cold Foam mode, showing the blue power button indicator and the whisk with a metal coil, resulting in a glass of cold frothed milk for an iced coffee.
3. Hot Milk (Purple Light)
This mode heats milk without frothing, suitable for lattes or hot chocolate.
- Whisk: Use the whisk without the metal coil.
- Milk Level: Fill milk up to the MAX (600ml) heating line.
- Activation: Press the power button three times. The indicator light will turn purple.

Image: Illustration of the Hot Milk mode, showing the purple power button indicator and the whisk without a metal coil, resulting in a jug and glass of hot milk.
4. Hot Airy Foam (Green Light)
This mode creates light, airy hot milk foam, suitable for macchiatos or other layered drinks.
- Whisk: Use the whisk with the metal coil.
- Milk Level: Fill milk between MIN and MAX (250ml) frothing lines.
- Activation: Press the power button four times. The indicator light will turn green.

Image: Illustration of the Hot Airy Foam mode, showing the green power button indicator and the whisk with a metal coil, resulting in a glass of light frothed milk for a latte.

Image: The Morpilot HS007 Milk Frother pouring frothed milk into a cup, demonstrating the special pour spout design for creating latte art or simply serving.
Maintenance and Cleaning
Regular cleaning ensures optimal performance and extends the lifespan of your milk frother. Always unplug the appliance before cleaning and allow it to cool down.

Image: The Morpilot HS007 Milk Frother jug being rinsed under a kitchen faucet, demonstrating the ease of cleaning the detachable glass component.
- Immediate Cleaning: For best results, clean the frother jug immediately after each use to prevent milk residue from drying.
- Detaching Components: Carefully remove the frother jug from the power base.
- Cleaning the Jug and Whisk:
- Remove the whisk from the bottom of the jug.
- Wash the glass jug, lid, and whisk with warm soapy water using the provided cleaning brush. Rinse thoroughly.
- While the manufacturer states the glass jug is dishwasher safe, hand washing is recommended for optimal longevity and to protect attached plastic components.
- Cleaning the Power Base: Wipe the exterior of the power base with a soft, damp cloth. Do not use abrasive cleaners or scourers. Never immerse the power base in water or any other liquid.
- Drying: Ensure all parts are completely dry before reassembling or storing the appliance.
Troubleshooting
If you encounter issues with your Morpilot HS007 Milk Frother, please consult the table below for common problems and solutions.
| Problem | Possible Cause | Solution |
|---|---|---|
| Frother does not turn on. | Not plugged in; power outlet faulty; frother not correctly placed on base. | Check power cord connection; try a different outlet; ensure jug is seated properly on the power base. |
| Milk is not frothing or foam is poor quality. | Incorrect whisk used; milk level too high/low; type of milk; whisk not properly installed. | Ensure the whisk with the metal coil is used for frothing. Fill milk between MIN and MAX frothing lines. Use fresh, cold milk (full-fat or semi-skimmed usually froth best). Check whisk is securely attached. |
| Milk is not heating. | Incorrect whisk used; Hot Milk mode not selected; appliance malfunction. | Ensure the whisk without the metal coil is used for heating milk only. Select the Hot Milk (purple light) mode. If problem persists, contact customer support. |
| Milk overflows. | Overfilled past MAX line. | Do not fill milk above the MAX frothing line (250ml) for frothing functions, or the MAX heating line (600ml) for heating only. |
| Burnt smell or milk sticking to bottom. | Residue from previous use; insufficient milk; prolonged use without cleaning. | Clean the frother thoroughly after each use. Ensure milk level is above MIN line. Do not operate without milk. |
Specifications
| Brand | Morpilot |
| Model Number | HS007 |
| ASIN | B0CGTMKLPR |
| Functions | 4-in-1 (Hot Dense Foam, Cold Foam, Hot Milk, Hot Airy Foam) |
| Material | Glass, Plastic |
| Color | Black |
| Max Frothing Capacity | 250 ml |
| Max Heating Capacity | 600 ml |
| Special Feature | Auto Shut-Off, Temperature Control (Strix) |
| Care Instructions | Hand Wash Only (Power Base), Dishwasher Safe (Glass Jug - recommended hand wash for longevity) |
| Package Dimensions | 23.3 x 16.9 x 15.7 cm |
| Item Weight | 1.05 kg |
Warranty and Support
The Morpilot HS007 Milk Frother comes with a 1-year warranty from the date of purchase.
For any product inquiries, technical assistance, or warranty claims, please contact Morpilot customer service. The manufacturer offers 24/7 after-sales service.
Please refer to your purchase documentation or the Morpilot official website for specific contact details.