
WOCKODER R612
WOCKODER R612 Record Player
User Manual
Model: R612 | Brand: WOCKODER
Important Safety Instructions
Please read these instructions carefully before using the product and retain them for future reference. Follow all warnings and instructions marked on the product.
- Do not expose the unit to rain or moisture.
- Do not block any ventilation openings. Install in accordance with the manufacturer's instructions.
- Do not install near any heat sources such as radiators, heat registers, stoves, or other apparatus (including amplifiers) that produce heat.
- Protect the power cord from being walked on or pinched, particularly at plugs, convenience receptacles, and the point where they exit from the apparatus.
- Only use attachments/accessories specified by the manufacturer.
- Unplug this apparatus during lightning storms or when unused for long periods of time.
- Refer all servicing to qualified service personnel. Servicing is required when the apparatus has been damaged in any way, such as power-supply cord or plug is damaged, liquid has been spilled or objects have fallen into the apparatus, the apparatus has been exposed to rain or moisture, does not operate normally, or has been dropped.
Product Overview
The WOCKODER R612 is a versatile 3-speed vinyl record player designed for an enhanced audio experience. It features integrated stereo speakers and multiple connectivity options.
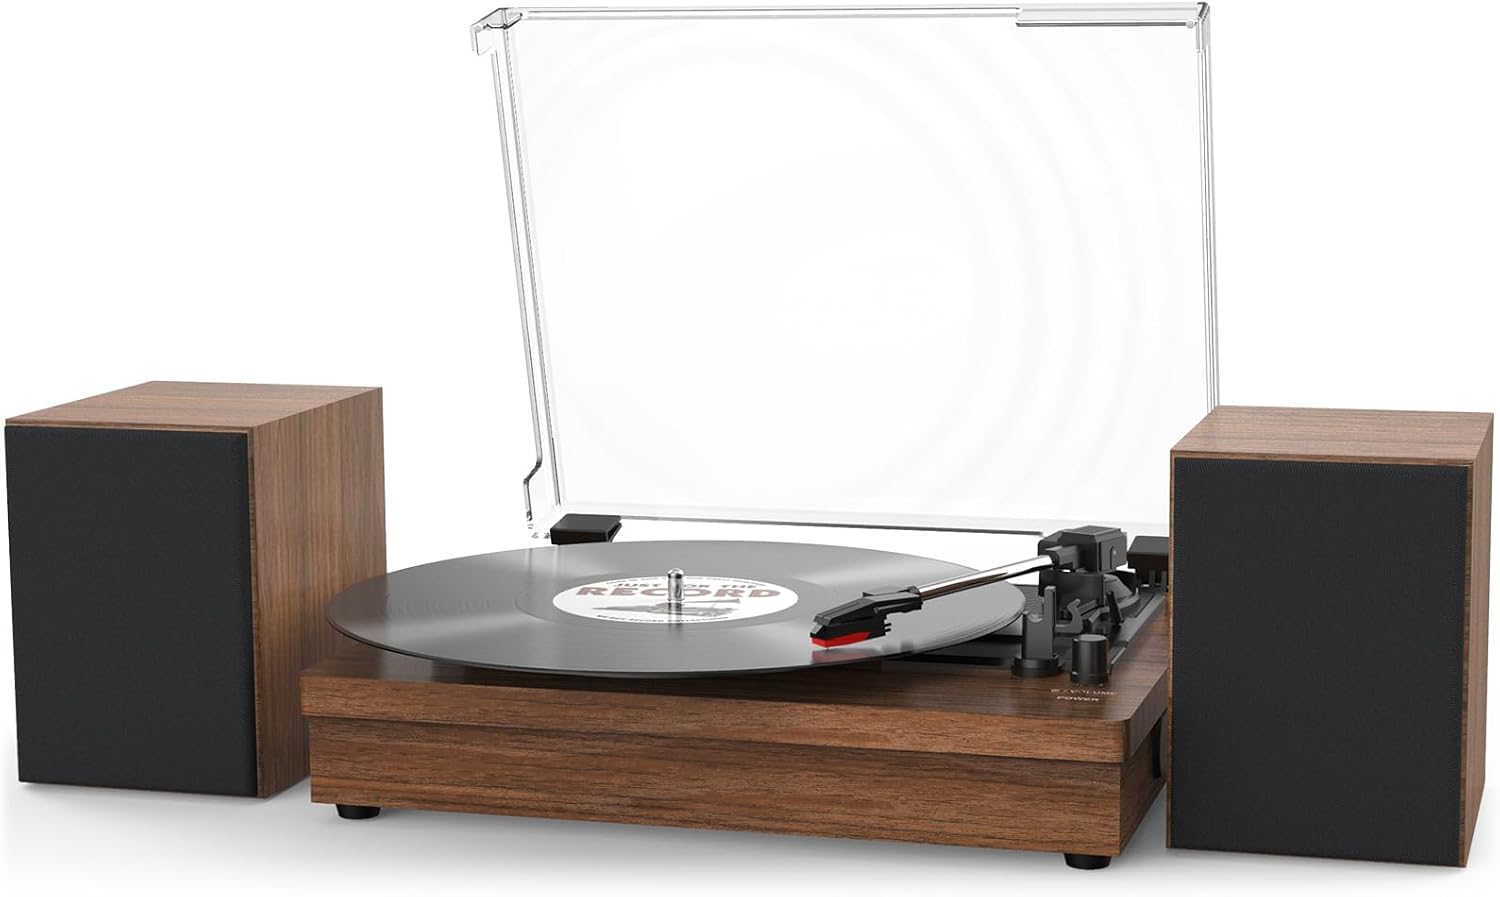
Image: The WOCKODER R612 record player in redbrown finish, shown with its two external stereo speakers and clear dust cover.
Components and Controls

Image: A detailed diagram illustrating the various components and control points of the WOCKODER R612 record player and its speakers. Key parts are numbered for easy identification.
- Speakers: External stereo speakers for rich sound output.
- 45RPM Adapter: Used for playing 7-inch records with a large center hole.
- Tonearm Raise Lever: Lifts and lowers the tonearm gently onto the record.
- Tonearm: Holds the stylus and tracks the record grooves.
- Tonearm Lock: Secures the tonearm when not in use.
- Auto Stop Button: Toggles the automatic stop function for record playback.
- 3 Speed LP Selected Button: Selects playback speed (33 1/3, 45, or 78 RPM).
- Power Button and Volume Control: Turns the unit on/off and adjusts volume.
- Stylus: The needle that reads the record grooves.
- Aux Input Jack: For connecting external audio devices via a 3.5mm cable.
- USB Playback: USB port for playing audio files from a USB drive.
- Power Adaptor Jack: Connects the power adapter to the unit.
- RCA Output Jack for Active: For connecting to external amplifiers or powered speakers.
Setup
1. Unpacking
Carefully remove the record player and all accessories from the packaging. Ensure all components listed in the "Product Overview" section are present and undamaged.
2. Connecting Speakers
Connect the included external speakers to the corresponding speaker output jacks on the back of the record player. Ensure the correct speaker (left/right) is connected to its respective output.
3. Power Connection
Insert the DC plug of the power adapter into the Power Adaptor Jack (12) on the back of the unit. Plug the AC end of the adapter into a standard wall outlet.
4. Dust Cover Installation
Place the clear dust cover onto the hinges at the back of the record player. This cover helps protect the turntable from dust when not in use.
Operating Instructions
Playing Vinyl Records

Image: Illustration showing 7-inch, 10-inch, and 12-inch vinyl records, indicating the different sizes supported by the player.
- Turn on the unit by rotating the Power Button and Volume Control (8) clockwise.
- Place a vinyl record on the turntable platter. If playing a 7-inch record with a large center hole, place the 45RPM Adapter (2) on the spindle first.
- Select the appropriate speed (33 1/3, 45, or 78 RPM) using the 3 Speed LP Selected Button (7) to match your record.
- Release the Tonearm Lock (5) to free the tonearm.
- Lift the Tonearm Raise Lever (3) to raise the tonearm.
- Gently move the tonearm over the desired starting point of the record.
- Lower the Tonearm Raise Lever (3) to slowly lower the tonearm onto the record. The music will begin to play.
- Adjust the volume using the Power Button and Volume Control (8).
- At the end of the record, if Auto Stop is enabled, the turntable will stop spinning automatically. If disabled, the tonearm will continue to spin in the run-out groove. To stop playback manually, lift the tonearm using the lever and return it to its rest, then engage the Tonearm Lock (5).
Auto Stop Function: The Auto Stop Button (6) allows you to enable or disable the automatic stop feature. When enabled, the turntable will stop spinning when the record finishes. When disabled, it will continue to spin until manually stopped.
Wireless Connection (Bluetooth)

Image: The record player shown with an illustration of wireless streaming from a smartphone, highlighting its Bluetooth connectivity.
The WOCKODER R612 can receive audio wirelessly from your Bluetooth-enabled devices.
- Turn on the record player.
- Press the "MODE" button on the front panel until the unit enters Wireless (Bluetooth) mode. You will hear an audible prompt or see an indicator light.
- Enable Bluetooth on your smartphone, tablet, or other audio device.
- Search for "WOCKODER R612" (or similar name) in your device's Bluetooth pairing list.
- Select the record player to pair. Once paired, you will hear a confirmation sound.
- You can now play audio from your device through the record player's speakers.
Aux-in Playback
Connect external audio devices (e.g., MP3 players, CD players) to the record player using a 3.5mm audio cable (not included).
- Connect one end of the 3.5mm audio cable to the Aux Input Jack (10) on the front of the record player.
- Connect the other end of the cable to the headphone jack or audio output of your external device.
- Press the "MODE" button to select Aux-in mode.
- Play audio from your external device. The sound will be routed through the record player's speakers.
USB Playback
Play audio files directly from a USB flash drive.
- Insert a USB flash drive containing audio files into the USB Playback port (11) on the front of the record player.
- Press the "MODE" button to select USB mode.
- The unit will automatically begin playing audio files from the USB drive. Use the playback controls (if available on the unit, or via the connected device if applicable) to navigate tracks.
RCA Output
Connect the record player to an external amplifier or powered speakers for a different audio setup.
- Connect an RCA cable (not included) to the RCA Output Jack (13) on the back of the record player.
- Connect the other end of the RCA cable to the audio input of your external amplifier or powered speakers.
- Ensure your external audio system is set to the correct input.
- Play a record on the turntable. The audio will now be output through your external system.
Maintenance
Cleaning the Unit
- Always unplug the unit from the power outlet before cleaning.
- Use a soft, dry cloth to wipe the exterior surfaces of the record player and speakers.
- Do not use harsh chemicals, cleaning solvents, or strong detergents, as these may damage the finish.
Stylus Care and Replacement
- The stylus (needle) is a delicate component. Avoid touching it with your fingers.
- Clean the stylus periodically using a soft brush designed for stylus cleaning, brushing gently from back to front.
- A worn stylus can damage your records and degrade sound quality. Replace the stylus approximately every 300-500 hours of playback, or if you notice a significant drop in sound quality or increased skipping.
- Refer to the manufacturer's website or contact support for information on purchasing replacement styluses.
Dust Cover Care
- Wipe the dust cover with a soft, damp cloth. Avoid abrasive cleaners that can scratch the surface.
- Ensure the dust cover is closed when the unit is not in use to prevent dust accumulation on the platter and stylus.
Troubleshooting
| Problem | Possible Cause | Solution |
|---|---|---|
| No power | Power cord not connected; Power outlet not active. | Ensure power cord is securely plugged in. Test the outlet with another device. |
| No sound from speakers | Volume too low; Speakers not connected; Incorrect input mode selected; Stylus damaged. | Increase volume. Check speaker connections. Ensure correct mode (Phono, Wireless, Aux, USB) is selected. Inspect stylus for damage. |
| Record skipping | Record is dirty or scratched; Stylus is dirty or worn; Unit is not on a stable surface. | Clean the record. Clean or replace the stylus. Place the unit on a flat, stable surface away from vibrations. |
| Bluetooth not connecting | Unit not in Bluetooth mode; Device too far; Bluetooth not enabled on device; Already connected to another device. | Ensure unit is in Wireless (Bluetooth) mode. Move device closer. Enable Bluetooth on your device. Disconnect from other Bluetooth devices. |
| Turntable not spinning | Power issue; Belt dislodged; Auto Stop enabled and record finished. | Check power. Inspect the drive belt (if accessible and safe to do so, otherwise contact support). If Auto Stop is on, the turntable will stop after the record ends. |
If the problem persists after trying these solutions, please contact customer support.
Specifications

Image: A diagram showing the physical dimensions of the WOCKODER R612 record player and its accompanying speakers.
| Brand | WOCKODER |
| Model Name | R612 |
| Connectivity Technology | Bluetooth, RCA, Aux-in, USB |
| Maximum Rotational Speed | 78 RPM (Supports 33 1/3, 45, and 78 RPM) |
| Included Components | Record player, External Speakers, 45RPM Adapter |
| Special Feature | Built-In Bluetooth Receiver, Auto Stop Function |
| Item Weight | 5.06 pounds (2.3 Kilograms) |
| Package Dimensions | 15.27 x 12.01 x 11.3 inches |
| Color | Redbrown |
Warranty and Support
For warranty information and customer support, please refer to the warranty card included with your product or visit the official WOCKODER website. You may also contact their customer service directly for assistance with product inquiries, troubleshooting, or replacement parts.
Online Support: Visit the WOCKODER Store on Amazon
Related documentsR612


Ask a question about this manual
Ask about setup, troubleshooting, compatibility, parts, safety, or missing instructions. Manuals+ will review the question and use this page’s manual context to help answer it.