1. Important Safety Instructions
Please read and understand all safety instructions before operating this product. Failure to follow these instructions may result in product damage, injury, or electric shock.
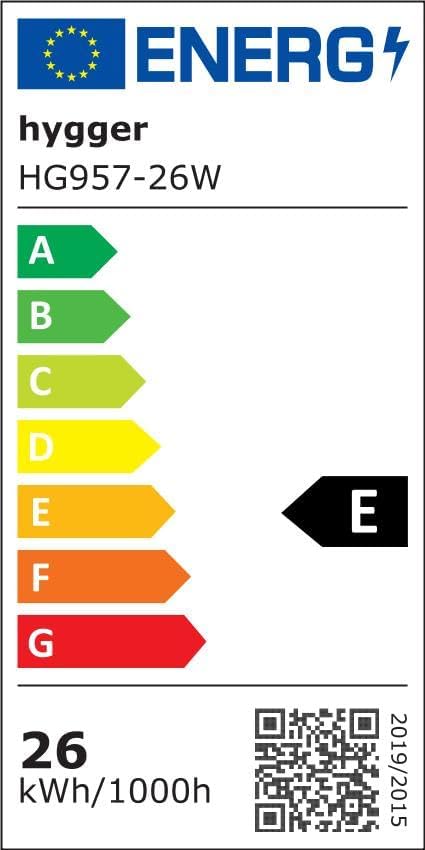
- Ensure the power supply voltage matches the product's requirements (AC100-240V).
- Do not immerse the light fixture or power adapter in water. This product is water-resistant, not submersible.
- Always unplug the light from the power outlet before performing any maintenance, cleaning, or installation.
- Ensure a drip loop is formed with the power cord to prevent water from traveling along the cord and reaching the electrical outlet.
- Do not operate the light if any part is damaged, especially the power cord or adapter. Contact customer support for replacement parts.
- Keep out of reach of children and pets.
2. Product Overview
2.1 Package Contents
- hygger HG957-26W LED Aquarium Light
- Power Adapter
- Adjustable Mounting Brackets
- Instruction Manual
2.2 Product Features
- Full Spectrum LED lighting for optimal plant growth and fish coloration.
- Integrated LCD control panel with touch buttons for easy programming.
- Simulates natural sunrise, sunset, and moonlight cycles.
- DIY mode with up to 8 customizable light stages for personalized schedules.
- Adjustable light intensity (0-100%) and 7 color options (Red, Purple, Blue, Light Blue, Green, Yellow, White).
- Memory function retains programmed settings after a power outage.
- Durable aluminum alloy plastic casing with water-resistant coating.
2.3 Components Diagram


3. Specifications
| Feature | Detail |
|---|---|
| Model | HG957-26W |
| Light Dimensions (L x W x H) | 45 x 10 x 2.2 cm |
| Recommended Tank Size | 46-61 cm (18-24 inches) |
| Input Voltage | AC100-240V |
| Output Voltage | DC15V |
| Power Consumption | 26 Watts |
| LED Quantity | 77 PCS (38 White 6500K, 10 Blue 450-455nm, 6 Red 620-625nm, 4 Green 520-525nm, 19 RGB) |
| CRI (Color Rendering Index) | 89 |
| Lumens | 1290 |
| Color Temperature | 6,500-10,000 K |
| Power Cord Length | 2.7 m |
| Material | Aluminum alloy, Plastic |
| Item Weight | 1.2 Kilograms |

4. Setup
- Unpack the Light: Carefully remove the LED aquarium light and all accessories from the packaging. Inspect for any damage.
- Attach Mounting Brackets: Slide the adjustable mounting brackets onto the ends of the light fixture. Ensure they are securely fastened.
- Position on Aquarium: Place the light fixture on top of your aquarium, adjusting the brackets to fit the tank's width (for 46-61 cm tanks). Ensure the light is stable and level.
- Connect Power: Connect the power adapter to the light fixture, then plug the adapter into a suitable power outlet. Ensure a drip loop is formed with the power cord to prevent water from reaching the outlet.
- Initial Power On: The light should power on, and the LCD display will activate.
5. Operating Instructions
The hygger HG957-26W LED Aquarium Light features an integrated LCD control panel for easy programming. The panel includes touch buttons for setting time, adjusting modes, and changing intensity/color.


5.1 Setting Local Time
- Press and hold the Set/Save button until the time display flashes.
- Use the Increase and Decrease buttons to adjust the hour.
- Press Set/Save again to move to minutes, then adjust using the Increase and Decrease buttons.
- Press Set/Save to confirm and exit time setting.
5.2 Standard Mode (Daylight + Moonlight)
This mode combines a full spectrum daylight period with a blue moonlight period, simulating a natural 24-hour cycle.

- Press the Power/Light Mode button repeatedly to cycle through modes until "Standard Mode" or a similar indicator appears on the display.
- The default settings for Daylight and Moonlight will activate.
- To adjust intensity: In the desired mode, press the Power/Light Mode button twice quickly to enter fine-tuning mode, then use Increase and Decrease buttons to adjust brightness.
5.3 Daylight Mode (Sunrise & Sunset Simulation)
This mode simulates a gradual sunrise and sunset over 15-minute periods, preventing sudden light changes that can stress fish.

- Press the Power/Light Mode button until "Daylight Mode" is selected.
- Press and hold Set/Save to enter editing mode for Daylight ON/OFF times.
- Use Increase and Decrease to set the desired ON time (e.g., 6:30).
- Press Set/Save to move to OFF time (e.g., 18:30), then adjust.
- Press Set/Save to confirm. The light will now follow the programmed sunrise/daylight/sunset cycle.
5.4 Moonlight Mode
This mode provides a gentle blue light for nighttime viewing, also with gradual on/off transitions.

- Press the Power/Light Mode button until "Moonlight Mode" is selected.
- Press and hold Set/Save to enter editing mode for Moonlight ON/OFF times.
- Use Increase and Decrease to set the desired ON time (e.g., 18:00).
- Press Set/Save to move to OFF time (e.g., 23:30), then adjust.
- Press Set/Save to confirm.
- To change moonlight color: In Moonlight Mode, press the Power/Light Mode button once to cycle through the 6 single-color options (Red, Purple, Blue, Light Blue, Green, Yellow).
5.5 DIY Mode (Customizable Light Stages)
The DIY mode allows you to create a personalized lighting schedule with up to 8 separate light stages, each with its own start time, end time, and intensity.

- Press the Power/Light Mode button until "DIY Mode" is selected.
- Press and hold Set/Save to enter editing mode for DIY stages.
- The display will show "L1" (Light Stage 1). Press Set/Save to edit its start time, then use Increase and Decrease to adjust.
- Press Set/Save to edit the end time, then adjust.
- Press Set/Save to edit the intensity (00-100%), then adjust. Set intensity to 00 to turn off the light during that stage.
- Repeat for L2 through L8. After setting L8, press Set/Save to confirm all DIY settings.
5.6 Adjustable Intensity and Color
Beyond programmed modes, you can manually adjust intensity and cycle through colors.


- To change color: In any mode, press the Power/Light Mode button once to cycle through available colors.
- To adjust intensity: Press the Power/Light Mode button twice quickly to enter fine-tuning mode, then use Increase and Decrease buttons to adjust brightness.
5.7 Memory Function
The light features a memory function. In case of a power outage, the light will resume its last programmed settings. However, the time display may reset. After power is restored, the default operation starts at 12 PM every day. It will take another 4 hours for the light to turn on if it was programmed to turn on after 12 PM.

6. Maintenance
- Cleaning: Regularly wipe the light fixture with a soft, damp cloth to remove dust and water spots. Ensure the light is unplugged before cleaning. Do not use abrasive cleaners or solvents.
- Inspection: Periodically check the power cord and adapter for any signs of damage, such as fraying or cracks. If damage is found, discontinue use and replace the component immediately.
- Water Resistance: The light has a water-resistant coating, but it is not submersible. Avoid direct immersion in water and ensure the control panel remains dry.
7. Troubleshooting
| Problem | Possible Cause | Solution |
|---|---|---|
| Light does not turn on. | No power supply. Power adapter or light fixture is faulty. | Check power connection to the outlet and the light. Ensure the outlet is working. If possible, test with another compatible adapter. If still not working, the light or adapter may be faulty. |
| Light turns on/off at incorrect times. | Incorrect local time setting. Incorrect program settings (Daylight, Moonlight, DIY). | Reset the local time on the control panel. Review and re-program the desired mode settings (Daylight ON/OFF, Moonlight ON/OFF, or DIY stages). |
| Light intensity or color is not as expected. | Incorrect intensity/color setting. Light is in a different mode than expected. | Adjust intensity/color using the fine-tuning function (press Power/Light Mode twice quickly). Cycle through modes to ensure the correct one is active. |
| LCD display is blank or unresponsive. | Power issue. Control panel malfunction. | Check power connection. Unplug and replug the light to reset. If the problem persists, contact customer support. |
8. Warranty and Support
Specific warranty information and customer support contact details are not available in the provided product data. Please refer to the product packaging or the retailer's website for detailed warranty terms and support contacts.
For further assistance, you may visit the hygger brand store on Amazon.


