1. Introduction
The Electro-Harmonix Pico Platform Compressor / Limiter is a compact, studio-style dynamics processing pedal designed for precise control over your instrument's signal. It offers both compressor and limiter modes, along with selectable hard or soft knee compression curves, making it suitable for a wide range of musical applications. This pedal is engineered to provide transparent dynamic control, enhancing sustain and leveling out signal peaks and valleys without altering your instrument's core tone.

Figure 1: Front view of the Electro-Harmonix Pico Platform Compressor & Limiter Pedal.
2. Controls and Indicators
The Pico Platform pedal features intuitive controls for shaping your sound dynamics:
- VOL (Volume) Knob: Controls the overall output level of the pedal. Adjust this to match the bypassed signal level or to boost your signal.
- SUSTAIN Knob: Adjusts the compression ratio in Compressor mode or the limiter threshold in Limiter mode. Higher settings increase sustain and compression intensity.
- ATTACK Knob: Determines how quickly the compressor or limiter reacts to incoming signal peaks. A faster attack (lower setting) will catch transients more aggressively, while a slower attack (higher setting) allows initial transients to pass through before compression engages.
- BLEND Knob: Mixes the dry (unaffected) signal with the wet (compressed/limited) signal. This allows for parallel compression, preserving the original signal's attack and tone while adding sustain and dynamic control.
- TYPE Button: Toggles between Compressor and Limiter modes. Press and hold to switch between Hard Knee and Soft Knee compression curves. The LED indicator changes color to show the selected mode and knee type.
- LED Indicator: Illuminates to indicate the pedal's status and mode. The color and state of the LED provide feedback on the active compression mode and knee setting.
- INPUT Jack: 1/4-inch (6.35mm) audio input for your instrument or preceding effects pedal.
- OUTPUT Jack: 1/4-inch (6.35mm) audio output to your amplifier or subsequent effects pedal.
- 9V Power Jack: Connects to a standard 9V DC power supply (center-negative).

Figure 2: Angled view highlighting the control knobs and TYPE button.
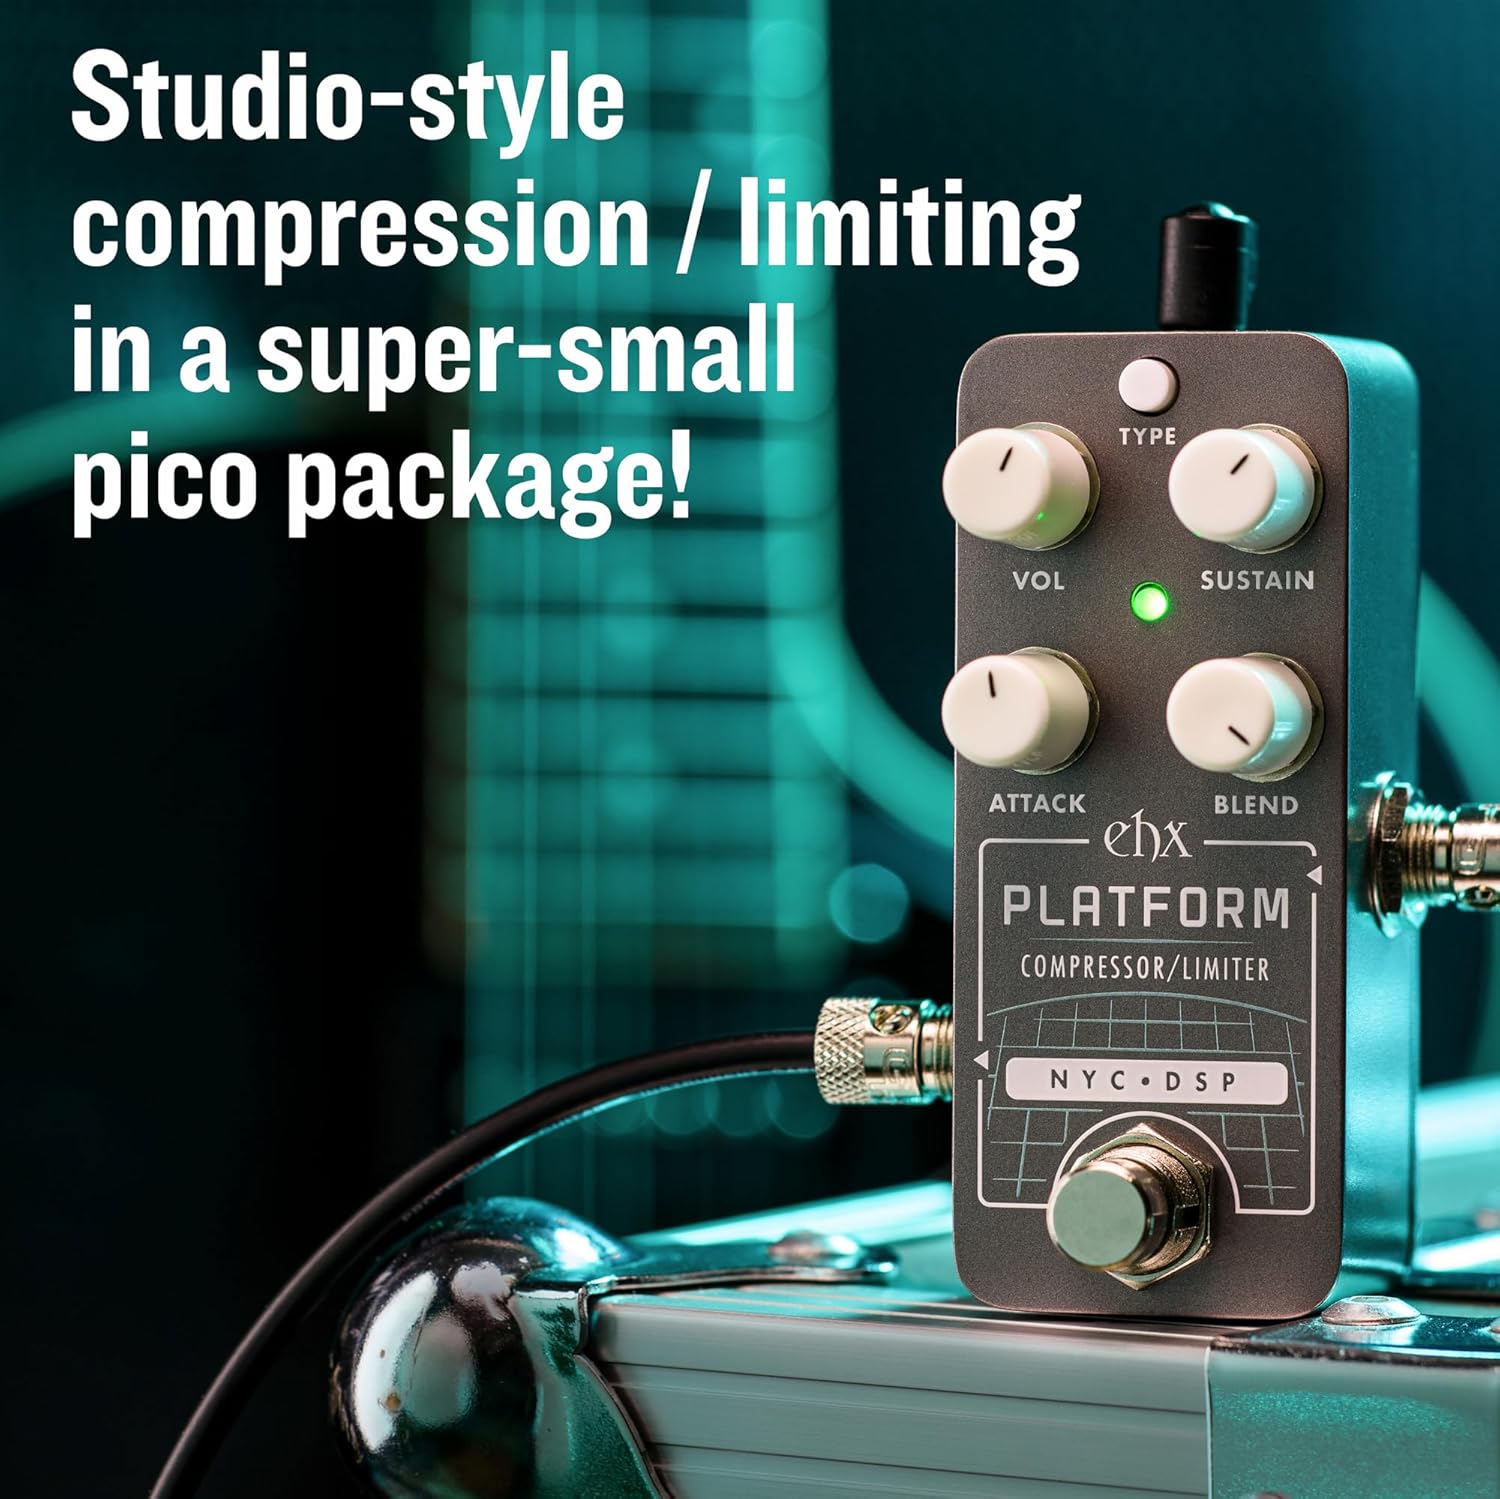
Figure 3: Rear view showing the 9V power input jack.
3. Setup
- Power Connection: Connect a standard 9V DC power supply (center-negative) to the 9V Power Jack on the pedal. Ensure the power supply meets the pedal's voltage and polarity requirements.
- Input Connection: Connect your instrument (e.g., guitar, bass) or the output of a preceding effects pedal to the INPUT jack on the Pico Platform.
- Output Connection: Connect the OUTPUT jack of the Pico Platform to your amplifier's input or to the input of the next effects pedal in your signal chain.
- Signal Chain Placement: Compressors are typically placed early in the signal chain, often after tuners and wah pedals, but before overdrive/distortion and modulation effects. Experiment with placement to achieve desired results.

Figure 4: The Pico Platform pedal integrated into a signal chain with input and output cables.
4. Operation
4.1. Modes and Knee Types
The Pico Platform offers two primary modes and two knee types, selectable via the TYPE button:
- Compressor Mode: Reduces the dynamic range of your signal, making quiet parts louder and loud parts quieter. This results in increased sustain and a more even sound.
- Limiter Mode: A more extreme form of compression where the output level is prevented from exceeding a certain threshold, effectively "limiting" peaks.
- Hard Knee: Compression engages abruptly once the signal crosses the threshold. This provides a more noticeable and aggressive compression effect.
- Soft Knee: Compression gradually increases as the signal approaches the threshold, resulting in a smoother and more transparent compression.
To switch between Compressor and Limiter modes, press the TYPE button briefly. To switch between Hard Knee and Soft Knee, press and hold the TYPE button for a few seconds. The LED indicator will change color to reflect the current settings.

Figure 5: Visual representation of compression ratio and limiting behavior.
4.2. Adjusting Controls
- Sustain: Start with the SUSTAIN knob at a lower setting and gradually increase it to hear the effect. In Compressor mode, this increases the compression ratio, leading to more sustain. In Limiter mode, it lowers the threshold, making the limiting more active.
- Attack: For a natural feel, begin with the ATTACK knob around the middle. Turn it counter-clockwise for a faster attack to tame sharp transients, or clockwise for a slower attack to allow initial pick attacks to cut through before compression.
- Blend: The BLEND knob is crucial for maintaining dynamic feel. A 100% wet signal (fully clockwise) provides maximum compression, while mixing in the dry signal (counter-clockwise) allows for parallel compression, which can sound more natural and retain pick dynamics.
- Volume: Adjust the VOL knob to achieve unity gain (output volume matches bypassed volume) or to provide a slight boost for solos.

Figure 6: The Blend knob allows for mixing dry and wet signals for parallel compression.
5. Maintenance
- Cleaning: To clean the pedal, use a soft, dry cloth. Avoid using abrasive cleaners, solvents, or excessive moisture, as these can damage the finish or internal components.
- Storage: When not in use for extended periods, store the pedal in a cool, dry place away from direct sunlight and extreme temperatures.
- Power Supply: Always use a regulated 9V DC center-negative power supply to prevent damage to the unit. Disconnect the power supply when the pedal is not in use.
6. Troubleshooting
- No Sound:
- Ensure all cables (input, output, power) are securely connected.
- Verify the power supply is functioning correctly and meets the 9V DC center-negative specification.
- Check if your instrument and amplifier are working properly by bypassing the pedal.
- Ensure the VOL knob is not set to minimum.
- Unwanted Noise/Hum:
- Use a high-quality, regulated power supply. Unregulated power supplies can introduce noise.
- Check for ground loops in your setup.
- Ensure instrument cables are shielded and in good condition.
- Try isolating the pedal from other pedals or power sources to identify the source of the noise.
- Effect Not Engaging:
- Confirm the pedal is powered on (LED indicator should be active).
- Adjust the SUSTAIN knob to a higher setting to ensure compression/limiting is active.
- Check the BLEND knob; if it's fully counter-clockwise, you will only hear the dry signal.
7. Specifications
| Feature | Detail |
|---|---|
| Model | PICO PLATFORM |
| Brand | Electro-Harmonix |
| Item Weight | 1.21 pounds (0.55 Kilograms) |
| Product Dimensions | 3.65"L x 2"W x 2"H (9.27 x 5.08 x 5.08 cm) |
| Power Source | Corded Electric (9V DC, center-negative) |
| Voltage | 9 Volts |
| Connector Type | 1/4 inch (6.35mm) audio jack |
| Hardware Interface | 1/4-inch Audio |
| Signal Format | Analog |
8. Warranty and Support
Electro-Harmonix products are designed for reliability and performance. For specific warranty information and details regarding repairs or technical assistance, please refer to the warranty card included with your product or visit the official Electro-Harmonix website. For further support, you may contact Electro-Harmonix customer service directly.
Official Website: www.ehx.com


