1. Introduction
The OTOFIX D1 Max is a new generation, high-end diagnostic scan tool designed for comprehensive vehicle diagnostics and maintenance. It combines powerful hardware with advanced software capabilities to provide efficient and accurate solutions for automotive professionals and enthusiasts. This manual provides detailed instructions on setting up, operating, maintaining, and troubleshooting your OTOFIX D1 Max scanner.

Image 1.1: OTOFIX D1 Max Scanner highlighting key features like 40+ HOT Services, 3X Faster AutoScan 2.0, All System Diagnostics, Guided Functions, Blu. Wireless VCI, Wide Coverage, CAN-FD & DoIP, 2015+ Renault SGW, and 2 Years Update.
2. Product Overview
The OTOFIX D1 Max is engineered for superior performance and user experience. It features a robust design and advanced functionalities to meet the demands of modern vehicle diagnostics.
2.1 Key Features
- ECU Coding & Offline ECU Programming: Advanced capabilities for vehicle personalization and module replacement.
- 40+ Service Functions: Comprehensive maintenance solutions including Oil Reset, TPMS Reset, Injector Coding, Suspension, and Throttle Matching.
- Active Test (Bi-directional Control): Perform component tests by sending commands to vehicle modules.
- OE-level Full-System Diagnostics: Access all available vehicle systems for reading/clearing codes, live data, and ECU information.
- Wide Vehicle Coverage: Supports over 80 brands and 10,000+ vehicle models (1996-2025).
- Advanced Protocols: Supports DoIP & CAN FD for faster data transfer and diagnostics.
- Secure Gateway Access: Compatible with FCA (2018+) and Renault (2015+) SGW-equipped vehicles.
- Auto VIN 2.0: Faster and more accurate automatic vehicle identification.
- Wi-Fi Printing: Wirelessly print diagnostic reports.
- 2-Years Free Software Updates: Ensures continuous functionality and compatibility.
2.2 Hardware Specifications
| Component | Specification |
|---|---|
| Operating System | Android 11.0 |
| Processor | Qualcomm CPU (4-Core, 1.8GHz) |
| Memory | 4GB RAM + 128GB Storage |
| Screen Size | 10.4 inches |
| Screen Resolution | 2000*1200 |
| Battery Capacity | 7250mAh Lithium Ion |
| Cameras | Front: 5MP; Rear: 8MP |
| Lower Computer (VCI) | V1 |
| Dimensions | 10.8 x 7.1 x 0.7 inches |
| Item Weight | 9.79 pounds |

Image 2.1: Visual representation of OTOFIX D1 Max hardware specifications including Android 11.0, 4-Core CPU, 10.4" screen, 4+128G memory, 7250mAh battery, and 5MP/8MP cameras.
3. Setup
3.1 Unboxing and Initial Inspection
Upon receiving your OTOFIX D1 Max, carefully open the packaging and inspect all components for any signs of damage. Ensure all items listed in the package contents are present.
3.2 Package Contents
The OTOFIX D1 Max package typically includes the following items:
- 1x OTOFIX D1 MAX Diagnostic Tool (Tablet)
- 1x OTOFIX V1 (Vehicle Communication Interface)
- 1x USB-C Cable
- 1x AC/DC Power Adapter (12V)
- 1x Carrying Case
- 1x Packing List
- 1x Quick Reference Guide
- 1x Soft Cloth
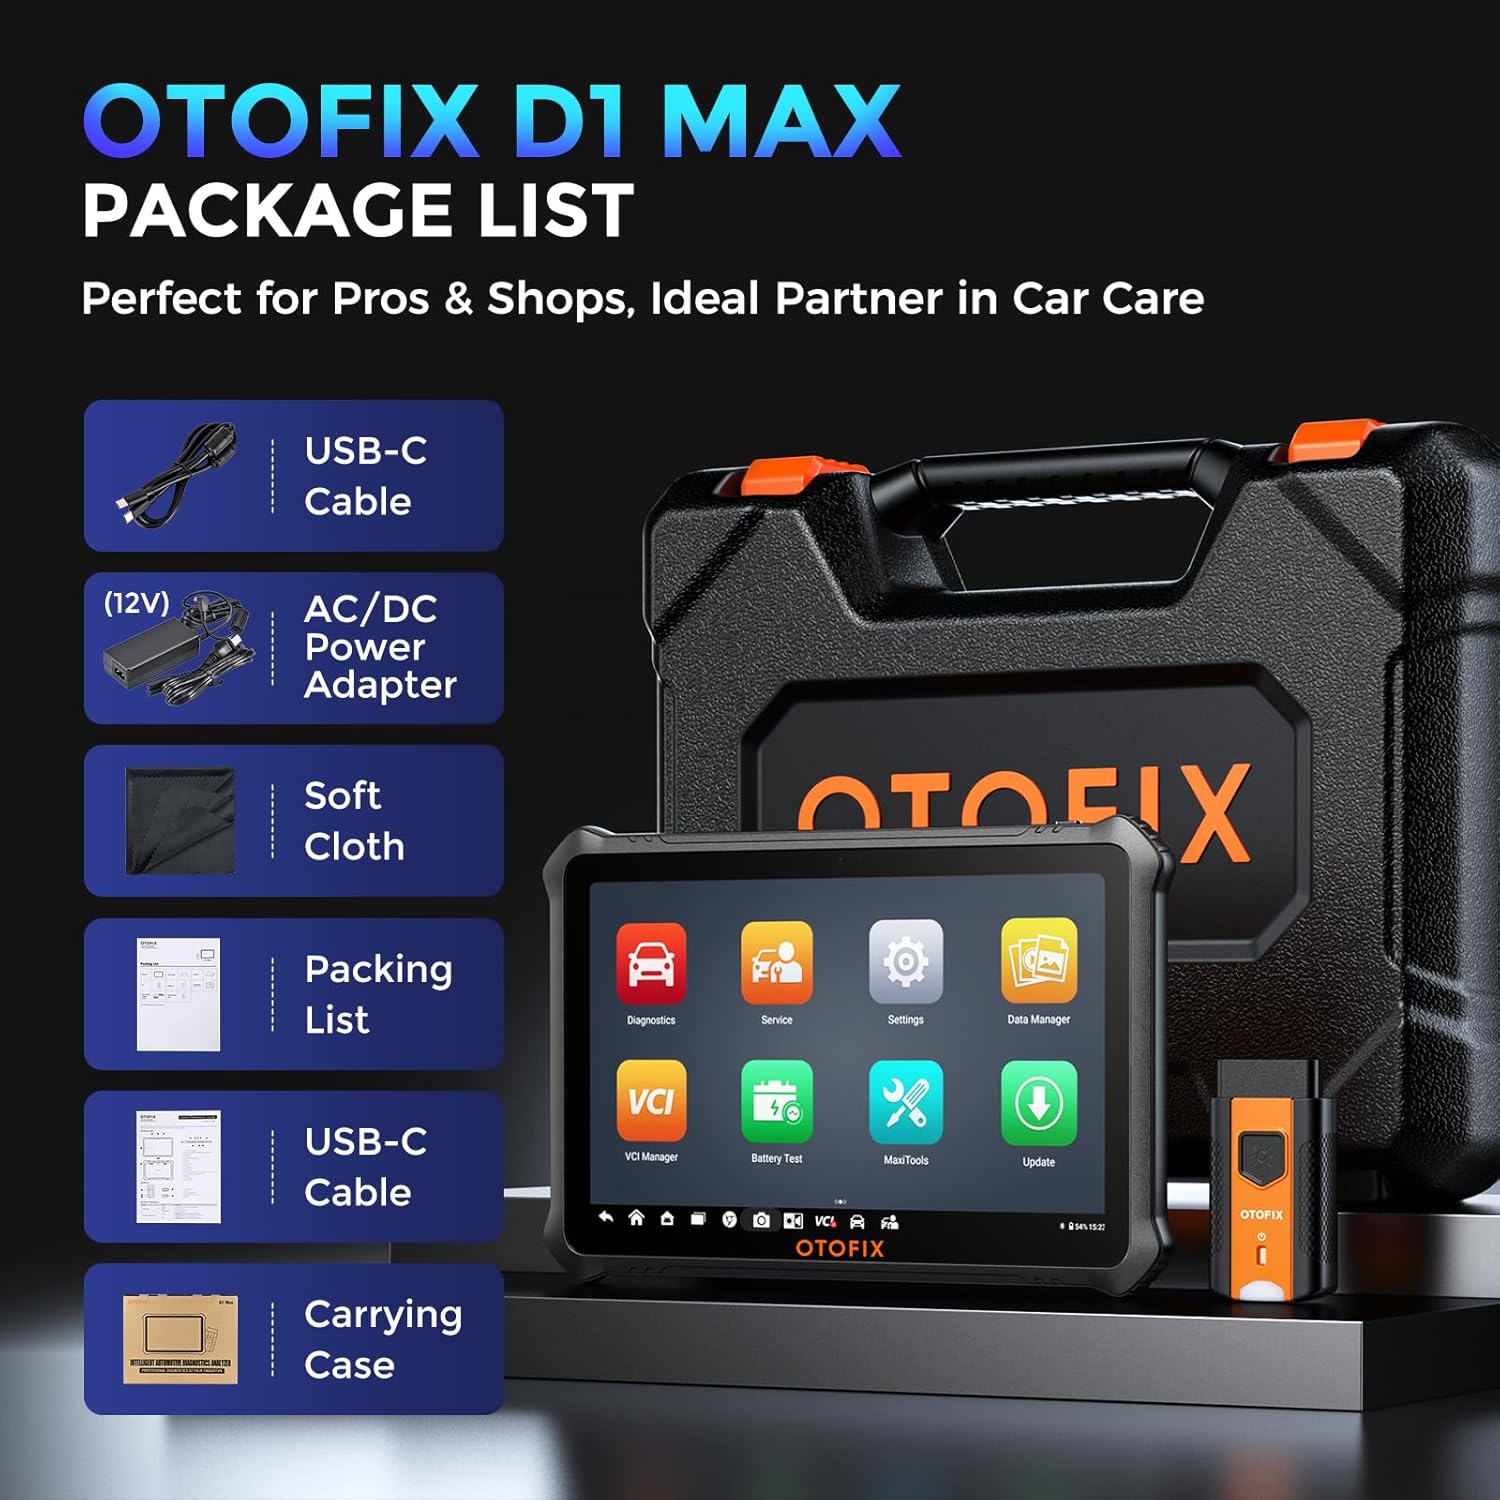
Image 3.1: Contents of the OTOFIX D1 Max package, including the tablet, VCI, cables, power adapter, carrying case, and documentation.
3.3 Powering On and Initial Configuration
- Connect the AC/DC Power Adapter to the OTOFIX D1 Max tablet and a power outlet to ensure the device is charged.
- Press and hold the Power button until the OTOFIX logo appears on the screen.
- Follow the on-screen prompts to complete the initial setup, including language selection, Wi-Fi connection, and time zone settings.
- Register your device and activate the software updates as prompted. A stable internet connection is required for this step.
4. Operation
4.1 Connecting to a Vehicle
- Locate the vehicle's OBDII port, typically under the dashboard on the driver's side.
- Plug the OTOFIX V1 (VCI) into the vehicle's OBDII port. The VCI's indicator light should illuminate.
- On the OTOFIX D1 Max tablet, ensure Bluetooth is enabled and the VCI is paired. The VCI Manager application can be used to manage the connection.
- Turn the vehicle's ignition to the ON position (engine off).
4.2 OE-Level All System Diagnostics
The OTOFIX D1 Max can access all available vehicle systems to perform comprehensive diagnostics.
- Read Codes: Retrieve Diagnostic Trouble Codes (DTCs) from all control modules.
- Clear Codes: Erase DTCs after repairs are completed.
- Live Data: View real-time data streams from various sensors and components.
- Freeze Frame Data: Capture a snapshot of vehicle conditions when a DTC was set.
- ECU Information: Retrieve detailed information about the Electronic Control Unit.

Image 4.1: Illustration of OE-level all system diagnostics, showing the scanner connected to a car and accessing various systems like Engine, ABS, EPB, and BMS.
4.3 ECU Coding & Advanced Functions
This function allows for advanced vehicle customization and module adaptation.
- Online Coding: Automatically retrieves coding values from the server for quick and precise operations. Compatible with brands like Volkswagen, Audi, Skoda, Peugeot, Citroen, DS, Porsche, BMW, Mini, Nissan, Infiniti, Nissan GT-R, Renault.
- Offline Coding: Allows manual input of coding values, suitable for experts and a wider range of car builds. Compatible with Ford, Ford AU, Ford EU, Subaru, Land Rover, Jaguar, Peugeot, Citroen, DS, Volkswagen, Volkswagen Brazil, Audi, Skoda, Volkswagen CV.
- Offline ECU Programming: Replace or update ECU software, program new blank ECUs, and fix software-controlled issues. Compatible with Ford, Ford AU, Ford EU, Land Rover, Jaguar, Opel, Vauxhall.
- Personalization: Customize vehicle settings such as disabling auto start-stop, activating daytime running lights, and other comfort functions.
- V.A.G Guided Functions: Provides step-by-step procedures for complex diagnostics on Volkswagen, Audi, Skoda, and VW vehicles, skipping channel numbers and security codes.

Image 4.2: Detailed view of ECU Programming & Coding capabilities, including open/close functions, module matching, personalization, parameter reset, and fixing complex issues.
5. Service Functions
The OTOFIX D1 Max offers over 40 maintenance and service functions to address common vehicle issues.
- Oil Reset: Reset the oil life system after an oil change.
- TPMS Reset: Reset tire pressure monitoring system.
- SAS Reset: Calibrate the steering angle sensor.
- EPB Reset: Reset the electronic parking brake pads after replacement.
- Throttle Matching: Relearn the throttle body position.
- BMS Reset: Register the new battery after replacement.
- ABS Bleeding: Perform ABS brake bleeding to get a firm brake pad.
- Suspension: Adjust the vehicle height sensor for suspension calibration.
- Clutch Learning: Perform clutch adaptation.

Image 5.1: Overview of 40+ service functions, including Oil Reset, SAS Reset, EPB Reset, Injector Coding, Throttle, BMS Reset, and Clutch Learning.
6. Bi-directional Control (Active Test)
The bi-directional control feature allows the scanner to send commands to vehicle modules to perform specific tests, narrowing down diagnostic scope and quickly pinpointing problems.
- Activate components like windows, headlights, wipers, sunroof, radiator fans, fuel pump, A/C clutch, etc.
- Test the functionality of various actuators without disassembling the vehicle.

Image 6.1: Demonstration of bi-directional control, showing the scanner sending commands to vehicle components like lights, fuel pump, A/C clutch, and window wipers.
7. Maintenance
Proper maintenance ensures the longevity and optimal performance of your OTOFIX D1 Max scanner.
- Software Updates: Regularly update the software to ensure compatibility with new vehicle models and access to the latest features. The device includes 2 years of free updates.
- Cleaning: Use a soft, damp cloth to clean the tablet screen and body. Avoid abrasive cleaners or solvents.
- Storage: Store the device in its carrying case in a cool, dry place when not in use. Avoid extreme temperatures.
- Battery Care: Charge the battery regularly, even if the device is not in frequent use, to maintain battery health.
- VCI Care: Keep the VCI clean and free from debris. Ensure the OBDII connector pins are not bent or damaged.

Image 7.1: Information regarding the included 2 years of free software updates, emphasizing cost savings.
8. Troubleshooting
This section provides solutions to common issues you might encounter with your OTOFIX D1 Max scanner.
8.1 Common Issues and Solutions
- Device not powering on: Ensure the battery is charged. Connect the power adapter and try again. If the issue persists, contact support.
- VCI not connecting: Check if the VCI is securely plugged into the vehicle's OBDII port. Ensure Bluetooth is enabled on the tablet and the VCI is paired. Restart both the tablet and the VCI.
- Unable to communicate with vehicle: Verify the vehicle's ignition is ON. Check the OBDII port for power. Ensure the vehicle model and year are correctly selected in the software. Try a different vehicle to rule out vehicle-specific issues.
- Software freezing/slow performance: Close unnecessary applications. Clear cache if available in settings. Ensure sufficient storage space. Perform a software update if available.
- Diagnostic function not working: Ensure the vehicle supports the specific function. Some advanced functions may require specific vehicle conditions or procedures. Refer to the on-screen guided functions or vehicle service manual.
8.2 Contacting Support
If you encounter issues that cannot be resolved using the troubleshooting steps above, please contact OTOFIX customer support. Provide detailed information about the problem, including any error messages, vehicle details, and steps taken to troubleshoot.
Email: otofixaftersales-amz@outlook.com
Support is available Monday-Friday 9:00 AM - 6:00 PM EST, with 24/7 support available via email.
9. Specifications
Detailed technical specifications for the OTOFIX D1 Max scanner.
| Attribute | Value |
|---|---|
| Brand | OTOFIX |
| Model | OTOFIX D1 MAX Scanner |
| Operating System | Android 11.0 |
| Processor | 4-Core, 1.8GHz |
| Memory | 4GB RAM, 128GB Storage |
| Screen Size | 10.4 inches |
| Screen Resolution | 2000 x 1200 |
| Battery | 7250mAh Lithium Ion (included) |
| Cameras | Front: 5MP; Rear: 8MP |
| Connectivity | Wi-Fi, Bluetooth |
| Supported Protocols | DoIP, CAN FD, J2534 (with VCI) |
| Dimensions (L x W x H) | 10.8 x 7.1 x 0.7 inches |
| Item Weight | 9.79 pounds |
| Manufacturer Part Number | OTOFIX D1 MAX Scanner |
| UPC | 850051166305 |
10. Warranty and Support
OTOFIX provides comprehensive support and warranty for the D1 Max scanner.
- Warranty: 1-year quality undertaking.
- Software Updates: 2 years of free software updates included.
- Technical Assistance: Lifetime technical assistance is available.
- Return Policy: Hassle-free return policy within 30 days.
- Customer Service: 24/7 support via email.
For any inquiries or support needs, please contact OTOFIX at otofixaftersales-amz@outlook.com.


