
PowMr POW-HVM2H-12V-N
Contents
PowMr 1600W Hybrid Solar Inverter User Manual
Model: POW-HVM2H-12V-N
1. Introduction
This manual provides detailed instructions for the installation, operation, and maintenance of the PowMr 1600W Hybrid Solar Inverter. This device integrates a solar charge controller, an inverter, and a battery charger into one unit, offering uninterruptible power support in a compact size. It is designed to work with 12V lead-acid and lithium batteries, providing a reliable power solution for various applications including RVs, camping boats, and home emergencies.
Please read this manual thoroughly before installation and operation to ensure proper use and to prevent damage to the unit or injury to personnel. Keep this manual for future reference.
2. Safety Information
Please observe all warnings and cautions in this manual. Improper operation may cause damage to the unit and/or personal injury.
- Installation must be performed by qualified personnel.
- Ensure all wiring is correctly connected and securely fastened before operation.
- Do not disassemble the unit. There are no user-serviceable parts inside.
- Keep the inverter away from water, excessive heat, and flammable materials.
- Ensure adequate ventilation around the unit to prevent overheating.
- Always disconnect all power sources (PV, AC, and Battery) before performing any maintenance or wiring.
- This inverter is designed for 12V battery systems. Connecting to other voltage systems may cause damage.

Figure 2.1: Front view of the PowMr 1600W Hybrid Solar Inverter. Note the caution label regarding electric shock hazard and energy hazardous.
3. Product Overview
The PowMr 1600W Hybrid Solar Inverter is an all-in-one solution for off-grid and hybrid solar power systems. It features an integrated 80A MPPT solar charge controller and a 1600W pure sine wave inverter.
3.1 Key Features:
- Pure Sine Wave Inverter: Provides high-quality AC power suitable for sensitive electronics.
- Built-in 80A MPPT Solar Charge Controller: Maximizes power extraction from solar panels.
- High PV Input Voltage Range: Supports up to 400V DC PV input.
- Multiple Charging Modes: Solar only, Utility only, Solar and Utility, Hybrid charging.
- LCD Display and LED Indicators: For dynamic system data display and status monitoring.
- Battery Compatibility: Works with 12V lead-acid (sealed, AGM, gel, flooded) and lithium batteries (user-configurable).
- Intelligent Cooling Fan: Adjusts speed based on ambient temperature for optimal performance and noise reduction.
- Optional WiFi/GPRS Monitoring: Allows remote monitoring via mobile phone or website (module sold separately).

Figure 3.1: Key specifications and features of the PowMr 1600W Solar Inverter.
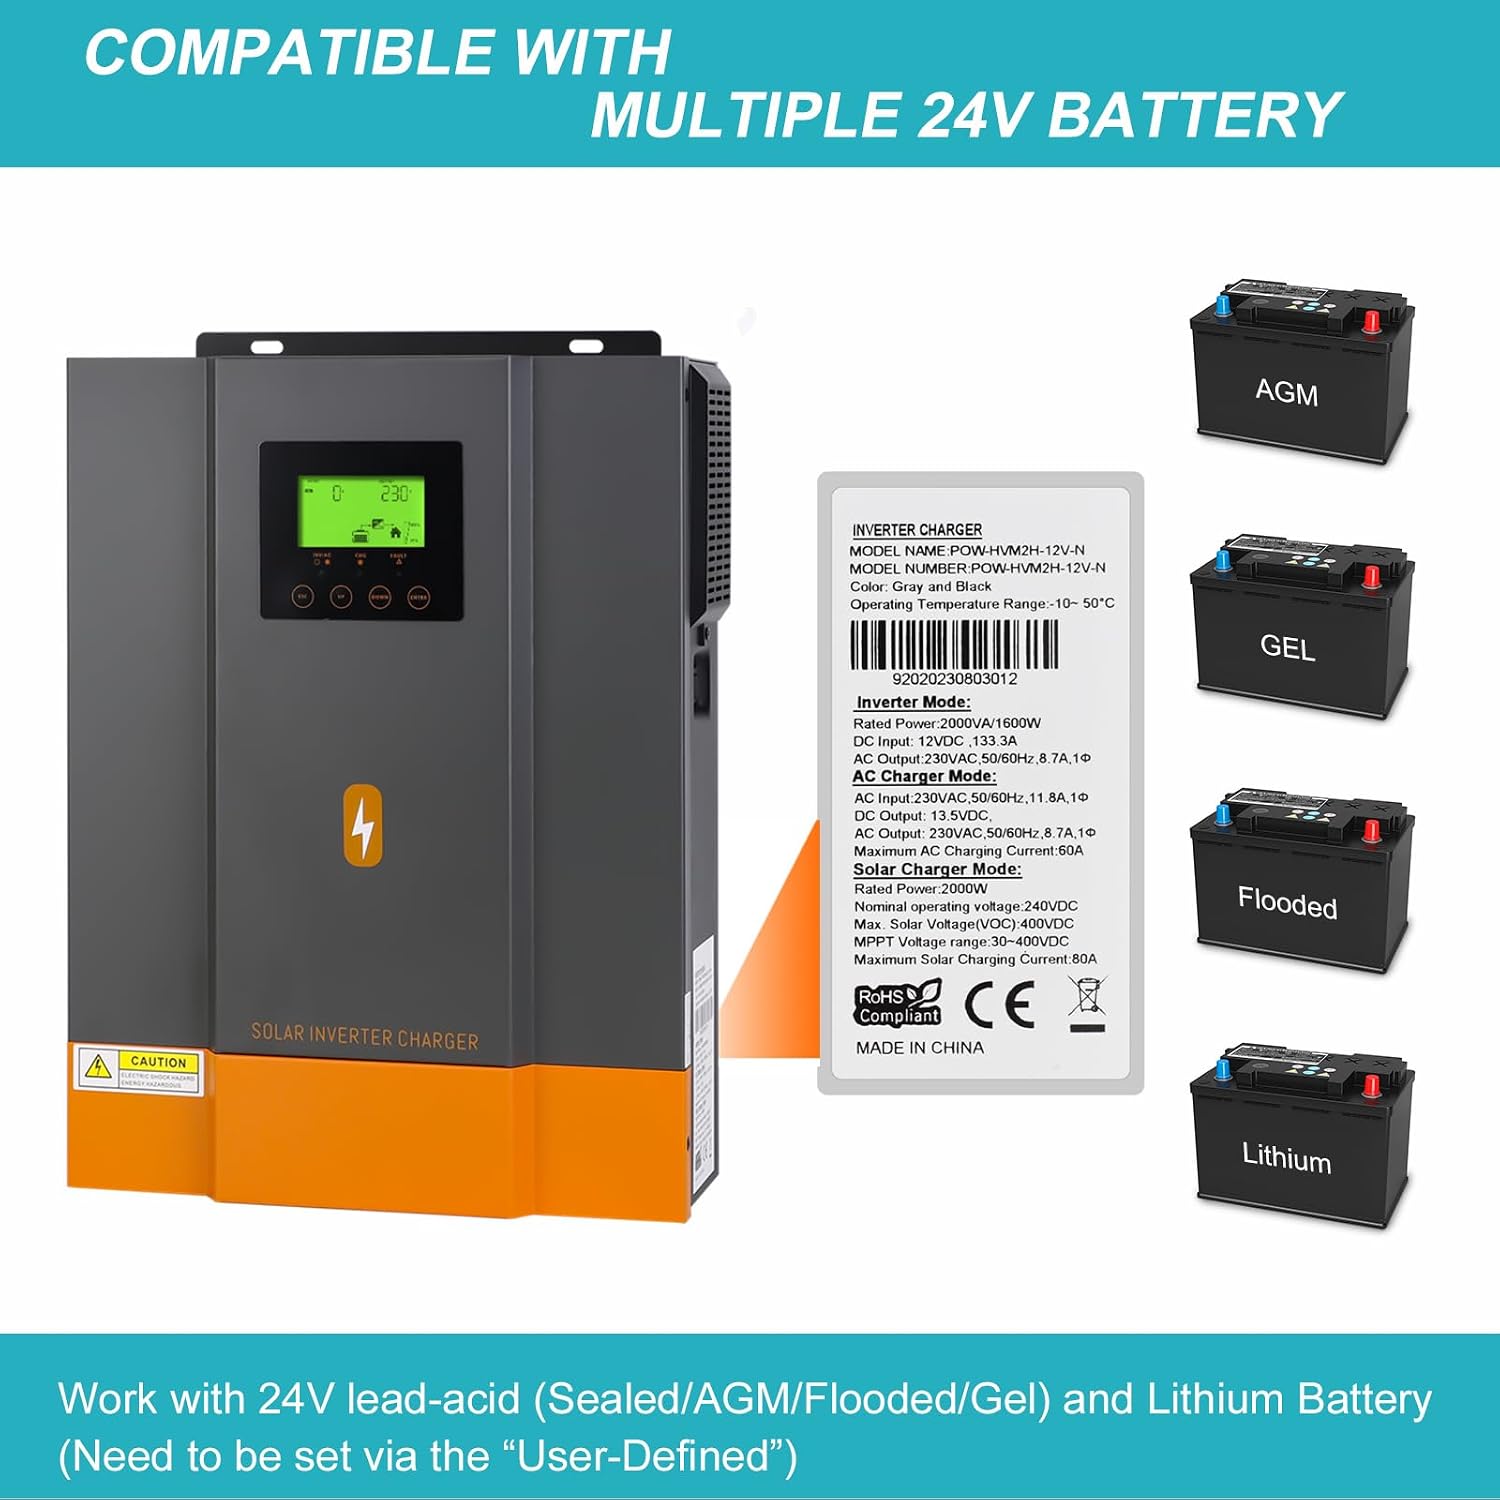
Figure 3.2: Battery compatibility of the PowMr Hybrid Solar Inverter, supporting various 12V battery types.
4. Setup and Installation
Before installation, ensure you have all necessary components and tools. Choose a suitable mounting location that is dry, well-ventilated, and away from direct sunlight or heat sources.
4.1 Mounting the Unit:
- Select a vertical surface strong enough to support the inverter's weight.
- Mark the positions for mounting screws using the inverter as a template.
- Drill pilot holes and secure the inverter to the wall using appropriate screws.
4.2 Wiring Connections:
WARNING: All wiring must comply with local electrical codes and regulations. Ensure all power sources are disconnected before making any connections.
- Battery Connection: Connect the battery cables to the inverter's battery terminals. Ensure correct polarity (+ to + and - to -). Recommended cable size: 16 AWG.
- PV Array Connection: Connect the solar panel array to the PV input terminals. Observe correct polarity and ensure the PV open circuit voltage (VOC) does not exceed 400V DC.
- AC Input Connection: Connect the AC utility grid or generator to the AC input terminals.
- AC Output Connection: Connect your AC loads to the AC output terminals.
- Grounding: Connect the inverter's ground terminal to a reliable earth ground.
After all connections are made, double-check all wiring for correctness and security before powering on the unit.
5. Operating Instructions
Once installed and wired, the inverter can be powered on and configured.
5.1 Powering On:
- Ensure the battery is connected and has sufficient charge.
- Turn on the battery breaker (if installed).
- Turn on the AC input breaker (if connected to utility/generator).
- Turn on the PV array breaker (if connected to solar panels).
- Press the power button on the inverter. The LCD display will light up.
5.2 LCD Display and Buttons:
The LCD display shows real-time system data, including input/output voltage, battery status, and charging/inverting modes. Use the buttons (ESC, UP, DOWN, ENTER) to navigate menus and adjust settings.
5.3 Charging Modes:
The inverter supports four charging modes, configurable via the LCD menu:
- Solar Charging: Prioritizes solar power for battery charging.
- Utility Priority: Prioritizes utility power for charging and powering loads.
- Solar Priority: Prioritizes solar power for loads, then utility if solar is insufficient.
- Hybrid Charging: Combines solar and utility power for optimal charging.

Figure 5.1: Available Charging and Load Output Modes.
5.4 Load Output Modes:
The inverter also offers three load output modes:
- PV Priority: Loads are powered primarily by solar, then battery, then utility.
- Utility Priority: Loads are powered primarily by utility, then battery.
- SBU Priority: Solar -> Battery -> Utility. Loads are powered by solar, then battery, then utility as a last resort.
5.5 WiFi Monitoring (Optional):
The inverter supports optional WiFi/GPRS modules for remote monitoring. This allows users to view system performance and change parameters in real-time via a mobile app or web interface. The WiFi module is not included and must be purchased separately.

Figure 5.2: Optional WiFi Monitoring capability.
6. Maintenance
Regular maintenance ensures the longevity and optimal performance of your inverter.
- Cleaning: Periodically clean the exterior of the inverter with a dry cloth. Do not use liquid cleaners.
- Ventilation: Ensure the ventilation openings are clear of dust and debris. The intelligent cooling fan helps maintain optimal temperature.
- Connections: Annually check all electrical connections for tightness and signs of corrosion.
- Battery Health: Monitor battery voltage and health according to battery manufacturer guidelines.

Figure 6.1: Intelligent Cooling Fan system.
7. Troubleshooting
This section lists common issues and their potential solutions. For problems not listed here, please contact customer support.
| Problem | Possible Cause | Solution |
|---|---|---|
| Inverter not turning on | No battery connection; Battery voltage too low; Power button not pressed. | Check battery connections; Charge battery; Press and hold power button. |
| No AC output | Overload; Battery low; Inverter fault. | Reduce load; Charge battery; Check fault codes on LCD. |
| Solar charging not working | PV input voltage too low/high; PV polarity reversed; Solar panels dirty/shaded. | Check PV voltage within range (30-400V DC); Verify PV polarity; Clean panels/remove shade. |
| Loud fan noise | High internal temperature; Dust accumulation. | Ensure adequate ventilation; Clean fan vents. |
8. Specifications
Technical specifications for the PowMr 1600W Hybrid Solar Inverter (Model: POW-HVM2H-12V-N).
| Parameter | Value |
|---|---|
| Model Number | POW-HVM2H-12V-N |
| Rated Power | 1600 W |
| Battery Voltage | 12 VDC |
| AC Output Voltage | 220V/230V AC |
| AC Output Frequency | 50/60 Hz (Auto sensing) |
| Max. PV Array Power | 2000 W |
| MPPT Operating Voltage Range | 30 - 400 VDC |
| Max. PV Array Open Circuit Voltage | 400 VDC |
| Max. Solar Charge Current | 80 A |
| Dimensions (L x W x H) | 42 x 19 x 3.5 cm |
| Weight | 4.6 kg |
9. Warranty and Support
For warranty information and technical support, please refer to the warranty card included with your product or visit the official PowMr website. If you require assistance, please have your model number (POW-HVM2H-12V-N) and purchase details ready.
For additional resources or to download a PDF version of this manual, please contact PowMr customer service via Amazon or their official channels.
Ask a question about this manual
Ask about setup, troubleshooting, compatibility, parts, safety, or missing instructions. Manuals+ will review the question and use this page’s manual context to help answer it.