1. Important Safety Information
Please read all instructions carefully before using your Milex MBM001 Bread Master. Keep this manual for future reference. Failure to follow these instructions may result in electric shock, fire, or serious injury.
- Always ensure the appliance is unplugged from the power outlet before cleaning or when not in use.
- Do not immerse the appliance, cord, or plug in water or any other liquid.
- This appliance is for household use only. Do not use outdoors.
- Keep hands, hair, clothing, and utensils away from moving parts during operation to prevent injury.
- Do not touch hot surfaces. Use oven mitts when handling hot parts like the bread pan or viewing window.
- Ensure the appliance is placed on a stable, heat-resistant surface, away from walls and other appliances to allow for proper ventilation.
- Do not operate the appliance with a damaged cord or plug, or after the appliance malfunctions or has been damaged in any manner.
- Children should be supervised to ensure they do not play with the appliance.
2. Product Overview
The Milex MBM001 Bread Master is an automatic bread maker designed to simplify the bread-making process. It features multiple programs, adjustable crust control, and an automatic seed and nut dispenser.
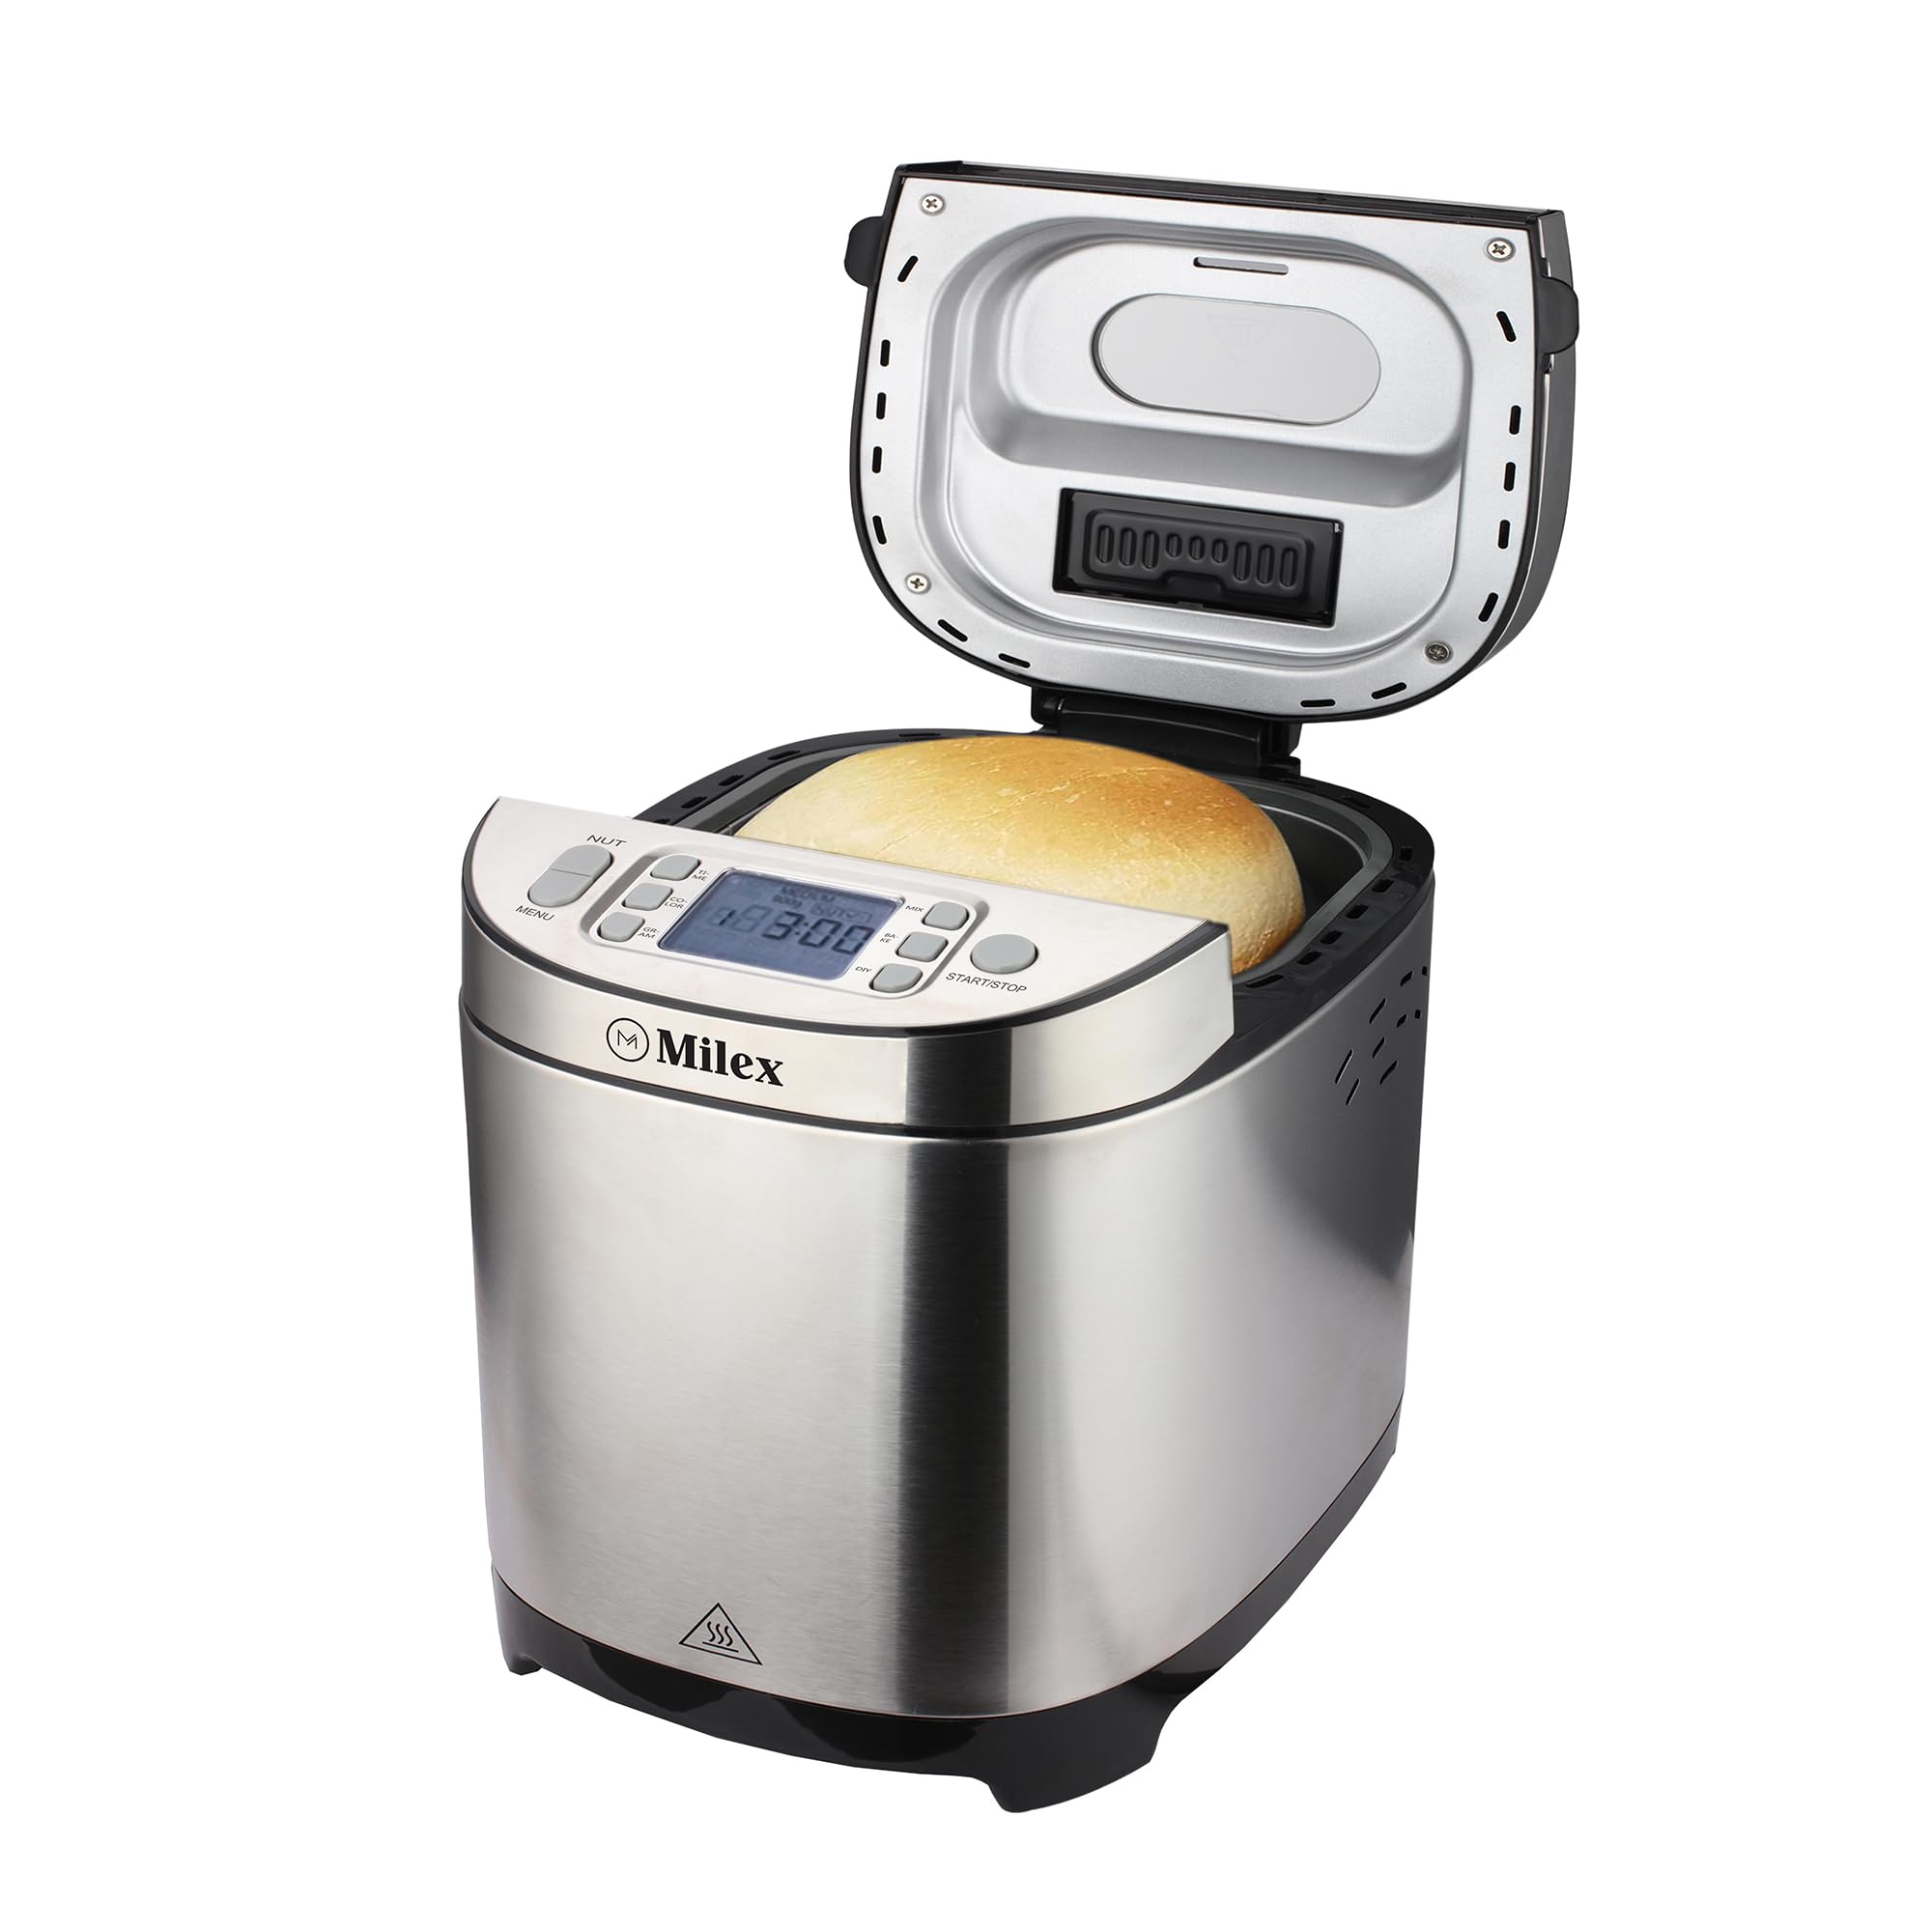
Image 1: Front view of the Milex MBM001 Bread Master. This image displays the sleek stainless steel exterior, the control panel with an LCD display, and the viewing window on the lid. The overall design is compact and modern, suitable for any kitchen countertop.
Components:
- Main Unit: Stainless steel body housing the motor and heating element.
- Control Panel: Features an LCD display and intuitive buttons for program selection, delay timer, and crust control.
- Viewing Window: Allows monitoring of the baking process without opening the lid.
- Bread Pan: Removable non-stick pan for easy cleaning and bread removal.
- Kneading Blade(s): Single kneading blade for mixing and kneading dough.
- Automatic Seed & Nut Dispenser: Detachable dispenser that releases ingredients at the optimal time.
- Measuring Cup & Spoon: Included accessories for accurate ingredient measurement.
3. Setup and First Use
3.1 Unpacking
- Carefully remove the bread maker and all accessories from the packaging.
- Check that all components listed in the "Product Overview" section are present.
- Remove any protective films or stickers from the appliance.
3.2 Initial Cleaning
- Wash the bread pan, kneading blade(s), measuring cup, and spoon in warm, soapy water. Rinse thoroughly and dry completely.
- Wipe the exterior of the bread maker with a damp cloth. Do not use abrasive cleaners.
- Ensure all parts are completely dry before assembly and use.
3.3 Placement
Place the bread maker on a stable, flat, and heat-resistant surface. Ensure there is adequate ventilation around the appliance, at least 10-15 cm (4-6 inches) of space from walls or other appliances.
4. Operating Instructions
4.1 Adding Ingredients
- Attach the kneading blade(s) to the shaft inside the bread pan.
- Add liquid ingredients first (water, milk, eggs, oil), followed by dry ingredients (flour, sugar, salt, dry milk).
- Make a small indentation in the center of the dry ingredients (not touching liquids) and add yeast.
- If using the automatic dispenser, add seeds, nuts, or dried fruit to the dispenser compartment. Do not overfill.
- Place the bread pan securely into the bread maker. Close the lid.
4.2 Program Selection
Plug the bread maker into a grounded power outlet. The display will light up, showing the default program (usually "Basic").
- Use the "Menu" button to cycle through the 12 available programs (e.g., Basic, French, Whole Wheat, Quick, Sweet, Gluten Free, Dough, Cake, Jam, Bake, Sandwich, Custom).
- Refer to the program chart in your recipe book for specific timings and recommended ingredients for each program.
4.3 Crust Control and Loaf Size
- Use the "Crust" button to select your desired crust color: Light, Medium, or Dark.
- The Milex MBM001 supports a 900g loaf size. Ensure your recipe is suitable for this capacity.
4.4 Delay Start Function
The 13-hour delay start feature allows you to program the bread maker to finish baking at a later time.
- After selecting the program, crust, and loaf size, press the "Delay" buttons (usually + and -) to set the desired delay time. This time includes the baking cycle.
- Press the "Start/Stop" button to activate the delay timer. The display will count down until the program begins.
- Caution: Do not use perishable ingredients (e.g., milk, eggs) with the delay start function in warm environments, as they may spoil.
4.5 Starting and Stopping
- To start a program immediately, select your desired settings and press the "Start/Stop" button.
- To stop a program, press and hold the "Start/Stop" button for a few seconds until the machine resets.
4.6 Keep Warm Function
After the baking cycle is complete, the bread maker will automatically enter a 1-hour "Keep Warm" phase. This keeps the bread warm and fresh until you are ready to remove it.
5. Maintenance and Cleaning
Regular cleaning ensures optimal performance and extends the life of your bread maker. Always unplug the appliance and allow it to cool completely before cleaning.
5.1 Bread Pan and Kneading Blade(s)
- Remove the bread pan from the unit. If the kneading blade is stuck in the bread, use the provided hook tool to carefully remove it.
- Wash the bread pan and kneading blade(s) with warm, soapy water. Do not use abrasive cleaners or scourers, as this can damage the non-stick coating.
- For stubborn residue, fill the pan with warm water and a small amount of dish soap, let it soak for 10-15 minutes, then clean.
- Rinse thoroughly and dry completely before storing or next use.
5.2 Automatic Seed & Nut Dispenser
- Detach the dispenser from the lid.
- Clean any residue with a small brush or damp cloth. Ensure it is completely dry before reattaching.
5.3 Exterior and Interior
- Wipe the exterior of the bread maker with a soft, damp cloth.
- Clean the interior of the baking chamber with a damp cloth, removing any crumbs or spills.
- Do not use harsh chemicals or immerse the main unit in water.
6. Troubleshooting
If you encounter issues with your Milex MBM001 Bread Master, refer to the following common problems and solutions:
| Problem | Possible Cause | Solution |
|---|---|---|
| Bread does not rise. | Expired yeast, incorrect water temperature, too much salt/sugar, wrong flour type. | Check yeast expiry. Use lukewarm water (38-43°C). Ensure correct ingredient measurements. Use bread flour. |
| Bread is too dense/heavy. | Too much flour, too little liquid, old yeast. | Measure ingredients accurately. Ensure proper liquid-to-flour ratio. Check yeast activity. |
| Bread collapses during baking. | Too much liquid, too much yeast, high humidity. | Reduce liquid slightly. Reduce yeast amount. Adjust recipe for humid conditions. |
| Kneading blade stuck in bread. | Common occurrence. | Allow bread to cool slightly, then use the provided hook tool to carefully remove the blade. |
| Machine not starting. | Not plugged in, power outage, lid not closed properly. | Check power connection. Ensure lid is securely closed. |
If the problem persists after trying these solutions, please contact Milex customer support.
7. Specifications
| Feature | Detail |
|---|---|
| Model Number | MBM001 |
| Brand | Milex |
| Power / Wattage | 550W |
| Voltage / Frequency | 220-240V~ 50Hz |
| Material | Stainless Steel |
| Loaf Capacity | 900g (approx. 900 Milliliters) |
| Programs | 12 Digital Programs (e.g., Basic, Gluten Free, Quick, Cake) |
| Delay Timer | Up to 13 Hours |
| Keep Warm Function | 1 Hour |
| Crust Control | Light, Medium, Dark |
| Dimensions (Product) | 38.4D x 28.4W x 38.8H cm (approx.) |
| Item Weight | 4.88 kg |
| Special Features | Automatic Seed & Nut Dispenser, Non-stick Bread Pan, LCD Display, Viewing Window, Non-slip feet |
8. Warranty and Customer Support
For information regarding the product warranty, please refer to the warranty card included with your purchase or visit the official Milex website. Keep your proof of purchase for any warranty claims.
If you require technical assistance, have questions about operation, or need to order spare parts, please contact Milex customer support. Contact details can typically be found on the Milex website or on the product packaging.
Note: Spare part information was not available or provided in the product data. Please contact Milex directly for spare part inquiries.


