
1. Introduction
Thank you for choosing the Behringer U-PHORIA UM2 USB Audio Interface bundle. This manual provides essential information for setting up, operating, and maintaining your audio interface, headphones, and XLR cable. The UM2 is a compact 2x2, 48 kHz USB audio interface designed for recording microphones and instruments directly to your computer. It features a studio-grade XENYX Mic Preamp, combination XLR/TRS input, and an additional 1/4" instrument input.
This bundle includes:
- Behringer U-PHORIA UM2 USB Audio Interface
- Closed-Back Studio Monitor Headphones
- 15' XLR M to F Professional Microphone Cable
- USB Cable
2. Safety Instructions
Please read and follow these safety guidelines to ensure proper operation and prevent damage to the device or injury.
- Power Source: Connect the device only to the USB port of your computer. The UM2 is USB-powered and does not require an external power supply.
- Moisture: Do not expose the device to rain or moisture. Do not use it near water.
- Heat: Avoid placing the device near heat sources such as radiators, heat registers, stoves, or other heat-producing apparatus.
- Ventilation: Ensure adequate ventilation around the device. Do not block any ventilation openings.
- Cleaning: Clean only with a dry cloth.
- Servicing: Do not attempt to service this product yourself. Refer all servicing to qualified service personnel.
- Cables: Use only the specified attachments/accessories. Protect power cords from being walked on or pinched.
- Hearing Protection: Prolonged listening at high volume levels through headphones can cause hearing damage. Always set the volume to a comfortable level.
3. Package Contents
Verify that all items listed below are included in your package:
- Behringer U-PHORIA UM2 USB Audio Interface
- USB Cable
- Closed-Back Studio Monitor Headphones
- 15' XLR M to F Professional Microphone Cable
4. Setup
4.1 Connecting the U-PHORIA UM2
The Behringer U-PHORIA UM2 is a plug-and-play device for most modern operating systems (Windows and Mac). No special drivers are typically required, but it is recommended to check the official Behringer website for the latest drivers or firmware updates if you encounter any issues.
- Connect to Computer: Use the provided USB cable to connect the UM2's USB port to an available USB port on your computer. The device will power on automatically.
- Connect Microphone/Line Input: For microphones or line-level devices, connect your XLR or 1/4" TRS cable to the MIC/LINE 1 combo input on the front panel.
- Connect Instrument Input: For guitars or other instruments, connect a 1/4" TS cable to the INST 2 input on the front panel.
- Connect Headphones: Plug your studio monitor headphones into the 1/4" HEADPHONES output on the front panel.
- Connect Outputs: For connecting to studio monitors or an amplifier, use RCA cables to connect the OUTPUTS 1 (L) and 2 (R) on the rear panel.
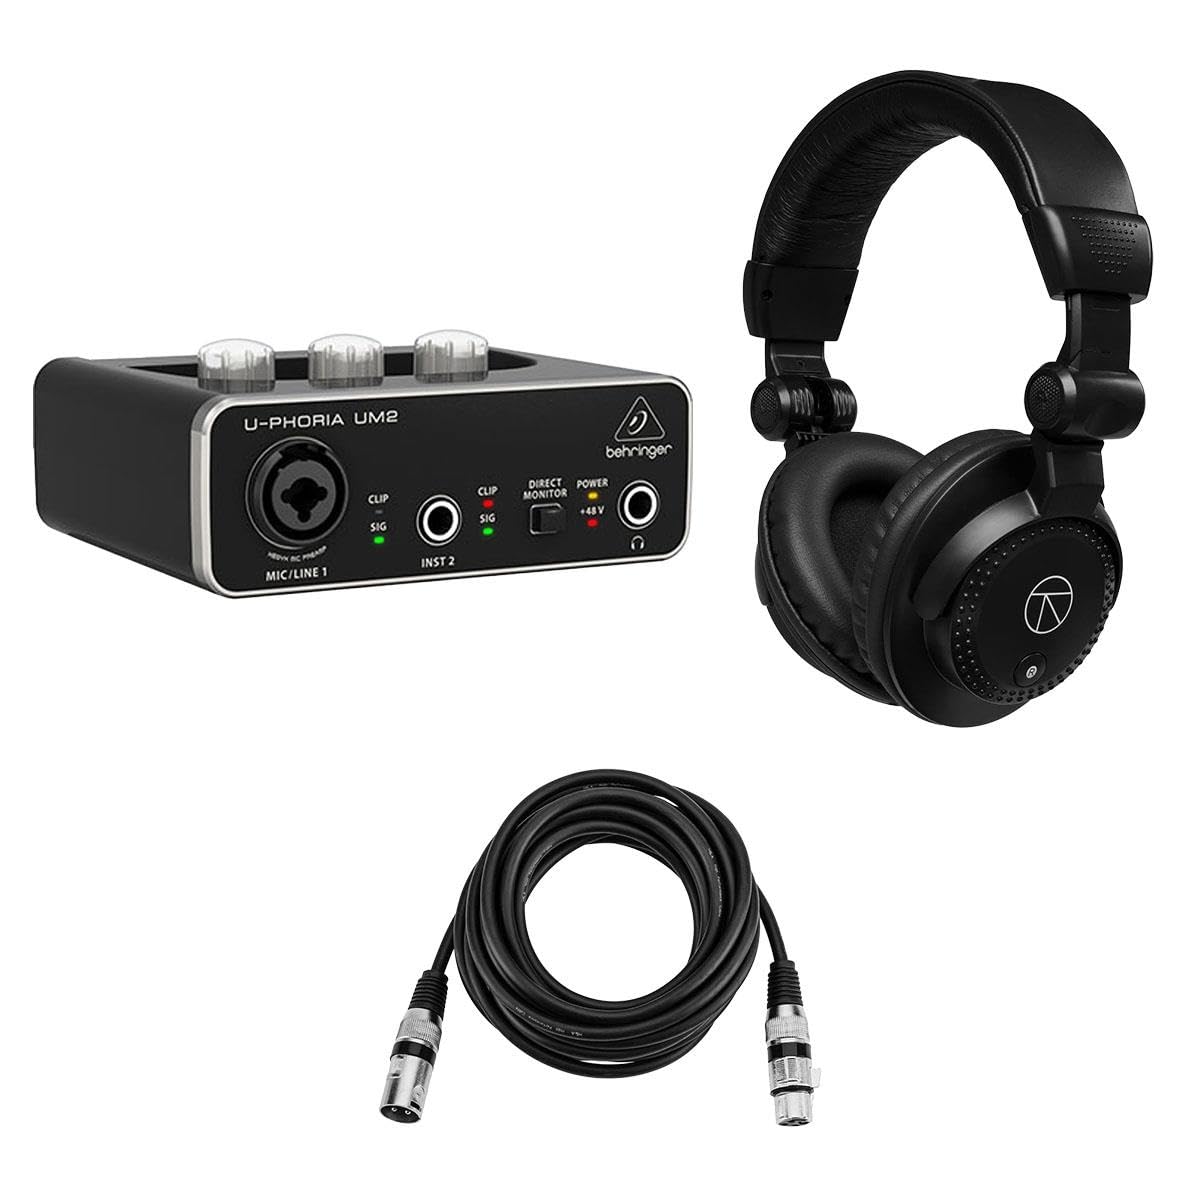
Figure 1: Front view of the Behringer U-PHORIA UM2 audio interface, showing inputs for microphone/line and instrument, headphone output, and control knobs.

Figure 2: Rear view of the Behringer U-PHORIA UM2 audio interface, showing USB port, RCA outputs, and +48V phantom power switch.
4.2 Connecting Headphones and XLR Cable
The included closed-back studio monitor headphones connect to the 1/4" headphone jack on the UM2. The 15' XLR M to F professional microphone cable is used to connect a microphone to the MIC/LINE 1 input of the UM2.

Figure 3: Included closed-back studio monitor headphones for monitoring audio.

Figure 4: 15-foot XLR male to female microphone cable for connecting microphones.
5. Operating the UM2
5.1 Controls and Indicators
Familiarize yourself with the controls and indicators on your UM2 interface:
- MIC/LINE 1 GAIN: Adjusts the input level for the microphone/line input.
- INST 2 GAIN: Adjusts the input level for the instrument input.
- OUTPUT: Controls the overall output volume for the RCA outputs and headphone output.
- CLIP/SIG LEDs:
- SIG (Signal): Lights green when an input signal is detected.
- CLIP: Lights red when the input signal is too high, indicating potential distortion. Reduce the gain if this LED illuminates.
- DIRECT MONITOR Switch: Engages direct monitoring, allowing you to hear your input signal directly through the headphones with zero latency.
- POWER LED: Lights when the device is powered on via USB.
- +48V Switch: Activates phantom power for condenser microphones connected to MIC/LINE 1. The corresponding LED lights when active.

Figure 5: Close-up of the UM2 front panel, highlighting gain knobs, signal/clip indicators, direct monitor switch, and headphone jack.
5.2 Recording Process
- Connect Inputs: Connect your microphone to MIC/LINE 1 and/or instrument to INST 2.
- Enable Phantom Power (if needed): If using a condenser microphone, switch on the +48V phantom power.
- Set Gain Levels: Speak into the microphone or play your instrument. Adjust the corresponding GAIN knob (MIC/LINE 1 GAIN or INST 2 GAIN) until the SIG LED lights consistently and the CLIP LED only flashes occasionally during the loudest peaks. Avoid constant clipping.
- Engage Direct Monitoring: Flip the DIRECT MONITOR switch to hear your input signal directly through your headphones without latency.
- Set Output Volume: Adjust the OUTPUT knob to a comfortable listening level through your headphones or studio monitors.
- Software Setup: Open your Digital Audio Workstation (DAW) software (e.g., Audacity, GarageBand, Ableton Live, Pro Tools). Select the Behringer UM2 as your audio input and output device in the software's preferences or settings.
- Record: Create a new audio track in your DAW, arm it for recording, and begin recording.
6. Maintenance
To ensure the longevity and optimal performance of your Behringer U-PHORIA UM2 bundle, follow these maintenance guidelines:
- Cleaning: Use a soft, dry cloth to wipe down the audio interface, headphones, and cables. Do not use liquid cleaners or solvents.
- Storage: When not in use, store the equipment in a clean, dry place away from extreme temperatures and direct sunlight.
- Cable Care: Avoid sharp bends or kinks in the cables. Do not pull on the cables to disconnect them; always grasp the connector.
- Headphone Care: Keep headphone earcups clean. Avoid dropping the headphones or exposing them to excessive force.
7. Troubleshooting
If you encounter issues with your Behringer U-PHORIA UM2 bundle, refer to the following common troubleshooting steps:
| Problem | Possible Cause / Solution |
|---|---|
| No power to UM2 | Ensure the USB cable is securely connected to both the UM2 and a powered USB port on your computer. Try a different USB port or cable. |
| No sound from headphones/outputs |
|
| No input signal (no SIG LED) |
|
| Distorted audio (CLIP LED lights frequently) | Reduce the GAIN knob for the input that is clipping. Ensure your microphone/instrument output level is not excessively high. |
| Latency during recording | Engage the DIRECT MONITOR switch on the UM2. In your DAW, reduce the buffer size in audio settings (this may increase CPU load). |
If these steps do not resolve your issue, please refer to the Behringer support website or contact their customer service.
8. Specifications
Key technical specifications for the Behringer U-PHORIA UM2:
- Interface Type: 2x2 USB Audio Interface
- Resolution: 48 kHz
- Preamplifier: XENYX Mic Preamp
- Inputs: 1x XLR/TRS Combo (Mic/Line), 1x 1/4" TS (Instrument)
- Outputs: 2x RCA (Main Out), 1x 1/4" TRS (Headphones)
- Phantom Power: +48V switchable
- Connectivity: USB 2.0
- Compatible Devices: Headphones
- Operating System Compatibility: Windows XP (and newer), macOS
- Item Weight: Approximately 3.08 pounds
- Product Dimensions: Approximately 9.75 x 7.25 x 3.75 inches
9. Warranty and Support
The Behringer U-PHORIA UM2 bundle typically comes with a manufacturer's warranty. The product description indicates an Adorama 1 Year Limited Warranty. Please retain your proof of purchase for warranty claims.
For technical support, driver downloads, or further assistance, please visit the official Behringer website or contact their customer support directly. You may also refer to the retailer (Adorama) for specific warranty details and support options.
Online Resources:
- Behringer Official Website: www.behringer.com
- Adorama Support: www.adorama.com/support


