
Blooy 3011700900
Contents
Blooy 3011700900 Lower Looper Instruction Manual
For JACK W4, JK-8569 Industrial Flatlock Coverstitch Sewing Machines
1. Product Overview
This manual provides essential information for the installation, operation, and maintenance of the Blooy 3011700900 Lower Looper. This precision-engineered component is designed to ensure optimal performance of compatible industrial flatlock coverstitch sewing machines.
The lower looper is a critical part of the sewing machine's stitch formation mechanism, working in conjunction with the upper looper and needles to create secure and consistent stitches, particularly in coverstitch applications.
Compatibility
The Blooy 3011700900 Lower Looper is specifically designed to fit the following industrial flatlock coverstitch sewing machine models:
- JACK W4 Series
- JACK JK-8569 Series
Please verify your machine's model number before installation to ensure proper fit and function.
2. Safety Precautions
- Always disconnect the sewing machine from the power supply before performing any installation, maintenance, or cleaning.
- Use appropriate tools and follow instructions carefully to avoid injury or damage to the machine.
- Keep small parts away from children.
- If unsure about any step, consult a qualified sewing machine technician.
3. Setup and Installation
Installing the lower looper requires careful attention to detail. Refer to your sewing machine's specific service manual for detailed diagrams and instructions if available.
Required Tools:
- Small screwdriver (flathead or Phillips, depending on machine screws)
- Tweezers or needle-nose pliers (optional, for handling small parts)
- Lint brush or compressed air for cleaning
Installation Steps:
- Power Disconnection: Ensure the sewing machine is turned off and unplugged from the electrical outlet.
- Access the Looper Area: Open the front or side cover of your sewing machine to access the looper mechanism. This may involve unscrewing a few cover plates.
- Remove Old Looper (if applicable): Carefully identify the existing lower looper. Loosen the screw(s) that secure the looper in place. Gently remove the old looper, noting its exact orientation and position.
- Clean the Area: Before installing the new looper, thoroughly clean any lint, dust, or thread debris from the looper area using a lint brush or compressed air.
- Install New Looper: Position the Blooy 3011700900 Lower Looper into its designated slot. Ensure it is oriented correctly, matching the position of the old looper. The part number "3011700900" is often visible on the looper itself.
- Secure the Looper: Gently tighten the screw(s) that hold the looper in place. Do not overtighten, as this can strip the threads or damage the looper. The looper should be firmly seated but still allow for smooth movement if it's a moving part.
- Check Alignment and Timing: This is a critical step. After installation, manually turn the machine's handwheel to observe the interaction between the lower looper, upper looper, and needles. The looper must be correctly timed with the needle bar for proper stitch formation. If you are unfamiliar with timing adjustments, it is highly recommended to consult your machine's service manual or a professional technician.
- Replace Covers: Once the looper is installed and checked for basic movement, replace any covers or plates that were removed.
- Test Stitching: Plug in the machine and perform test stitching on scrap fabric to confirm proper function and stitch quality.

Figure 3.1: Front view of the Blooy 3011700900 Lower Looper, showing its general shape and the part number engraving.

Figure 3.2: Image indicating the compatibility of the looper with JACK W4 and JK-8569 models.
4. Operating Considerations
Once installed, the lower looper operates as an integral part of your sewing machine's stitch formation system. No direct user operation of the looper itself is required during sewing.
Proper functioning of the lower looper is dependent on:
- Correct installation and timing with other machine components.
- Using appropriate thread types and tensions for your fabric and stitch type.
- Regular cleaning and maintenance of the entire looper area.
5. Maintenance
Regular maintenance of the lower looper and surrounding area is crucial for extending the lifespan of the part and ensuring consistent stitch quality.
Cleaning:
- Frequency: Clean the looper area after every few hours of sewing, or more frequently if sewing linty fabrics.
- Procedure:
- Disconnect power to the machine.
- Open the looper cover.
- Use a lint brush or small vacuum attachment to remove all accumulated lint and thread snippets from around the lower looper, upper looper, and feed dogs.
- Avoid using compressed air directly into the machine without proper ventilation, as it can push debris further into mechanisms.
Lubrication:
Refer to your sewing machine's specific manual for lubrication points and recommended oil types. Generally, areas where metal parts rub against each other, including the looper shaft, may require a drop of high-quality sewing machine oil.
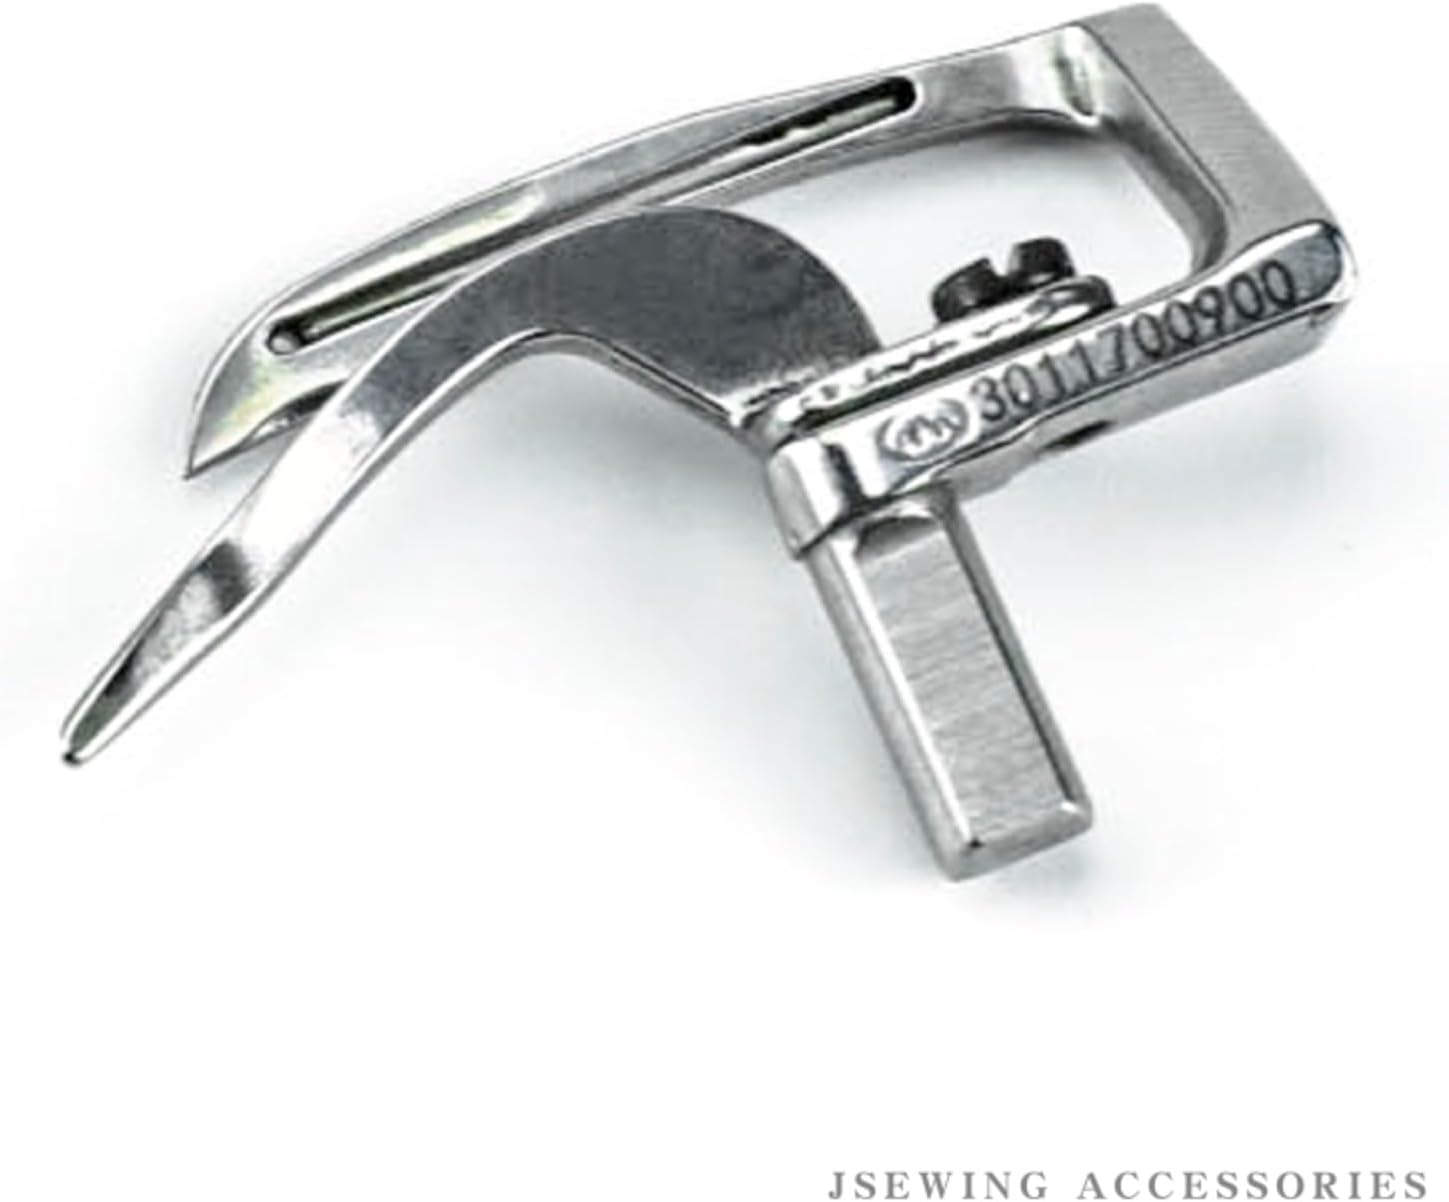
Figure 5.1: Side view of the lower looper, showing the precision design and part number.
6. Troubleshooting
If you experience issues after installing the new lower looper, consider the following common problems and solutions:
| Problem | Possible Cause | Solution |
|---|---|---|
| Skipped Stitches | Incorrect looper timing or needle-to-looper clearance. Looper not seated correctly. Damaged needle. | Re-check looper installation and timing. Ensure the looper is securely fastened. Replace the needle. Consult machine manual for timing adjustments. |
| Thread Breakage (Looper Thread) | Rough edges on looper, incorrect threading, excessive tension, lint accumulation. | Inspect looper for burrs (replace if damaged). Re-thread the machine carefully. Adjust looper thread tension. Clean looper area thoroughly. |
| Poor Stitch Quality (Loose/Tight) | Incorrect tension settings, improper threading, wrong needle size/type. | Adjust looper and needle tensions. Verify all threads are correctly routed. Use appropriate needles for fabric and thread. |
| Machine Jamming | Looper obstruction, severe timing issue, thread nest. | Disconnect power, clear any thread jams. Re-check looper installation and timing. If jamming persists, seek professional service. |
If troubleshooting steps do not resolve the issue, it is recommended to contact a certified sewing machine technician or the machine manufacturer for assistance.
7. Specifications
| Attribute | Detail |
|---|---|
| Part Number | 3011700900 |
| Product Type | Lower Looper |
| Brand | Blooy |
| Compatibility | JACK W4, JK-8569 Industrial Flatlock Coverstitch Sewing Machines |
| Material | Metal (specific alloy not provided) |
| Dimensions (Approx.) | 6 x 4 x 2 inches (Product packaging dimensions) |
| UPC | 794697679969 |
| Country of Origin | China |

Figure 7.1: Angled view of the lower looper, highlighting its intricate design.

Figure 7.2: Top-down view of the lower looper, showing the overall form factor.

Figure 7.3: Bottom view of the lower looper, revealing additional structural details.
8. Warranty and Support
Specific warranty information for the Blooy 3011700900 Lower Looper is typically provided by the seller or manufacturer at the time of purchase. Please retain your proof of purchase for any warranty claims.
For technical support, installation queries, or warranty service, please contact the retailer or the Blooy manufacturer directly. Contact information can usually be found on the product packaging or the seller's website.
It is recommended to consult a professional sewing machine technician for complex repairs or adjustments, especially concerning machine timing.
Documents and downloads
Ask a question about this manual
Ask about setup, troubleshooting, compatibility, parts, safety, or missing instructions. Manuals+ will review the question and use this page’s manual context to help answer it.