Model: SQ11 | 1080p Mini Night Vision Security Camera
1. Product Overview
The GOWENIC SQ11 is a compact 1080p surveillance camera designed for discreet monitoring in home or office environments. It features a 160-degree wide viewing angle, night vision capabilities, and a built-in 200mAh battery for portable use. Its small size allows for easy placement and concealment.
Image: The GOWENIC SQ11 camera positioned in a room, demonstrating its compact size and potential for discreet placement.
2. Package Contents
Please verify that all items listed below are included in your package:
GOWENIC SQ11 Camera
USB Charging/Data Cable
Adjustable Mounting Bracket
Clip Mount
User Manual (this document)
Image: All components of the GOWENIC SQ11 package, including the camera, USB cable, and various mounting accessories.
Video: An overview of the GOWENIC SQ11 camera and its included accessories, demonstrating how to assemble the mounting bracket.
3. Setup
3.1 Charging the Camera
Before initial use, fully charge the camera's internal battery. Connect the supplied USB cable to the camera's mini-USB port and the other end to a 5V 1A (or higher) USB power source (e.g., computer USB port, wall adapter). The indicator light will show charging status (refer to LED indicator section for details).
Image: A detailed view of the GOWENIC SQ11 camera, highlighting the mini-USB port for charging and data transfer.
3.2 Inserting a MicroSD Card
The camera requires a MicroSD card (not included) for recording video. Insert the MicroSD card into the card slot with the gold contacts facing down until it clicks into place. Ensure the card is formatted to FAT32 for optimal performance. The camera supports cards up to 32GB.
3.3 Mounting Options
The GOWENIC SQ11 comes with two mounting accessories:
Adjustable Mounting Bracket: This bracket allows for angle adjustment and can be placed on a flat surface or screwed into a wall.
Clip Mount: Use this clip to attach the camera to clothing, bags, or other thin objects for portable surveillance.
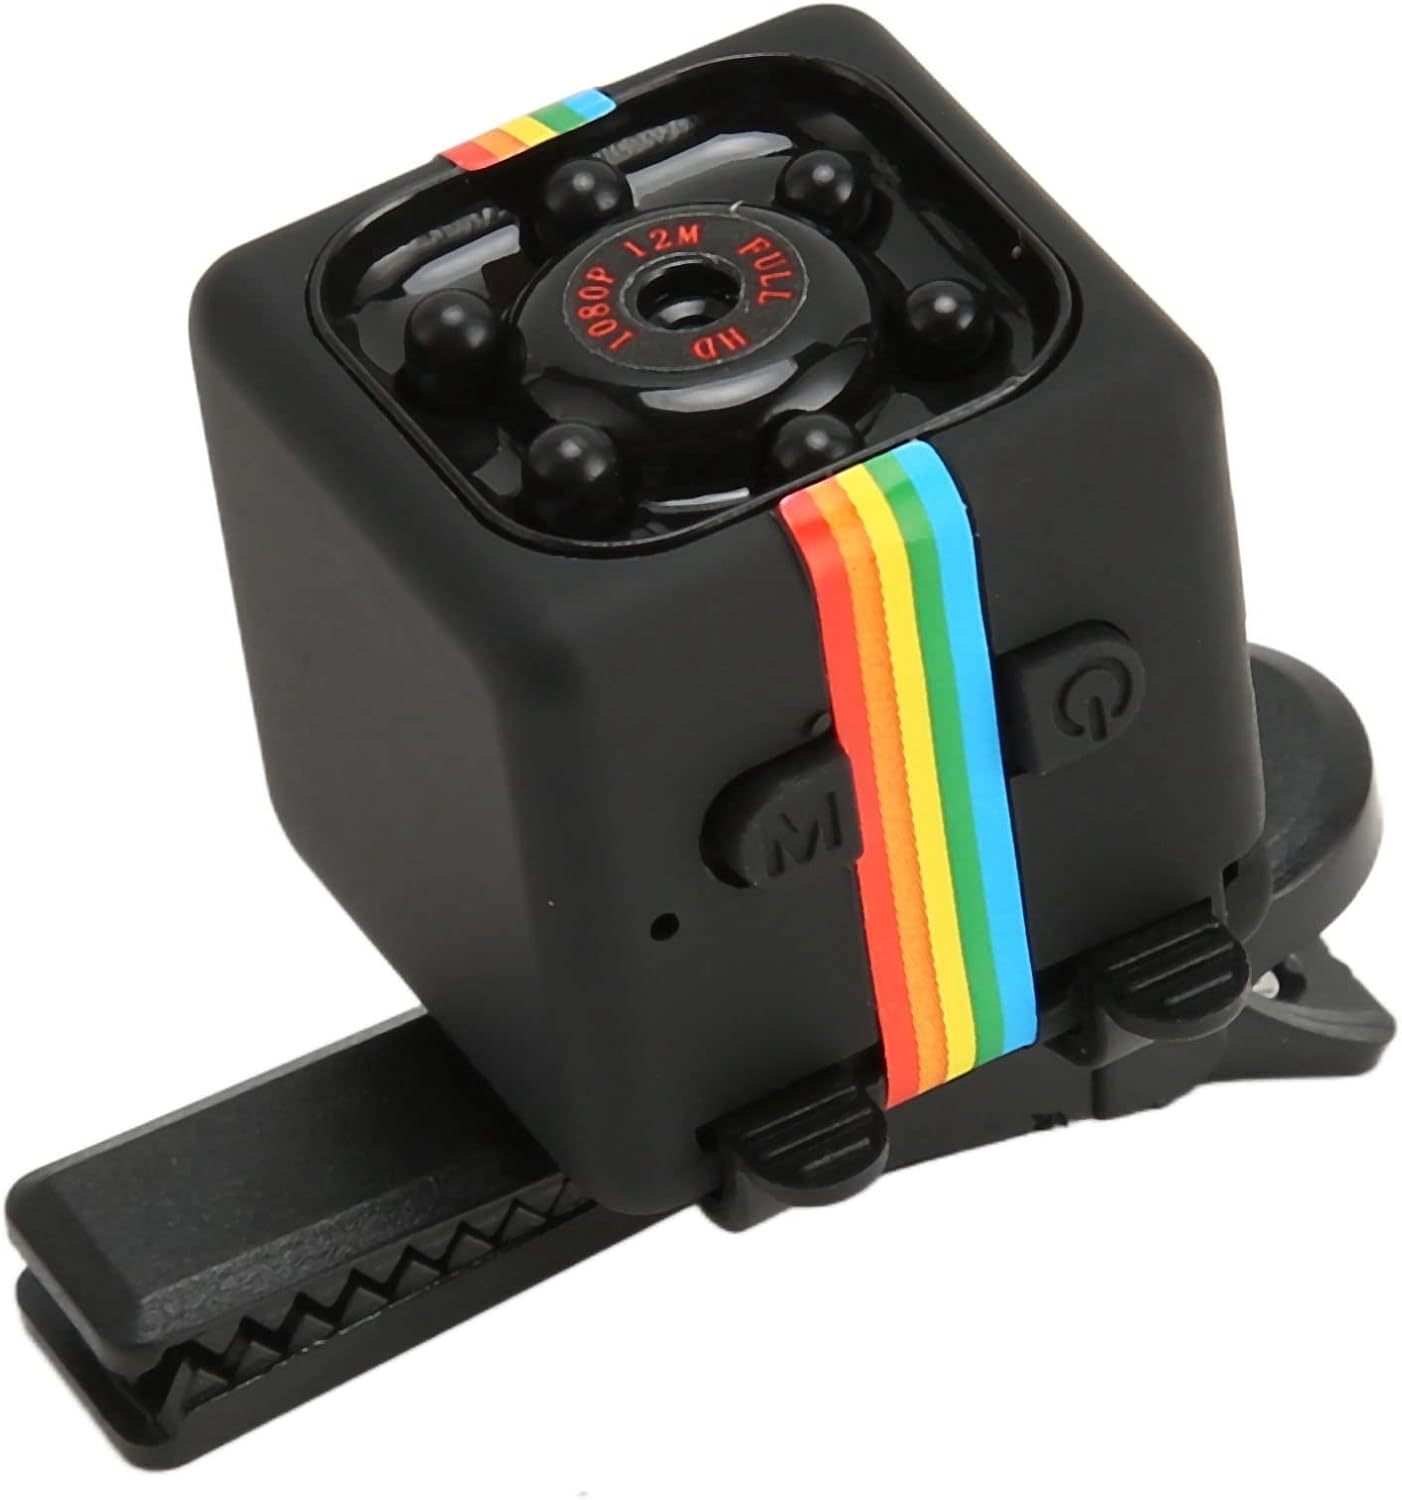
Image: The GOWENIC SQ11 camera attached to the clip mount, demonstrating its portability.
4. Operating Instructions
4.1 Powering On/Off
Power On: Press and hold the Power button for approximately 2 seconds until the blue indicator light turns on.
Power Off: Press and hold the Power button for approximately 5 seconds until the indicator lights turn off.
Image: Top view of the GOWENIC SQ11 camera, clearly showing the power and mode buttons.
4.2 Recording Video (1080P)
Ensure the camera is powered on and a formatted MicroSD card is inserted.
Press the Mode button to select 1080P video recording mode (indicated by specific LED pattern, refer to LED guide).
Press the Power button once to start recording. The indicator light will flash to confirm recording is in progress.
Press the Power button again to stop recording. The camera will save the video file and return to standby mode.
4.3 Night Vision Mode
The camera automatically activates night vision in low-light conditions. No manual activation is required.
Image: Close-up of the GOWENIC SQ11 camera lens, showing the surrounding infrared LEDs for night vision.
4.4 Motion Detection Mode
To activate motion detection recording:
Power on the camera.
Press the Mode button repeatedly until the camera enters motion detection standby mode (indicated by specific LED pattern).
The camera will automatically begin recording when motion is detected and stop when motion ceases.
4.5 Connecting to an External Power Bank
For extended recording times, connect the camera to an external 10000mAh (or larger) power bank using the supplied USB cable. This can provide up to 30 hours of continuous operation.
Image: The GOWENIC SQ11 camera shown with its USB cable, illustrating how it can be connected to an external power source for continuous operation.
5. Maintenance
Cleaning: Use a soft, dry cloth to clean the camera body and lens. Avoid using liquid cleaners or abrasive materials.
Storage: Store the camera in a cool, dry place away from direct sunlight and extreme temperatures when not in use.
Battery Care: To prolong battery life, avoid fully discharging the battery frequently. Charge the camera regularly, even if not in active use.
Firmware Updates: Check the GOWENIC official website periodically for any available firmware updates to ensure optimal performance and new features.
6. Troubleshooting
Problem
Possible Cause / Solution
Camera does not power on or charge.
Ensure the USB cable is securely connected to both the camera and a working power source.
Try a different USB cable or power adapter.
The battery might be completely drained; allow it to charge for a longer period (e.g., 2-3 hours).
Video recording is inconsistent or stops unexpectedly.
Check if the MicroSD card is full. Transfer files to a computer and format the card.
Ensure the MicroSD card is properly inserted and not corrupted. Try a different, high-quality MicroSD card.
The battery might be low. Charge the camera or connect it to an external power source.
Poor video quality (blurry, dark).
Ensure the camera lens is clean and free from smudges or dust.
Verify that the camera is set to 1080P recording mode.
Ensure sufficient lighting for optimal video quality during the day.
Night vision is not working.
Night vision activates automatically in low light. Ensure the environment is dark enough.
Check for any obstructions blocking the infrared LEDs around the lens.
7. Specifications
Feature
Detail
Video Resolution
1080p (Full HD)
Viewing Angle
160 Degrees
Battery Capacity
200mAh
Battery Life (approx.)
50 minutes (up to 30 hours with 10000mAh power bank)
Night Vision
Supported (automatic)
Motion Detection
Supported
Storage
MicroSD card (up to 32GB, FAT32 format)
Connectivity
Wired (USB for charging/data)
Dimensions
Approximately 2x2x2 cm (compact design)
Item Weight
1.76 ounces
8. Warranty and Support
For warranty information, technical support, or service inquiries, please refer to the documentation provided with your purchase or contact GOWENIC customer service directly. Keep your proof of purchase for warranty claims.
You can often find support contact details on the official GOWENIC website or through the retailer where the product was purchased.