
LILYGO T-Deck
Contents
LILYGO T-Deck ESP32-S3 Development Board User Manual
Model: T-Deck
1. Introduction
Welcome to the user manual for the LILYGO T-Deck ESP32-S3 Development Board. This document provides essential information for setting up, operating, maintaining, and troubleshooting your device. The LILYGO T-Deck is a versatile development board featuring an ESP32-S3FN16R8 dual-core LX7 microprocessor, 2.4 GHz Wi-Fi, Bluetooth 5 (LE) connectivity, and a 2.8-inch LCD, designed for various embedded projects and applications.
2. Product Overview
The LILYGO T-Deck combines a powerful microcontroller with a compact form factor, including a keyboard and display, making it suitable for portable and interactive projects. Key features include:
- MCU: ESP32-S3FN16R8 Dual-core LX7 microprocessor
- Wireless Connectivity: 2.4 GHz Wi-Fi, Bluetooth 5 (LE)
- Display: 2.8 inch ST7789 SPI Interface IPS LCD (320x240 resolution)
- Onboard Functions: Trackball, Microphone, Speaker
- Development Support: Arduino, PlatformIO-IDE, Micropython
- Memory: 16MB PSRAM, 8MB Flash

Figure 2.1: Front and back view of the LILYGO T-Deck ESP32-S3 Development Board, showcasing the LCD, keyboard, and main components on the PCB.
3. Package Contents
Please verify that all items are present in your package:
- 1 x LILYGO T-Deck Development Board
- 1 x 6-pin Header
- 1 x Power Cable
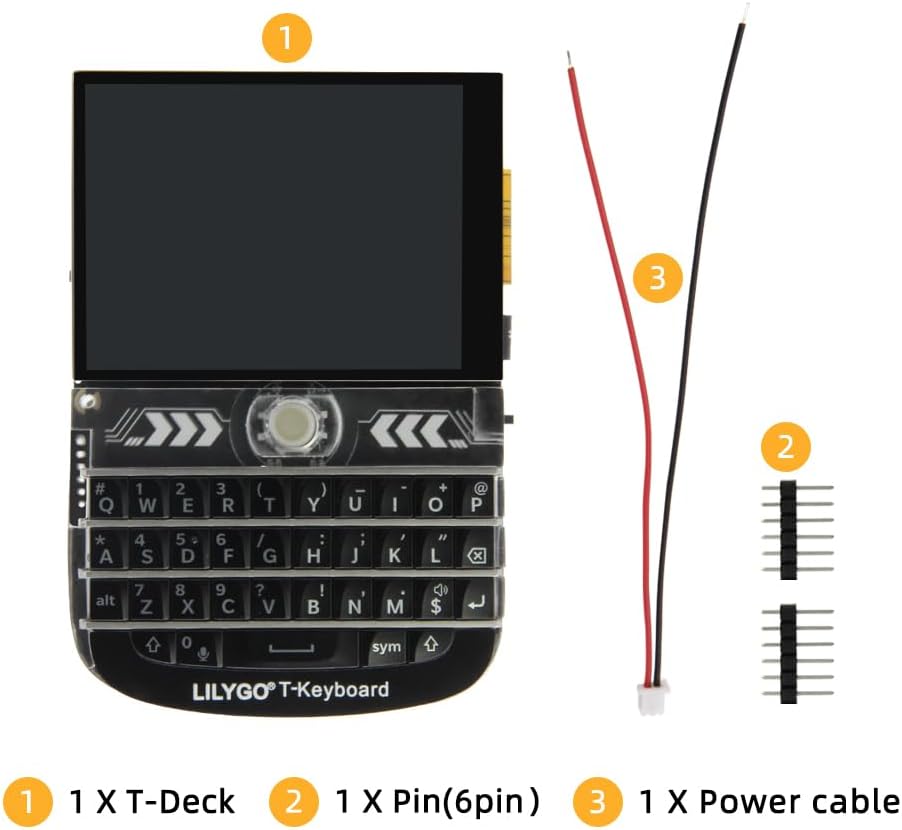
Figure 3.1: Contents of the LILYGO T-Deck package, showing the main board, a 6-pin header, and a power cable.
4. Setup Guide
Follow these steps for the initial setup of your LILYGO T-Deck:
- Power Connection: Connect the provided power cable to the appropriate port on the T-Deck. Ensure the power source meets the board's voltage requirements.
- Pin Header Installation (Optional): If your project requires external connections, solder or attach the 6-pin header to the designated GPIO pins on the board. Refer to the pinout diagram for correct orientation and pin assignments.
- Development Environment Setup: To program the T-Deck, you will need to set up a development environment. LILYGO T-Deck supports Arduino IDE, PlatformIO-IDE, and Micropython. Detailed instructions and example code can be found on the official LILYGO GitHub repository: github.com/Xinyuan-LilyGO/T-Deck.
- First Boot: Once powered, the LCD should illuminate. If pre-flashed with firmware, it may display initial information or a demo.

Figure 4.1: Detailed pinout diagram and board function overview for the LILYGO T-Deck, showing connections for LCD, TF Card, USB, and various GPIOs.
5. Operating Instructions
The LILYGO T-Deck is designed for custom application development. Its operation largely depends on the firmware loaded onto it. Here are general guidelines:
- Power On/Off: Connect or disconnect the power cable. Some boards may have a dedicated power button or switch.
- LCD Display: The 2.8-inch LCD provides visual output for your applications. Its 320x240 resolution and full viewing angle make it suitable for displaying text, graphics, and simple user interfaces.
- Keyboard and Trackball: Interact with your applications using the integrated keyboard and trackball. The trackball typically provides navigation (up, down, left, right, press).
- Audio: The onboard speaker and microphone allow for audio input and output, depending on your application's requirements.
- Connectivity: Utilize Wi-Fi and Bluetooth for wireless communication with other devices or networks.
- Firmware Updates: Regularly check the LILYGO GitHub repository for the latest firmware, examples, and documentation to enhance functionality and address any known issues.
6. Maintenance
To ensure the longevity and optimal performance of your LILYGO T-Deck, follow these maintenance guidelines:
- Keep Clean: Use a soft, dry cloth to gently clean the board and display. Avoid using liquid cleaners or abrasive materials.
- Handle with Care: The board contains sensitive electronic components. Avoid dropping or subjecting it to physical shock.
- Storage: Store the T-Deck in a cool, dry environment, away from direct sunlight, extreme temperatures, and high humidity.
- Power Supply: Always use a stable and appropriate power supply to prevent damage to the board.
- Firmware Management: Keep your firmware updated to benefit from bug fixes and new features. Back up your custom code before flashing new firmware.
7. Troubleshooting
If you encounter issues with your LILYGO T-Deck, consider the following troubleshooting steps:
- Board Not Powering On:
- Ensure the power cable is securely connected.
- Verify that the power source is providing the correct voltage and current.
- Check for any visible damage to the power port or cable.
- LCD Not Displaying:
- Confirm the board is powered on.
- If you've flashed custom firmware, ensure the display initialization code is correct.
- Check the display ribbon cable connection to the main board.
- Connectivity Issues (Wi-Fi/Bluetooth):
- Verify your firmware includes the necessary Wi-Fi/Bluetooth libraries and configurations.
- Ensure correct network credentials are provided in your code.
- Check for interference from other wireless devices.
- Programming Errors:
- Ensure you have the correct board selected in your IDE (Arduino, PlatformIO).
- Install all required drivers for the USB-to-serial converter.
- Check your code for syntax errors or logical flaws.
For more specific issues or advanced troubleshooting, refer to the LILYGO GitHub repository or community forums.
8. Technical Specifications
| Feature | Specification |
|---|---|
| MCU | ESP32-S3FN16R8 Dual-core LX7 microprocessor |
| Wireless Connectivity | 2.4 GHz Wi-Fi, Bluetooth 5 (LE) |
| Display | 2.8 inch ST7789 SPI Interface IPS LCD, 320x240 resolution, Full viewing angle |
| Flash Memory | 16MB |
| PSRAM | 8MB |
| Onboard Peripherals | Trackball, Microphone, Speaker |
| Battery ADC Pin | IO04 |
| Dimensions (Approx.) | Height: 10cm, Width: 6.8cm, Thickness: 1.1cm |
| Operating System Support | Linux (for development environment) |

Figure 8.1: Detailed technical specifications and a visual representation of the LILYGO T-Deck's key components and functions.

Figure 8.2: LILYGO T-Deck showing approximate dimensions (Height: 10cm, Width: 6.8cm, Thickness: 1.1cm).
9. Support and Warranty
For any questions, suggestions, or technical support regarding your LILYGO T-Deck, please feel free to contact LILYGO directly. You can often find support resources, including forums and contact information, on the official LILYGO website or their GitHub page.
While specific warranty details may vary, LILYGO is committed to providing quality products. If you experience any manufacturing defects or issues not covered by troubleshooting, please reach out to the seller or manufacturer for assistance.
For the latest information and community support, visit: github.com/Xinyuan-LilyGO/T-Deck
Ask a question about this manual
Ask about setup, troubleshooting, compatibility, parts, safety, or missing instructions. Manuals+ will review the question and use this page’s manual context to help answer it.