1. Introduction
This manual provides detailed instructions for the Transformers Studio Series Voyager Class 06 Gamer Edition Starscream action figure. This collectible figure is inspired by the Transformers: War for Cybertron video game and features the ability to convert between robot and jet modes. Please read this manual thoroughly to ensure proper handling, transformation, and care of your figure.
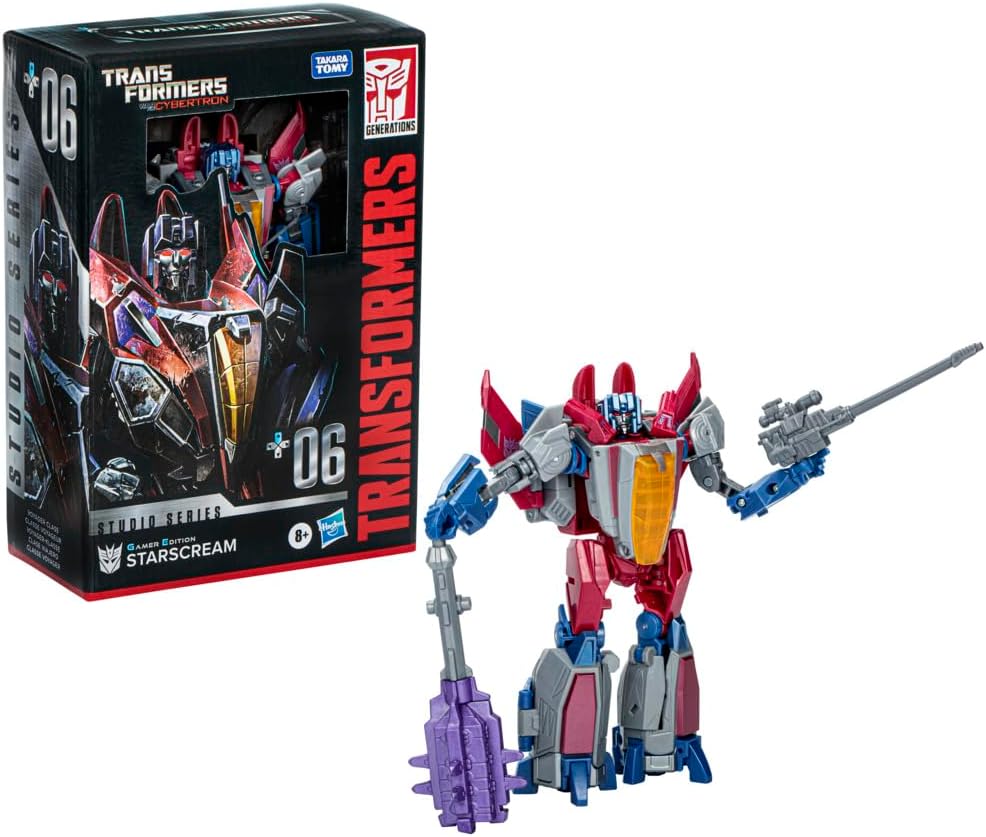
Image: The Starscream figure in robot mode, displayed alongside its product packaging. The packaging highlights the "Studio Series" and "Gamer Edition" branding, indicating its origin from the War for Cybertron video game.
2. Safety Information
Warning: Choking Hazard – Small parts may be generated. Not for children under 3 years. This product is recommended for ages 8 years and up.
- Keep small parts away from young children to prevent accidental ingestion.
- Do not force joints or parts during transformation, as this may cause breakage.
- Inspect the figure regularly for any damage or loose parts.
3. What's in the Box
Your Transformers Studio Series Voyager 06 Gamer Edition Starscream package should contain the following items:
- Starscream Action Figure
- 2 Shoulder Pieces
- 1 Blaster Accessory
- 1 Two-piece Mace Accessory
- Removable Backdrop (Fuel of War scene)
- Instruction Sheet
4. Assembly and Transformation
The Starscream figure converts between robot and jet modes in 27 steps. Follow these general guidelines for transformation. Refer to the included instruction sheet for detailed visual steps.
4.1 Initial Assembly (Robot Mode)
Upon unboxing, ensure the two shoulder pieces are attached to the figure. These are typically found in a separate small bag within the packaging.

Image: Front view of the Starscream figure in its robot mode, showcasing its articulation and design details.

Image: Back view of the Starscream figure in its robot mode, showing the rear design and potential transformation hinges.
4.2 Converting to Jet Mode (27 Steps)
The transformation process involves manipulating various panels, joints, and hinges. It is crucial to apply gentle, firm pressure and avoid forcing any parts. If a part feels stuck, re-examine the previous steps or consult the included instruction sheet for visual guidance.
- Begin by detaching any accessories from the figure.
- Carefully articulate the arms and legs to align with the jet form.
- Fold and collapse panels to form the fuselage and wings of the jet.
- Ensure all tabs and slots are securely connected to form a cohesive jet mode.
- The transformation is designed to be precise; if parts do not align, gently retrace your steps.

Image: The Starscream figure fully transformed into its jet mode, showcasing the sleek vehicle form.
4.3 Converting to Robot Mode
To convert back to robot mode, reverse the steps taken for jet mode transformation. Pay attention to the alignment of the robot's limbs and torso as you unfold the jet components.
5. Accessories
Your Starscream figure comes with several accessories to enhance play and display:
- Blaster: This weapon can be held in the figure's hand or attached as an arm cannon by swapping out the figure's arm.
- Two-piece Mace: This melee weapon can be assembled and held by the figure.
- Shoulder Pieces: These are small aesthetic pieces that attach to the figure's shoulders in robot mode. Ensure they are securely fastened.
- Removable Backdrop: The "Fuel of War" backdrop can be used to display your Starscream figure in a dynamic scene.

Image: The Starscream figure in robot mode, equipped with its blaster and mace accessories, demonstrating how they can be held.
6. Care and Maintenance
To ensure the longevity of your Starscream action figure, follow these care guidelines:
- Cleaning: Wipe the figure with a soft, dry cloth. For stubborn dirt, a slightly damp cloth can be used, but avoid harsh chemicals or abrasive cleaners.
- Storage: Store the figure away from direct sunlight, extreme temperatures, and high humidity to prevent discoloration or material degradation.
- Handling: Always handle the figure by its main body parts. Avoid excessive force on joints or thin plastic components.
- Joint Care: If joints become loose over time, a small amount of clear nail polish or a specialized joint tightener can be applied to the joint peg and allowed to dry, but this should be done with caution.
7. Troubleshooting
If you encounter issues with your Starscream figure, consider the following:
| Problem | Possible Cause / Solution |
|---|---|
| Parts do not tab securely in place. | Ensure all previous transformation steps are correctly executed. Sometimes, a slight adjustment in one area can affect alignment in another. Do not force. |
| Joints feel too tight or stiff. | Apply gentle, consistent pressure. Some joints may be stiff initially. Avoid twisting or bending in unintended directions. If very stiff, carefully warm the joint slightly with warm water (not hot) or a hairdryer on low setting, then attempt to move. |
| Figure does not fully convert to jet mode. | Review the instruction sheet carefully, paying close attention to the order of steps and the orientation of parts. Ensure all panels are folded and aligned as shown. |
| Accessories do not attach properly. | Verify that you are using the correct accessory for the intended port. Ensure the port is clear of debris. |
8. Specifications
| Feature | Detail |
|---|---|
| Product Dimensions | 6.25 x 3.19 x 9 inches (packaging) |
| Item Weight | 7.7 ounces |
| Model Number | F8765AX00 |
| Manufacturer Recommended Age | 8 years and up |
| Release Date | December 16, 2023 |
| Language | English |
| Manufacturer | Hasbro |
| Transformation Steps | 27 steps (Robot to Jet) |
9. Warranty and Support
For product support, warranty information, or to inquire about replacement parts, please contact Hasbro customer service. Details can typically be found on the product packaging or on the official Hasbro website.
You can visit the official Transformers brand store for more information and products: Transformers Store on Amazon.


