
1. Introduction
Thank you for choosing the ABASK Dash Cam J05 PRO-2. This manual provides detailed instructions for the installation, operation, and maintenance of your dash cam. Please read this manual thoroughly before use to ensure proper functionality and to maximize your device's performance. Keep this manual for future reference.
2. Product Overview
2.1 Package Contents
- ABASK Dash Cam J05 PRO-2
- Car Mount (Suction Cup)
- Car Charger
- USB Cable
- 32GB Micro SD Card
- User Manual
2.2 Device Layout
The ABASK J05 PRO-2 dash cam features a compact design with a front-facing camera and an interior-facing camera, a 1.45-inch display, and intuitive controls.

Image 2.2.1: Overview of the ABASK J05 PRO-2 Dash Cam and its accessories.

Image 2.2.2: Detailed view of the dash cam's front and interior cameras.
3. Setup
3.1 Inserting the Micro SD Card
Before first use, insert the provided 32GB Micro SD card (or another compatible card up to 128GB, Class 10 or higher) into the designated slot on the dash cam. Ensure the card is inserted correctly until it clicks into place.

Image 3.1.1: Dash cam with a 32GB Micro SD card, illustrating where to insert the card.
3.2 Mounting the Dash Cam
- Clean the windshield area where you intend to mount the dash cam.
- Attach the suction cup mount to the windshield, ensuring a secure grip.
- Slide the dash cam onto the mount until it locks into position.
- Adjust the camera angle to ensure a clear view of the road ahead and the vehicle interior.
3.3 Power Connection
- Connect the car charger to the dash cam's power input port.
- Plug the other end of the car charger into your vehicle's 12V power outlet (cigarette lighter socket).
- Route the power cable neatly to avoid obstructing your view or interfering with driving controls.
4. Operating Instructions
4.1 Power On/Off
- Automatic: The dash cam will automatically power on and begin recording when your vehicle's engine starts and power is supplied.
- Manual: Press and hold the Power button to manually turn the device on or off.
4.2 Basic Recording
Once powered on, the dash cam will typically start recording automatically. A red indicator light or on-screen icon will confirm recording is active. To stop recording, press the OK button. Press it again to resume.
4.3 Menu Navigation
Use the 'Menu' button to access settings. Navigate through options using the Up/Down arrow buttons and confirm selections with the 'OK' button. Press 'Menu' again to exit the menu.
4.4 Date and Time Setting
It is important to set the correct date and time for accurate timestamps on your recordings. Access the 'Date/Time' setting in the menu and adjust accordingly.
5. Features Explained
5.1 4K Front and 1080P Interior Video Recording
The J05 PRO-2 captures high-resolution video, with the front camera recording in 4K (Ultra HD) and the interior camera recording in 1080P (Full HD). This dual-camera system provides comprehensive coverage of both the road and the vehicle's cabin.

Image 5.1.1: Illustration of 4K front and 1080P interior video capture.
5.2 Wi-Fi Connectivity and App Control
Connect your dash cam to your smartphone via Wi-Fi using the dedicated app. This allows you to:
- View live footage from the dash cam.
- Adjust dash cam settings directly from your phone.
- Download recorded videos to your phone.
- Share videos easily.
Image 5.2.1: Demonstrating Wi-Fi app control for the dash cam.
5.3 Super Night Vision
Equipped with an F1.8 aperture, 4 infrared (IR) lights, and Wide Dynamic Range (WDR) technology, the dash cam enhances video clarity in low-light conditions, ensuring usable footage even in complete darkness.

Image 5.3.1: Visual representation of Super Night Vision capabilities.
5.4 G-Sensor and Emergency Lock
The built-in G-Sensor detects sudden impacts or collisions. When triggered, it automatically locks the current video footage, preventing it from being overwritten by loop recording. This ensures critical incident evidence is preserved.
5.5 Loop Recording
Loop recording ensures continuous recording by overwriting the oldest unlocked footage with new video once the memory card reaches its capacity. This eliminates the need for manual memory card management.

Image 5.5.1: Explanation of G-Sensor, Emergency Lock, and Loop Recording functions.
5.6 24 Hours Motion Activated Parking Mode
When enabled, this mode allows the dash cam to monitor your vehicle for motion or impact even when parked. If motion or an impact is detected, the dash cam will automatically start recording. A Mini USB hardwire kit (not included) is required for this function to provide continuous power.
5.7 Wide-Angle Field of View
The dash cam offers a total 310° wide-angle field of view, with 170° for the front camera and 140° for the interior camera, providing extensive coverage of your surroundings and cabin.
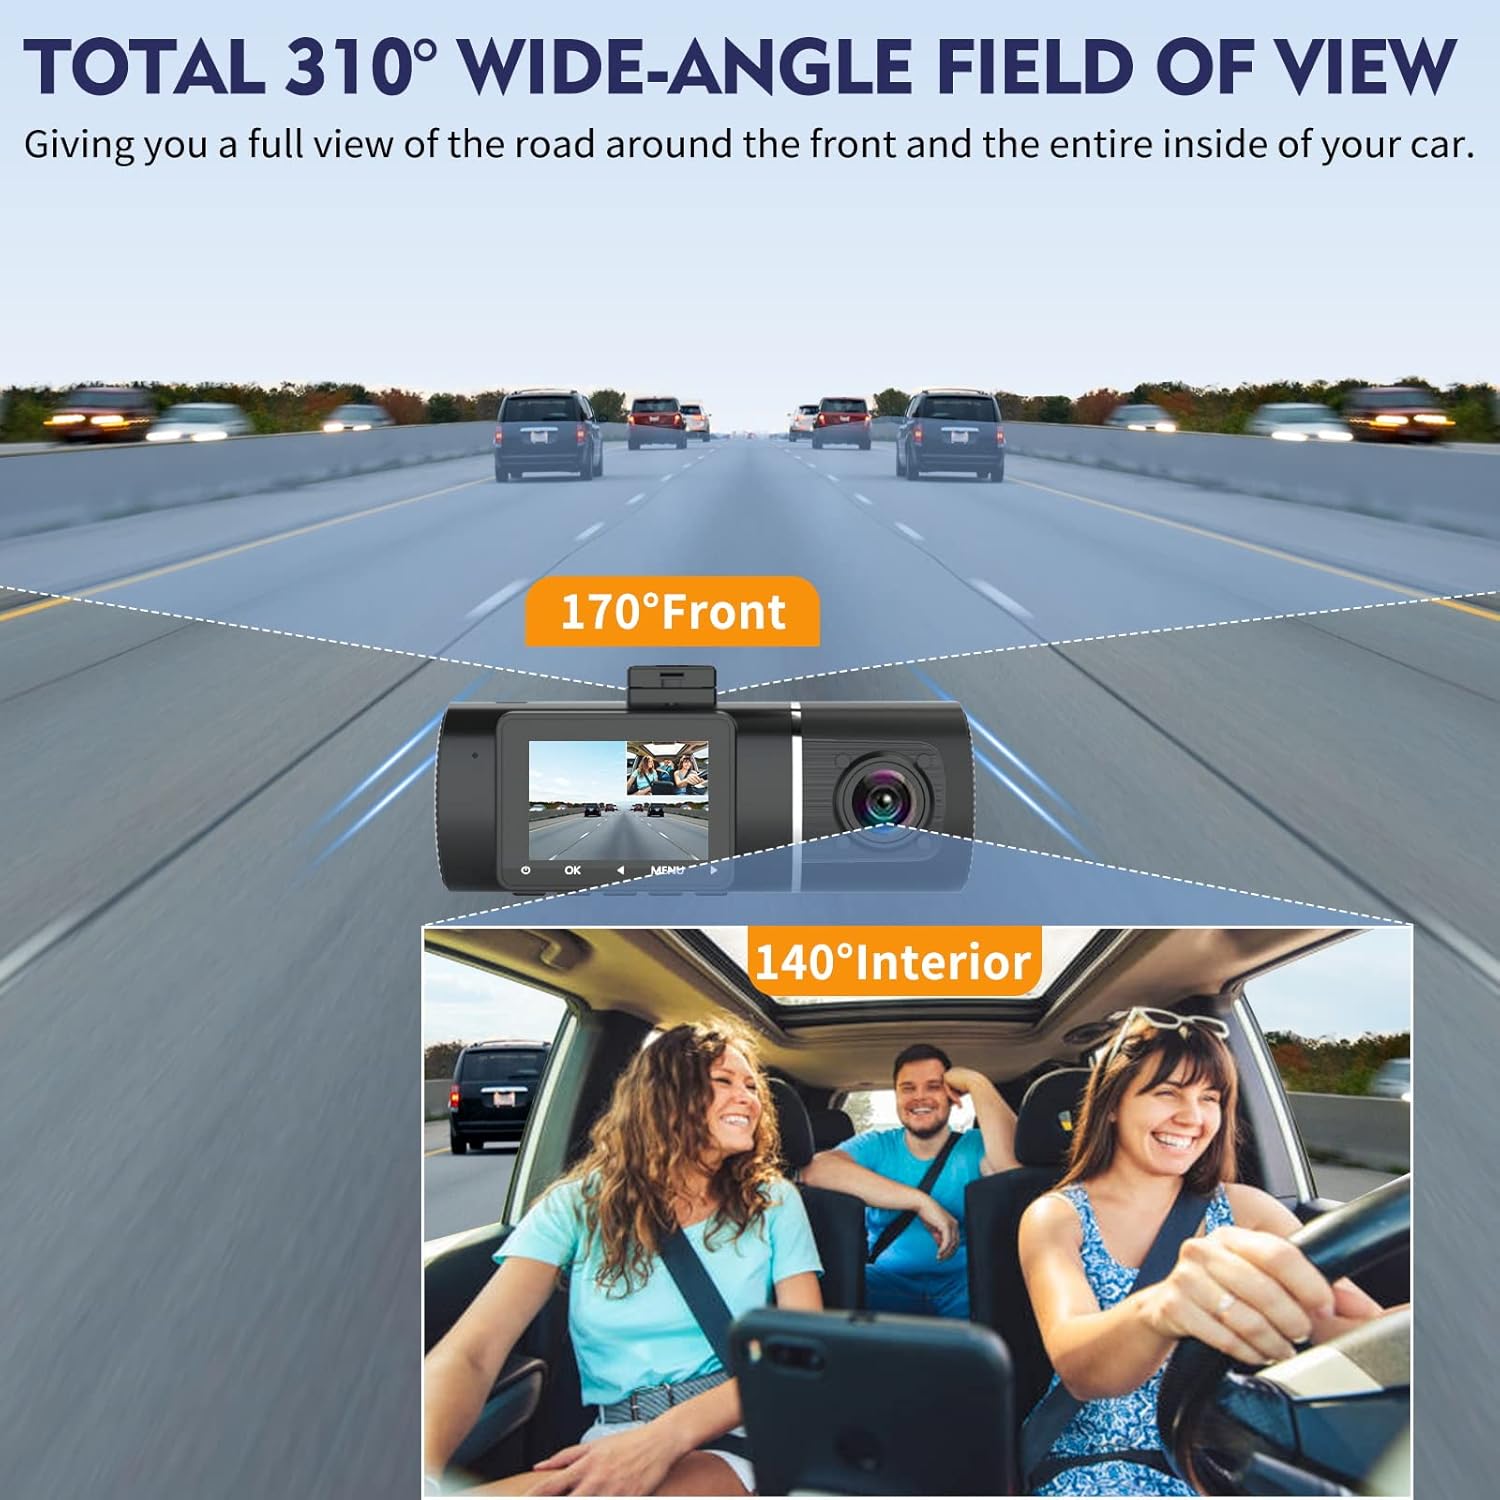
Image 5.7.1: Visualizing the 24-hour parking mode and wide-angle field of view.
6. Maintenance
- Memory Card Formatting: It is recommended to format the Micro SD card regularly (e.g., once a month) to maintain optimal recording performance and prevent data corruption. This can usually be done through the dash cam's menu settings.
- Lens Cleaning: Gently clean the camera lenses with a soft, lint-free cloth to ensure clear video quality. Avoid abrasive materials or harsh chemicals.
- Firmware Updates: Check the manufacturer's website periodically for any available firmware updates. Updates can improve performance and add new features.
7. Troubleshooting
| Problem | Possible Cause | Solution |
|---|---|---|
| Dash cam does not power on. | No power supply; faulty car charger; loose connection. | Check car charger connection; test car charger in another port; ensure vehicle's 12V outlet is functional. |
| Dash cam does not record automatically or stops recording. | Memory card full or corrupted; loop recording off; power interruption. | Format the Micro SD card; ensure loop recording is enabled in settings; check power connection stability. If the camera turns off after engine start, manually press the power button to restart recording. |
| Video footage is blurry or unclear. | Protective film on lens; dirty lens; incorrect focus. | Remove any protective film from the lens; clean the lens with a soft cloth. |
| Wi-Fi connection issues. | Incorrect app; Wi-Fi not enabled on dash cam; signal interference. | Ensure you have the correct ABASK dash cam app; enable Wi-Fi in the dash cam settings; try connecting in a different location. |
| Loop recording does not seem to work. | Memory card issues; G-Sensor sensitivity too high. | Format the memory card. Reduce G-Sensor sensitivity to prevent too many files from being locked, which can fill the card. |
8. Specifications
| Feature | Detail |
|---|---|
| Brand | ABASK |
| Model | J05 PRO-2 |
| Video Capture Resolution | Front: 4K, Interior: 1080P |
| Screen Size | 1.45 Inches |
| Actual Viewing Angle | Front: 170 Degrees, Interior: 140 Degrees |
| Connectivity Technology | Wi-Fi |
| Included Memory Card Size | 32 GB (Supports up to 128 GB) |
| Mounting Hardware | Car Mount (Suction Cup) |
| Product Dimensions | 4.5 x 11 x 5 cm; 380 g |
| Control Method | App, Buttons |
| Special Features | G-Sensor, Loop Recording, Super Night Vision, 24H Parking Monitor (requires hardwire kit) |
9. Warranty and Support
For warranty information and technical support, please refer to the documentation included with your purchase or visit the official ABASK website. If you encounter any issues not covered in this manual, please contact ABASK customer service for assistance.


