
1. Introduction
Thank you for choosing the Karinear Built-in Induction Hob. This manual provides essential information for the safe and efficient installation, operation, and maintenance of your new appliance. Please read these instructions carefully before use and keep them for future reference.
This 30cm induction hob features two cooking zones, including flexible zones, touch control, 9 power levels, a 99-minute timer, and a child lock for enhanced safety and convenience.
2. Safety Instructions
Your safety and the safety of others are paramount. Please read these safety instructions carefully before operating the appliance.
- Electrical Safety: Ensure the appliance is connected to a properly grounded electrical outlet. Do not use extension cords or adapters. The hob comes with a pre-installed VDE plug for European households, simplifying connection.
- General Use: This appliance is for domestic use only. Do not use it for commercial purposes.
- Child Safety: This appliance is not intended for use by persons (including children) with reduced physical, sensory, or mental capabilities, or lack of experience and knowledge, unless they have been given supervision or instruction concerning use of the appliance by a person responsible for their safety. The child lock function prevents accidental operation.
- Hot Surfaces: The cooking zones become hot during use. Always use oven mitts or pot holders. The residual heat indicator will show when a zone is still hot.
- Overheating Protection: The hob is equipped with an overheat protection system that automatically shuts off the appliance if it detects excessive temperatures.
- Pot Detection: The hob will only heat when a suitable magnetic pot is placed on the cooking zone. If no pot is detected or an unsuitable pot is used, an error message will appear, and the zone will not heat.
- Automatic Shut-off: If a cooking zone is left on for an extended period without any operation, it will automatically shut off as a safety measure.
- Ventilation: Ensure adequate ventilation around the appliance during installation and use.
3. Installation
The Karinear Built-in Induction Hob is designed for integration into a kitchen countertop. Follow these guidelines for proper installation.
- Countertop Cut-out: Ensure your countertop has the correct cut-out dimensions. The required cut-out dimensions are approximately 270 mm x 490 mm.
- Appliance Dimensions: The product dimensions are 290 mm (width) x 520 mm (depth) x 61 mm (height).
- Electrical Connection: The hob operates on 220-240 V, 50/60 Hz and has a total power of 3500 W. It comes with a pre-installed 16A VDE plug, making electrical connection straightforward for European households. Connect the plug to a suitable, grounded wall socket.
- Ventilation: Allow sufficient space for ventilation beneath the hob to ensure proper cooling of the electronic components.

Image: Karinear 30cm Built-in Induction Hob installed in a kitchen countertop, showing its sleek design.
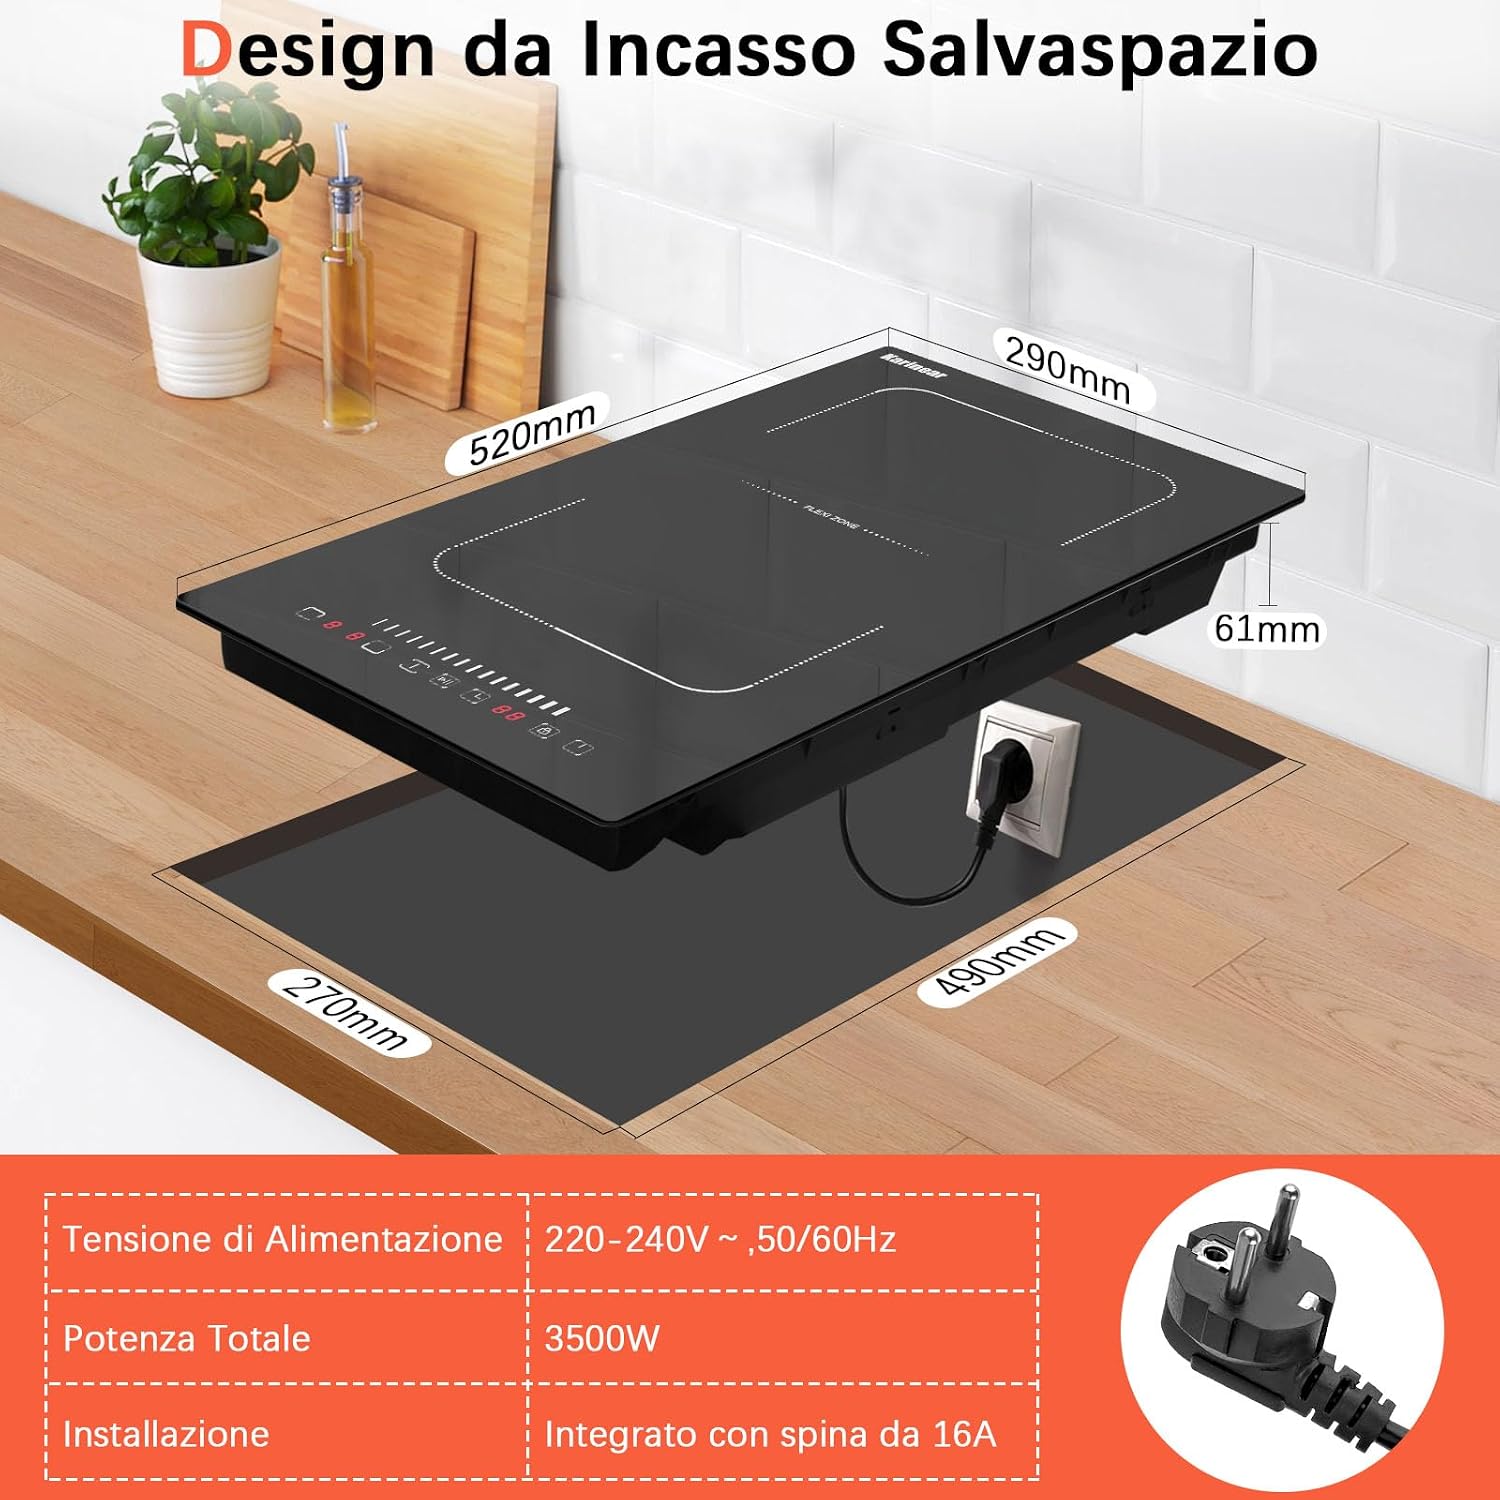
Image: Detailed diagram showing the product dimensions (520mm depth, 290mm width, 61mm height) and the required cut-out dimensions (490mm depth, 270mm width) for installation. It also highlights the 220-240V, 50/60Hz power supply and 3500W total power with a 16A plug.
4. Operating the Hob
The Karinear Induction Hob features intuitive touch controls for easy operation.

Image: Close-up view of the touch control panel, showing the slider for power adjustment, zone selection buttons, timer controls, and child lock button.
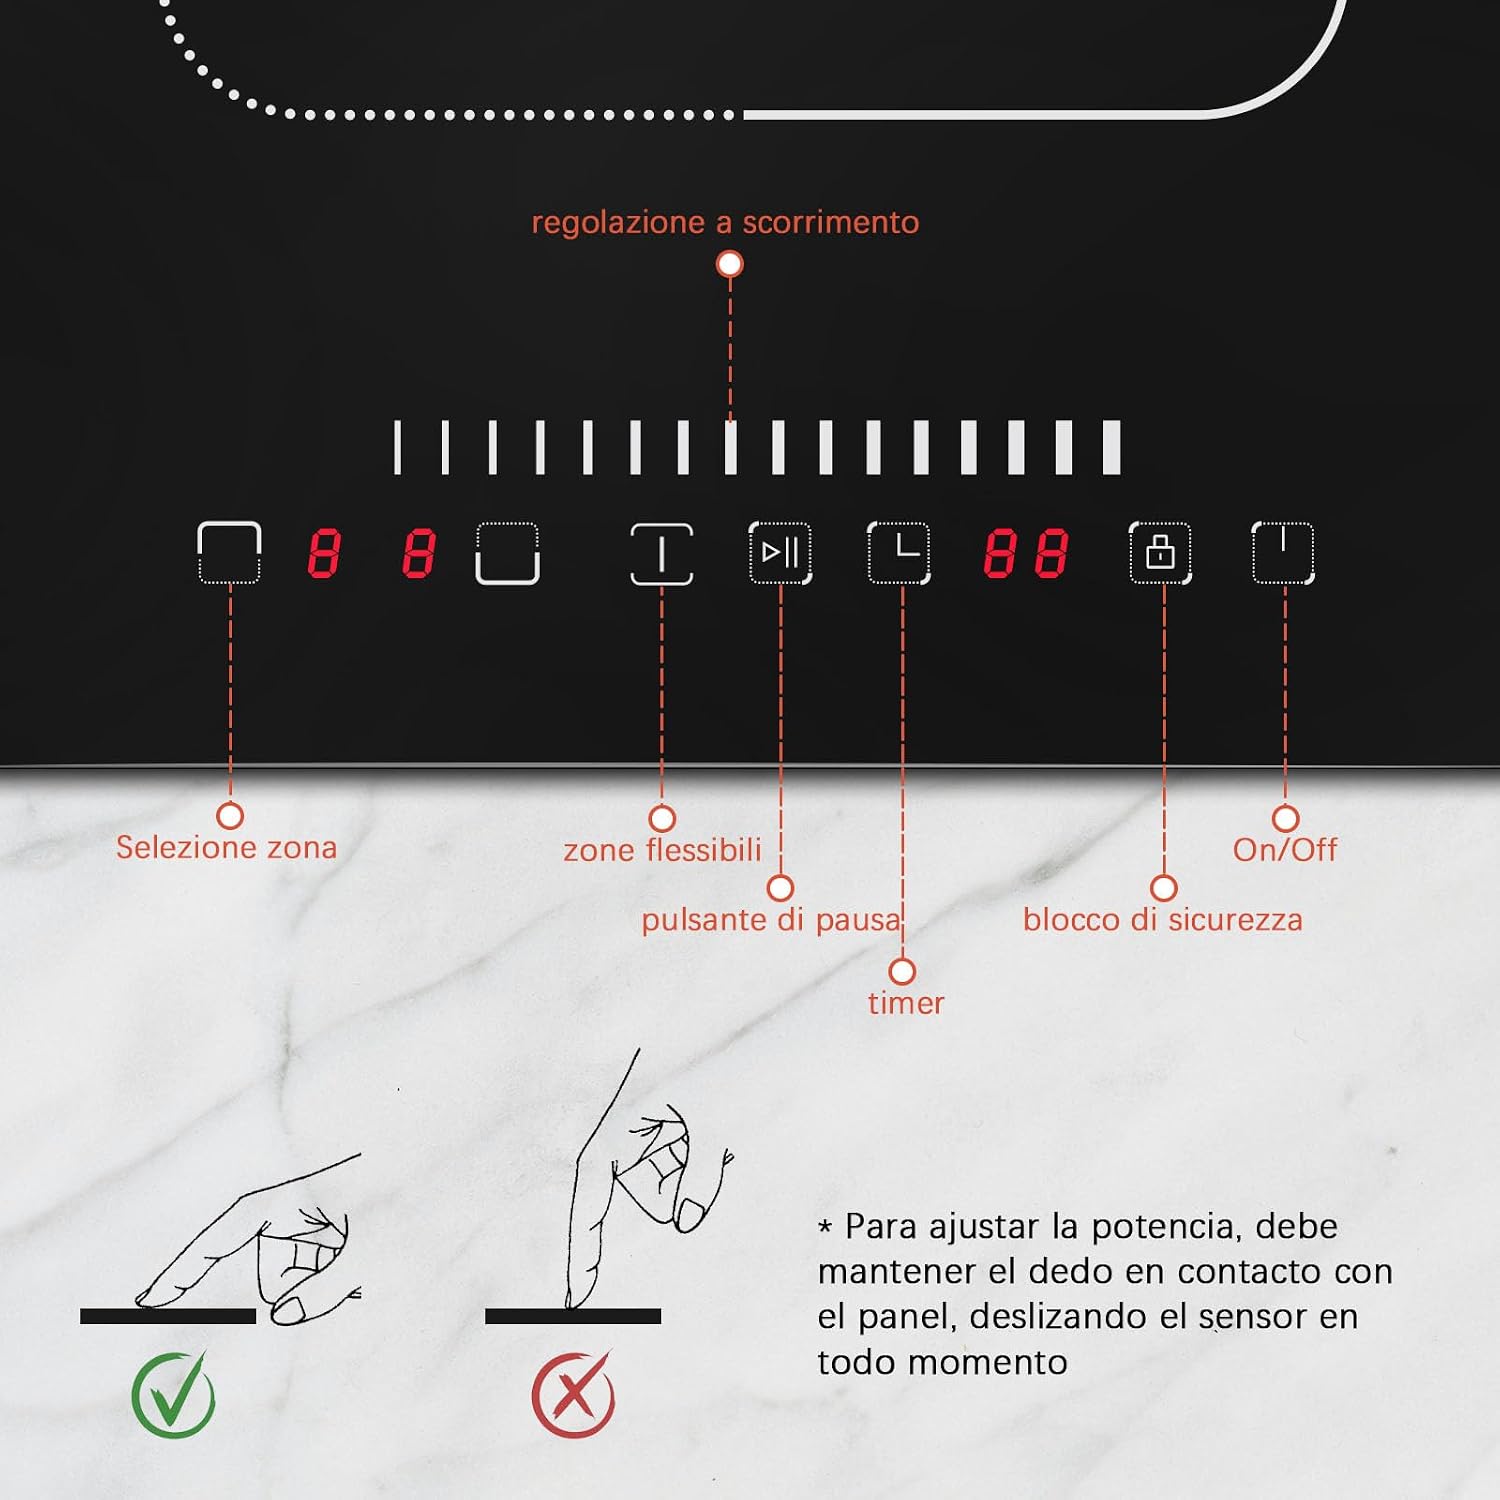
Image: An annotated diagram of the control panel, pointing out the functions for zone selection, flexible zones, pause, timer, safety lock, and On/Off. It also illustrates how to use the sliding touch control for power adjustment.
4.1 Powering On/Off
- To turn on the hob, touch the On/Off button. The display will show '00' or similar indicators.
- To turn off the hob, touch the On/Off button again.
4.2 Selecting Cooking Zones and Adjusting Power
- Place a suitable pot on the desired cooking zone.
- Select the cooking zone by touching its corresponding zone selection button.
- Adjust the power level from 1 to 9 using the touch slider control. Slide your finger along the scale to increase or decrease the heat.
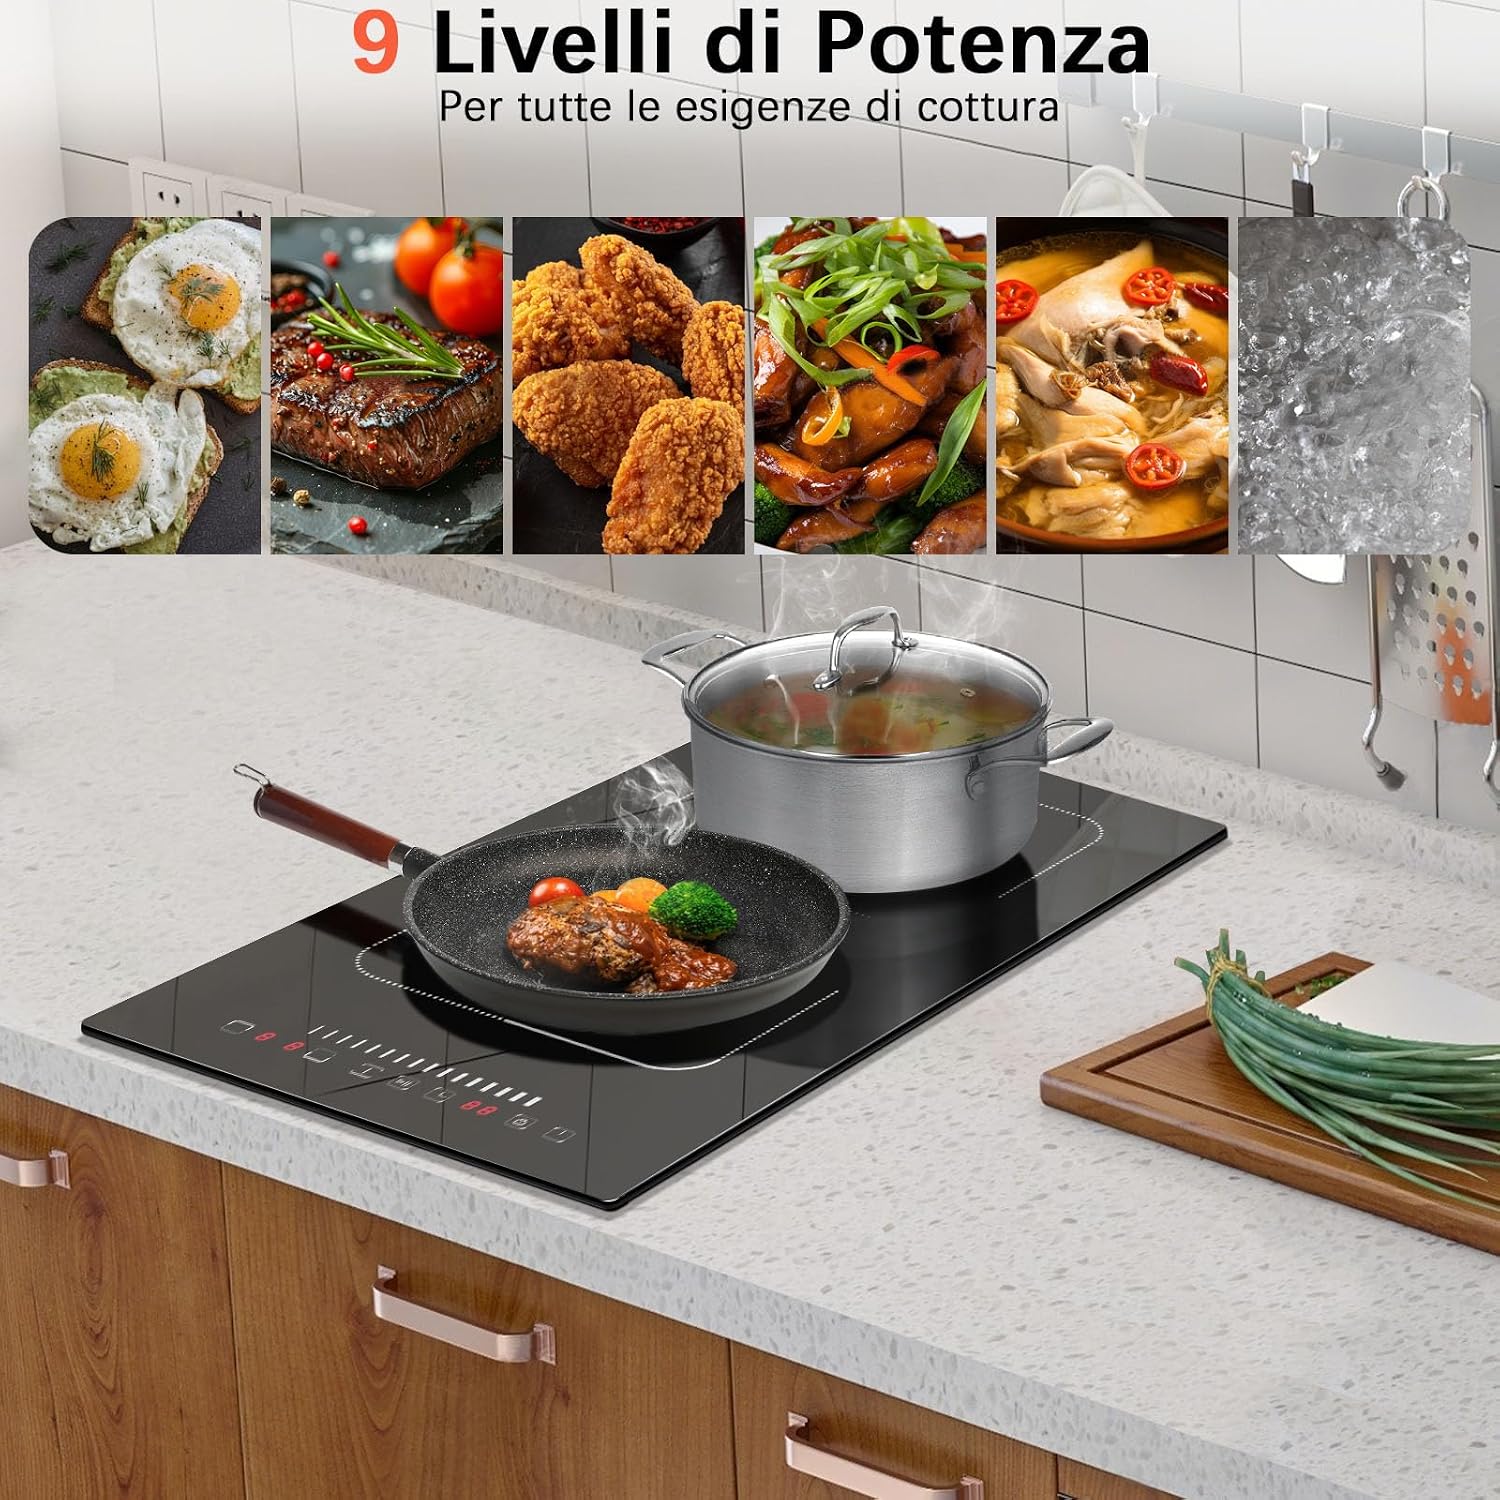
Image: Visual examples of cooking tasks corresponding to different power levels, from gentle simmering to rapid boiling, demonstrating the versatility of the 9 power settings.
4.3 Using Flex Zones
The hob features flexible cooking zones that can be combined to accommodate larger cookware.
- To activate the flex zone, select one of the two zones that form the flexible area, then touch the Flex Zone button. The two zones will now operate as a single large cooking area.
- This is ideal for griddle pans, large roasting dishes, or multiple smaller pots.

Image: The Karinear induction hob with a large rectangular griddle pan spanning both flexible zones, alongside a standard round pot on another zone, illustrating the versatility of the flex zone feature.
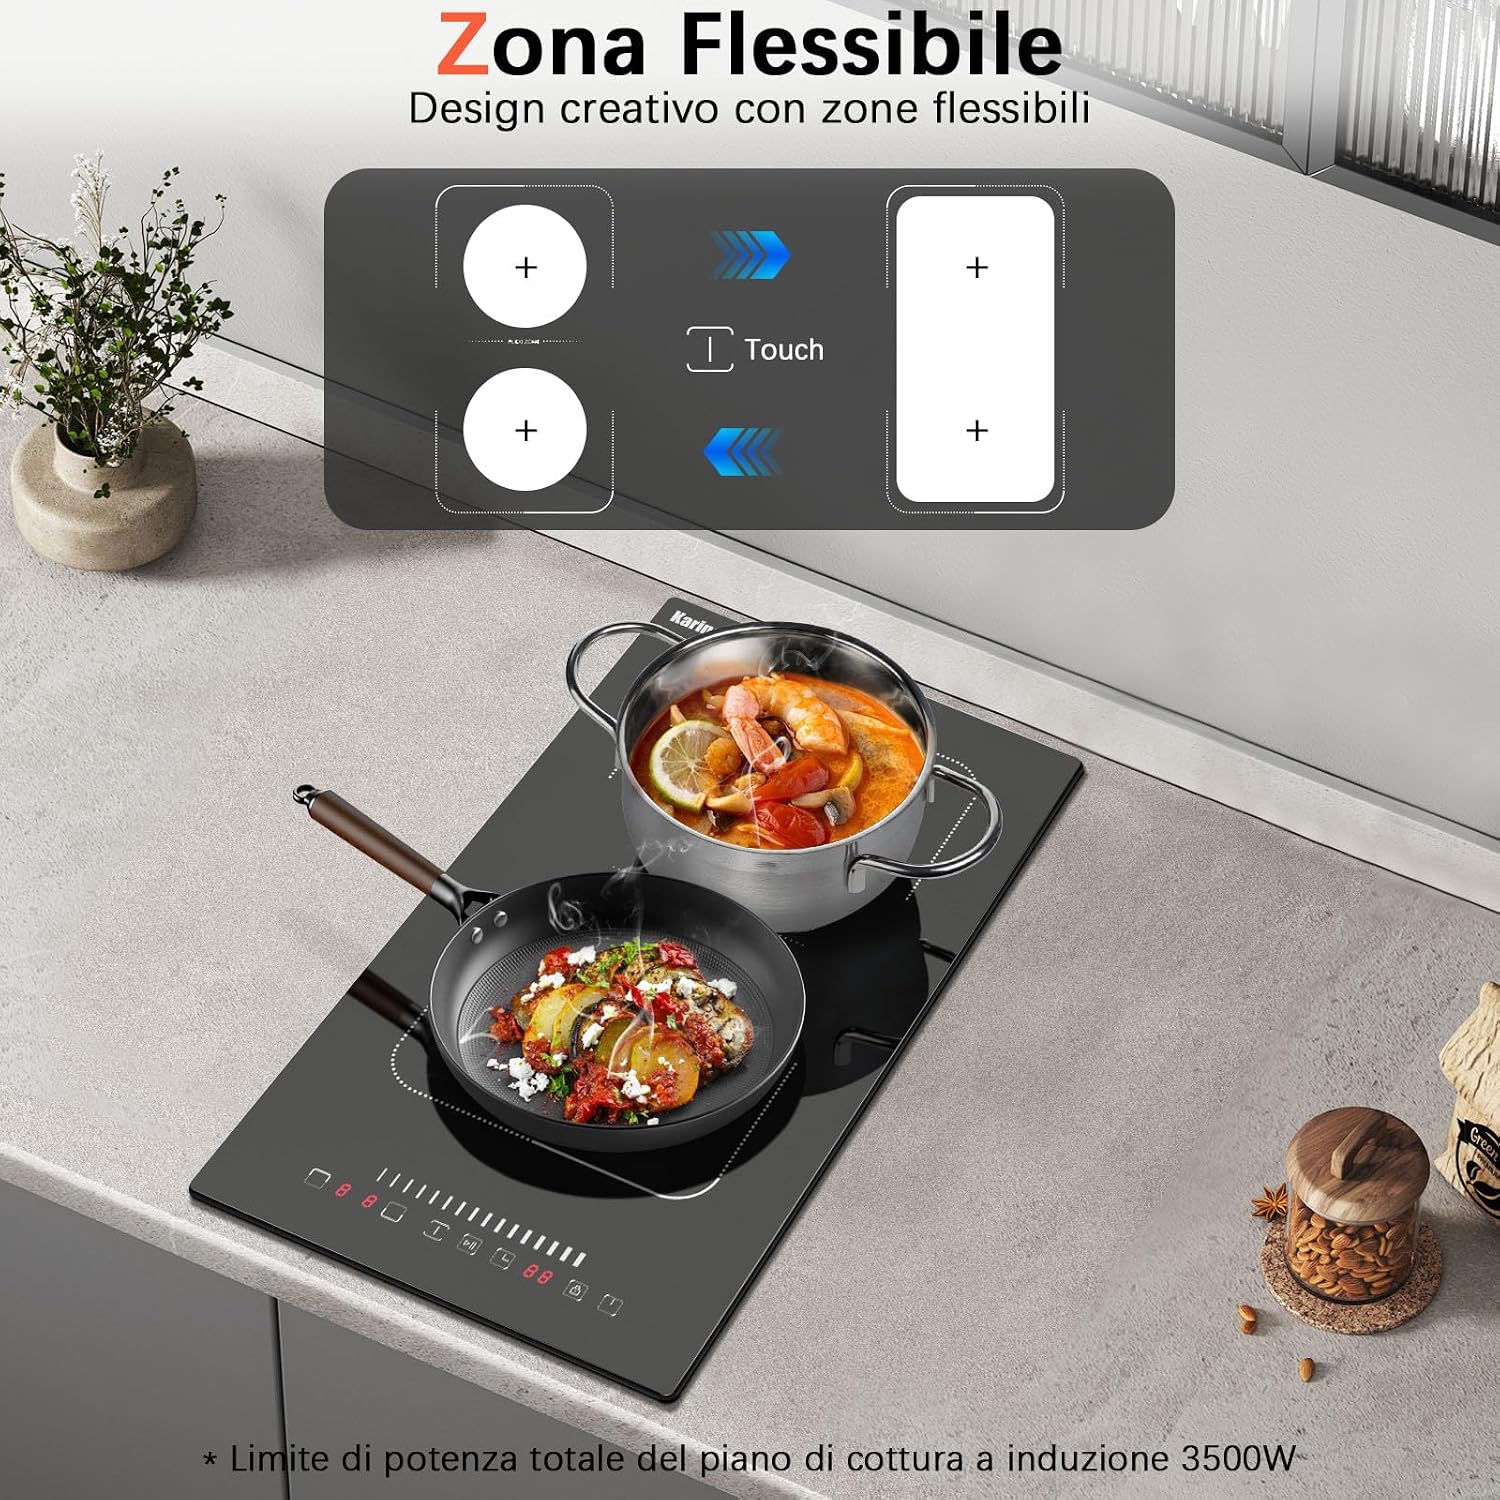
Image: A graphic representation of how two individual cooking zones can be combined into a single, larger flexible zone by touching the designated button, suitable for oversized pots and pans.
4.4 Timer Function
The digital timer can be set for up to 99 minutes.
- To set the timer, select the desired cooking zone and then touch the Timer button.
- Use the '+' and '-' controls or the slider to adjust the time.
- The hob will automatically switch off the selected zone when the set time expires.
4.5 Child Lock
The child lock prevents accidental operation of the hob.
- To activate the child lock, touch and hold the Lock button for a few seconds. An indicator light or symbol will appear.
- To deactivate, touch and hold the Lock button again until the indicator disappears.
5. Compatible Cookware
Induction hobs require cookware with a magnetic base. To check if your cookware is suitable, hold a magnet to the bottom of the pot or pan. If it sticks, the cookware is compatible.
- Suitable: Cast iron, stainless steel, enameled cast iron, and magnetic non-stick pans.
- Unsuitable: Cookware made of aluminum, copper, glass, ceramic, or non-magnetic stainless steel.

Image: A visual guide displaying four types of cookware suitable for induction hobs: cast iron pot, stainless steel pot, enameled cast iron pot, and a magnetic non-stick frying pan.
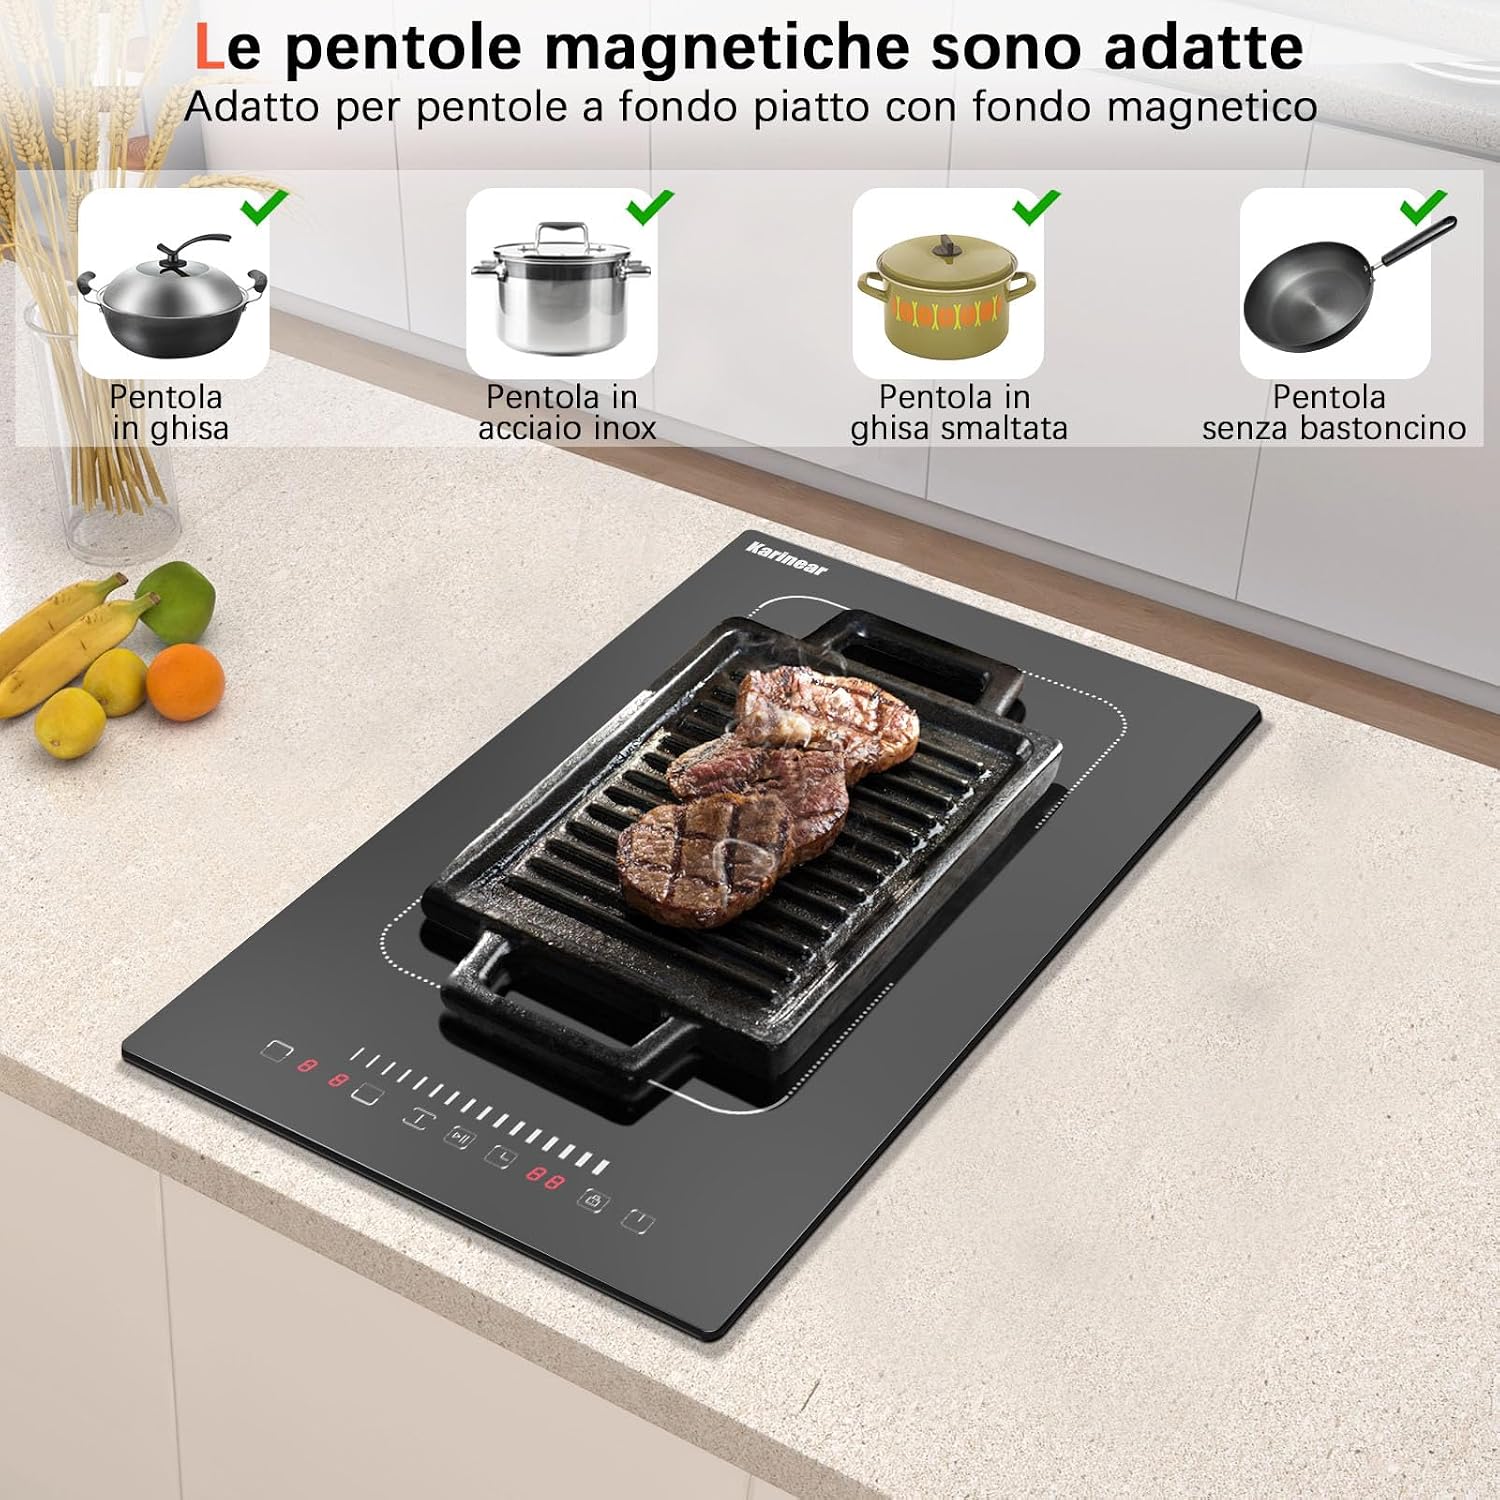
Image: An illustrative guide confirming that magnetic pots are suitable for the induction hob, specifically mentioning cast iron, stainless steel, enameled cast iron, and non-stick pans with magnetic bases.
6. Cleaning and Maintenance
Regular cleaning and maintenance will ensure the longevity and optimal performance of your induction hob.
- Daily Cleaning: After each use, allow the hob to cool down. Wipe the tempered glass surface with a damp cloth and a mild detergent. Dry thoroughly with a soft cloth.
- Stubborn Stains: For burnt-on food or stubborn stains, use a ceramic hob scraper (often included) to gently remove residue. Follow with a damp cloth and dry.
- Avoid: Do not use abrasive cleaners, scouring pads, or harsh chemicals, as these can scratch or damage the glass surface.

Image: A person cleaning the Karinear induction hob's black tempered glass surface with a cloth, demonstrating the ease of cleaning.
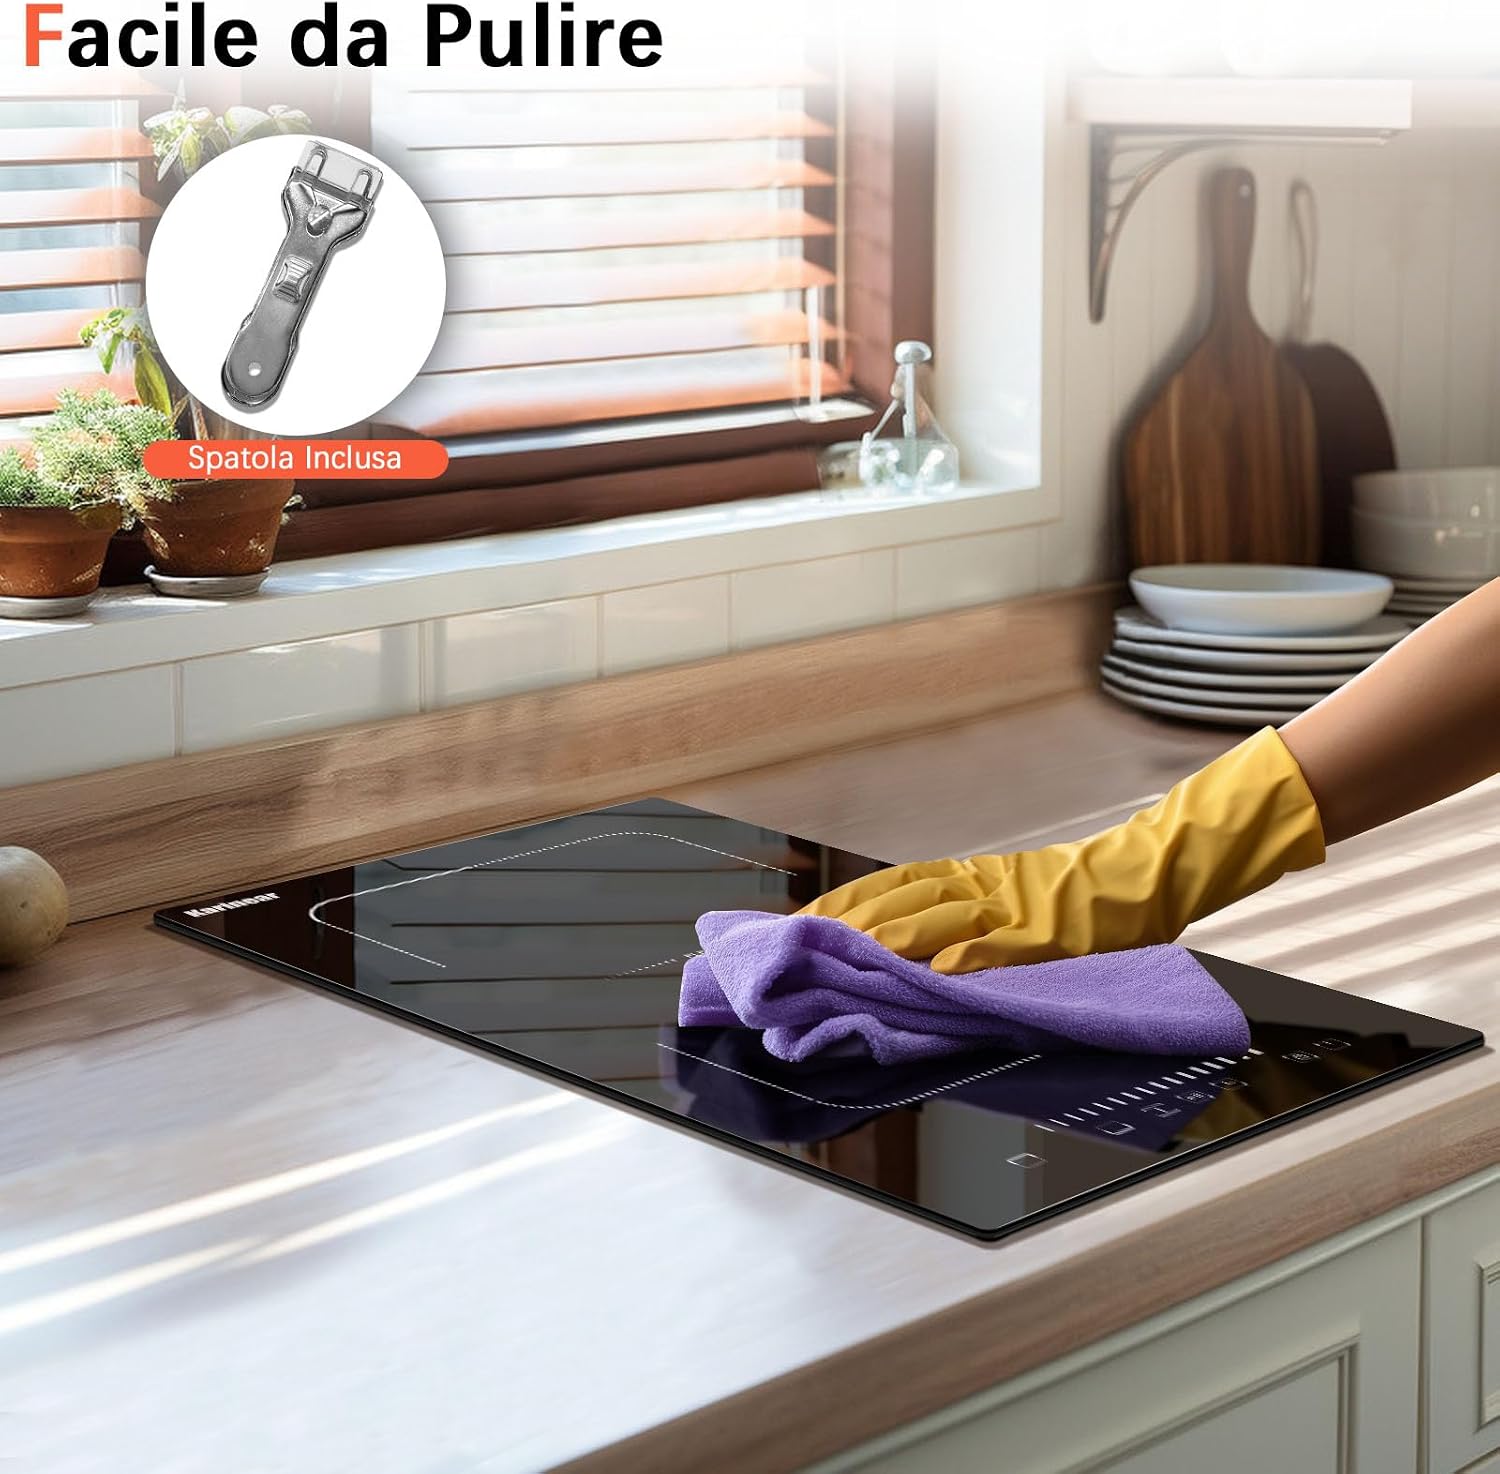
Image: The smooth, easy-to-clean surface of the induction hob being wiped, with an inset image of a scraper tool, indicating that it is included for effective cleaning.
7. Troubleshooting
If you encounter any issues with your induction hob, refer to the following table for common problems and solutions.
| Problem | Possible Cause | Solution |
|---|---|---|
| Hob does not turn on. | No power supply; Child lock activated. | Check power connection; Deactivate child lock. |
| Cooking zone not heating. | Unsuitable cookware; No pot detected; Pot not centered. | Use magnetic cookware; Place pot on zone; Center the pot. |
| Display shows 'E' or error code. | Overheating; Internal fault. | Turn off hob, let it cool; If error persists, contact customer support. |
| Hob makes noise during operation. | Normal fan operation; Cookware noise. | This is normal for induction hobs; Some cookware may vibrate slightly. |
8. Technical Specifications
- Brand: Karinear
- Model Number: KNI-302S1
- Power Supply: 220-240 V, 50/60 Hz
- Total Power: 3500 W
- Heating Zones: 2 (including flexible zones)
- Left Front Zone Power: 180 x 180 mm / 1500 W
- Left Rear Zone Power: 180 x 180 mm / 2000 W
- Flex Zone Power: 370 x 200 mm / 3000 W
- Control Type: Touch Slider
- Power Levels: 9
- Timer: 99 minutes
- Product Dimensions (W x D x H): 290 x 520 x 61 mm
- Cut-out Dimensions (W x D): 270 x 490 mm
- Net Weight: 4.1 kg
- Material: Black Tempered Glass
- Special Features: Flex Zones, Child Lock, Overheat Protection, Automatic Shut-off, Pot Detection, Residual Heat Indicator
9. Warranty and Customer Support
Karinear offers a 30-day money-back guarantee and a 12-month warranty from the date of purchase for this product. For any questions, technical assistance, or warranty claims, please contact Karinear customer support through your retailer or the official Karinear website.


