1. Introduction
The GEYA Mini ATS Dual Power Automatic Transfer Switch (Model G2R-63) is designed to provide uninterrupted power by automatically switching between two power sources, typically a main power supply (e.g., city power) and a backup power supply (e.g., generator or inverter). This device ensures continuous operation of electrical loads during power outages or fluctuations, enhancing reliability for various applications.
2. Safety Information
- Installation and maintenance should only be performed by qualified electrical personnel.
- Always disconnect all power sources before installing, servicing, or removing the device to prevent electric shock.
- Ensure proper grounding and wiring according to local electrical codes and standards.
- Verify that the voltage and current ratings of the ATS match your electrical system requirements.
- Do not operate the device if it appears damaged or malfunctioning.
- The device is designed for indoor use in a dry, well-ventilated environment.
3. Product Overview
The GEYA Mini ATS is a compact and efficient solution for managing dual power sources. It features both automatic and manual operation modes, allowing for flexible control over power transfer. The device is designed for DIN rail mounting, making integration into existing electrical panels straightforward. Key features include high temperature resistance, flame retardant material, quick switchover, and ease of use.
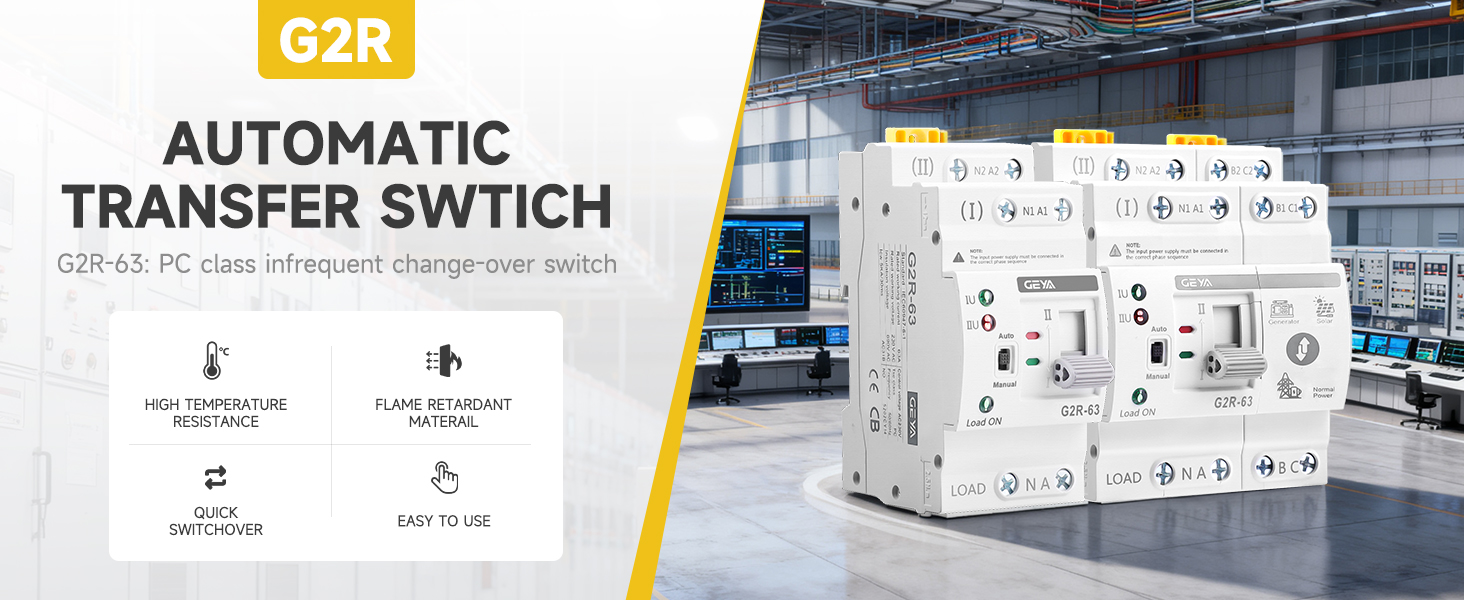
Figure 3.1: GEYA Mini ATS G2R-63 with highlighted features.

Figure 3.2: Front view of the GEYA Mini ATS G2R-63.
4. Specifications
The following table outlines the technical specifications for the GEYA Mini ATS G2R-63:
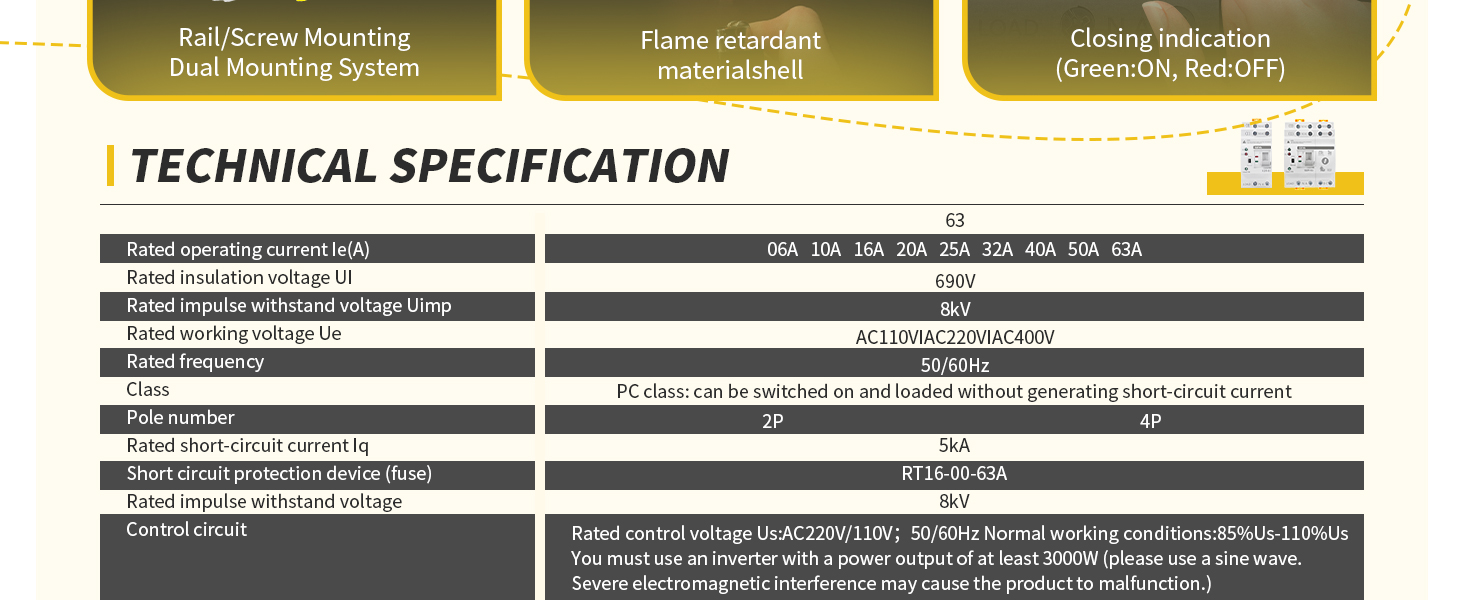
Figure 4.1: Technical Specifications of GEYA Mini ATS G2R-63.
It is crucial to select the correct voltage model for your application. The G2R-2P 63A 110V model is suitable for voltage systems of 110/220V where one line is 110V. Damage to the control circuit coil can occur if the operating voltage is not within 85%-110% of the rated operating voltage.

Figure 4.2: Voltage selection guidance for G2R-63 models.
5. Setup
Proper wiring is essential for the safe and correct operation of the ATS. Ensure all connections are secure and follow the provided diagrams.
5.1 Wiring Diagram
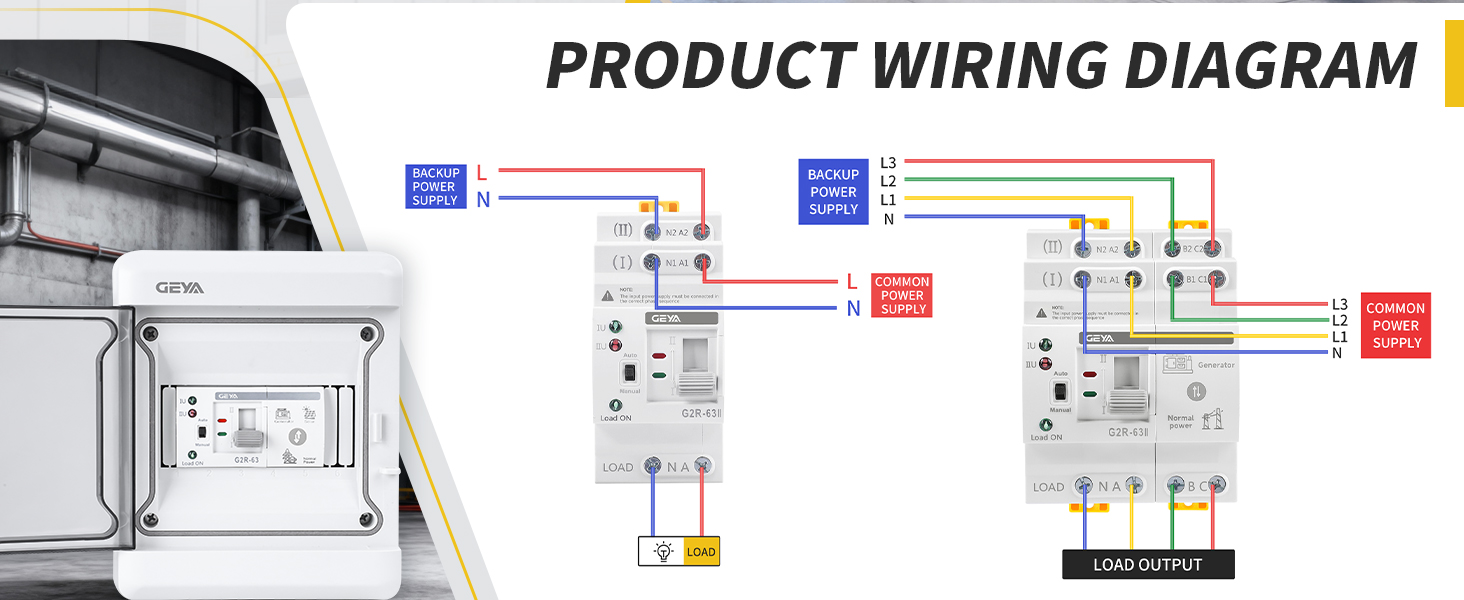
Figure 5.1: Detailed Product Wiring Diagram.
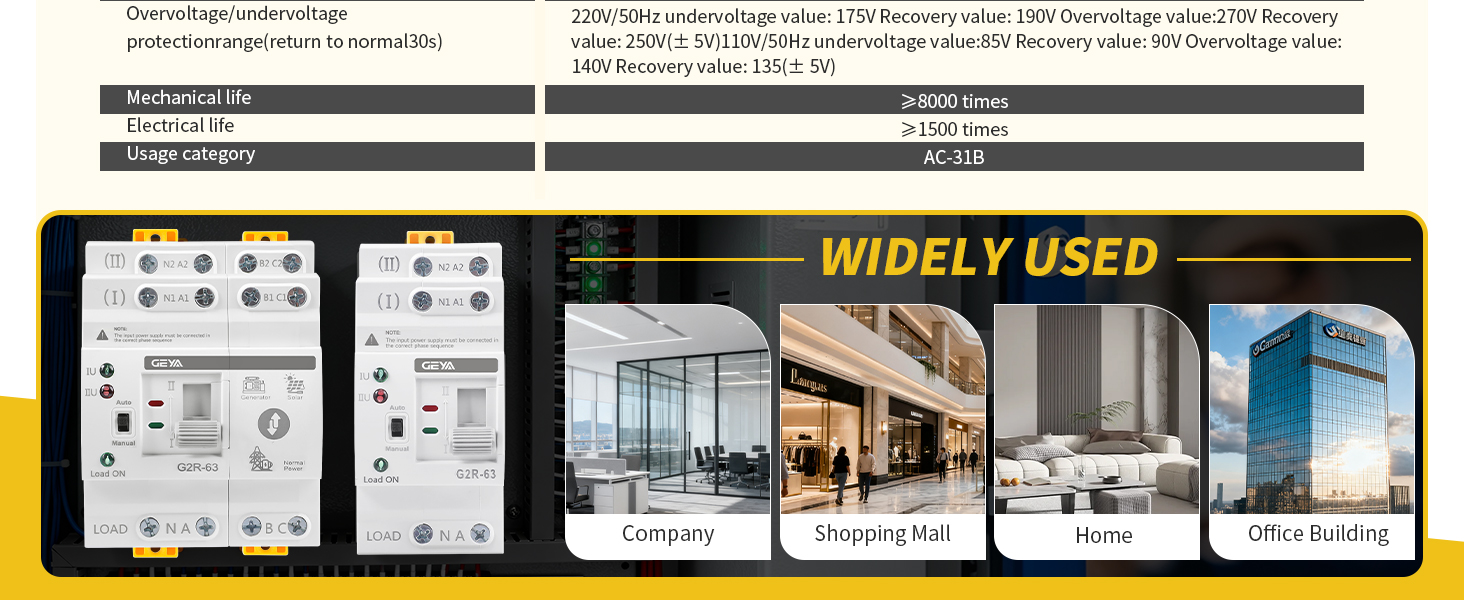
Figure 5.2: Wiring Instructions.
Note: The input power supply must be connected in the correct phase sequence. When the power supply is abnormal (under voltage or over voltage state), the flashing indicator light will activate.
5.2 Installation Steps
- Mount the ATS on a standard DIN rail.
- Connect the main power supply (Source I) to the designated input terminals (N1/A1, N2/A2).
- Connect the backup power supply (Source II) to the designated input terminals (B1/C1, B2/C2).
- Connect the load to the output terminals (LOAD N/A, LOAD B/C).
- Ensure all wire connections are tight using a screwdriver.
Video 5.1: Wiring example and operation demonstration of ATS G2R. This video illustrates the physical wiring process and initial setup.
6. Operating Instructions
The GEYA Mini ATS offers both automatic and manual operation modes.
6.1 Mode Selection
- Automatic Mode: Set the selector switch to 'Auto'. In this mode, the ATS will automatically detect the presence and quality of both power sources and switch to the preferred source (typically Source I/Main Power) or the available backup source (Source II) as needed.
- Manual Mode: Set the selector switch to 'Manual'. In this mode, you can manually switch between Source I and Source II using the push button. Ensure the device is in manual mode before attempting to switch manually to avoid damage.
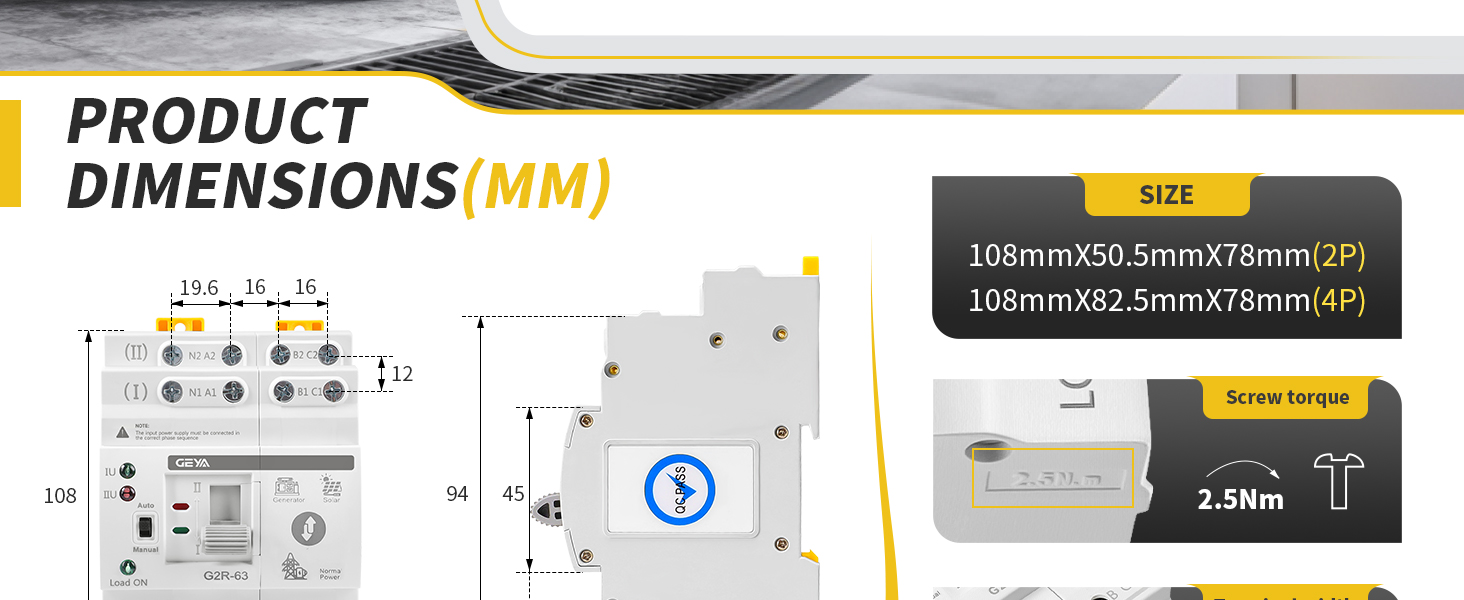
Figure 6.1: Manual/Auto switch and manual operation handle.
6.2 Automatic Transfer Logic
In 'Auto' mode, the ATS prioritizes the main power supply (Source I). If Source I fails or its voltage drops below a set threshold (e.g., 175V for 110V systems), the ATS will automatically switch to Source II (backup power). When Source I is restored and its voltage returns to a normal range (e.g., above 195V), the ATS will switch back to Source I after a short delay. Similarly, if Source I voltage rises above a set threshold (e.g., 260V), it will switch to backup power.
Video 6.1: Demonstration of Over & Under Voltage Protection. This video shows how the ATS reacts to voltage fluctuations.
Video 6.2: Function Demonstration. This video illustrates the automatic switching functionality.
Video 6.3: Function Demonstration: Over & Under Voltage Protection. This video provides another view of the voltage protection features.
7. Maintenance
Regular maintenance ensures the longevity and reliable operation of your GEYA Mini ATS.
- Periodic Inspection: Visually inspect the device and its connections for any signs of wear, damage, or loose wiring.
- Cleaning: Keep the device free from dust and debris. Use a dry, soft cloth for cleaning. Do not use liquid cleaners.
- Connection Checks: Periodically check all terminal connections to ensure they are tight and secure.
- Functionality Test: If safe to do so, periodically test the automatic transfer function by simulating a power outage (e.g., by temporarily disconnecting the main power supply).
8. Troubleshooting
If you encounter issues with your GEYA Mini ATS, consider the following troubleshooting steps:
- No Power Transfer:
- Check if both power sources (main and backup) are active and within their normal voltage ranges.
- Ensure the ATS is set to 'Auto' mode for automatic transfer.
- Verify all wiring connections are correct and secure.
- Indicator Lights Not Functioning:
- Check if the device is receiving power from at least one source.
- Inspect for internal damage if the device is powered but indicators are off.
- Frequent Switching:
- Check the stability of your power sources. Fluctuating voltage can cause frequent transfers.
- Ensure the voltage thresholds for over/under voltage protection are appropriate for your system.
If the problem persists after attempting these steps, contact a qualified electrician or GEYA customer support for assistance.
9. Warranty & Support
GEYA products are manufactured to high-quality standards and are covered by a manufacturer's warranty. For specific warranty terms and conditions, please refer to the documentation included with your purchase or visit the official GEYA website.
For technical support, troubleshooting assistance, or inquiries regarding your product, please contact GEYA customer service through their official channels. Provide your product model number (G2R-63) and purchase details when seeking support.


