1. Introduction
Thank you for purchasing the Alecto DVM149GN Baby Monitor. This device is designed to provide reliable monitoring of your baby with a high-quality video feed, night vision, and two-way communication. Please read this manual carefully before use to ensure proper operation and to keep it for future reference.
2. Safety Information
- Keep the baby monitor units and their cables out of reach of children (at least 1 meter away from the crib).
- Do not place the camera or monitor in direct sunlight or near heat sources.
- Use only the provided power adapters. Using unauthorized adapters may damage the device and void the warranty.
- Do not expose the units to water or moisture.
- Ensure proper ventilation around both units.
- This product is not a substitute for responsible adult supervision.
3. Package Contents
The package should contain the following items:
- Baby Unit (Camera)
- Parent Unit (Monitor with 4.3" color screen)
- 2x Power Adapters
- User Manual (this document)
4. Product Overview
Familiarize yourself with the components of your Alecto DVM149GN Baby Monitor.

Figure 4.1: Overview of the Alecto DVM149GN Baby Monitor, featuring the camera unit (left) and the parent monitor unit (right) with a live view of a baby.

Figure 4.2: The baby monitor units illustrating the 4.3-inch screen size (10.9 cm) and the camera's pan and tilt capabilities indicated by arrows.

Figure 4.3: Side profile of both the camera and parent units, highlighting the DC 5V power input ports.
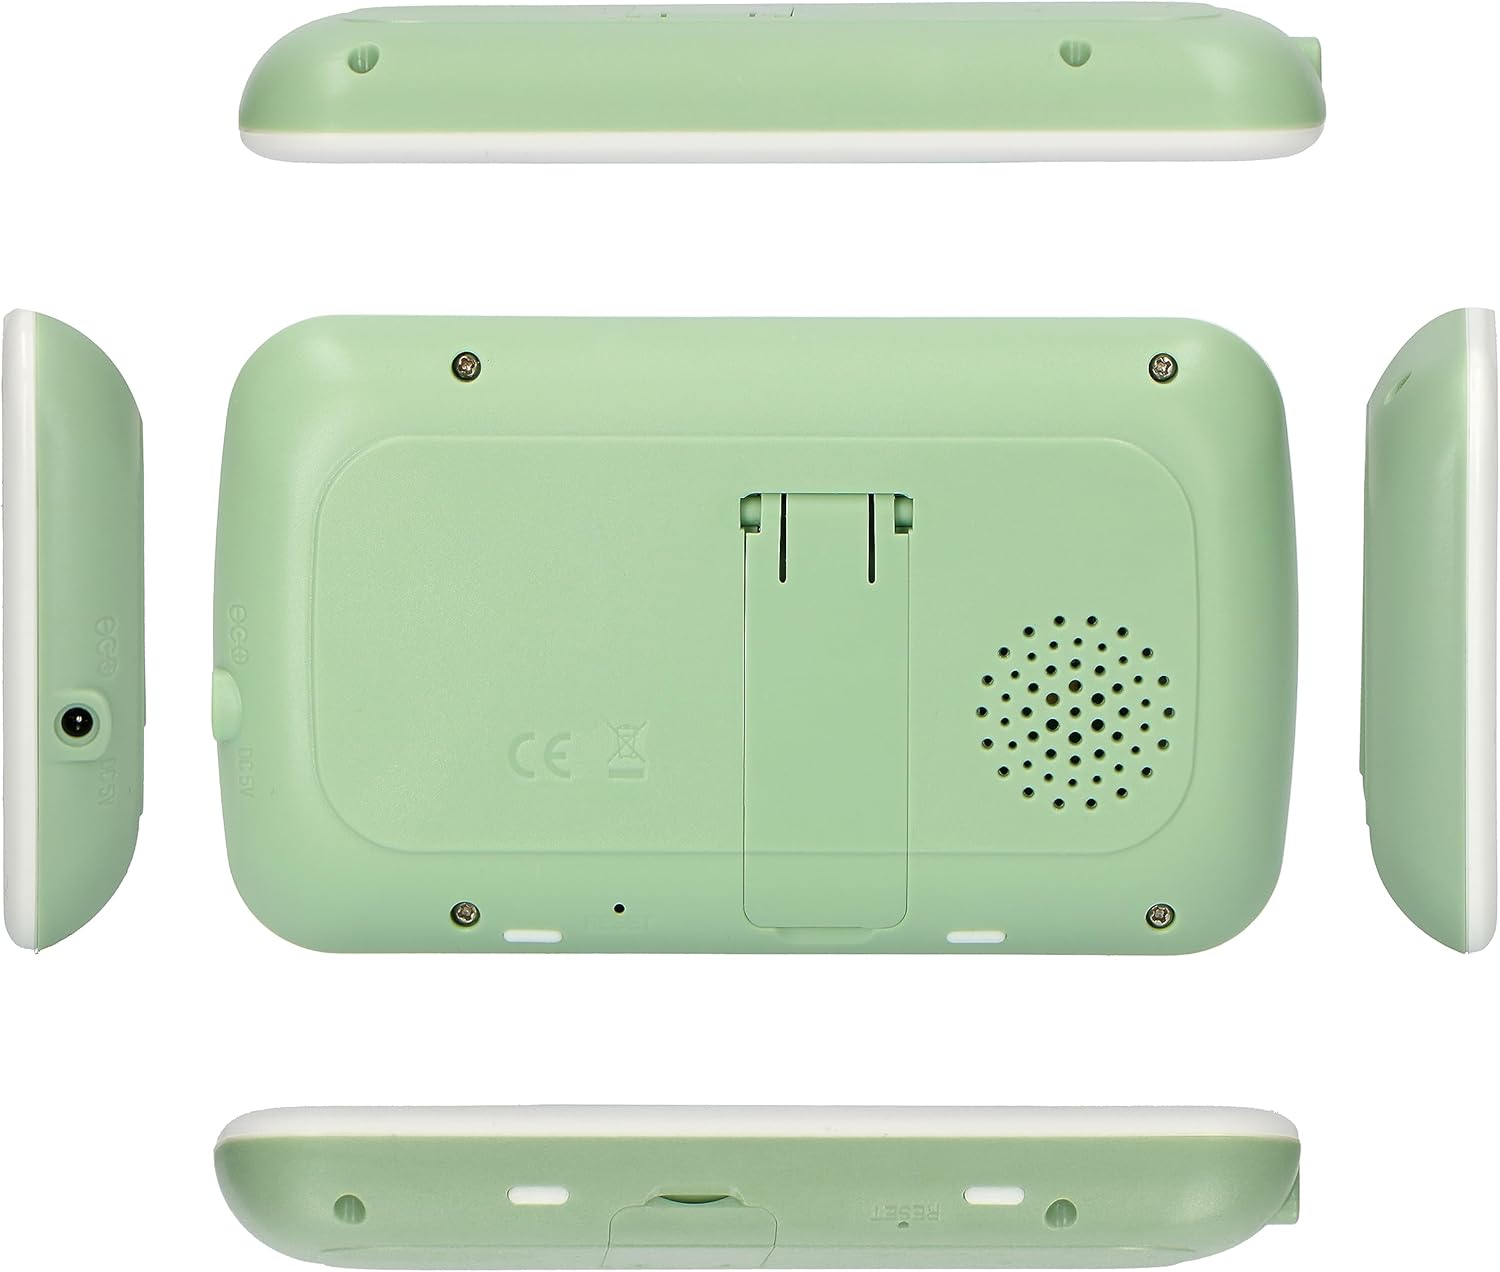
Figure 4.4: Various views of the parent unit, including the back with a kickstand and speaker, and side views showing its slim profile.

Figure 4.5: Various views of the camera unit, including the back with speaker and pairing button, and side views showing its adjustable stand.
5. Setup
5.1 Powering On
- Connect one power adapter to the Baby Unit (camera) and plug it into a wall outlet.
- Connect the second power adapter to the Parent Unit (monitor) and plug it into a wall outlet.
- Press and hold the power button on both units until they turn on.
5.2 Placement
- Place the Baby Unit (camera) in a location that provides a clear view of your baby, ensuring it is at least 1 meter away from the crib to prevent entanglement hazards with the power cord.
- Position the Parent Unit (monitor) in a convenient location where you can easily view the screen and hear audio.
- Avoid placing units near other electronic devices that may cause interference.
5.3 Pairing (if necessary)
The units are typically pre-paired from the factory. If they do not connect automatically, follow these steps:
- Ensure both units are powered on.
- On the Parent Unit, navigate to the pairing menu (refer to the on-screen menu for specific instructions, usually under 'Camera' or 'Pairing').
- Press the pairing button on the back of the Baby Unit (camera). The indicator light on the camera may flash.
- The Parent Unit should display a confirmation message once pairing is successful.
6. Operating Instructions
6.1 Live View and Basic Controls
Once powered on and paired, the Parent Unit will display a live video feed from the Baby Unit.

Figure 6.1: The parent unit screen showing a clear live video feed of a baby, along with control buttons on the right side.
- Volume Control: Use the dedicated buttons on the Parent Unit to adjust the listening volume.
- Brightness Control: Adjust screen brightness via the menu settings.
6.2 Night Vision
The Alecto DVM149GN features automatic infrared night vision. When the ambient light is low, the camera will automatically switch to night vision mode, providing a clear black and white image.

Figure 6.2: The parent unit screen displaying the automatic night vision feature, showing a clear black and white image of a crib in a dark room.
6.3 Pan and Tilt Function
The camera unit features remote pan and tilt capabilities, allowing you to adjust the viewing angle from the Parent Unit.
- Use the directional arrow buttons on the Parent Unit to move the camera lens horizontally (pan) and vertically (tilt).
6.4 Two-Way Intercom Function
The intercom function allows you to speak to your baby through the camera unit.
- Press and hold the microphone button on the Parent Unit to speak. Release the button to listen.
6.5 ECO Mode
The ECO mode helps conserve battery life by turning off the screen and audio when no sound is detected from the baby's room. The unit will reactivate when sound is detected.
- Activate or deactivate ECO mode through the Parent Unit's menu settings.
7. Maintenance
- Cleaning: Wipe the units with a soft, dry cloth. Do not use abrasive cleaners or solvents.
- Storage: If storing the device for an extended period, ensure both units are fully charged, then power them off. Store in a cool, dry place.
- Battery Care: For optimal battery life, avoid fully discharging the Parent Unit's battery frequently.
8. Troubleshooting
| Problem | Possible Cause | Solution |
|---|---|---|
| No picture/sound on Parent Unit. | Units are not powered on or not paired. Out of range. | Ensure both units are powered on and plugged in. Re-pair units if necessary. Move Parent Unit closer to Baby Unit. |
| Picture is black and white. | Night vision is active. | This is normal in low light conditions. The camera automatically switches to infrared night vision. |
| Static or interference. | Too far from Baby Unit. Other electronic devices interfering. | Move Parent Unit closer. Move units away from other electronics (Wi-Fi routers, microwaves). |
| Parent Unit battery drains quickly. | ECO mode is off. Frequent screen activation. | Activate ECO mode. Reduce screen brightness. Ensure battery is fully charged before use. |
9. Specifications
| Feature | Detail |
|---|---|
| Model | DVM149GN |
| Screen Size | 4.3 inches (color) |
| Voltage | 5 Volts |
| Power | 5 Watts |
| Material | Plastic |
| Special Features | Night Vision, Intercom Function, Pan/Tilt Camera |
| Connectivity Technology | Wireless (Wi-Fi) |
| Indoor/Outdoor Use | Indoor |
| Mounting Type | Wall Mount (optional) |
10. Warranty and Support
For warranty information and technical support, please refer to the warranty card included with your product or visit the official Alecto website. Keep your proof of purchase for warranty claims.
Manufacturer: Alecto


