1. Introduction
Thank you for choosing the ZHXINSD PTZ Security Camera System. This comprehensive manual provides essential information for the proper installation, operation, and maintenance of your new security system. Please read these instructions carefully before use to ensure optimal performance and longevity of your product. This system is designed for outdoor surveillance, featuring solar power, wireless connectivity, and advanced detection capabilities.
2. What's in the Box
Carefully unpack the contents and verify that all items listed below are present and in good condition. If any items are missing or damaged, please contact customer support.

Image: Contents of the ZHXINSD PTZ Security Camera System package.
- NVR (Network Video Recorder) x 1
- PTZ Security Cameras with Solar Panels x 5
- Power Supply x 1
- Mouse x 1
- Network Cable x 1
- Screw Pack x 4 (for mounting)
- User Manual x 1
3. Product Features
The ZHXINSD PTZ Security Camera System offers advanced features for comprehensive home surveillance:
- Wire-Free & Solar Powered: Each camera operates independently with power supplied by an integrated solar panel, eliminating the need for power cables.
- Pan-Tilt-Zoom (PTZ) Functionality: Enjoy a wide field of view with 355° horizontal pan and 140° vertical tilt capabilities, allowing for comprehensive area coverage.
- 2K 4MP HD Video & Color Night Vision: Capture clear, detailed 2K resolution video. Built-in floodlights enable full-color night vision for enhanced visibility in low-light conditions.
- Two-Way Audio: Communicate directly with visitors or deter intruders using the integrated microphone and speaker via your smartphone.
- PIR Motion Detection & Human Detection: Equipped with a Passive Infrared (PIR) sensor for accurate motion detection. The system can intelligently track and follow moving objects, sending instant alerts to your phone.
- IP66 Waterproof Rating: Designed to withstand various weather conditions, making it suitable for outdoor installation in rain or snow.
- Remote Access & Local Storage: View live feeds and recordings anytime, anywhere via a compatible smartphone or PC. The system includes a pre-installed 64GB TF card for local storage, with no monthly fees.

Image: Wire-free PTZ security camera with solar panel.

Image: Pan and Tilt functionality of the camera.

Image: 2K HD and Color Night Vision view on a smartphone.
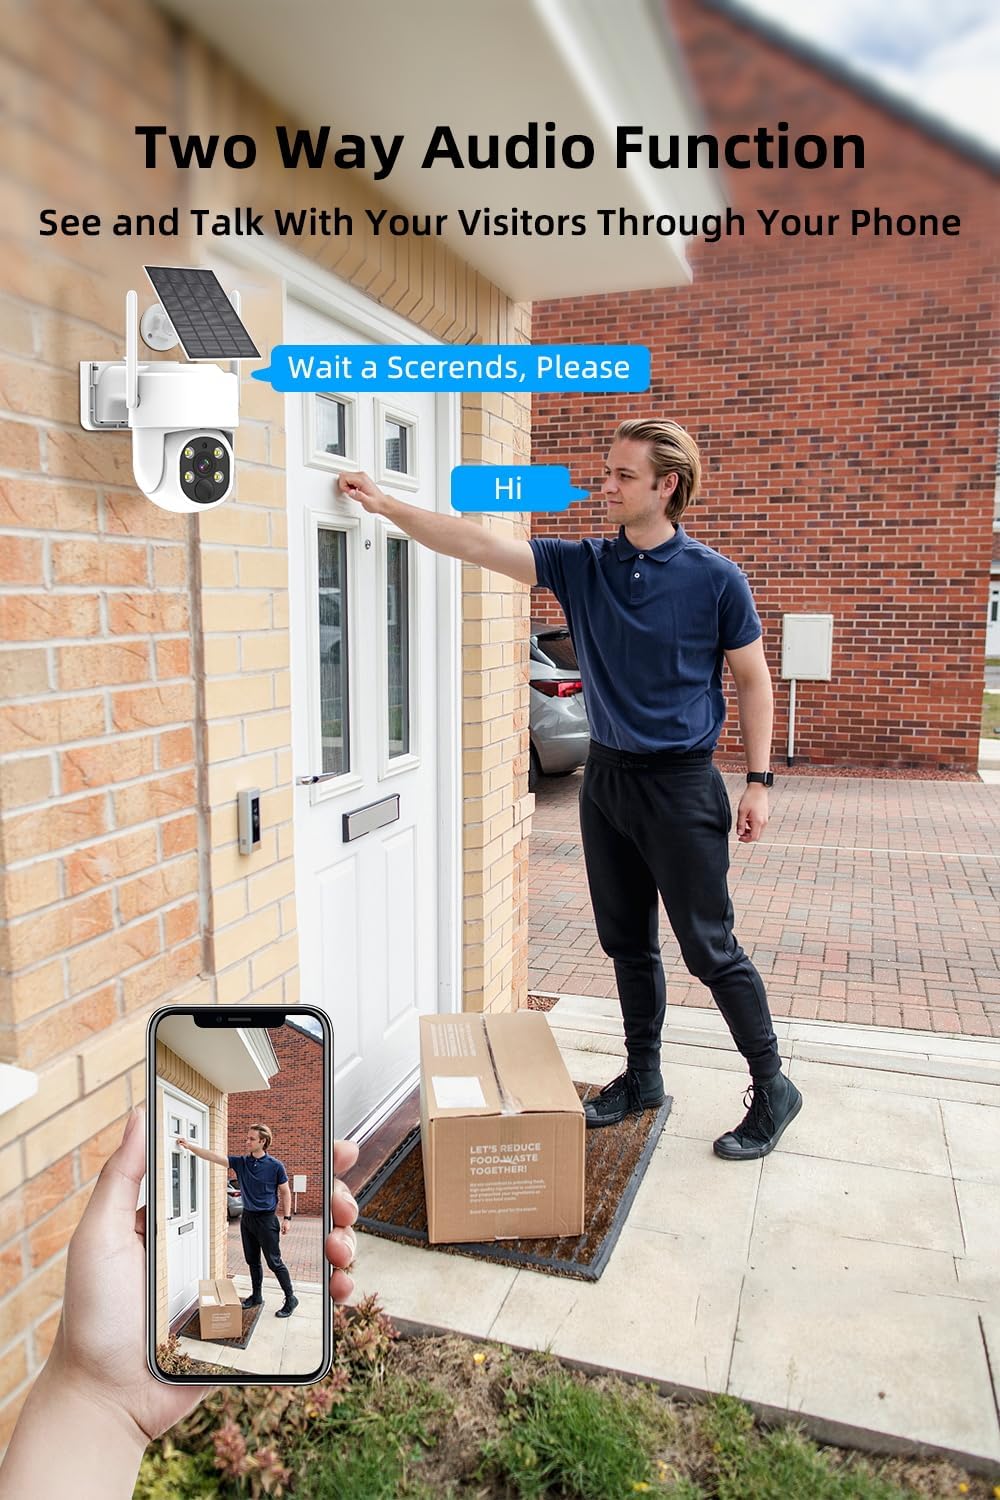
Image: Two-Way Audio function in use.

Image: Smart PIR Sensor detecting motion.

Image: IP66 Waterproof camera design.
4. Setup Guide
4.1 Initial Charging
Before installation, ensure the cameras are fully charged. While solar panels provide continuous power, an initial charge via the power adapter is recommended for optimal battery life.
4.2 Camera Installation
- Choose a Location: Select an outdoor location with good Wi-Fi signal coverage and direct sunlight exposure for the solar panel. Ensure the camera has a clear view of the area you wish to monitor.
- Mount the Camera: Use the provided screw pack to securely mount the camera to a wall or eaves. Ensure the mounting surface is stable.
- Position the Solar Panel: Adjust the solar panel's angle to maximize sunlight exposure throughout the day. It should be free from obstructions like tree branches or overhangs.
4.3 NVR Setup
- Connect NVR: Connect the NVR to a power source using the provided power adapter.
- Connect to Monitor (Optional): For initial setup or local viewing, connect the NVR to a monitor via HDMI or VGA.
- Network Connection: Connect the NVR to your router using the provided network cable for internet access and remote viewing capabilities.
- Mouse Connection: Plug the USB mouse into the NVR for navigation.
4.4 System Pairing & App Installation
- Power On: Power on the NVR and all cameras. The cameras will automatically attempt to connect to the NVR.
- Download App: Download the designated mobile application (refer to the included user manual for app name) from your smartphone's app store (Android/iOS).
- Register Account: Create a new user account and log in.
- Add Device: Follow the in-app instructions to add your NVR system. This typically involves scanning a QR code on the NVR or manually entering its device ID.
- Verify Connection: Once added, you should see the live feeds from all connected cameras within the app.
5. Operating Instructions
5.1 Live View & Playback
- Access Live View: Open the mobile app or NVR interface to view real-time footage from all cameras.
- Playback Recordings: Navigate to the playback section in the app or NVR menu to review recorded events stored on the 64GB TF card.
5.2 Pan & Tilt Control
In the live view interface of the mobile app, use the directional controls to remotely adjust the camera's horizontal (pan) and vertical (tilt) angles to cover different areas.
5.3 Two-Way Audio
While in live view, tap the microphone icon in the app to speak through the camera's speaker. Tap the speaker icon to listen to audio from the camera's microphone.
5.4 Motion Detection Settings
- Enable/Disable: Access camera settings in the app to enable or disable PIR motion detection.
- Sensitivity Adjustment: Adjust the motion detection sensitivity to minimize false alarms.
- Alerts: Configure push notifications to receive instant alerts on your smartphone when motion is detected.
5.5 Color Night Vision
The cameras automatically switch to color night vision when motion is detected in low-light conditions, thanks to built-in floodlights. This feature can often be configured in the camera settings.
6. Maintenance
- Clean Solar Panels: Periodically clean the surface of the solar panels with a soft, damp cloth to ensure maximum charging efficiency. Dust, dirt, and debris can reduce performance.
- Clean Camera Lens: Gently wipe the camera lens with a microfiber cloth to remove smudges or dirt that may affect image clarity.
- Check Connections: Regularly inspect all physical connections (NVR power, network cable) for security and wear.
- Firmware Updates: Check the mobile app or manufacturer's website for available firmware updates. Keeping your system updated ensures optimal performance and security.
- Battery Health: While solar-powered, the internal batteries benefit from consistent charging. Ensure solar panels are optimally positioned. If the camera is frequently in shaded areas, occasional manual charging may be necessary.
7. Troubleshooting
7.1 No Power to Camera
- Check Solar Panel: Ensure the solar panel is clean and receiving direct sunlight.
- Battery Level: Check the battery status in the app. If low, manually charge the camera using the power adapter.
7.2 No Video Feed
- Wi-Fi Connection: Verify that both the NVR and cameras are connected to your Wi-Fi network. Check router status.
- Signal Strength: Ensure cameras are within range of the NVR or your Wi-Fi router. Relocate if necessary.
- Reboot: Restart the NVR and the affected camera(s).
7.3 Motion Detection Not Working
- Enable Feature: Confirm that motion detection is enabled in the camera settings within the app.
- Sensitivity: Adjust the PIR sensitivity. Too low may miss events, too high may cause false alarms.
- Obstructions: Ensure there are no physical obstructions blocking the PIR sensor's view.
7.4 Poor Night Vision
- Clean Lens: Ensure the camera lens is clean and free from smudges or dirt.
- Obstructions: Remove any objects close to the camera that might reflect infrared light back into the lens.
- Floodlight Check: Verify that the built-in floodlights are functioning correctly.
7.5 Remote Access Issues
- Internet Connection: Ensure both your NVR and the device you are using for remote access have a stable internet connection.
- App Login: Verify you are logged into the correct account on the mobile app.
- Router Settings: Check your router's firewall or port forwarding settings if you experience persistent connectivity issues (advanced users).
8. Specifications
| Feature | Specification |
|---|---|
| Model | B0CFLP27RT |
| Video Capture Resolution | 2K, 4 MP |
| Number of Channels | 10 (5 cameras included, expandable) |
| Connectivity Technology | Wireless (Wi-Fi) |
| Pan/Tilt Range | Pan 355°, Tilt 140° |
| Night Vision | Color Night Vision (with floodlight) |
| Motion Detection | PIR Motion Sensor, Human Detection |
| Audio | Two-Way Audio |
| Storage | 64GB TF Card (pre-installed) |
| Weatherproof Rating | IP66 |
| Power Source | Solar Powered (with rechargeable battery) |
| Compatible Devices | Smartphone (Android/iOS), Desktop |
9. Warranty Information
ZHXINSD products typically come with a limited warranty. Please refer to the warranty card included in your product packaging or visit the official ZHXINSD website for detailed warranty terms and conditions. Keep your purchase receipt as proof of purchase for any warranty claims.
10. Customer Support
If you encounter any issues or have questions regarding your ZHXINSD PTZ Security Camera System that are not covered in this manual, please contact our customer support team. Contact information can typically be found on the product packaging, the included user manual, or the official ZHXINSD website.
For the quickest resolution, please have your product model number (B0CFLP27RT) and purchase details ready when contacting support.