Introduction
This manual provides detailed instructions for the safe installation, operation, and maintenance of your Parrot Uncle F8277 27-inch bladeless ceiling fan with integrated LED light. Please read this manual thoroughly before installation and use, and retain it for future reference.

Image: The Parrot Uncle F8277 bladeless ceiling fan with light, showcasing its design and installation.
Safety Information
WARNING: To reduce the risk of fire, electric shock, or personal injury, always follow these safety precautions:
- Installation must be performed by a qualified, licensed electrician. Incorrect installation can lead to malfunction or damage.
- Ensure the power supply is disconnected at the circuit breaker before installation or maintenance.
- All wiring must be in accordance with national and local electrical codes.
- The mounting structure must be capable of supporting the weight of the fan (approximately 16.72 pounds).
- Handle the product with care as it contains fragile components.
- Do not operate the fan if any part is damaged. Contact customer support for assistance.
Package Contents
Verify that all components are present before beginning installation:
- 1 x Ceiling Fan Unit
- 1 x Integrated LED Light Kit
- 1 x Downrod
- 1 x Remote Control
- 1 x User Manual (this document)
Specifications
| Model Number | F8277 |
| Overall Size | 27.1" Diameter x 16.1" Height |
| Weight | 16.72 pounds (7.6 kg) |
| Material | Iron, Acrylonitrile Butadiene Styrene (ABS) |
| Color | Bronze-Houston (Black/Bronze) |
| Light Type | Integrated LED Module |
| Light Wattage | Max 28 Watts |
| Light Color | Warm White (Adjustable brightness) |
| Number of Blades | 3 |
| Fan Speeds | 6 |
| Control Method | Remote Control |
| Power Supply | DC Power |
| Voltage | 120V 60Hz |
| Installation Type | Downrod Mount |
| Sloped Ceiling Compatibility | Flat or Sloped Ceilings |
| Usage Environment | Indoor, Dry Location |
| Special Features | Remote Controlled, Reversible Motor, Energy-efficient |
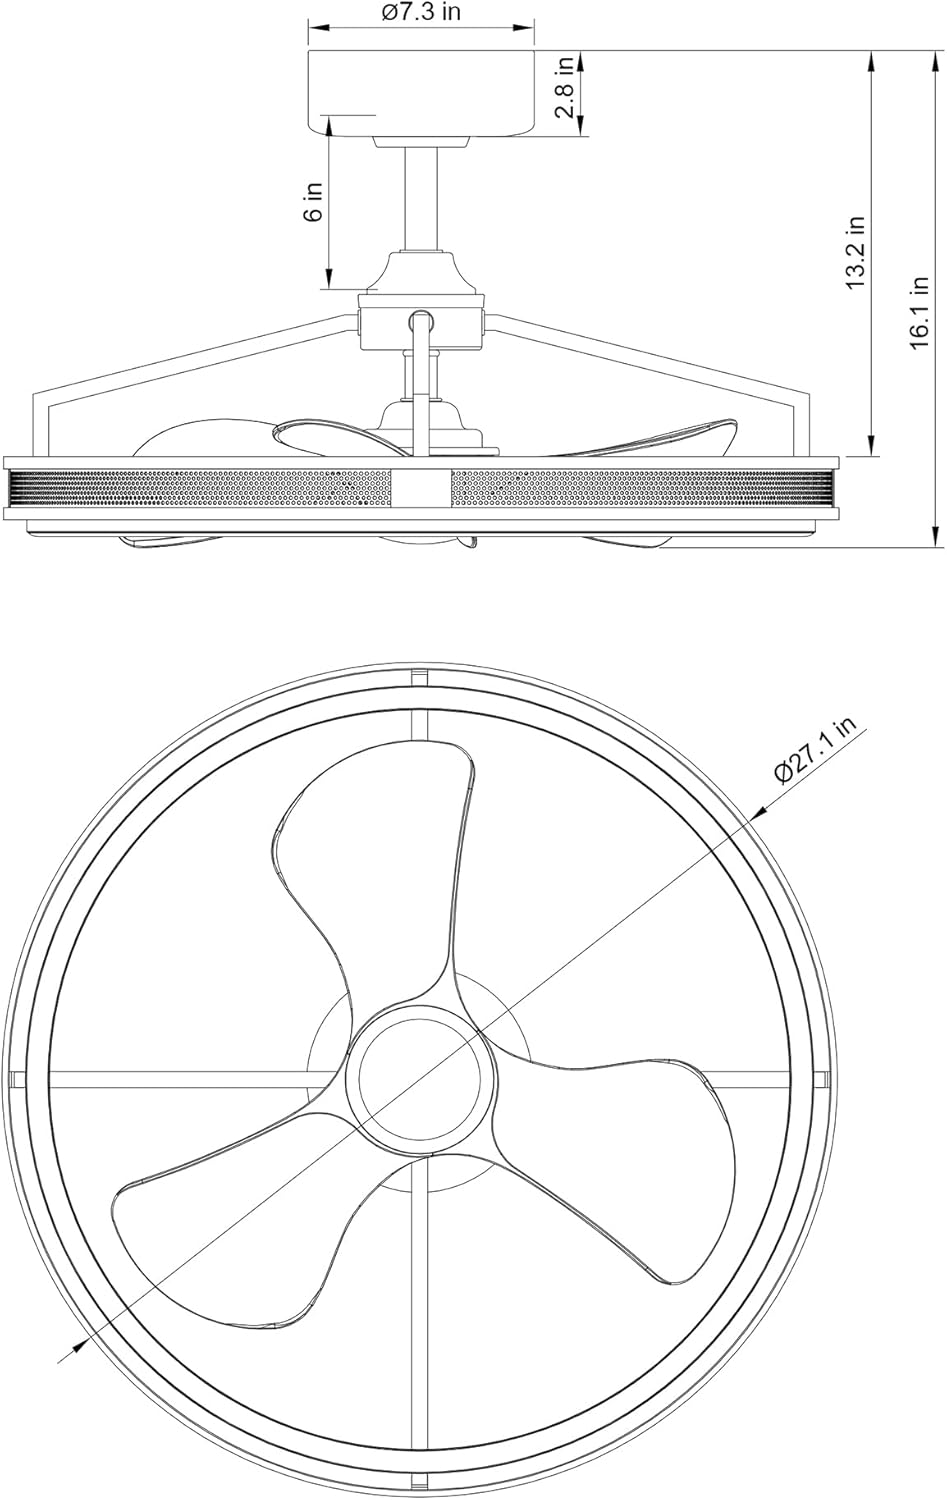
Image: Dimensional drawing of the F8277 ceiling fan.
Setup and Installation
Professional installation by a licensed electrician is strongly recommended. This section provides a general overview; refer to the detailed wiring diagrams and specific instructions included in your package for precise steps.
- Preparation:
- Turn off power at the main circuit breaker.
- Clear the installation area and gather all tools.
- Ensure the ceiling junction box is securely mounted and capable of supporting the fan's weight.
- Mounting the Bracket:
- Attach the mounting bracket to the ceiling junction box using the provided screws and washers.
- Assembling the Downrod:
- Feed the electrical wires from the fan motor through the downrod.
- Secure the downrod to the fan motor assembly.
- Hanging the Fan:
- Carefully lift the fan assembly and place the downrod ball into the mounting bracket socket.
- Wiring Connections:
- Connect the fan's electrical wires to the house wiring according to the provided wiring diagram (typically black to black, white to white, and ground to ground).
- Ensure all connections are secure and insulated.
- Securing the Canopy:
- Slide the canopy up to the ceiling and secure it to the mounting bracket with the designated screws.
- Light Kit Installation:
- Connect the light kit wires to the fan's light wires.
- Attach the light kit assembly to the bottom of the fan.
- Final Check:
- Verify all connections are tight and all components are securely fastened.
- Restore power at the circuit breaker.

Image: The F8277 fan providing air circulation and light in a kitchen.
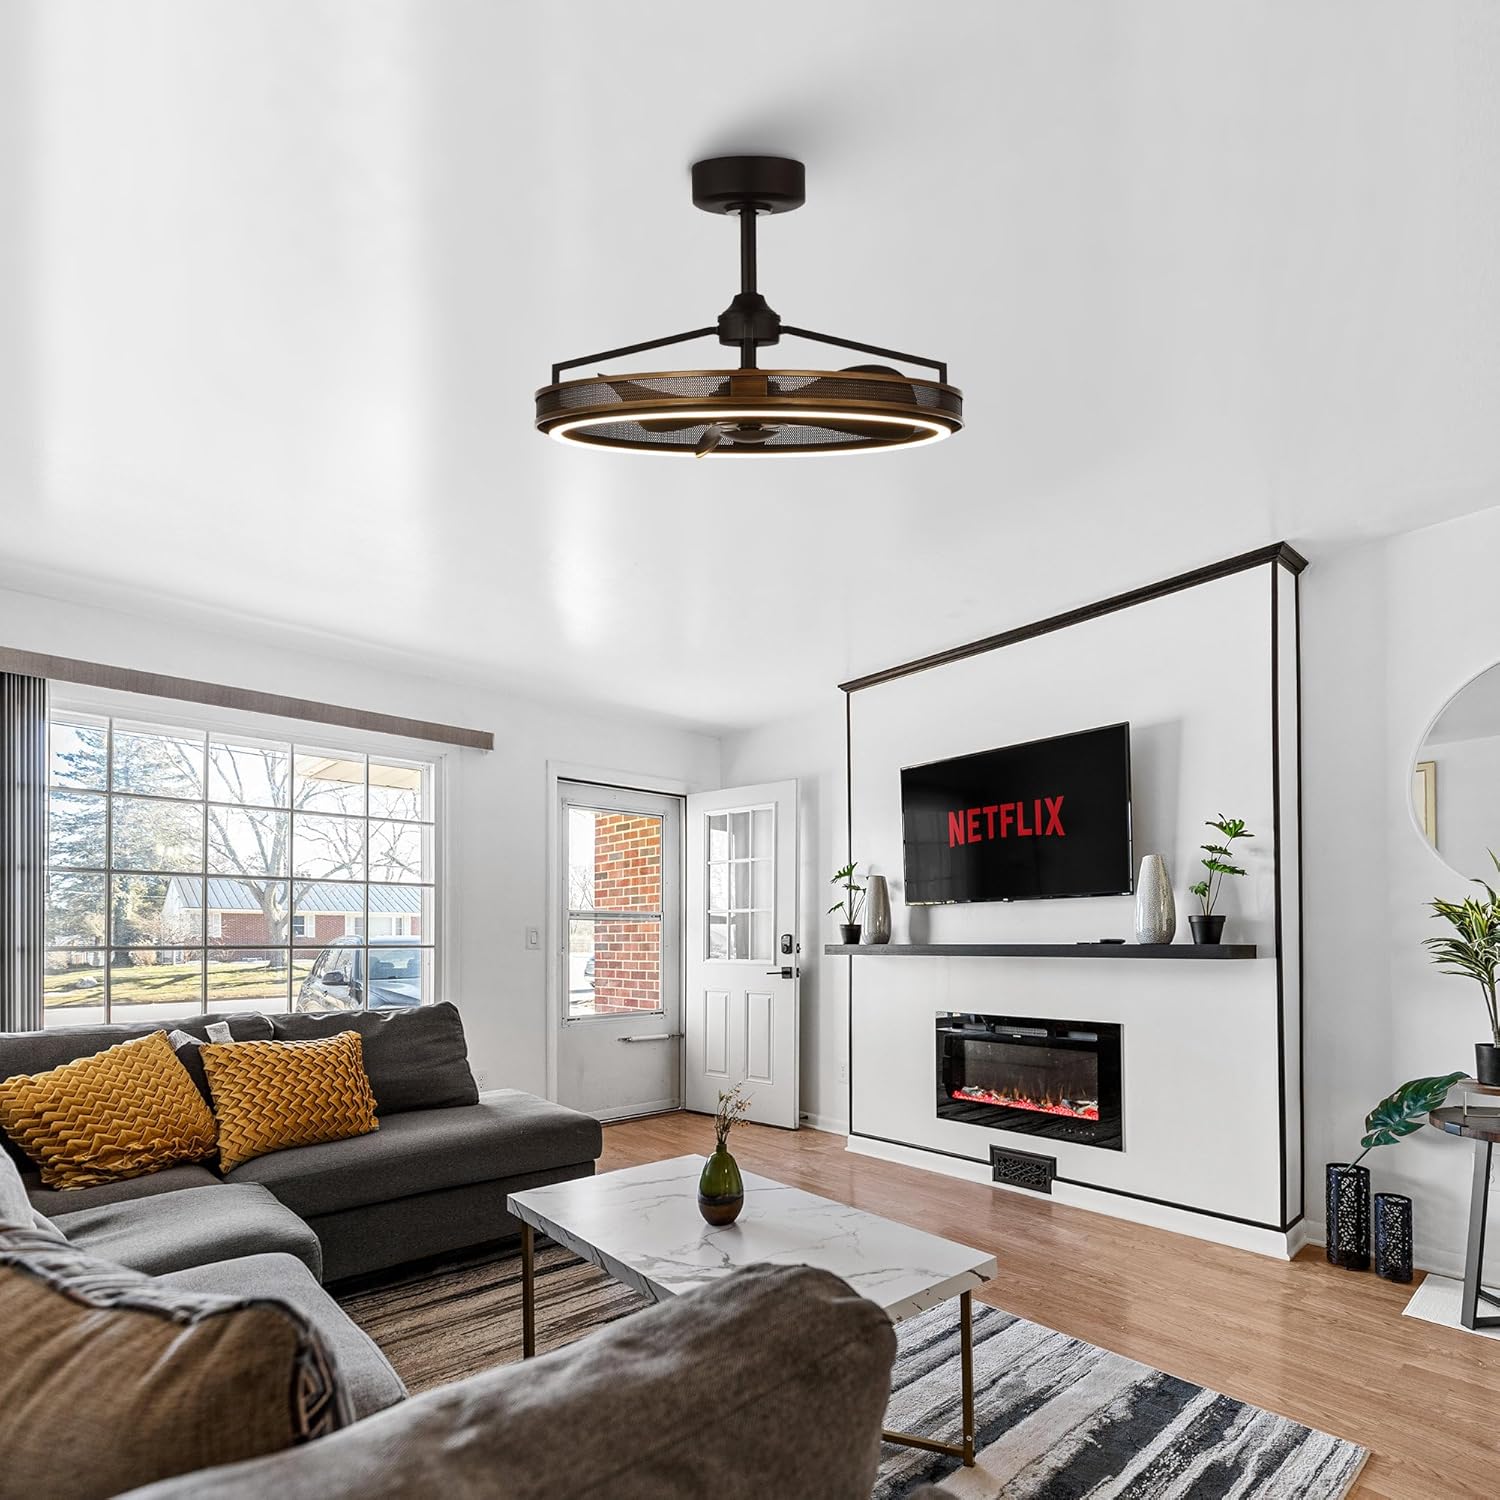
Image: The F8277 fan integrated into a living room environment.
Operating Instructions
Your Parrot Uncle F8277 ceiling fan is operated using the included remote control. Ensure batteries are installed correctly in the remote.
Remote Control Functions:
- Fan ON/OFF: Press the fan button to turn the fan on or off.
- Fan Speed Control: Use the speed buttons (1-6) to adjust the fan's rotation speed. There are 6 available speeds.
- Light ON/OFF: Press the light button to turn the LED light on or off.
- Light Brightness Adjustment: Hold the light button to dim or brighten the LED light.
- Reversible Motor: Press the reverse button to change the direction of the fan blades.
- Downward Airflow (Summer Mode): Creates a cooling breeze.
- Upward Airflow (Winter Mode): Circulates warm air trapped near the ceiling, improving heat distribution.
- Timer Function: (If applicable, check your specific remote for timer buttons) Allows you to set the fan to turn off automatically after a set period.
- Natural Wind Mode: (If applicable) Simulates a natural breeze by varying fan speeds.

Image: Detail of the fan's LED light and internal blades.
Maintenance
Regular maintenance ensures optimal performance and longevity of your ceiling fan.
- Cleaning:
- Before cleaning, ensure the power is turned off at the circuit breaker.
- Use a soft, damp cloth to wipe down the fan's exterior. Do not use abrasive cleaners or solvents.
- Avoid getting moisture into the motor housing or electrical components.
- Tightening Fasteners:
- Periodically check all screws and fasteners on the mounting bracket and fan assembly to ensure they are secure.
- Light Source:
- The LED module is integrated and designed for long life. Do not attempt to replace individual LEDs. If the light fails, contact customer support.

Image: Detail of the fan's outer mesh design, highlighting the bronze finish.
Troubleshooting
Before contacting customer support, review the following common issues and solutions:
| Problem | Possible Cause | Solution |
|---|---|---|
| Fan does not start. | No power supply; Loose wiring; Remote control battery dead or not paired. | Check circuit breaker; Verify wiring connections (consult electrician); Replace remote battery or re-pair remote. |
| Light does not work. | No power to light kit; Loose wiring; Integrated LED module failure. | Check light switch/remote; Verify light kit wiring; Contact customer support for LED module issues. |
| Fan makes excessive noise. | Loose screws; Improper installation; Obstruction. | Tighten all mounting screws; Ensure proper installation (consult electrician); Check for any objects interfering with fan operation. |
| Remote control not working. | Dead batteries; Remote not paired; Obstruction between remote and receiver. | Replace batteries; Follow pairing instructions (if applicable); Ensure clear line of sight. |
If you encounter issues not listed here or if the suggested solutions do not resolve the problem, please contact Parrot Uncle customer support.
Warranty and Support
Parrot Uncle provides the following support for your product:
- 1-Year Quality Warranty: Covers manufacturing defects for one year from the date of purchase.
- 30-Day Return and Replacement Service: For initial product issues.
- One-Year Free Replacement Parts Service: For eligible components.
- Lifetime Professional Customer Service: Assistance with product inquiries and support.
For any questions, concerns, or to claim warranty service, please contact Parrot Uncle customer support. Contact information can typically be found on the product packaging or the official Parrot Uncle website.


