
1. Safety Information
Please read this manual carefully before using the Magicshine EVO 1300 Bike Light. Improper use may result in injury or damage to the product.
- Do not look directly into the light beam when the light is on, as this may cause temporary vision impairment or permanent eye damage.
- Ensure the light is securely mounted before riding.
- Keep the light away from children.
- Do not disassemble or modify the light. This will void the warranty and may cause damage or injury.
- Use only the provided USB-C charging cable.
- The light may become hot during prolonged use. Exercise caution when handling.
2. Package Contents
Verify that all items are present in your package:
- EVO 1300 Bike Front Light x 1
- Handlebar Out-Front Mount Kit x 1
- MJ-6508 Remote Control (incl. strap) x 1
- USB-C Charging Cable x 1
- Wahoo Mount x 1
- Screw x 2
- 2mm Hex Key x 1
- 3mm Hex Key x 1
- User Manual x 1

Image: Contents of the Magicshine EVO 1300 package, including the light, mount, remote, cables, and tools.
3. Product Overview
The Magicshine EVO 1300 is a high-performance bicycle headlight designed for night riding, offering a maximum output of 1300 lumens. It features a durable aluminum housing and an IPX6 waterproof rating, ensuring reliability in various weather conditions. The light is equipped with a fast-charging USB-C port and a 3200mAh battery for extended runtime.

Image: The Magicshine EVO 1300 bike light, showcasing its compact design and front lens.
Key features include a unique beam combination with a glare-free low beam for urban commutes and a powerful high beam for off-road exploration. Users can customize lighting settings via the Magicshine App for a personalized experience. The light also comes with a wireless remote control for convenient mode switching.
Image: The Magicshine EVO 1300 mounted underneath a bike computer, demonstrating the space-saving design.
4. Setup
4.1 Mounting the Light
The EVO 1300 utilizes an out-front mount with a GoPro quick-release design, allowing the light to be positioned beneath the handlebars. This design frees up handlebar space for other accessories like a bike computer.
- Attach the handlebar out-front mount to your bicycle's handlebars using the provided hex keys and screws. Ensure it is securely fastened.
- Slide the EVO 1300 light onto the GoPro quick-release mechanism on the mount until it clicks into place.
- Adjust the angle of the light to ensure optimal illumination of your path without blinding oncoming traffic.
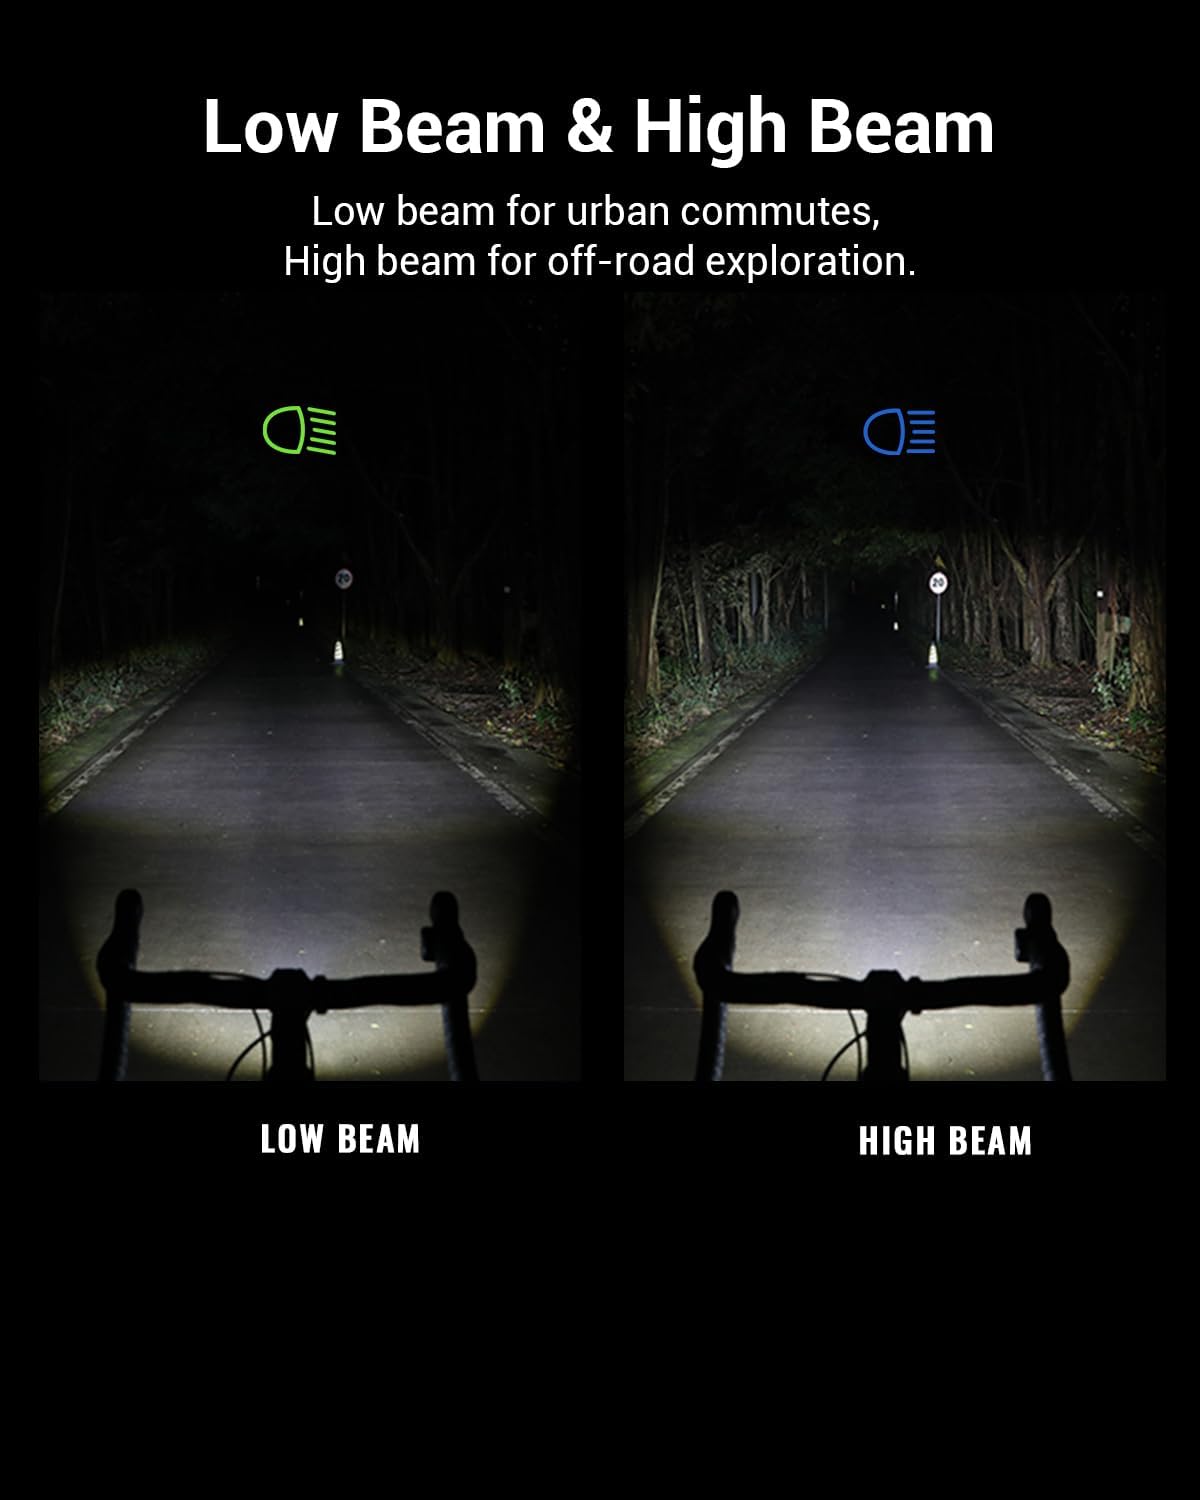
Image: The Magicshine EVO 1300 light securely mounted beneath bicycle handlebars, with a bike computer mount above it.
4.2 Mounting the Remote Control
The MJ-6508 remote control can be attached to your handlebars for easy access to light functions.
- Position the remote control on your handlebar in a location that is easily accessible with your thumb or finger while riding.
- Use the provided strap to secure the remote control firmly to the handlebar.
Image: The wireless remote control for the EVO 1300 mounted on a bicycle handlebar, showing its ergonomic placement near the brake lever.
4.3 Charging the Light
The EVO 1300 features a USB-C charging port for convenient and fast charging.
- Locate the USB-C charging port on the light, typically covered by a rubber flap for waterproofing.
- Open the rubber flap and insert the provided USB-C charging cable.
- Connect the other end of the cable to a USB power source (e.g., wall adapter, computer USB port).
- The battery indicator will show charging status. Ensure the flap is securely closed after charging to maintain waterproofing.

Image: A hand plugging a USB-C cable into the charging port of the Magicshine EVO 1300 bike light.
5. Operation
5.1 Powering On/Off
To power on the light, press and hold the main power button located on the light unit. Press and hold again to power off.
5.2 Changing Modes
The EVO 1300 offers various lighting modes for different riding conditions:
- Low Beam: Designed for urban environments, providing a glare-free beam to avoid dazzling oncoming road users.
- High Beam: For off-road or unlit areas, offering maximum illumination.
- Flash Modes: For increased visibility during daytime or in low-light conditions.
Double-click the main power button on the light or the corresponding button on the remote control to switch between low beam and high beam. Single-click to cycle through different intensity levels within each beam type or flash modes.
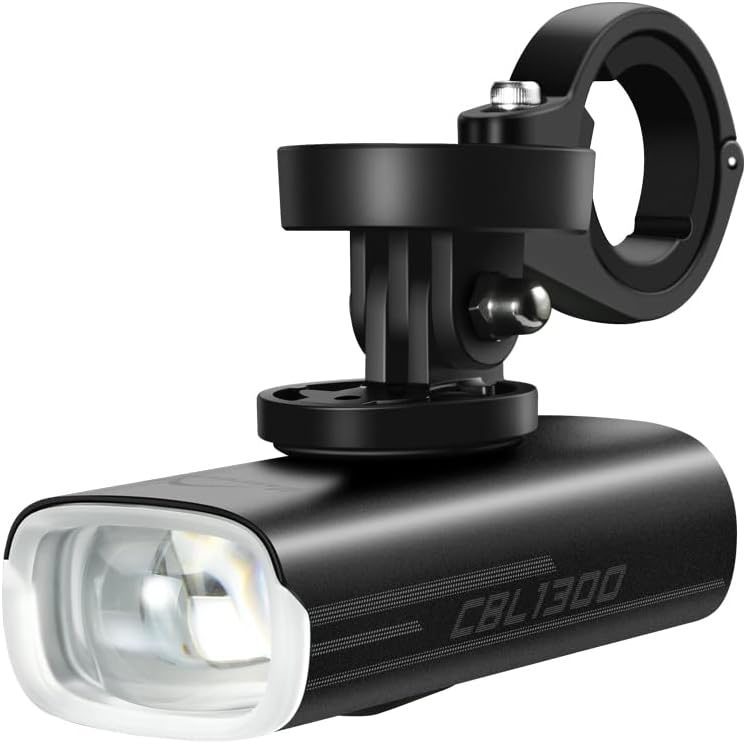
Image: Comparison of the Magicshine EVO 1300's low beam (cut-off) and high beam patterns on a dark road.
5.3 Remote Control Usage
The MJ-6508 wireless remote control allows for convenient adjustment of light modes without removing your hands from the handlebars.
- Press the designated button on the remote to cycle through brightness levels.
- Use another button to switch between low beam and high beam.
5.4 App Customization
Download the Magicshine App to customize your lighting settings for various riding scenarios. The app allows for fine-tuning of brightness levels and mode configurations.
Video: An overview of the Magicshine EVO 1300 bike light, demonstrating its features including the underneath mounting, dual-lens system, IPX6 waterproof rating, Garmin quick-release mount, and wireless remote control. The video also shows the cut-off low beam and high beam in action.
6. Maintenance
6.1 Cleaning
Wipe the light with a soft, damp cloth to remove dirt and debris. Do not use harsh chemicals or abrasive materials, as these may damage the housing or lens.
6.2 Charging Best Practices
To prolong battery life, charge the light regularly and avoid completely draining the battery. Store the light in a cool, dry place when not in use.
6.3 Waterproofing
The EVO 1300 has an IPX6 waterproof rating, meaning it is protected against high-pressure water jets from any direction. Ensure the USB-C charging port cover is securely closed to maintain its waterproof integrity.
7. Troubleshooting
- Light not turning on: Check battery level. If low, charge the light using the provided USB-C cable.
- Light flickering or dim: This may indicate a low battery. Recharge the light.
- Remote control not working: Ensure the remote control is properly paired with the light. Check the remote's battery.
- Light not charging: Verify that the USB-C cable is correctly inserted and the power source is functional. Try a different cable or power adapter.
- Mount not secure: Re-tighten the mount screws with the provided hex keys.
8. Specifications
| Feature | Detail |
|---|---|
| Brand | Magicshine |
| Model | EVO 1300 |
| Brightness | 1300 lumens (Max) |
| Power Source | Battery Powered |
| Battery Capacity | 3200mAh (Internal) |
| Charging Port | USB-C |
| Water Resistance Level | IPX6 |
| Material | Aluminum, Plastic |
| Item Weight | 154 Grams |
| Product Dimensions | 3.7"L x 1.65"W x 1.36"H |
| Mounting Type | Handlebar Mount (GoPro quick-release compatible) |
| Number of Settings | 8 |
9. Warranty & Support
Magicshine products are designed for durability and performance. For warranty information, please refer to the specific warranty policy provided with your purchase or visit the official Magicshine website.
For technical support or customer service inquiries, please contact Magicshine support at: aftersales@magicshine.com


