1. Introduction
The onewscan 8103T is a versatile wireless barcode scanner designed for efficient data collection and inventory management. It integrates three primary functions: a barcode scanner, a data collector, and an inventory counter. This device supports both 1D and 2D barcodes, including QR codes, and features a 2.2-inch TFT color screen for clear data display. It is compatible with various operating systems and offers both wireless (2.4GHz) and wired (USB) connectivity options.

Image 1.1: Overview of the onewscan 8103T's key features, including intelligent decoding, wireless transmission, large battery capacity, quick upload, HD screen, and long-distance scanning capabilities.
2. Package Contents
Please verify that all items listed below are included in your package. If any items are missing or damaged, please contact customer support.
- 1 x onewscan 8103T Barcode Scanner
- 1 x USB Receiver (2.4GHz Wireless Dongle)
- 1 x USB Data Cable
- 1 x User Manual

Image 2.1: Contents of the onewscan 8103T package, showing the barcode scanner, USB receiver, USB data cable, and user manual.
3. Product Overview
Familiarize yourself with the physical components and controls of your onewscan 8103T barcode scanner.

Image 3.1: Diagram illustrating the various buttons and features of the onewscan 8103T, including the 2.2 HD screen, ENT (Enter), SCAN, ESC (Cancel) buttons, F1-F4 function buttons, directional indicator, number pad, Delete button, screen brightness adjustment, power button, and manual input barcode/input method switch.
- 2.2 HD Screen: Displays scanned data, menu options, and device status.
- ENT (Enter) Button: Confirms selections or inputs.
- SCAN Button: Activates the barcode scanning function.
- ESC (Cancel) Button: Exits current menu or cancels an operation.
- F1-F4 Function Buttons: Programmable or context-sensitive function keys.
- Directional Indicator: Navigates through menus and options.
- Number Button Pad: For manual data entry.
- DEL (Delete) Button: Deletes characters during manual input.
- SW (Screen Brightness Adjustment): Adjusts screen illumination.
- Power Button: Turns the device on or off.
- JProduct Label: Contains product information and model number.
- Buzzer: Provides audio feedback for scans and operations.
- Reset Hole: For factory reset (use a pin).
4. Setup
4.1 Charging the Device
Before initial use, fully charge the scanner. Connect the USB data cable to the scanner's charging port and the other end to a USB power adapter or a computer's USB port. The built-in 1000mAh lithium polymer battery provides extended operation.
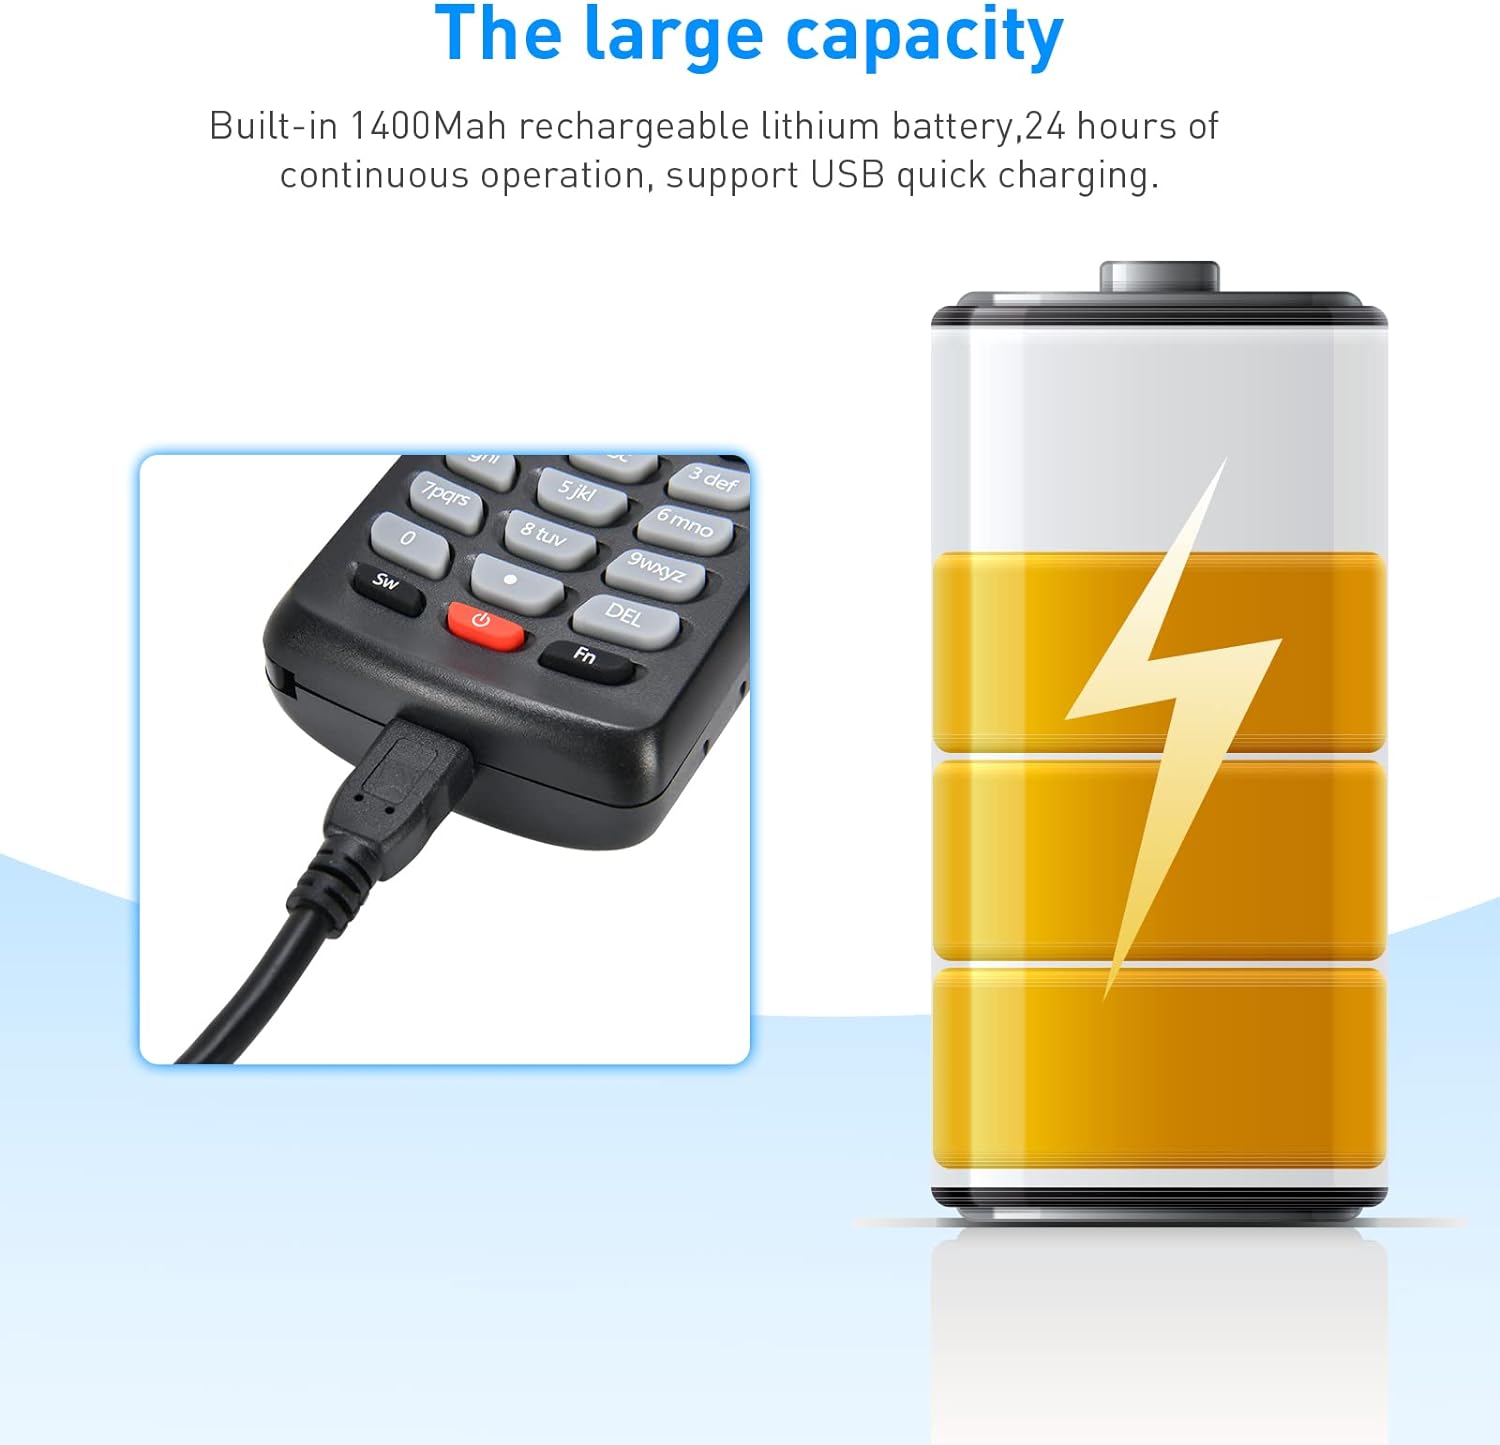
Image 4.1: Illustration of the onewscan 8103T connected for charging via its USB port, highlighting the large capacity battery.
4.2 Connecting via 2.4GHz Wireless Dongle
- Insert the 2.4GHz USB receiver into an available USB port on your computer.
- The computer will automatically install the necessary drivers.
- Turn on the onewscan 8103T scanner. It will automatically attempt to connect to the receiver.
- Once connected, the scanner will function as a keyboard input device, transmitting scanned data directly to any active text field on your computer.

Image 4.2: The 2.4GHz USB receiver, indicating its wireless connectivity for the scanner.
4.3 Connecting via USB Cable (Wired Mode)
- Connect the USB data cable to the scanner and the other end to a USB port on your computer.
- The scanner will enter wired mode and can transmit data directly to your computer.
- This mode also charges the device.
5. Operating Modes
The onewscan 8103T offers three distinct operating modes to suit various data collection needs.

Image 5.1: Visual representation of the three scanning modes: Scan Gun Mode, Collection Mode, and Inventory Mode, with their respective functionalities.
5.1 Scan Gun Mode
In Scan Gun Mode, the scanner acts as a direct input device. Scanned data is immediately transmitted to the connected computer or device. If the scanner is offline or out of wireless range, data will be temporarily stored and transmitted automatically once a signal is re-established.
5.2 Collection Mode
Collection Mode is a plug-and-play option where scanned data is stored internally. This mode allows for batch processing. You can configure settings such as preventing duplicate scans. Data can be exported to a computer when needed.
5.3 Inventory Mode
Inventory Mode is designed for accumulating barcode data. When scanning barcodes, the device automatically counts and stores the quantity. This mode also allows you to browse and modify incorrect data directly on the scanner's screen before exporting.

Image 5.2: The scanner's screen displaying inventory counting, showing multiple barcode entries with associated quantities.

Image 5.3: An example of the export table status, showing operations (Inventory), product barcodes, and their corresponding numbers.
6. Barcode Recognition
The onewscan 8103T is capable of reading a wide range of 1D and 2D barcodes, including those on screens and those that are partially damaged.
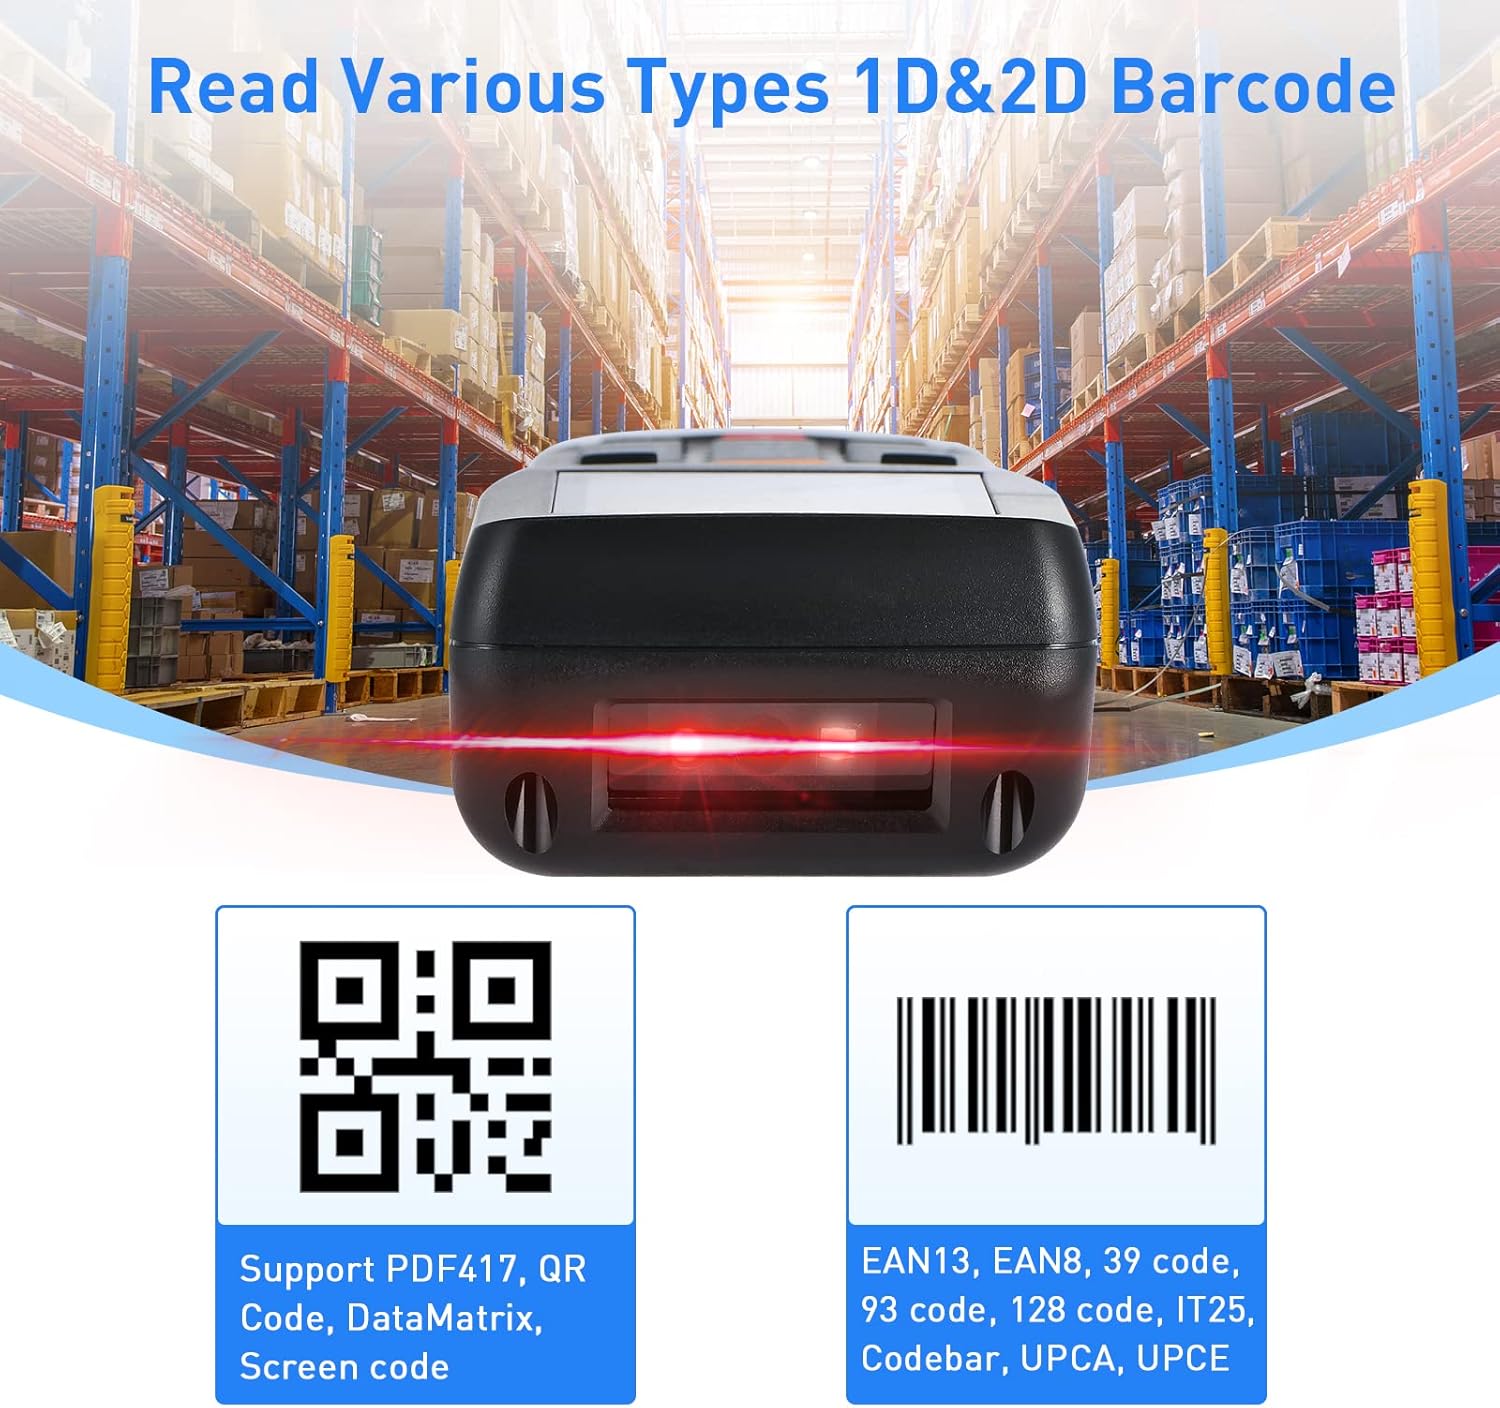
Image 6.1: Examples of 1D and 2D barcode types supported by the scanner, including QR, DataMatrix, PDF417, EAN13, EAN8, Code 39, Code 93, Code 128, IT25, Codabar, UPCA, and UPCE.

Image 6.2: The scanner's ability to efficiently read barcodes even if they are blurry, distorted, broken, or long, as displayed on various screens.
6.1 Supported 1D Barcodes
- Codabar
- Code 11
- Code 93
- MSI
- Code 128
- EAN
- UPC
- Code 39
- UPC-A
- ISBN
- Industrial 25
- Standard 25
- Matrix
6.2 Supported 2D Barcodes
- QR Code
- DataMatrix
- PDF417
- Aztec
- Micro PDF417
7. Advanced Features and Settings
The onewscan 8103T offers several customizable features to enhance its functionality.
- Multiple Keyboard Languages: Supports US, UK, German, French, Italian, Spanish, Japanese, and more.
- Uppercase / Lowercase Setting: Configure scanned data output.
- Prefix or Suffix: Add custom characters before or after scanned data.
- Hide Characters: Conceal specific characters within scanned data.
- Volume Setting: Adjust the scanner's audio feedback level.
- Identify Barcode Type: Display the type of barcode scanned.
- Internal Flash Storage: 4MB internal flash memory allows storage of up to 100,000 barcodes when offline. Data can be uploaded later when within transmission range.
- Long Transmission Range: Up to 200m in open air, and 50m with obstacles.

Image 7.1: Diagram illustrating the wireless transmission range of the scanner, showing up to 50m with obstacles and 200m in barrier-free environments.
8. Compatibility
The onewscan 8103T is designed for broad compatibility with various devices and operating systems.
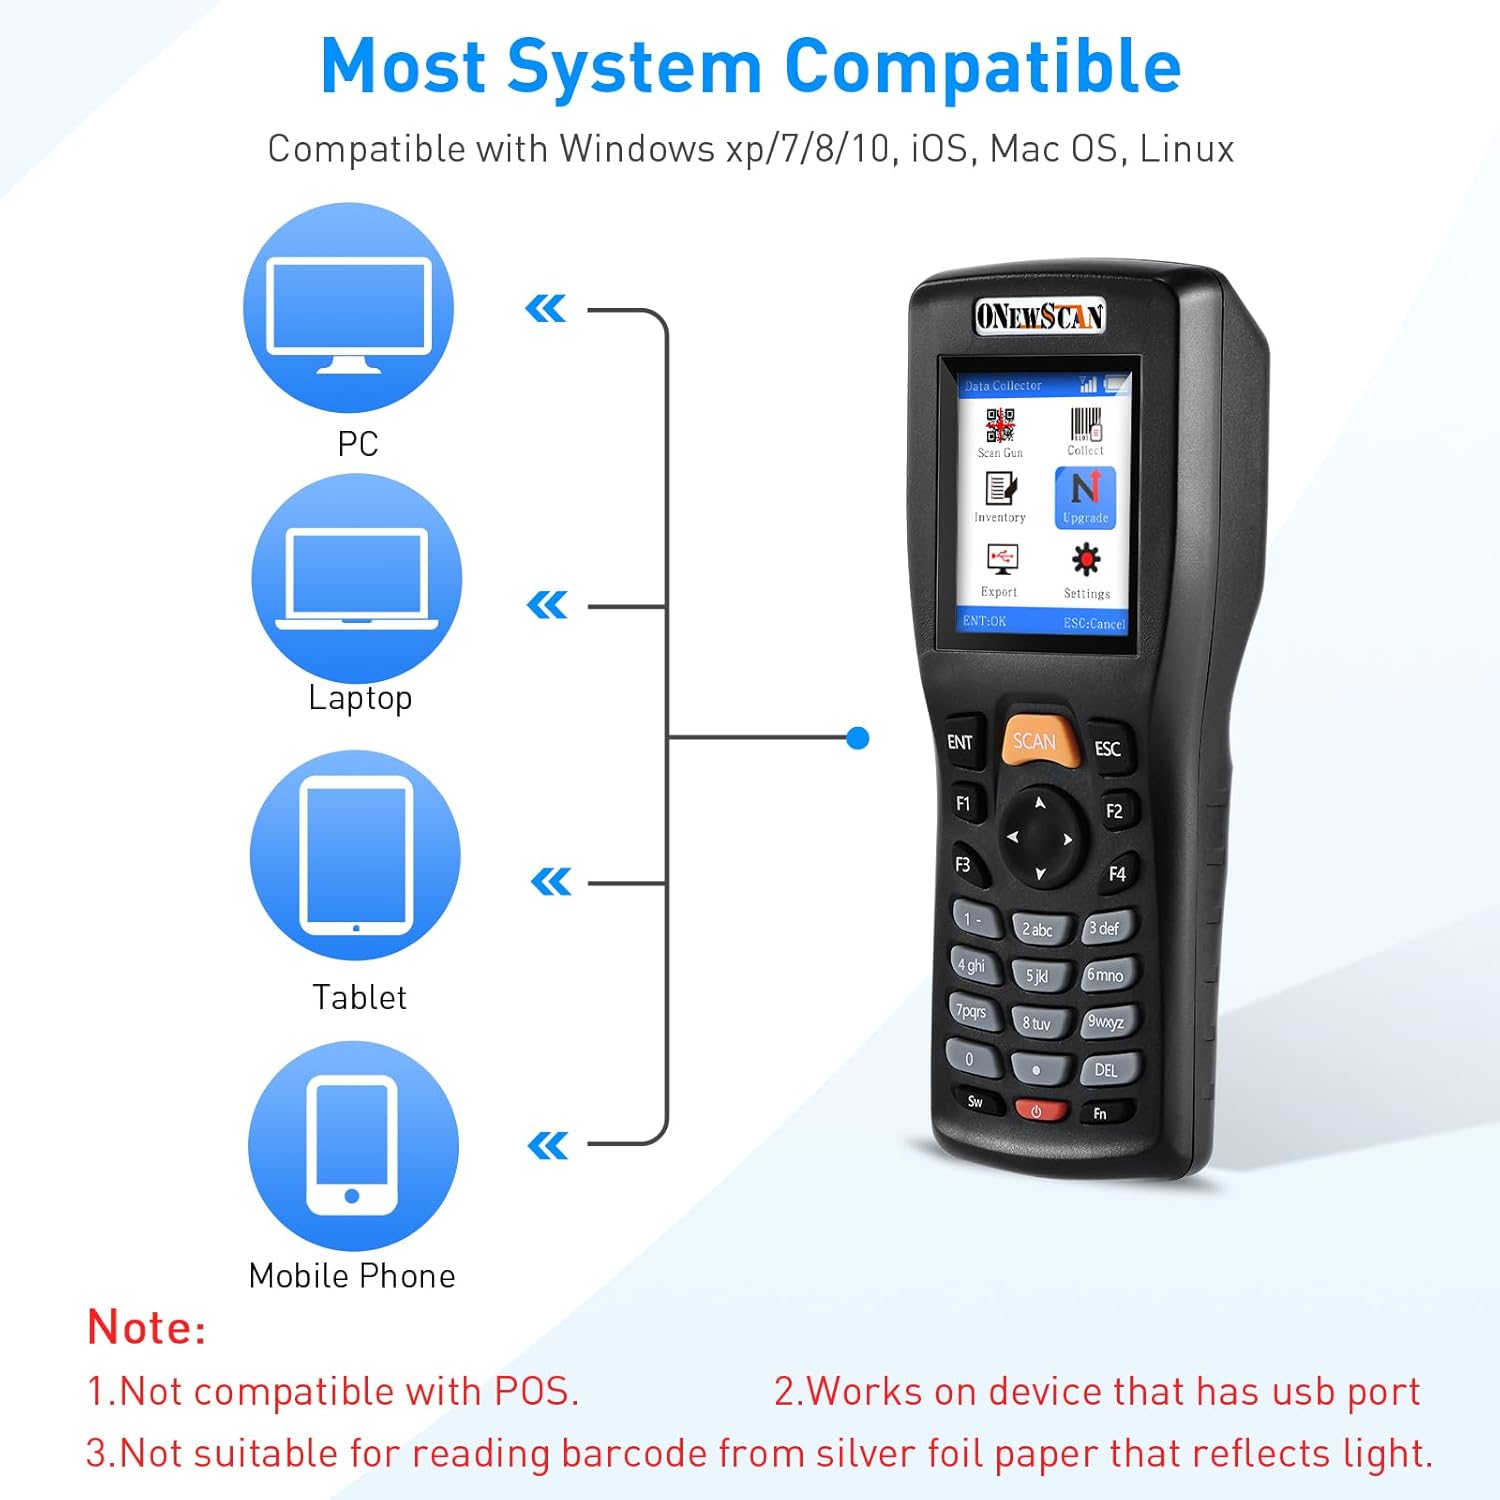
Image 8.1: Visual representation of the scanner's compatibility with PC, Laptop, and Tablet devices. It is compatible with Windows XP/7/8/10, iOS, Mac OS, and Linux.
- Operating Systems: Windows XP/7/8/10, Mac OS, Linux.
- Compatible Devices: Desktop computers, Laptops.
- Note: Not compatible with POS systems. Not suitable for reading barcodes from reflective silver foil paper.
9. Maintenance
9.1 Battery Care
- The scanner uses a built-in 1000mAh lithium polymer battery.
- Charge the device regularly to maintain battery health.
- Avoid fully discharging the battery frequently.
- If storing the device for an extended period, charge it to approximately 50% and store in a cool, dry place.
9.2 Cleaning
- Use a soft, dry cloth to clean the exterior of the scanner.
- For the scanning window, use a lens cleaning cloth or a microfiber cloth with a small amount of isopropyl alcohol.
- Do not use abrasive cleaners or immerse the device in liquids.
10. Troubleshooting
If you encounter issues with your onewscan 8103T, refer to the following common problems and solutions.
- Device does not turn on:
Ensure the battery is charged. Connect the scanner to a power source using the USB cable and try again. - Scanner not connecting wirelessly:
Verify the USB receiver is properly inserted into the computer. Ensure the scanner is powered on and within range. Re-pair the scanner with the receiver if necessary (refer to the full user manual for pairing instructions). - Scanned data not appearing on computer:
Check if the scanner is successfully connected (wired or wireless). Ensure an active text input field is selected on your computer. Test with a simple text editor like Notepad. - Unable to read certain barcodes:
Ensure the barcode is clean and undamaged. Check if the barcode type is supported by the scanner (refer to Section 6). Adjust the scanning distance and angle. The scanner may have difficulty with highly reflective surfaces. - Data collection or inventory mode issues:
Ensure you have selected the correct operating mode. Check the device's internal storage capacity. If the device is full, export data and clear the memory. - Device is unresponsive:
Use a thin pin to press the reset hole on the back of the device. This will perform a soft reset without losing stored data.
11. Specifications
| Feature | Specification |
|---|---|
| Model | 8103T |
| Dimensions | 7.4 x 3.2 x 2.4 inches |
| Item Weight | 8.4 ounces |
| Battery | 1000mAh Lithium Polymer (included) |
| Connectivity | 2.4GHz Wireless (USB Dongle), USB Cable |
| Internal Storage | 4MB Flash (up to 100,000 barcodes) |
| Transmission Range | 200m (open air), 50m (with obstacles) |
| Screen | 2.2 Inch TFT Color Screen |
| Supported 1D Codes | Codabar, Code 11, Code 93, MSI, Code 128, EAN, UPC, Code 39, UPC-A, ISBN, Industrial 25, Standard 25, Matrix |
| Supported 2D Codes | QR, DataMatrix, PDF417, Aztec, Micro PDF417 |
| Compatible OS | Windows XP/7/8/10, Mac OS, Linux |
12. Warranty and Support
Information regarding product warranty and customer support was not provided in the available product details. Please refer to the product packaging or the manufacturer's official website for specific warranty terms and contact information for support.