
EasySMX 9101
EasySMX 9101 Wireless Controller User Manual
Model: 9101
1. Introduction
Thank you for choosing the EasySMX 9101 Wireless Controller. This manual provides detailed instructions on how to set up, operate, and maintain your controller to ensure an optimal gaming experience. Please read this manual thoroughly before use and keep it for future reference.
2. Product Overview
2.1 Package Contents
- EasySMX 9101 Wireless Controller
- 2.4G USB Receiver
- USB-C Charging Cable
- User Manual
2.2 Controller Layout

Figure 1: EasySMX 9101 Wireless Controller with key components labeled.
The EasySMX 9101 controller features a standard gamepad layout designed for comfortable and intuitive control. Key components include:
- Left Joystick (R3): For movement and camera control. Press down for R3 button.
- Directional-Pad (D-Pad): For precise directional input.
- Right Joystick (R3): For camera control or specific in-game actions. Press down for R3 button.
- Function Keys (A, B, X, Y): Standard action buttons.
- LB/RB Buttons: Left and Right Bumper buttons.
- LT/RT Buttons: Left and Right Trigger buttons.
- Turbo Button: Activates/deactivates turbo function for rapid firing.
- Back Button: Typically used for menu navigation or specific in-game functions.
- Start Button: Typically used for pausing games or accessing menus.
- Charging Port: USB-C port for charging the controller.
- LED Indicators (LED 1, 2, 3, 4): Indicate connection status, player number, and charging status.
3. Setup
3.1 Charging the Controller
Before first use, fully charge the controller. Connect the supplied USB-C cable to the controller's charging port and the other end to a USB power source (e.g., PC, USB wall adapter). The LED indicators will show charging status and turn off or change color when fully charged.
3.2 Wireless Connection (2.4G Receiver)
The EasySMX 9101 uses 2.4G wireless technology for a stable connection.
- Insert the 2.4G USB receiver into an available USB port on your device (PC, PS3, Android TV Box).
- Turn on the controller by pressing the Home button.
- The controller will automatically attempt to connect to the receiver. The LED indicators will blink during pairing and become solid once connected.

Figure 2: Wireless connection setup using the 2.4G USB receiver.
3.3 Wired Connection
The controller can also be used in wired mode, which is required for Nintendo Switch compatibility.
- Connect the USB-C cable to the controller's charging port.
- Connect the other end of the USB-C cable to a USB port on your device.
- The controller will automatically switch to wired mode and be recognized by your device.
3.4 Connecting to Specific Devices

Figure 3: EasySMX 9101 Wireless Controller compatibility across multiple platforms.
- PC (Windows): Insert the 2.4G USB receiver into a USB port. The system will automatically install the necessary drivers.
- PS3: Insert the 2.4G USB receiver into a USB port on the PS3 console.
- Android Mobile/Tablet/TV Box: Ensure your Android device supports OTG (On-The-Go) function. Use an OTG adapter (not included) to connect the 2.4G USB receiver to your device.
- Nintendo Switch/Switch Lite/Switch OLED: The controller works in wired mode only. Connect the controller to the Switch dock or console (with an adapter if needed) using the USB-C cable.
4. Operating Instructions
4.1 Turbo Function
The Turbo function allows for rapid, continuous pressing of a button without repeatedly pressing it manually. To activate Turbo:
- Press and hold the Turbo button.
- While holding Turbo, press the action button (A/B/X/Y, LB/RB, LT/RT) you wish to assign the Turbo function to.
- Release both buttons. The assigned button will now have Turbo enabled.
To deactivate Turbo for a specific button, repeat the process: hold Turbo and press the assigned action button again.
4.2 Dual Vibration
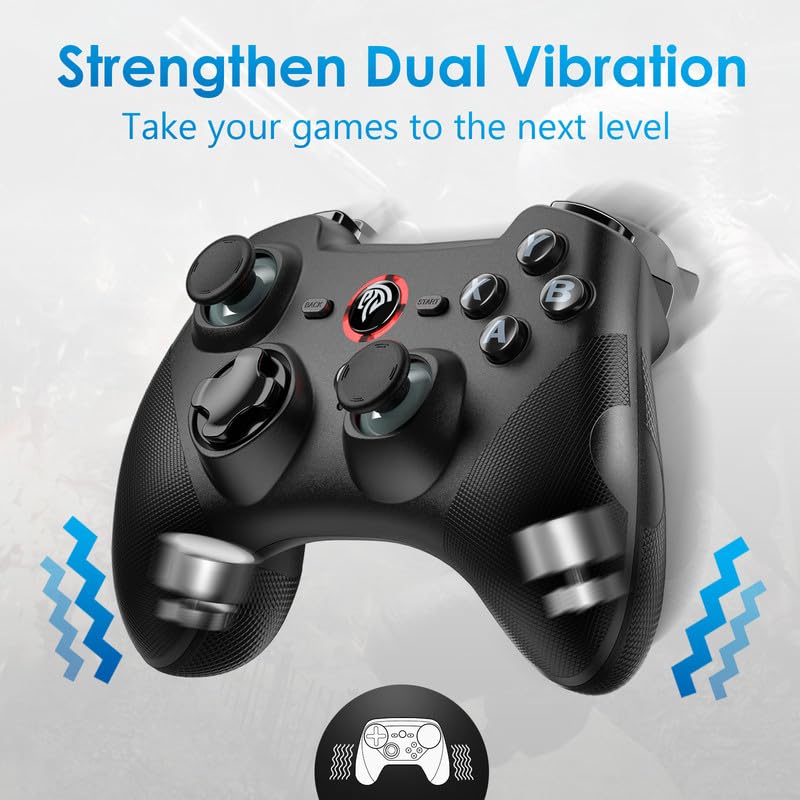
Figure 4: Illustration of the dual vibration motors within the controller.
The controller features built-in asymmetrical motors that provide dual vibration feedback, enhancing immersion by simulating in-game actions like bumps, shocks, and gunshots. The intensity of the vibration may vary depending on the game and platform.
4.3 Power Management
The controller is equipped with a 600mAh rechargeable battery, providing up to 12 hours of playing time on a single charge. To conserve battery life, the controller has an automatic shut-off function. If there is no activity for approximately 5 minutes, the controller will automatically power off. To reactivate, press the Home button.
5. Maintenance
- Cleaning: Use a soft, dry cloth to clean the controller. Do not use harsh chemicals or abrasive materials.
- Storage: Store the controller in a cool, dry place away from direct sunlight and extreme temperatures.
- Battery Care: Avoid fully discharging the battery frequently. Charge the controller regularly, even if not in use, to maintain battery health.
- Handling: Avoid dropping the controller or subjecting it to strong impacts, as this can damage internal components.
6. Troubleshooting
| Issue | Possible Cause | Solution |
|---|---|---|
| Controller does not connect wirelessly. | Receiver not properly inserted; controller not powered on; interference; low battery. | Ensure receiver is fully inserted. Turn on controller. Move closer to receiver. Charge controller. Try a different USB port. |
| Red light around center button blinks continuously. | Indicates low battery or charging in progress, even if near full charge. | This is normal behavior for some charge states. Ensure controller is fully charged. If it persists, it may be a minor visual quirk. |
| Vibration not working. | Game does not support vibration; vibration feature disabled in game settings; driver issue. | Check game settings for vibration options. Ensure game supports vibration. Reinstall controller drivers on PC if necessary. |
| Controller not recognized by Android device. | OTG function not enabled/supported; faulty OTG adapter. | Ensure your Android device supports OTG and that the function is enabled in settings. Try a different OTG adapter. |
| Controller disconnects frequently. | Low battery; too far from receiver; wireless interference. | Charge controller. Reduce distance to receiver. Minimize other 2.4G wireless devices nearby. |
7. Specifications
- Model: EasySMX 9101
- Connectivity: 2.4G Wireless, Wired (USB-C)
- Compatibility: PC (Windows), PS3, Android (5.0+ with OTG), Smart TV, TV Box, Nintendo Switch/Switch Lite (Wired only)
- Battery: 600mAh Rechargeable Lithium-ion
- Playing Time: Up to 12 hours
- Vibration: Dual Asymmetrical Motors
- Dimensions: Approximately 6.69 x 5.2 x 3.03 inches
- Weight: Approximately 11.4 ounces
8. Warranty and Support
The EasySMX 9101 Wireless Controller comes with an 18-month warranty from the date of purchase. This warranty covers manufacturing defects and issues arising from normal use. It does not cover damage caused by misuse, accidents, unauthorized modifications, or improper maintenance.
For technical support, warranty claims, or any questions regarding your EasySMX product, please contact EasySMX customer service through the retailer's platform or the official EasySMX website. Please have your purchase receipt and product model number ready when contacting support.
Related documents9101


Ask a question about this manual
Ask about setup, troubleshooting, compatibility, parts, safety, or missing instructions. Manuals+ will review the question and use this page’s manual context to help answer it.