1. Introduction
This manual provides detailed instructions for the assembly, operation, maintenance, and troubleshooting of your OUTON Deluxe Shelf Floor Lamp, Model CJD-CT-WT-03. This multifunctional floor lamp features integrated storage shelves, a convenient drawer, a 3-color temperature LED light, and a charging station with USB-C, USB-A, and AC power outlets. Please read this manual thoroughly before use to ensure proper function and safety.
2. Safety Instructions
- Ensure all components are present and undamaged before assembly.
- Do not connect the lamp to power until fully assembled.
- Use only the specified bulb type (E26, 9W LED) to prevent overheating or damage.
- Place the lamp on a stable, level surface to prevent tipping.
- Keep the power cord away from heat sources, sharp edges, and heavy traffic areas.
- Do not exceed the maximum weight capacity of the shelves (30 lbs).
- Unplug the lamp from the power outlet before cleaning or replacing the bulb.
- This product is for indoor use only and is not water resistant.
3. Package Contents
Verify that all parts are included in your package:
- Lamp Frame Components (Wood)
- Lampshade (White Line Texture)
- 9W LED Bulb (E26 Base)
- Charging Station Module (with 1 Type-C, 1 USB-A, 2 AC Outlets)
- Drawer with Knob
- Hardware Pack (Screws, Allen Wrench)
- Plastic Cord Clips
- User Manual (this document)
4. Assembly Instructions
Follow these steps to assemble your OUTON Deluxe Shelf Floor Lamp. Assembly typically takes approximately 10 minutes.

Figure 4.1: Overview of the assembly process.
- Assemble the Lamp Pole with Board: Connect the wooden lamp pole sections and attach the main shelf board. Ensure all connections are secure.
- Assemble the Drawer: Construct the drawer and attach the knob. Insert the assembled drawer into its designated slot on the lamp frame.
- Assemble the Charging Station: Secure the charging station module into its slot on the lamp frame. Ensure it is firmly in place.
- Assemble Additional Boards: Attach any remaining shelf boards to the lamp frame as per the included diagram.
- Assemble the Bulb: Carefully screw the provided 9W LED bulb into the E26 base socket.
- Assemble the Lampshade: Position the lampshade around the bulb and secure it to the top frame of the lamp.
- Cable Management: Use the provided plastic clips to neatly tuck the power cord along the lamp frame, ensuring a tidy appearance and preventing tripping hazards.

Figure 4.2: Attaching lamp pole sections.

Figure 4.3: Assembling the drawer.

Figure 4.4: Installing the charging station.

Figure 4.5: Attaching additional shelf boards.

Figure 4.6: Installing the LED bulb.

Figure 4.7: Securing the lampshade.
5. Operating Instructions
5.1. Lighting Control
The lamp features a pull chain switch to control the light and cycle through three color temperatures:
- First Pull: Warm White (2700K) - Creates a cozy atmosphere.
- Second Pull: Natural White (4000K) - Ideal for reading or general illumination.
- Third Pull: Daylight (5000K) - Bright light for detailed work.
- Fourth Pull: Turns the light off.

Figure 5.1: Three adjustable color temperatures.
5.2. Charging Station
The integrated charging station provides convenient power for your devices:
- 2 AC Outlets: For standard electrical devices.
- 1 Type-C Fast Charging Port: For compatible devices requiring fast charging.
- 1 USB-A Port (5V/2A): For standard USB charging.
Simply plug your devices into the appropriate ports. The charging station is always active when the lamp is plugged into a wall outlet.
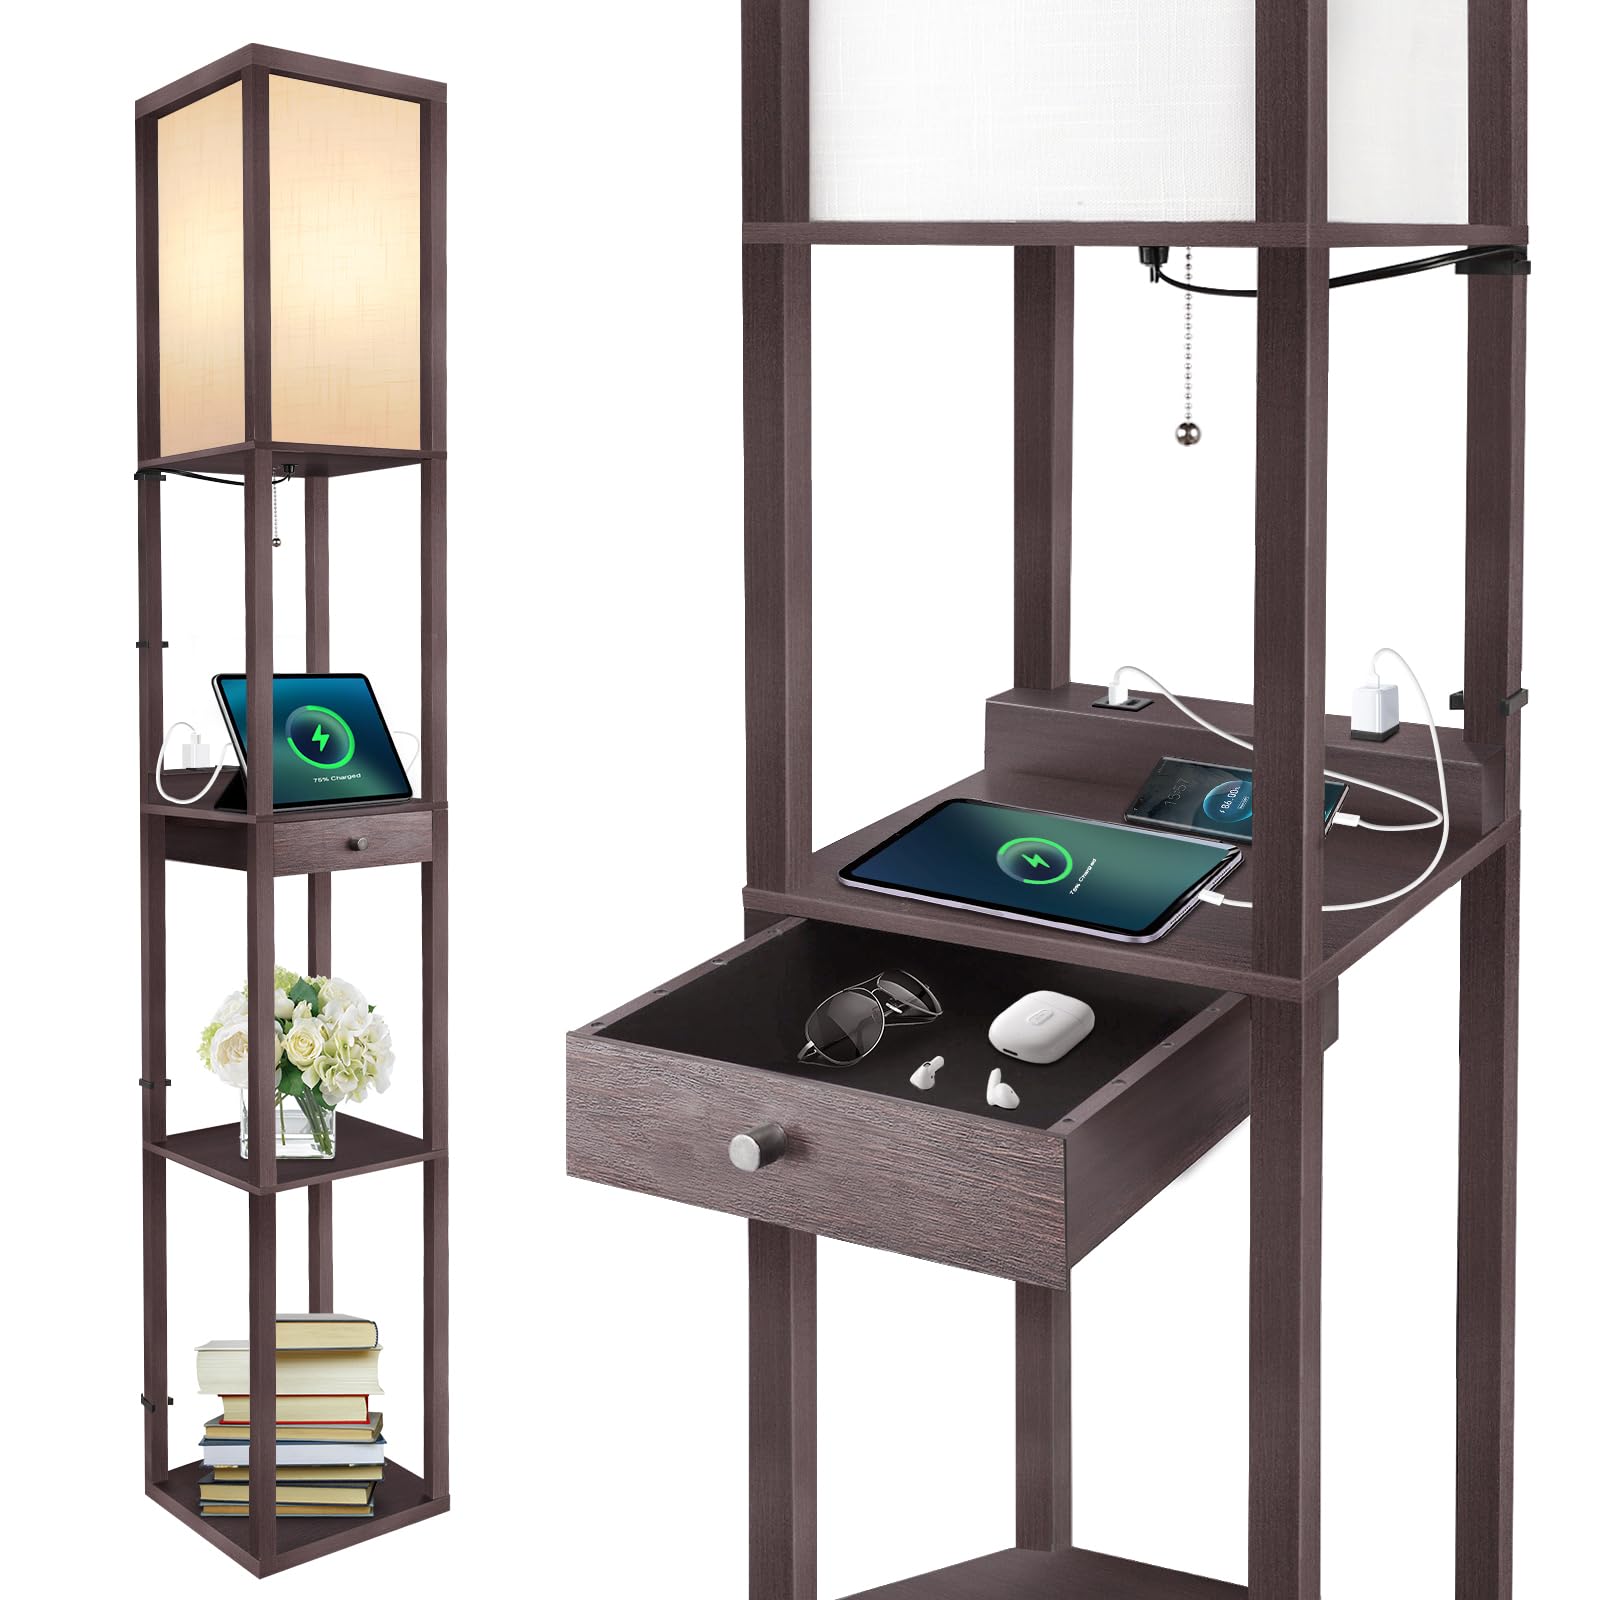
Figure 5.2: Integrated 4-in-1 charging station.
5.3. Storage Drawer and Shelves
Utilize the large sliding drawer for storing small items like remote controls, charging cables, or glasses. The three open shelves provide space for displaying decorative items, books, or small plants.

Figure 5.3: Storage shelves and drawer.
6. Maintenance
6.1. Cleaning
Before cleaning, ensure the lamp is unplugged from the power outlet. Wipe the wooden frame and shelves with a soft, dry cloth. For the lampshade, use a soft, slightly damp cloth if necessary, and allow it to air dry completely before reconnecting power.
6.2. Bulb Replacement
The lamp uses a standard E26 base LED bulb. The included 9W LED bulb has a lifespan of over 50,000 hours. When replacement is needed, ensure the lamp is unplugged. Unscrew the old bulb and screw in a new E26 LED bulb (maximum 60W equivalent incandescent). Do not use incandescent bulbs that exceed 60W equivalent.

Figure 6.1: Compatible E26 bulb types.
7. Troubleshooting
Refer to the table below for common issues and their solutions:
| Problem | Possible Cause | Solution |
|---|---|---|
| Lamp does not turn on. | 1. Power cord not fully plugged in. 2. Bulb is loose or faulty. 3. Wall outlet is not functioning. | 1. Ensure the power cord is securely plugged into a working outlet. 2. Tighten the bulb or replace it with a new one. 3. Test the outlet with another device. |
| Charging ports are not working. | 1. Lamp is not powered. 2. Device charging cable is faulty. 3. Device is not compatible with the port. | 1. Ensure the lamp is plugged in and receiving power. 2. Try a different charging cable. 3. Verify device compatibility with USB-C, USB-A (5V/2A), or AC outlets. |
| Lamp is wobbly after assembly. | Screws are not fully tightened. | Carefully re-tighten all assembly screws. Ensure the lamp is on a flat, stable surface. |
| Drawer sticks or does not slide smoothly. | Drawer rails are misaligned or obstructed. | Check the drawer rails for any obstructions. Ensure the drawer was assembled correctly and is not overtightened. |
8. Specifications
| Feature | Detail |
|---|---|
| Model Number | CJD-CT-WT-03 |
| Product Dimensions | 10.25"D x 10.25"W x 63.7"H |
| Item Weight | 10 Pounds |
| Material | Wood |
| Finish Type | Walnut Painted |
| Light Source Type | LED |
| Bulb Base | E26 |
| Wattage | 9 watts (LED) |
| Brightness | 810 Lumens |
| Color Temperature | Warm White (2700K), Natural White (4000K), Daylight (5000K) |
| Switch Type | Pull Chain |
| Charging Ports | 1x Type-C, 1x USB-A (5V/2A), 2x AC Outlets |
| Maximum Shelf Weight | 30 lbs |
| Power Source | Corded Electric (120 Volts AC) |
| Indoor/Outdoor Usage | Indoor |
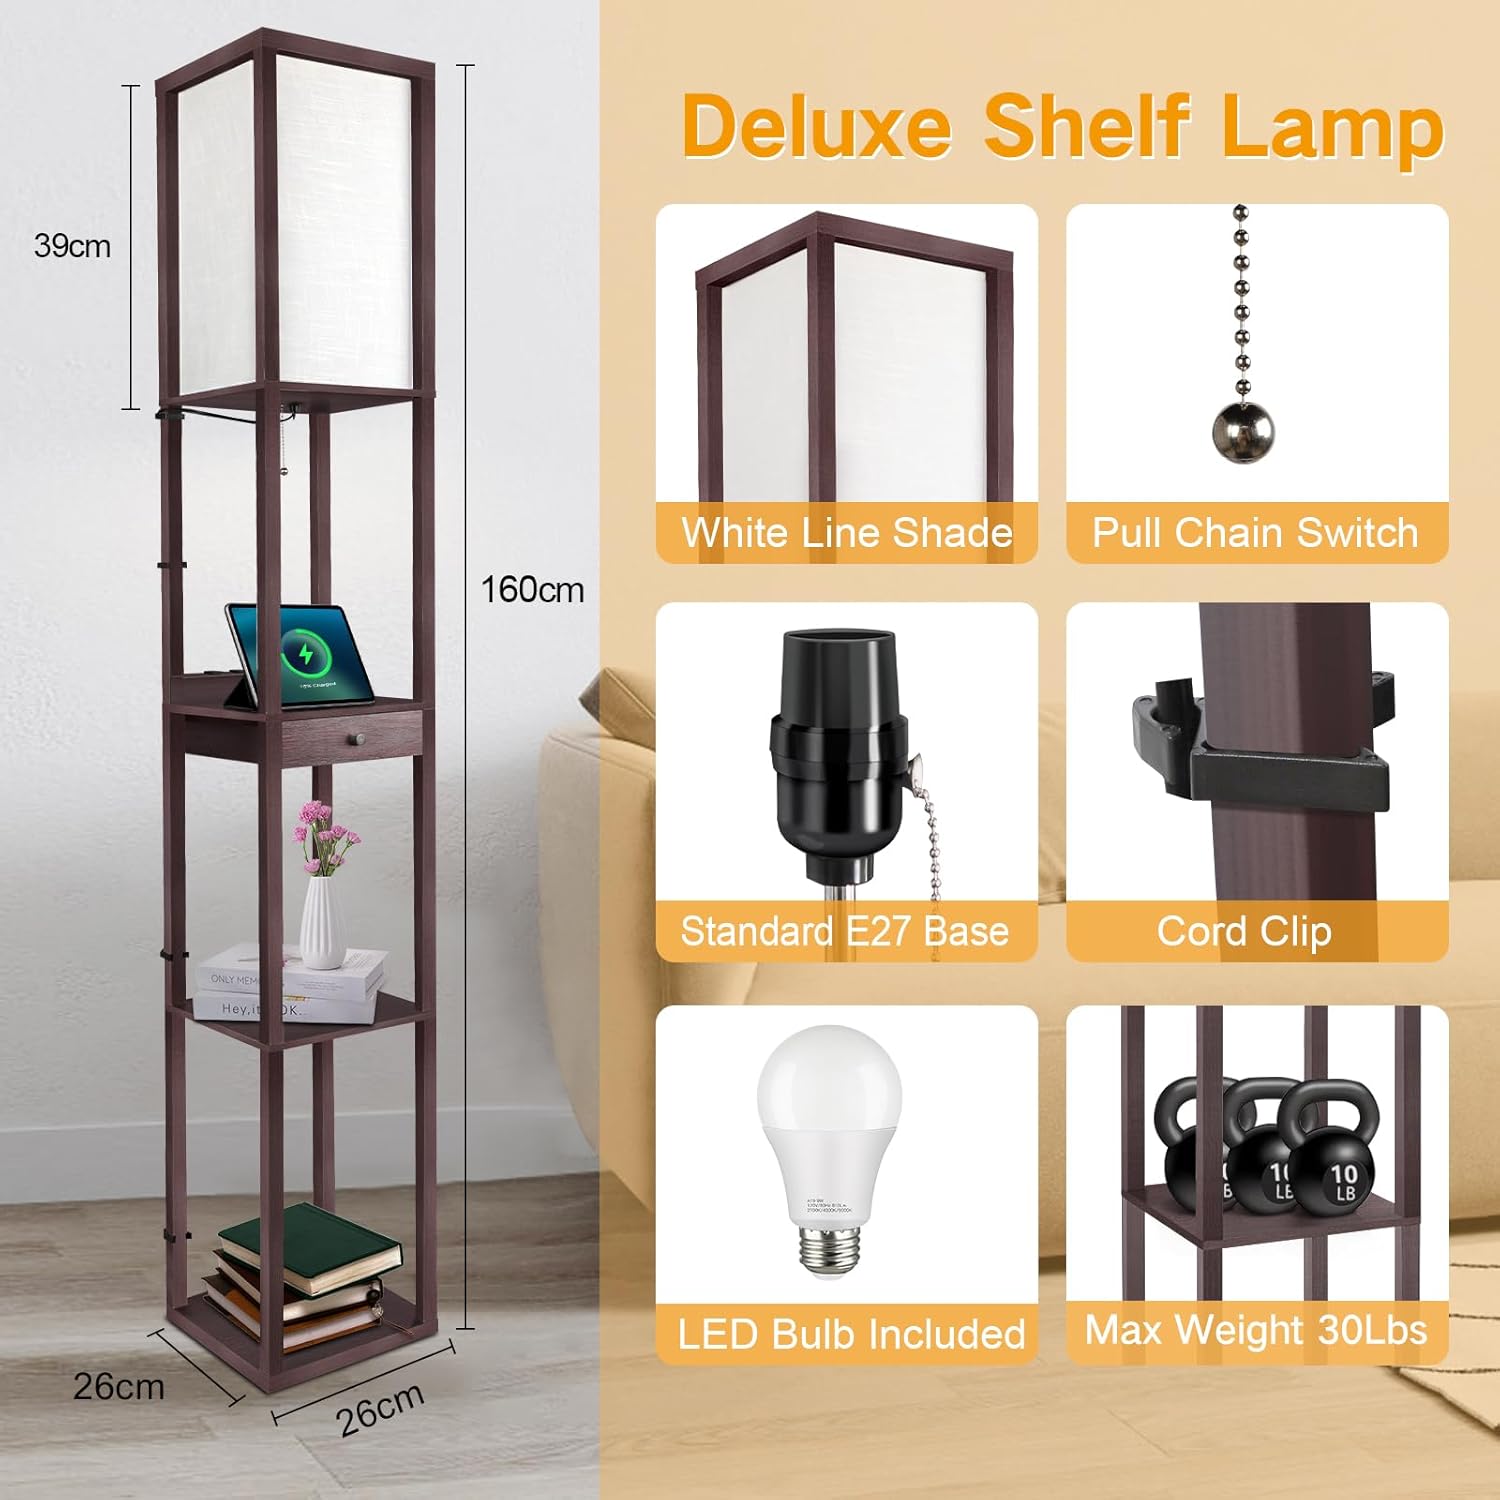
Figure 8.1: Product dimensions and features.
9. Warranty and Customer Support
OUTON provides a 2-year quality support warranty for this product. If you encounter any issues or have questions, please contact our customer service team. We are committed to providing satisfaction with our products and services.
Customer Service: Available 24/7. Please refer to your purchase documentation for specific contact details or visit the official OUTON website.


