
1. Product Overview
The nipify Solar Outdoor Lights are designed to provide efficient and reliable illumination for various outdoor spaces. Equipped with 140 high-quality LED beads and a 180° wide-angle lighting capability, these lights are powered by solar energy, converting sunlight into electricity during the day and automatically lighting up at night. They feature a sensitive motion sensor and offer three distinct lighting modes to suit different security and lighting needs. Constructed from durable ABS material with an LED protection screen, they are waterproof and weather-resistant, ensuring normal operation even in adverse conditions.

Figure 1: Overview of the nipify Solar Outdoor Lights (8-Pack).
2. Key Features
- Solar Powered & Energy Saving: Utilizes solar energy for power, reducing electricity consumption. Features 140 LED beads and 180° wide-angle lighting for broad coverage.
- 3 Lighting Modes & Motion Sensor: Built-in sensitive motion sensor with three adjustable lighting modes:
- Constant Light Mode: Automatically powers on at night and off during the day.
- Dim Light Sensor Mode: Maintains dim brightness when no motion is detected, and switches to full brightness upon motion detection.
- Sensor Light Mode: Remains off until motion is detected, then illuminates at full brightness for 20 seconds before turning off.
- Waterproof & Weatherproof: Constructed from high-quality, durable ABS material with an LED protection screen, designed to withstand rain, heat, and frost.
- High-efficiency Solar Panel: Improved solar energy conversion rate from 20% to 22% for faster charging and longer illumination times.
- Easy to Install & Widely Used: Simple installation process using provided screws, suitable for various outdoor locations such as walls, gardens, patios, decks, garages, driveways, porches, and fences.

Figure 2: Illustration of the solar panel's high conversion rate and automatic night illumination.

Figure 3: Demonstrating the light's waterproof, heat-resistant, and frost-resistant capabilities.
3. Setup and Installation
The nipify Solar Outdoor Lights are designed for quick and easy installation. Follow these steps for optimal performance:
- Activate and Set Mode: Before installation, activate the wall lamp and select your desired lighting mode by pressing the power button. Refer to Section 4 for detailed mode descriptions.
- Cover Solar Panel: Briefly cover the solar panel to test the selected mode and ensure the light functions correctly in darkness.
- Choose Sunny Location: Install the sconces in locations that receive direct sunlight for the majority of the day to ensure maximum charging efficiency. Avoid shaded areas.
- Secure Installation: Use the provided screws to securely mount the lights to your desired surface (wall, fence, etc.). Ensure the light is firmly attached to prevent accidental dislodgement.
- Automatic Charging and Lighting: Once installed, the lights will automatically charge during the day and illuminate according to the selected mode at night.
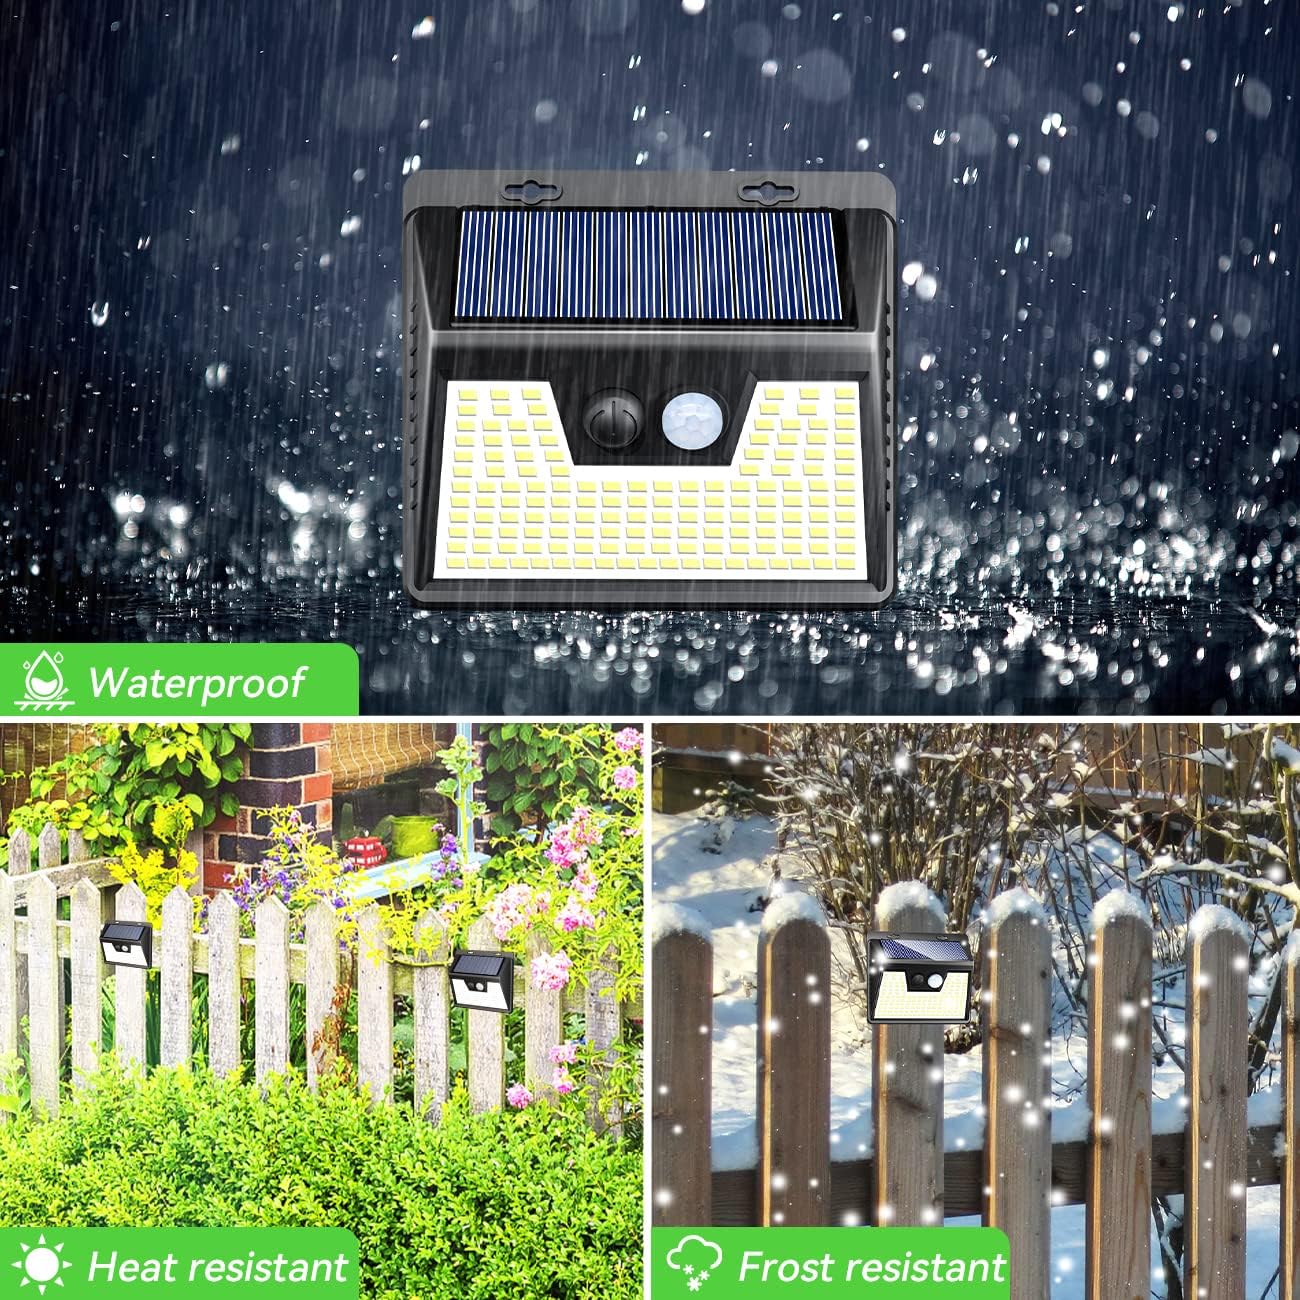
Figure 4: Step-by-step guide for activating and installing the solar lights.
4. Operating Modes
The nipify Solar Outdoor Lights offer three distinct lighting modes, easily selectable via the power button on the unit. Press the button repeatedly to cycle through the modes:
- Mode 1: Constant Light Mode
In this mode, the light will automatically turn on at a medium brightness level at night and remain on continuously until dawn. It will automatically power off during the day to charge.
- Mode 2: Dim Light Sensor Mode
The light will maintain a dim brightness when no motion is detected. Upon sensing motion, it will switch to full brightness for approximately 20 seconds, then revert to dim light if no further motion is detected.
- Mode 3: Sensor Light Mode
The light remains off until motion is detected. When motion is sensed, it will illuminate at full brightness for approximately 20 seconds, then turn off completely if no further motion is detected.

Figure 5: Visual representation of the three available lighting modes.
Video 1: Demonstration of the 8 Pack 140 LED solar outdoor lights and their three lighting modes.
5. Usage and Applications
These versatile solar lights are ideal for enhancing security and visibility in a variety of outdoor settings:
- Wall Lighting: Mount on exterior walls for general illumination or security.
- Stair Lighting: Install along stairways to improve safety at night.
- Step Lighting: Perfect for illuminating individual steps on patios or decks.
- Fence Lighting: Attach to fences to light up garden perimeters or pathways.
- Railing Lighting: Secure to deck or porch railings for ambient light and safety.
- Garage & Driveway: Provide motion-activated light for entryways and parking areas.
- Garden & Backyard: Enhance the aesthetics and security of your outdoor living spaces.

Figure 6: Examples of common applications for the solar outdoor lights, including stair, step, fence, and railing lighting.
6. Specifications
| Feature | Detail |
|---|---|
| Brand | nipify |
| Model Number | YHM-01B |
| Light Source | 140 LED beads |
| Lighting Angle | 180° wide angle |
| Power Source | Solar Powered |
| Material | Durable ABS Plastic |
| Weather Resistance | Waterproof, Heat-resistant, Frost-resistant |
| Motion Sensor | Built-in sensitive motion sensor |
| Lighting Modes | 3 Modes (Constant, Dim Sensor, Sensor Only) |
| Solar Conversion Rate | Up to 22% |
| Product Dimensions | 3 x 3 x 3 cm (approximate, as per product data) |
| Item Weight | 1.09 kg (for 8-pack) |
| Installation Method | Flush Mount (with screws) |
| Usage | Outdoor use only |
7. Maintenance
To ensure the longevity and optimal performance of your nipify Solar Outdoor Lights, consider the following maintenance tips:
- Clean Solar Panel: Regularly wipe the solar panel with a soft, damp cloth to remove dust, dirt, leaves, or snow. A clean panel ensures maximum sunlight absorption and charging efficiency.
- Clear Obstructions: Ensure no trees, bushes, or other structures grow to shade the solar panel, especially during peak sunlight hours.
- Inspect Mounting: Periodically check that the lights are securely mounted and that screws are tight.
- Winter Care: While designed to be frost-resistant, prolonged periods of heavy snow cover can reduce charging. If possible, clear snow from the solar panels.
8. Troubleshooting
If your solar lights are not performing as expected, try the following troubleshooting steps:
- Light Does Not Turn On At Night:
- Ensure the light is placed in a location that receives at least 6-8 hours of direct sunlight daily.
- Verify that the solar panel is clean and free of debris.
- Check if the light is activated and set to the desired mode (Mode 1, 2, or 3). Cover the solar panel to simulate darkness and see if it turns on.
- The battery might not be sufficiently charged. Allow the light to charge for 1-2 full sunny days before retesting.
- Light Stays Dim or Turns Off Quickly:
- Insufficient charging due to cloudy weather, short daylight hours, or shaded installation location. Relocate if necessary.
- Ensure the solar panel is clean.
- The battery capacity might be reduced over time. While not user-replaceable, ensuring proper charging can extend its life.
- Motion Sensor Not Working:
- Ensure the light is in Mode 2 or Mode 3, which utilize the motion sensor.
- Check for obstructions blocking the sensor's field of view.
- The detection range can be affected by ambient temperature.
9. Warranty and Support
For warranty information, technical support, or any inquiries regarding your nipify Solar Outdoor Lights, please refer to the product packaging or contact the manufacturer directly through their official website or customer service channels. Please have your model number (YHM-01B) and purchase details ready when contacting support.


