1. Introduction and Overview
This manual provides detailed instructions for the setup, operation, and maintenance of your Samsung 34-inch ViewFinity S65VC Series Ultrawide QHD Curved Monitor. This monitor features a 34-inch 1000R curved display with a 21:9 aspect ratio, Ultra-WQHD resolution, HDR10 support, a 100Hz refresh rate, and a built-in FHD camera. It also includes a USB-C port for power delivery and data transmission, an adjustable stand, and Intelligent Eye Care features.

Figure 1.1: Front view of the Samsung ViewFinity S65VC curved monitor. The monitor displays a colorful abstract image and has a slim bezel design with a central stand.
2. Package Contents
Verify that all items are present in the product box:
- Samsung 34-inch ViewFinity S65VC Monitor
- Power Cable
- HDMI Cable
- USB Type-C Cable
- USB 3.0 Cable
- Quick Setup Guide (not included in this digital manual)
3. Setup Instructions
3.1. Assembling the Stand
- Carefully remove the monitor and stand components from the packaging.
- Attach the stand neck to the monitor panel. Ensure it clicks securely into place.
- Attach the stand base to the stand neck and tighten the screw at the bottom of the base.
- Place the assembled monitor on a stable, flat surface.
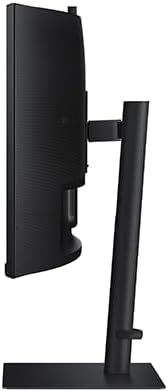
Figure 3.1: Side view of the monitor, illustrating the adjustable stand. The stand allows for height, tilt, and swivel adjustments.
3.2. Connecting Cables
Connect the necessary cables to the corresponding ports on the back of the monitor and your computer or other devices.

Figure 3.2: Rear view of the monitor, detailing the various input ports. Ports include HDMI IN, DisplayPort IN, USB-C, PC IN, LAN IN, USB/SERVICE, USB 3.0, and Headphone IN.
- Power Cable: Connect one end to the monitor's power input and the other to a power outlet.
- Video Cable (HDMI/DisplayPort/USB-C):
- For HDMI connection, use the provided HDMI cable.
- For DisplayPort connection, use a DisplayPort cable (sold separately).
- For USB-C connection, use the provided USB Type-C cable. This cable can also provide power to compatible devices and transmit data.
- USB 3.0 Cable: Connect the upstream USB 3.0 cable from your computer to the monitor to enable the monitor's USB ports.
- LAN Cable: If using the monitor's built-in Ethernet port, connect a LAN cable.
- Headphones: Connect headphones to the Headphone IN port if desired.
3.3. Initial Power On
After connecting all cables, press the power button on the monitor. The monitor will power on and display the input source. If no signal is detected, ensure your computer is on and the correct input source is selected.
4. Operating Instructions
4.1. On-Screen Display (OSD) Menu Navigation
The monitor's settings are controlled via a 5-position joystick button located on the bottom center of the monitor. This button allows you to navigate the OSD menu.
- Press: To open the OSD menu or confirm a selection.
- Move Up/Down/Left/Right: To navigate through menu options or adjust values.
4.2. Input Source Selection
To switch between input sources (HDMI, DisplayPort, USB-C):
- Press the joystick button to open the OSD menu.
- Navigate to the "Input" or "Source" menu.
- Select your desired input source.
4.3. Display Settings Adjustment
Access the OSD menu to adjust various display settings:
- Picture: Adjust brightness, contrast, sharpness, color temperature, and gamma.
- Color: Fine-tune color settings for optimal viewing.
- Screen: Adjust aspect ratio, screen size, and other screen-related options.
- System: Configure language, OSD timeout, and other general settings.
4.4. Using the Built-in FHD Camera
The monitor includes a built-in Full HD camera. Ensure the USB-C or USB 3.0 cable is connected to your computer to enable camera functionality. The camera can be used with video conferencing applications.
4.5. USB-C Functionality
The USB-C port supports 90W power delivery, allowing you to charge compatible laptops or devices directly from the monitor. It also transmits video, audio, and data signals through a single cable.
4.6. Intelligent Eye Care Features
The monitor incorporates Intelligent Eye Care technology to reduce eye strain:
- Adaptive Picture: Automatically adjusts brightness and color temperature based on ambient light conditions.
- Eye Saver Mode: Reduces blue light emissions to minimize eye fatigue.
- Flicker Free: Eliminates screen flickering for a more comfortable viewing experience.
These features can be enabled or configured through the OSD menu.
4.7. Adjustable Stand
The monitor stand allows for ergonomic adjustments:
- Height Adjustment: Raise or lower the monitor to your preferred viewing height.
- Tilt Adjustment: Tilt the screen forward or backward to optimize your viewing angle.
- Swivel Adjustment: Rotate the monitor horizontally on its base.
5. Maintenance
5.1. Cleaning the Monitor
- Always power off the monitor and unplug the power cable before cleaning.
- Use a soft, lint-free cloth slightly dampened with water or a specialized screen cleaner.
- Do not spray cleaning solutions directly onto the screen or monitor casing.
- Avoid using abrasive cleaners, alcohol, benzene, or thinners, as these can damage the monitor's surface.
5.2. General Care
- Keep the monitor away from direct sunlight, heat sources, and excessive dust.
- Ensure adequate ventilation around the monitor.
- Avoid placing heavy objects on the monitor or its cables.
6. Troubleshooting
| Problem | Possible Cause | Solution |
|---|---|---|
| No power | Power cable not connected or power outlet not active. | Ensure the power cable is securely connected to the monitor and a working power outlet. Check the power button. |
| No image on screen | Video cable not connected or incorrect input source selected. | Verify the video cable (HDMI, DisplayPort, USB-C) is securely connected to both the monitor and the computer. Select the correct input source using the OSD menu. Ensure the computer is powered on. |
| Image is blurry or distorted | Incorrect resolution or refresh rate settings. Loose video cable. | Set the display resolution to the monitor's native resolution (3440 x 1440) and refresh rate to 100Hz in your computer's display settings. Check video cable connections. |
| Built-in camera not working | USB-C or USB 3.0 cable not connected. Driver issues. | Ensure the USB-C or USB 3.0 upstream cable is connected between the monitor and your computer. Check device manager for camera drivers. |
| OSD menu difficult to navigate | Unfamiliarity with the 5-position joystick. | Practice using the joystick button for navigation. Press to select, move in directions to navigate. |
7. Specifications
| Feature | Detail |
|---|---|
| Brand | Samsung |
| Model Number | LS34C654VANXGO |
| Screen Size | 34 Inches |
| Screen Resolution (Max) | 3440 x 1440 Pixels (Ultra-WQHD) |
| Aspect Ratio | 21:9 |
| Curvature | 1000R |
| Refresh Rate | 100Hz |
| Brightness | 350 nit |
| HDR Support | HDR10 |
| Built-in Camera | FHD Camera |
| Connectivity | HDMI, DisplayPort, USB-C (90W PD), USB 3.0, LAN, Headphone IN |
| Stand Features | Adjustable Height, Tilt, Swivel |
| Special Features | Intelligent Eye Care (Adaptive Picture, Eye Saver Mode, Flicker Free), KVM Switch, Built-in Speakers |
| Item Weight | 17.9 pounds (8.12 kg) |
| Product Dimensions (LxWxH) | 9.5 x 31.76 x 22.1 inches (24.13 x 80.67 x 56.13 cm) |
| Color | Black |
8. Warranty and Support
For warranty information and technical support, please refer to the warranty card included with your product or visit the official Samsung support website. You can typically find support resources, FAQs, and contact information for your region on their website.
Samsung Support Website: https://www.samsung.com/us/support/


