1. Introduction
This user manual provides comprehensive instructions for the installation, operation, and maintenance of your ZGZUXO Baby Car Camera and Monitor system. This system is designed to provide a clear view of your child in the backseat, enhancing safety and peace of mind while driving. Please read this manual thoroughly before using the product.
Package Contents:
- Baby Car Camera x 1
- Baby Car Monitor (5-inch IPS Screen) x 1
- 10ft Car Charging Cable x 1
- 18ft Camera Connection Cable x 1
- Anti-Slip Pad x 1
- 3M Adhesive x 2
- Velcro Strap x 2
- User Manual x 1
2. Safety Information
- Ensure the monitor and camera are securely installed and do not obstruct the driver's view or interfere with vehicle controls.
- Do not attempt to operate or adjust the system while driving. Always pull over to a safe location before making any adjustments.
- Keep cables away from airbags and other safety equipment.
- This device is an aid for monitoring and does not replace direct supervision of a child.
- Use only the provided power cables and accessories.
3. Setup and Installation
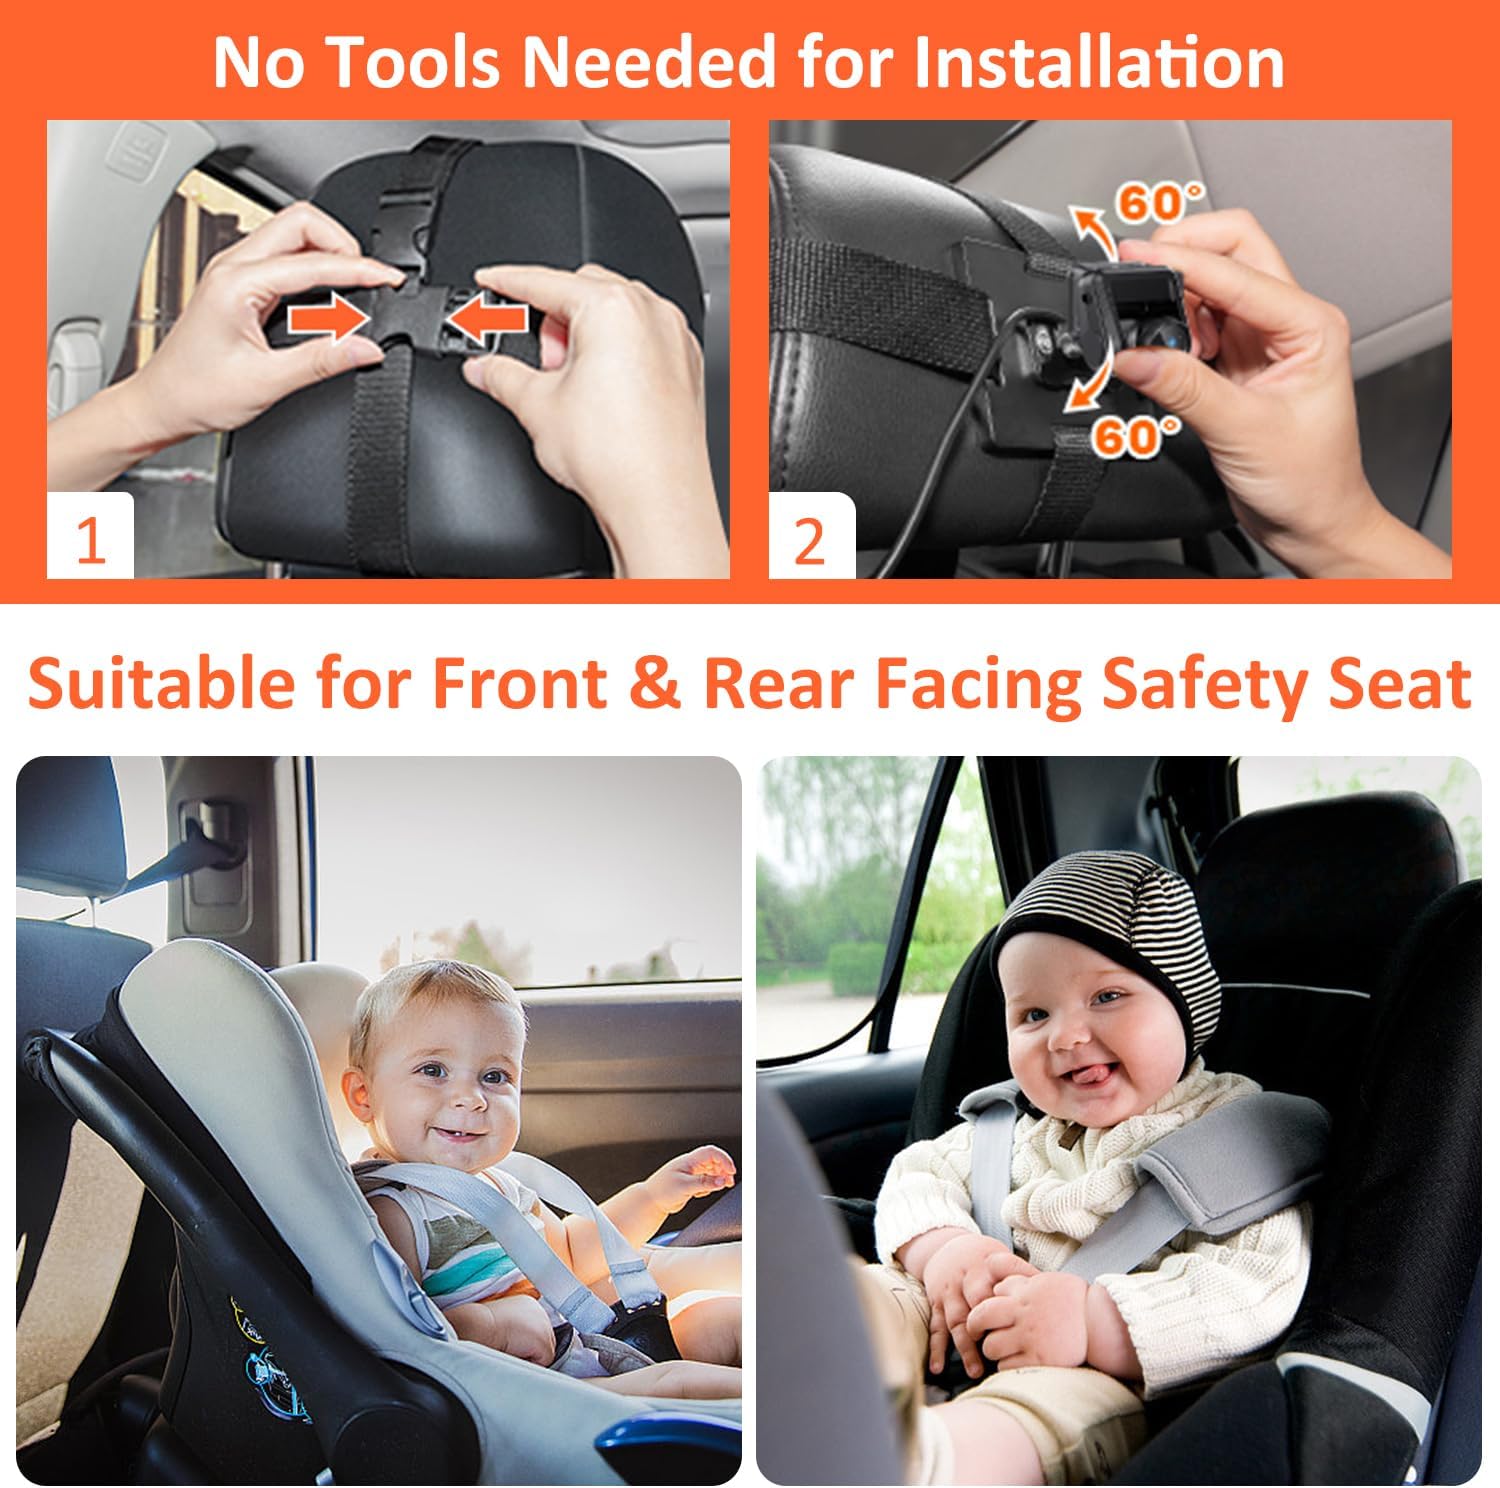
The ZGZUXO Baby Car Camera and Monitor system is designed for easy installation without the need for special tools. The installation process can typically be completed in approximately 3 minutes.
3.1 Camera Installation
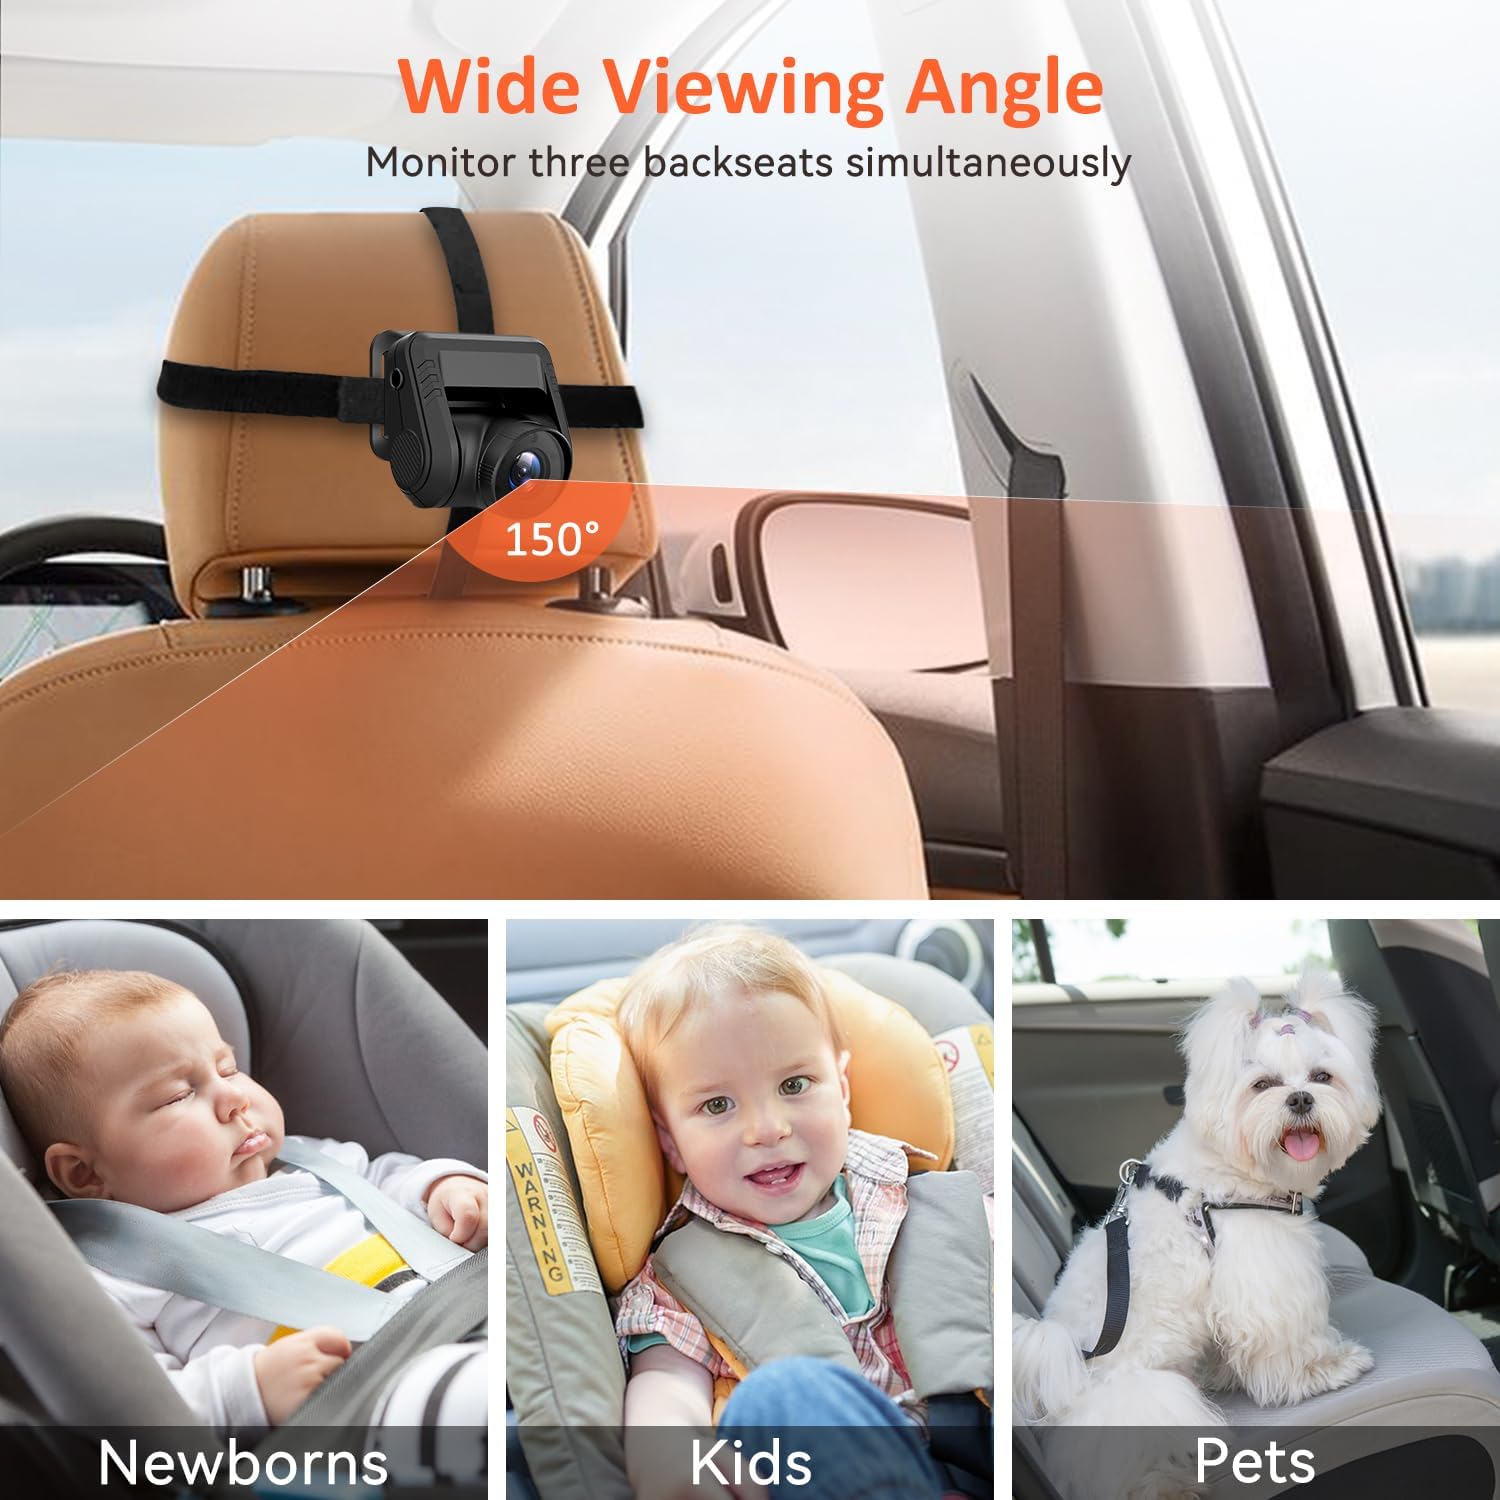
- Mount the Camera: Secure the baby car camera to the headrest of the backseat, facing the child's car seat. Use the provided Velcro straps to firmly attach the camera. Ensure the camera has a clear line of sight to the child. The camera features a 120° adjustable angle for optimal positioning.
- Connect the Camera Cable: Route the 18ft camera connection cable from the camera to the front of the vehicle where the monitor will be placed. Ensure the cable is tucked away safely and does not interfere with passengers or vehicle operation.

3.2 Monitor Installation
- Position the Monitor: Place the 5-inch IPS monitor on your car's dashboard. Use the provided anti-slip mat to prevent the monitor from sliding. Alternatively, use the 3M adhesive pads for a more permanent fixture.
- Connect Power: Plug the 10ft car charging cable into the monitor and then into your car's cigarette lighter socket. Alternatively, a USB power cord can be used for power.
- Connect Camera to Monitor: Connect the 18ft camera connection cable from the camera to the designated input port on the monitor.
The monitor features a 0-90° foldable display screen design for convenient storage and adjustment.
4. Operating Instructions
4.1 Powering On/Off
- The system will automatically power on when the car's ignition is turned on (if connected to the cigarette lighter).
- To manually power on/off, press and hold the power button located on the monitor.
4.2 Real-Time Monitoring
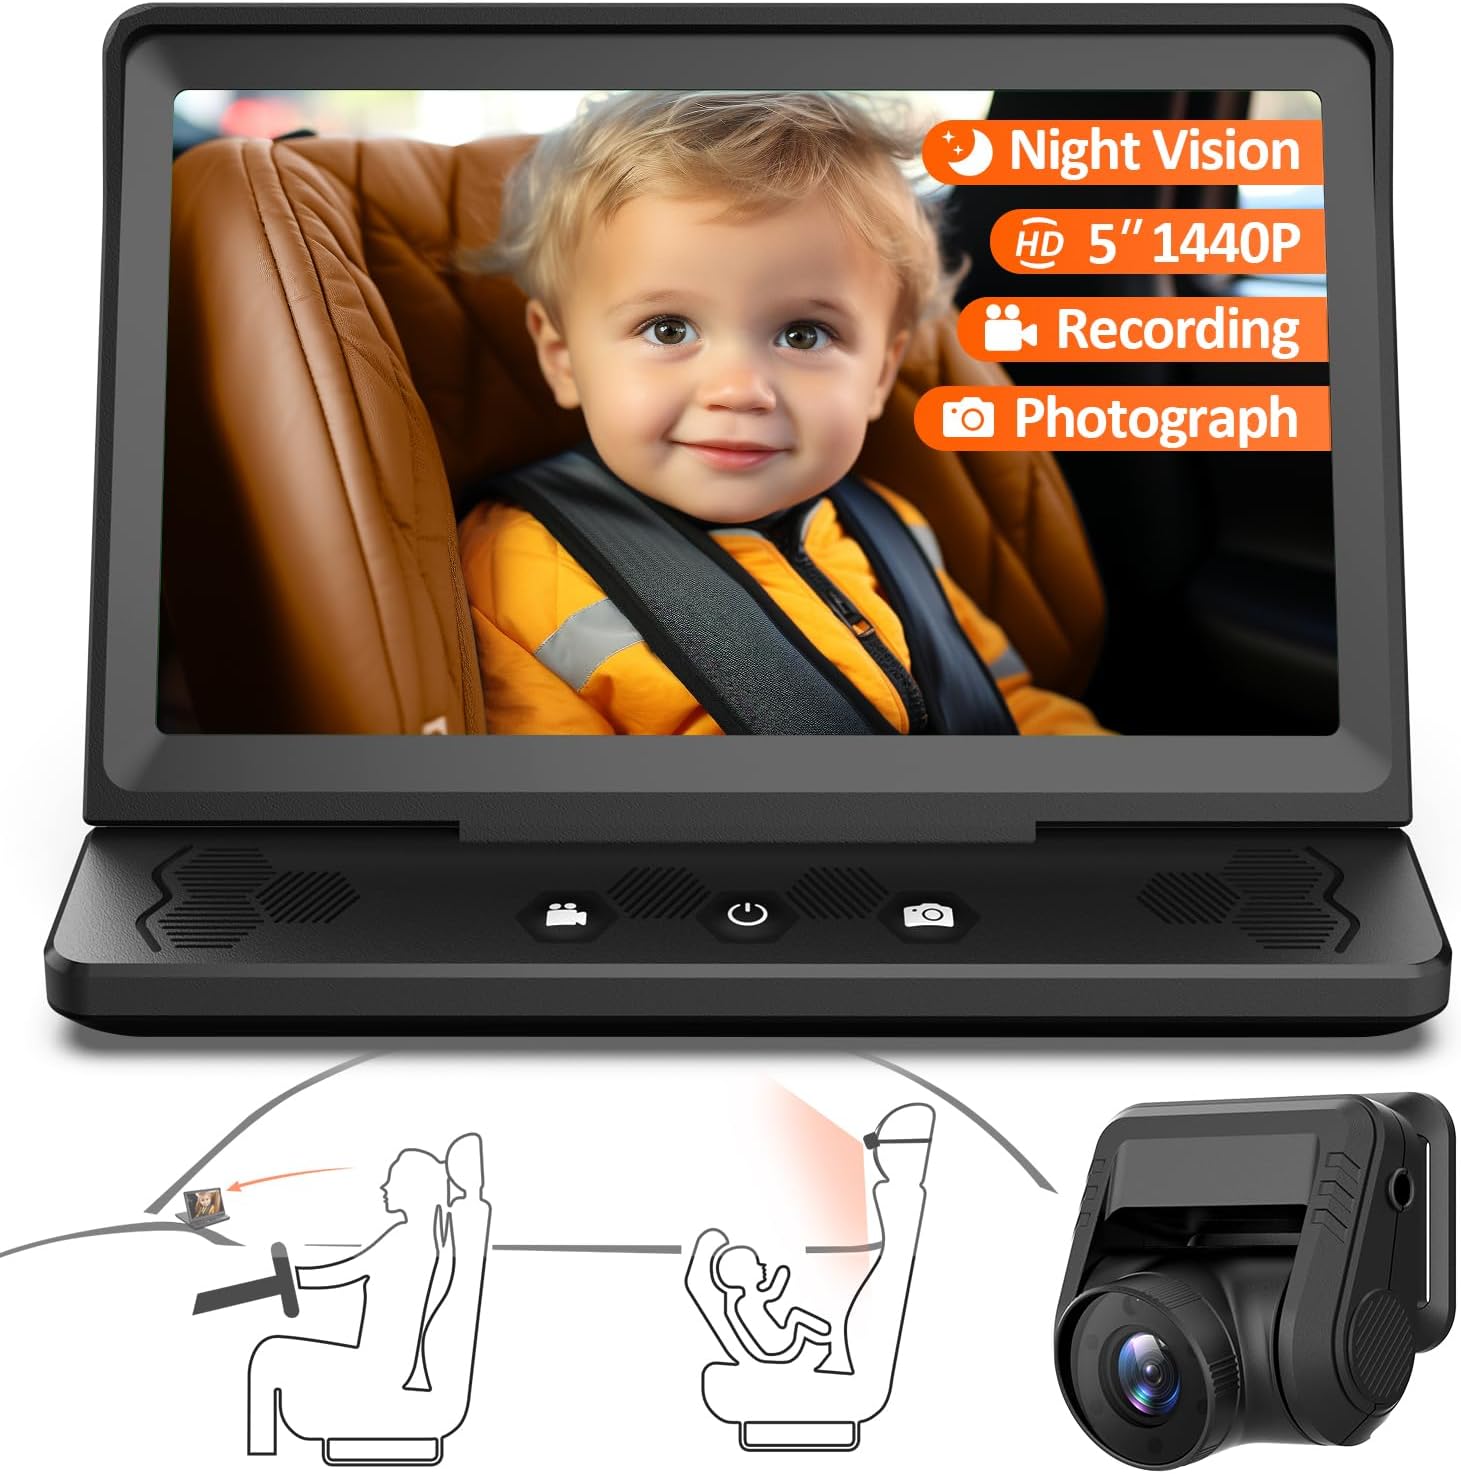
Once powered on, the 5-inch IPS screen will display a live 1440P HD video feed from the camera. This provides real-time monitoring of your child in the backseat.

4.3 Night Vision Function
The baby car camera automatically switches to infrared (IR) night vision mode in low-light conditions. This feature ensures a clear view of your child even when driving at night, providing full-color night vision.

4.4 Recording and Photography
The system supports photography and video recording. To utilize these features, a TF card (not included) must be inserted into the monitor's TF card slot. The system supports up to a U3 128GB TF card.
- Recording Mode: Press the designated button on the monitor to start or stop video recording. The system supports loop recording, overwriting the oldest video files when the TF card is full. Loop recording intervals can be set to 1, 2, 3, or 5 minutes.
- Photograph Mode: Press the designated button to capture still images.
- Review Footage: Recorded videos and photos can be reviewed directly on the monitor or by removing the TF card and viewing on a computer.


4.5 Menu Settings
Access the menu settings to adjust various parameters such as loop recording duration, frequency, date stamp, sequence, beep sound, and language (supports 12 languages).
5. Maintenance
- Cleaning: Use a soft, dry cloth to clean the monitor screen and camera lens. Do not use liquid cleaners or abrasive materials.
- Cable Management: Periodically check all cables for wear or damage. Ensure they are securely connected and not pinched or exposed to excessive heat.
- Storage: When not in use for extended periods, store the system in a cool, dry place away from direct sunlight and extreme temperatures. The monitor's foldable design aids in compact storage.
6. Troubleshooting
| Problem | Possible Cause | Solution |
|---|---|---|
| No image on monitor |
|
|
| Image is blurry or unclear |
|
|
| Recording not working |
|
|
7. Specifications
| Feature | Detail |
|---|---|
| Model Number | T5 |
| Brand | ZGZUXO |
| Monitor Screen Size | 5 Inches IPS |
| Camera Resolution | 1440P HD |
| Camera Viewing Angle | 150 Degrees |
| Camera Adjustable Angle | 120 Degrees |
| Night Vision | Automatic IR Night Vision (Full-Color) |
| Recording Capability | Yes, with TF Card (Loop Recording) |
| TF Card Support | Up to U3 128GB (not included) |
| Power Input | 24 Volts (via cigarette lighter or USB) |
| Special Features | Foldable Display, 12 Language Support, User-Friendly, Shatter Resistant |
| Product Dimensions | 9.7 x 6.3 x 3.3 inches |
| Item Weight | 1.38 pounds |
| Compatible Devices | ATV, Van, RV, Car, Pickup, UTV, Truck |
8. Warranty and Support
ZGZUXO offers the following support for this product:
- 2-Year Replacement: In case of product defects or malfunctions.
- 60-Day Return: For returns within 60 days of purchase.
- Lifetime After-Sale Service: Ongoing support for product inquiries and issues.
For customer support or warranty claims, please contact the seller directly through your Amazon order page. Navigate to your order, find the item, and select "Ask a question" or "Contact Seller".


