
1. Introduction
This manual provides essential instructions for the proper installation, function, and maintenance of your Toro 51-4190 Driven Pulley. Please read this manual thoroughly before attempting any installation or service to ensure safe and efficient operation of your equipment. This driven pulley is a critical component in the power transmission system of compatible Toro lawn and garden equipment.
2. Safety Information
WARNING: Failure to follow these safety instructions could result in serious injury or equipment damage.
- Always wear appropriate personal protective equipment (PPE), including safety glasses and gloves, when handling or installing parts.
- Ensure the equipment is turned off, the engine is cool, and the spark plug wire is disconnected (for gasoline engines) before beginning any work.
- Refer to your equipment's main operator's manual for specific safety procedures and component locations.
- Use only genuine Toro replacement parts to ensure compatibility and maintain equipment performance.
- If you are unsure about any step, consult a qualified service technician.
3. Installation
The Toro 51-4190 Driven Pulley is designed for specific applications. Follow these general steps for installation. Always refer to your specific equipment's service manual for detailed, model-specific instructions and torque specifications.
3.1 Preparation
- Park the equipment on a flat, level surface.
- Engage the parking brake.
- Turn off the engine and remove the ignition key. Disconnect the spark plug wire.
- Allow all moving parts to come to a complete stop and cool down.
- Gather necessary tools, which may include wrenches, sockets, a torque wrench, and a pulley puller (if required for removal).
3.2 Removal of Old Pulley
- Locate the driven pulley assembly on your equipment. This typically involves removing deck covers or guards.
- Carefully observe and note the routing of any belts connected to the pulley. A diagram or photo can be helpful.
- Loosen any tensioning mechanisms to relieve tension on the belt(s).
- Remove the belt(s) from the pulley.
- Unfasten any retaining bolts, nuts, or clips securing the old pulley to its shaft or mounting bracket.
- Carefully remove the old pulley. A pulley puller may be necessary if it is seized onto the shaft.
- Inspect the shaft and surrounding components for wear or damage. Clean any debris.
3.3 Installation of New Pulley
- Ensure the new Toro 51-4190 Driven Pulley is clean and free of any packaging materials.
- Align the new pulley with the shaft or mounting point. Ensure any keyways or splines are correctly engaged.
- Secure the pulley with the appropriate retaining bolts, nuts, or clips.
- Important: Tighten fasteners to the torque specifications provided in your equipment's service manual. Overtightening or undertightening can lead to premature failure.
- Re-route the belt(s) onto the new pulley according to your previous observations or the equipment's diagram.
- Adjust the belt tensioning mechanism to the manufacturer's recommended specifications.
- Replace any removed covers or guards.
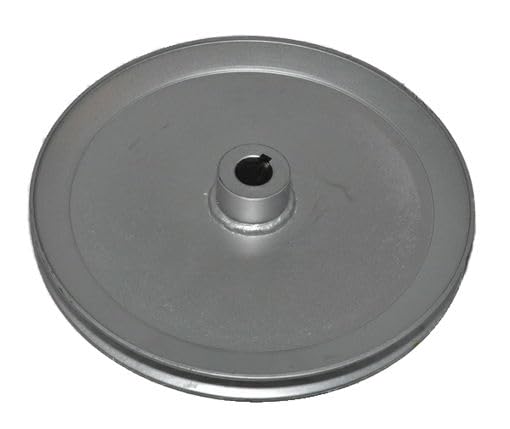
Figure 1: Toro 51-4190 Driven Pulley. This image shows the replacement part, a metal pulley with a central bore for shaft mounting and grooves for belt engagement.
4. Function and Post-Installation Check
The Toro 51-4190 Driven Pulley is a passive component designed to transmit power from a drive belt to another part of the equipment, such as a blade spindle or transmission. Proper installation ensures smooth and efficient power transfer.
4.1 Post-Installation Check
- Manually rotate the pulley to ensure it spins freely without binding or excessive wobble.
- Verify that all belts are correctly seated in the pulley grooves and have the proper tension.
- Double-check all fasteners to ensure they are securely tightened to specifications.
- Reconnect the spark plug wire (if applicable).
- Start the equipment and operate it at a low speed in a safe, open area. Listen for any unusual noises or vibrations. If any issues are detected, immediately shut down the equipment and investigate.
5. Maintenance
Regular inspection of the driven pulley can extend its lifespan and prevent unexpected equipment downtime.
- Visual Inspection: Periodically inspect the pulley for signs of wear, cracks, chips, or deformation, especially in the belt grooves.
- Bearing Check: If the pulley has an integrated bearing, check for excessive play or roughness when rotating. A noisy pulley often indicates a failing bearing.
- Cleanliness: Keep the pulley and surrounding area free of grass clippings, dirt, and other debris that can interfere with belt operation or cause premature wear.
- Belt Condition: Always inspect the belts running on the pulley for wear, cracking, or fraying. Replace worn belts as needed.
6. Specifications
| Attribute | Detail |
|---|---|
| Part Number | 51-4190 |
| Brand | Toro |
| Type | Driven Pulley |
| Material | Metal (typical for driven pulleys) |
| Application | Lawn Mower Deck Parts / Outdoor Power Equipment |
7. Warranty and Support
For information regarding the warranty of your Toro 51-4190 Driven Pulley, please refer to the warranty statement included with your original equipment or visit the official Toro website. Warranty terms may vary based on product type and region.
If you require technical assistance, replacement parts, or have questions not covered in this manual, please contact Toro Customer Support:
- Website: www.toro.com
- Phone: Refer to the "Contact Us" section on the Toro website for regional phone numbers.
- Authorized Service Dealer: Locate your nearest authorized Toro service dealer for professional assistance.