1. Introduction
This manual provides instructions for the RTX ZLM1 Zigbee Tuya Luxmeter Light Intensity Sensor. This smart device is designed to measure ambient light levels and integrate with your smart home system for automated control based on light intensity. It offers a detection range of 0 to 1000 lux and operates within the Tuya Smart Life ecosystem via a Zigbee gateway.

Image: Front view of the RTX ZLM1 Zigbee Tuya Luxmeter Light Intensity Sensor.
2. Product Overview
The RTX ZLM1 sensor is a compact and aesthetically designed device. It features a light sensor for detecting ambient lux levels and an LED indicator for operational status. The device is powered via a microUSB port.
2.1 Dimensions

Image: Dimensions of the sensor, approximately 58mm (height) x 30mm (width) x 16mm (depth).
2.2 Key Components
- Light Sensor: Detects ambient light intensity.
- LED Indicator: Displays device status (e.g., normal operation, pairing mode).
- MicroUSB Port: For 5V power supply.
3. Setup
3.1 Powering the Device
Connect the sensor to a 5V power source using a microUSB cable. A standard USB phone charger (not included) can be used. The device requires continuous power to operate.
3.2 Zigbee Gateway Requirement
The RTX ZLM1 is a Zigbee device and requires a Zigbee gateway to function. The gateway acts as a central hub, connecting the sensor to your home network and the Tuya Cloud server. Ensure you have a compatible Zigbee gateway (e.g., a Tuya WiFi or LAN gateway) set up before proceeding.

Image: Representation of a Zigbee smart home network.
3.3 Pairing with Tuya Smart Life App
- Ensure your Zigbee gateway is powered on and connected to the Tuya Smart Life application.
- Power on the RTX ZLM1 sensor. The LED indicator should show a specific pattern indicating pairing mode (refer to the LED status section in Troubleshooting if unsure).
- Open the Tuya Smart Life application on your smartphone or tablet.
- Add a new device through your Zigbee gateway. The app should detect the sensor.
- Follow the on-screen instructions in the app to complete the pairing process.
- Once successfully paired, the LED indicator on the sensor will change to a steady state, and the device will appear in your Tuya Smart Life app.

Image: Tuya Smart Life platform compatibility logo.
3.4 Mounting the Sensor
The sensor can be easily mounted using double-sided adhesive tape (not included). Choose a location where the sensor can accurately measure ambient light without direct obstruction, such as near a window or in a central area of a room.

Image: Sensor placed near a window for optimal light detection.
4. Operating the Sensor
4.1 Viewing Light Intensity Data
Once paired, open the Tuya Smart Life app and navigate to the RTX ZLM1 sensor. You will see real-time light intensity readings in lux. The app also provides historical data, allowing you to review daily, weekly, monthly, or annual light intensity trends.
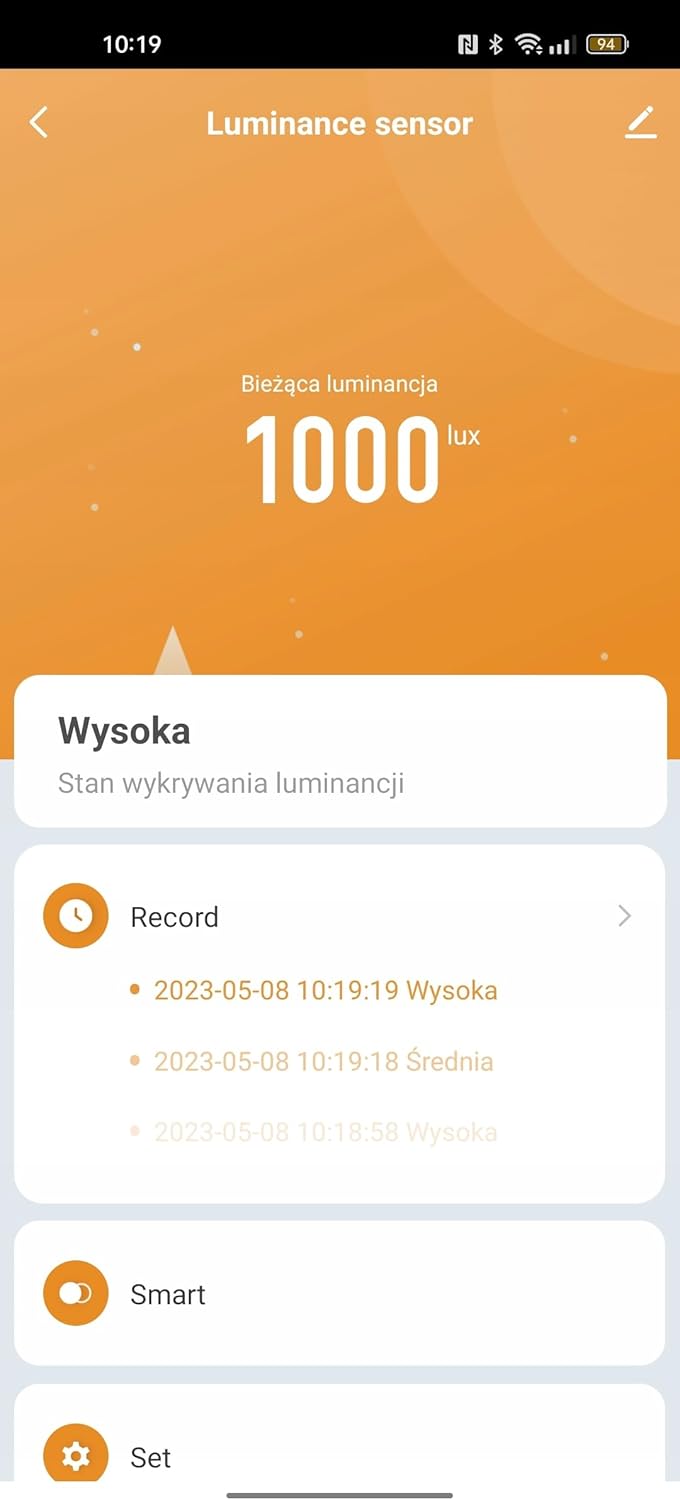
Image: Tuya Smart Life app interface displaying light intensity readings.
4.2 Smart Automation Scenarios
The primary function of the sensor is to enable smart automation based on detected light levels. You can create various scenarios within the Tuya Smart Life app:
- Roller Shutter Control: Integrate with Tuya-compatible roller shutter controls to automatically adjust shading percentage based on light intensity. For example, close shutters when light exceeds a certain lux level.
- Water Valve Control: Pair with Tuya water valves to implement light-dependent irrigation. For instance, water plants only when sufficient light is available.
- Lighting Automation: Collaborate with presence detectors and smart lighting actuators to automate lighting. Turn on lights when it's dark and motion is detected, or dim lights based on ambient brightness.

Image: Sensor in a living room, demonstrating potential for smart home integration.
5. Maintenance
5.1 Cleaning
To ensure accurate readings, keep the sensor's surface clean. Wipe gently with a soft, dry cloth. Avoid using abrasive cleaners or solvents, as these can damage the device.
5.2 Power Supply
The sensor requires a continuous 5V microUSB power supply. Ensure the power source is stable and the cable is securely connected. Interruption of power will cause the device to stop functioning until power is restored.
6. Troubleshooting
6.1 Device Not Connecting/Pairing
- Check Power: Ensure the sensor is properly powered via microUSB.
- Zigbee Gateway: Verify that your Zigbee gateway is online and functioning correctly within the Tuya Smart Life app.
- Proximity: Make sure the sensor is within range of your Zigbee gateway during the pairing process.
- Reset: If the sensor fails to pair, try resetting it (refer to the device's specific reset procedure, usually involving holding a button or power cycling).
6.2 Incorrect Light Readings
- Obstructions: Ensure the light sensor is not obstructed by dust, dirt, or objects.
- Placement: Reposition the sensor if it's in an area with inconsistent light or direct glare that might skew readings.
- Calibration: The sensor is factory calibrated. If you suspect significant inaccuracies, contact support.
6.3 LED Indicator Status
- Solid Blue: Normal operation, connected to the Zigbee network.
- Flashing Blue: Pairing mode or attempting to connect to the Zigbee network.
- Off: Device is not powered or is in a low-power state (if applicable, though this model requires continuous power).
7. Specifications
| Feature | Detail |
|---|---|
| Brand | RTX |
| Model | ZLM1 |
| Connectivity | Zigbee |
| App Compatibility | Tuya Smart Life |
| Detection Range | 0 - 1000 Lux |
| Power Supply | 5V DC (via microUSB) |
| Dimensions (approx.) | 58mm (H) x 30mm (W) x 16mm (D) |
| Manufacturer | RTX |
| ASIN | B0CDVKY1TR |
| Date First Available | August 6, 2023 |
8. Warranty and Support
For warranty information and technical support, please refer to the documentation provided with your purchase or contact RTX customer service directly. Details regarding spare parts availability are currently unavailable.


