1. Introduction
Thank you for choosing the DEGGOX Aquarium Electric Sponge Filter. This filter is designed to provide efficient physical and biological filtration for your aquarium, promoting a healthy environment for aquatic life. It is suitable for both freshwater and saltwater tanks ranging from 10 to 20 gallons. This manual provides detailed instructions for the proper setup, operation, and maintenance of your filter.

Figure 1: Overview of the DEGGOX Aquarium Electric Sponge Filter.
2. Safety Instructions
- Read all instructions before using the appliance.
- Ensure the power supply voltage matches the rating label on the pump.
- Always unplug the filter from the power outlet before performing any maintenance, cleaning, or when handling the filter.
- Do not operate the filter if the power cord or plug is damaged.
- Keep the power cord away from sharp objects or hot surfaces.
- This appliance is for indoor use only and must be fully submerged in water during operation.
- Do not use this filter for purposes other than its intended use in aquariums.
3. Package Contents
Verify that all components are present in the package:
- Submersible Water Pump with Power Cord
- Filter Sponges (2 main, 4 spare)
- Bio Ceramic Media Balls (1 bag)
- Venturi Nozzle / Rain Bar Output Assembly
- Connecting Pipes and Fittings
- Suction Cups (3)
4. Product Overview
Familiarize yourself with the main components of the DEGGOX Electric Sponge Filter:
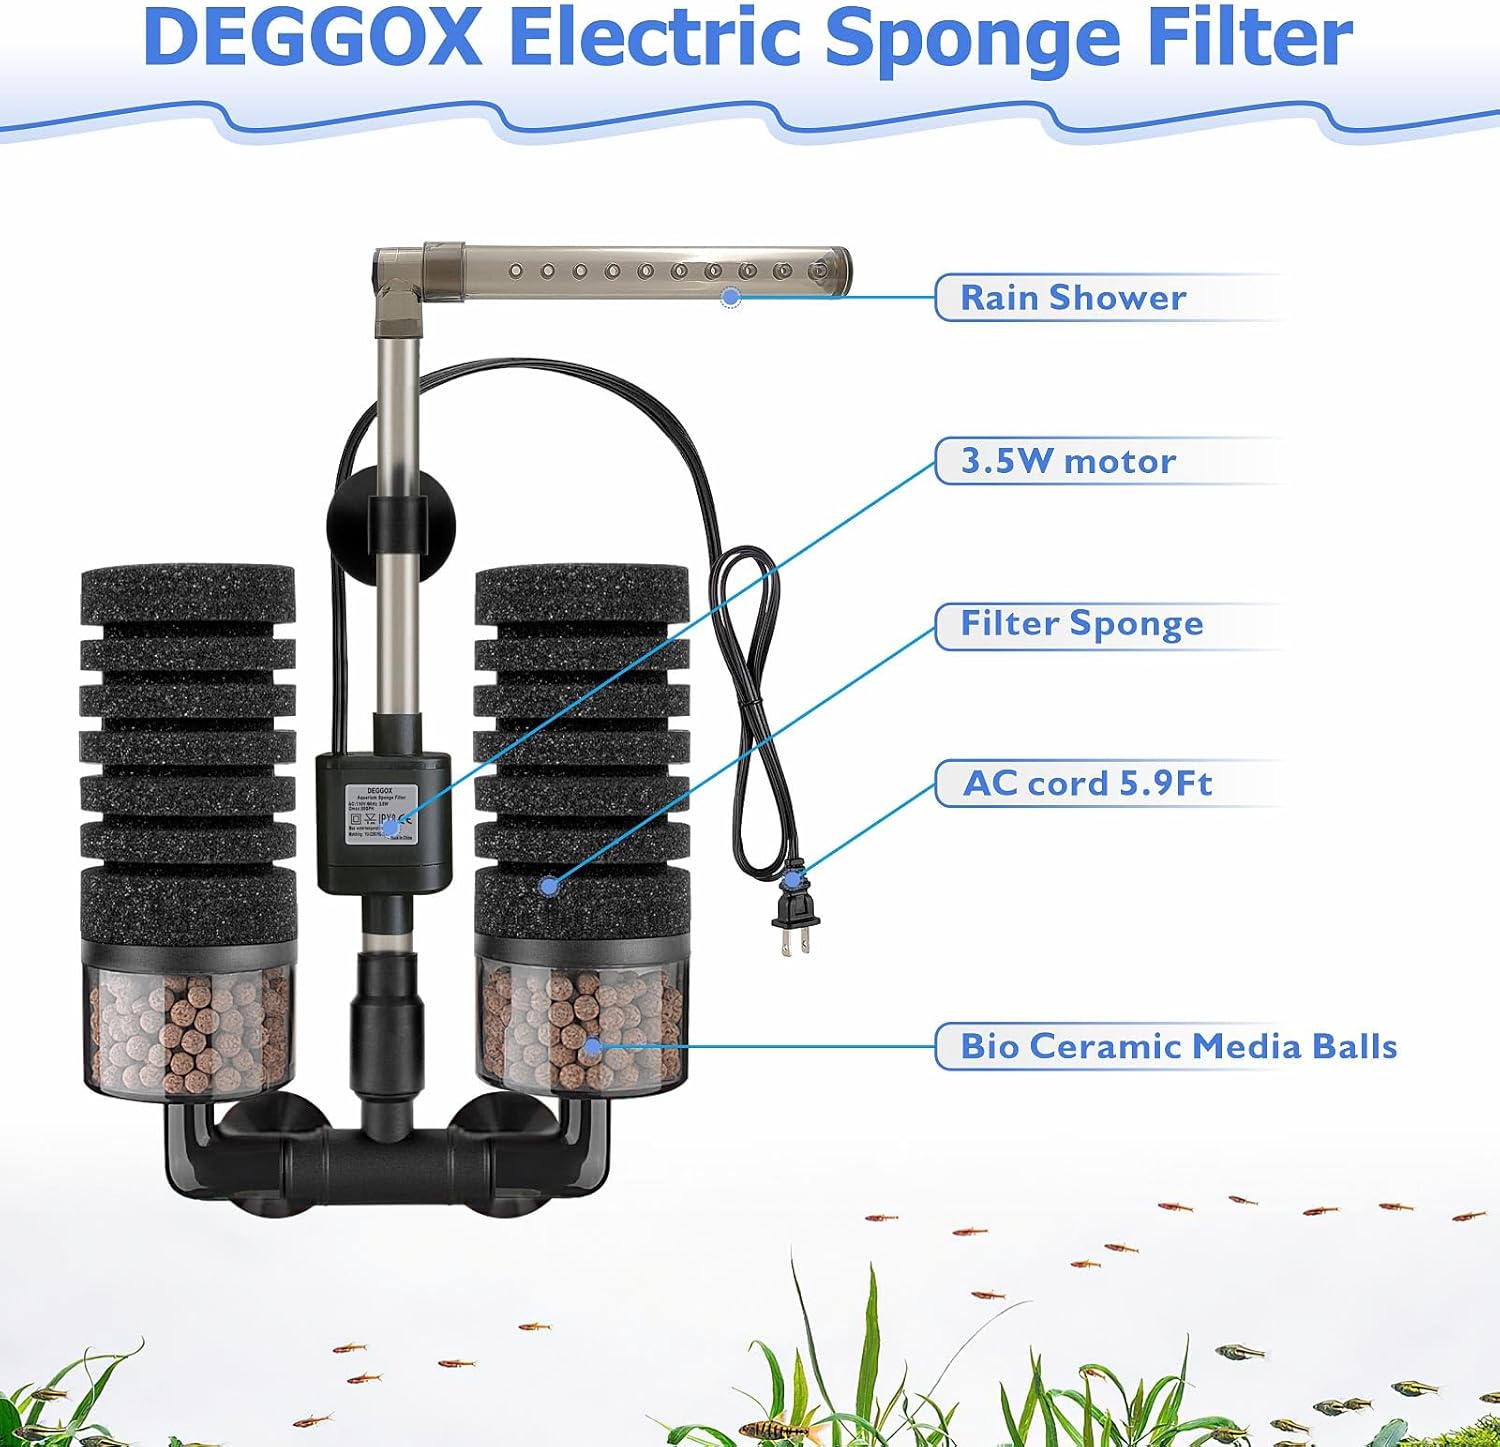
Figure 2: Labeled components of the filter.
- Rain Shower: Provides gentle water distribution and aeration.
- 3.5W Motor: The submersible pump that drives water through the filter.
- Filter Sponge: Provides mechanical filtration to remove particles and biological filtration for beneficial bacteria.
- AC Cord 5.9Ft: Power cable for the pump.
- Bio Ceramic Media Balls: Provides extensive surface area for biological filtration.
5. Setup Instructions
- Assemble the Filter: Connect the two sponge filter units to the central pump assembly. Ensure the bio ceramic media balls are placed inside the bottom compartments of the sponge filters.
- Attach Output: Connect the desired water output (venturi nozzle or rain bar) to the top of the pump's outlet pipe. The venturi nozzle can be rotated for flow direction.
- Position in Aquarium: Submerge the assembled filter completely in your aquarium. Use the three powerful suction cups located on the base and central column to securely attach the filter to the inside wall of your tank.
- Connect to Power: Once the filter is securely placed and fully submerged, plug the power cord into a suitable electrical outlet. No additional air pump is required.

Figure 3: Filter attachment using suction cups.
6. Operating Instructions
The DEGGOX Electric Sponge Filter operates by drawing water through the filter sponges and bio ceramic media, then expelling filtered water back into the tank. This process provides both mechanical and biological filtration.
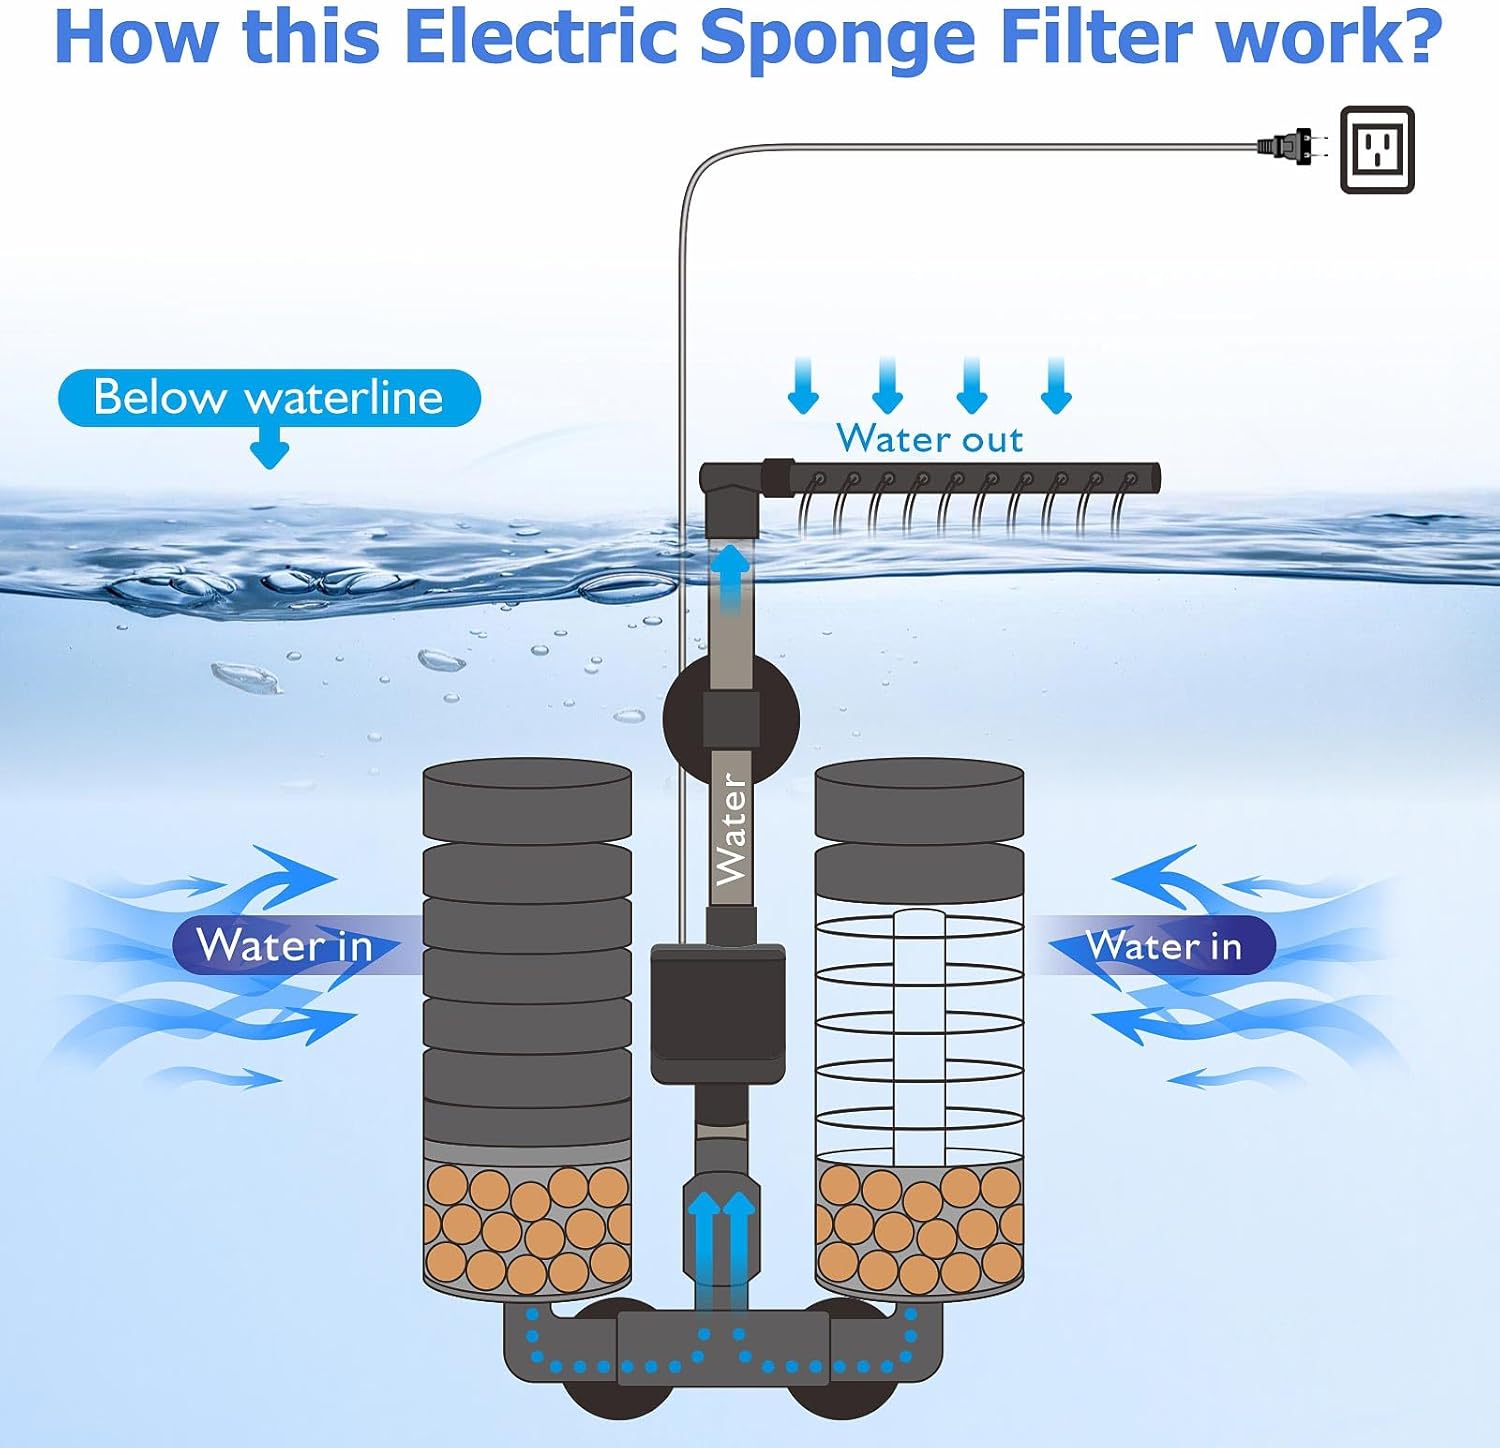
Figure 4: Illustration of the filter's water flow.
6.1. Venturi Nozzle and Rain Mode
The filter includes options for water output: a venturi nozzle and a rain bar. The venturi nozzle is designed to create a gentler water flow, which is beneficial for aquariums housing delicate species such as fry, shrimp, or bettas. The rain bar provides broader water distribution and aeration.


Figure 5: Venturi Nozzle (left) and Rain Bar (right) options.
6.2. Aquarium Compatibility
This filter is suitable for both freshwater and saltwater aquarium environments, providing effective filtration in either setup.

Figure 6: Filter usage in freshwater (left) and saltwater (right) aquariums.
7. Maintenance
Regular maintenance is crucial for the optimal performance and longevity of your filter.
7.1. Filter Sponge Cleaning
The filter sponges can be reused. It is recommended to clean or replace one sponge per week. After initial installation, wait approximately two weeks before cleaning. Then, remove one side for cleaning, and clean the other side the following week. This staggered cleaning helps preserve beneficial bacteria in the filter.
- Unplug the filter from the power source.
- Carefully remove one filter sponge unit from the main assembly.
- Gently rinse the sponge in old aquarium water (from a water change) to avoid killing beneficial bacteria with chlorinated tap water.
- Reattach the cleaned sponge unit.
- Repeat the process for the other sponge unit the following week.
7.2. Bio Ceramic Media Balls
The bio ceramic media balls generally require less frequent cleaning. If they appear heavily soiled, gently rinse them in old aquarium water during sponge cleaning. Avoid aggressive cleaning to preserve the bacterial colonies.
7.3. Pump Maintenance
Periodically inspect the pump impeller for debris or blockages. Disassemble the pump housing (after unplugging) and clean any accumulated detritus to ensure smooth operation.
8. Troubleshooting
| Problem | Possible Cause | Solution |
|---|---|---|
| Filter not running / No water flow |
|
|
| Weak water flow |
|
|
| Excessive noise |
|
|
9. Specifications
| Feature | Detail |
|---|---|
| Model Number | YU-228C |
| Recommended Tank Size | 10 to 20 Gallons |
| Power | 3.5W (Motor) |
| Item Weight | 0.8 Pounds (12.8 ounces) |
| Product Dimensions (LxWxH) | 9.25 x 7.47 x 2.76 inches |
| Color | Black |
| Filtration Type | Physical and Biochemical |
| Compatibility | Freshwater and Saltwater |

Figure 7: Dimensional comparison of filter models. This manual pertains to the 10-20 Gallon model (Model 1).
10. Warranty
This DEGGOX product is covered by a 1-Year Manufacturer Warranty from the date of purchase. This warranty covers defects in materials and workmanship under normal use. It does not cover damage resulting from misuse, accident, unauthorized modification, or improper installation.
Please retain your proof of purchase for warranty claims.
11. Customer Support
For technical assistance, troubleshooting, or warranty inquiries, please contact DEGGOX customer support. You can find more information and contact details by visiting the official DEGGOX store:


