Introduction
This user manual provides comprehensive instructions for the safe and effective operation, setup, and maintenance of your BMC G3 A20 Anti-Snoring Device. Please read this manual thoroughly before using the device and keep it for future reference.
Important Safety Information
WARNING: Consult a healthcare professional before using this device. Do not use if you have difficulty breathing or are unable to remove the device yourself. Keep out of reach of children. Discontinue use if you experience discomfort or adverse reactions.
Always ensure the device is placed on a stable, flat surface during operation. Do not block the air inlet or outlet. Use only accessories and parts recommended by the manufacturer.
Product Overview and Components
The BMC G3 A20 is an advanced anti-snoring device designed for comfortable and effective use. It features intelligent temperature control, automatic start/stop functions, and a low noise level for a peaceful sleep environment.

Figure 1: BMC G3 A20 device with its complete set of accessories, including the carrying case, air hose, power adapter, SD card for data storage, and replacement filters.

Figure 2: The BMC G3 A20 device with its integrated humidifier chamber opened, revealing the water reservoir for humidification.
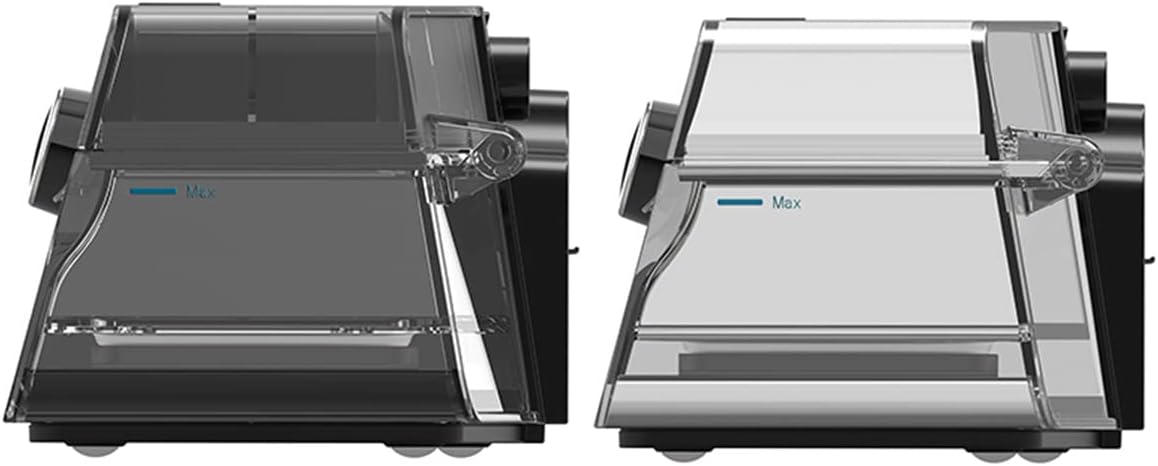
Figure 3: Side view comparison of two humidifier chambers, illustrating the 'Max' fill line for proper water level.

Figure 4: Hands demonstrating the process of opening and removing the humidifier chamber from the BMC G3 A20 device for cleaning or refilling.

Figure 5: All individual components of the BMC G3 A20 system laid out, including the main device, carrying bag, air hose, power adapter, mask, and filters.
Setup Instructions
- Unpack the Device: Carefully remove the BMC G3 A20 device and all accessories from the packaging.
- Power Connection: Connect the power adapter to the device and plug it into a suitable electrical outlet.
- Humidifier Setup (Optional):
- Open the humidifier chamber as shown in Figure 2 and Figure 4.
- Fill the humidifier with distilled water up to the 'Max' line (refer to Figure 3). Do not overfill.
- Close the humidifier chamber securely.
- Hose Connection: Connect the air hose to the device's air outlet.
- Mask Connection: Attach your compatible mask to the other end of the air hose.
- Initial Settings: Ensure the device is set to the default pressure range of 4-20 cm H2O. Adjust other settings as recommended by your healthcare professional.
Operating the Device
- Power On: Turn on the device. The BMC G3 A20 features an automatic start function.
- Apply Mask: Place the mask comfortably and securely on your face, ensuring a proper seal.
- Monitor Settings: Use the 3.5-inch color LCD screen to monitor important parameters in real-time, such as pressure, humidification status, and treatment data.
- Automatic Functions: The device will automatically adjust pressure and humidification based on its intelligent control system. It also features automatic stop when the mask is removed or the session ends.
- Data Access: For detailed treatment data, scan the QR code displayed on the device screen with your smartphone. This allows you to view data in iCode.
The device is designed for low energy consumption, maximizing humidification effect while reducing power usage through eco-intelligent heating technology.
Maintenance and Cleaning
Regular cleaning and maintenance are crucial for the optimal performance and longevity of your BMC G3 A20 device.
- Daily Cleaning:
- After each use, empty any remaining water from the humidifier chamber and rinse it with distilled water. Allow it to air dry completely.
- Wipe the exterior of the device with a soft, damp cloth. Do not immerse the device in water.
- Weekly Cleaning:
- Wash the humidifier chamber, air hose, and mask components with mild soap and warm water. Rinse thoroughly and allow to air dry away from direct sunlight.
- Inspect the air filter for dust and debris. Replace if visibly dirty or as recommended by your healthcare professional.
- Filter Replacement: Replace the air filter regularly, typically every 1-3 months, or more frequently in dusty environments.
- Storage: When not in use for an extended period, ensure the device and all components are clean and dry. Store them in the provided carrying case in a cool, dry place.
Care Instructions: Hand wash components as needed. Do not use harsh chemicals or abrasive cleaners.
Troubleshooting
| Problem | Possible Cause | Solution |
|---|---|---|
| Device not turning on | Power cable not connected; Power outlet issue | Check power connections; Try a different outlet |
| No air flow or low pressure | Hose kinked or disconnected; Mask leak; Air filter blocked | Check hose for kinks and connections; Adjust mask for proper seal; Clean or replace air filter |
| Humidifier not producing moisture | Water reservoir empty; Humidifier chamber not properly closed | Refill water reservoir; Ensure humidifier chamber is securely closed |
| Excessive noise | Air filter dirty; Device not on a stable surface | Clean or replace air filter; Place device on a firm, flat surface |
If the problem persists after attempting these solutions, please contact customer support or your healthcare provider.
Technical Specifications
- Model: BMC G3 A20
- Noise Level: <30 dB
- Dimensions (L x W x H): 17 cm x 19 cm x 11.7 cm
- Weight: Approximately 3.3 kg
- Default Pressure Setting: 4-20 cm H2O
- Humidification: Integrated, Eco-intelligent heating technology
- Breathing Relief: Yes
- Altitude Compensation: Automatic, up to 1000 meters
- Automatic Start/Stop: Yes
- Display: 3.5-inch color LCD screen
- Data Storage: Via SD card, accessible via QR code (iCode)
- Material: Synthetic fabric (for mask/strap, if applicable), other components as per device construction.
- Color: Black
Warranty and Support
The BMC G3 A20 device comes with a 2-year manufacturer's warranty from the date of purchase. This warranty covers defects in materials and workmanship under normal use.
For warranty claims, technical support, or any questions regarding your device, please contact your authorized BMC dealer or the customer support provided by the seller.
Please retain your proof of purchase for warranty purposes.


