1. Introduction
Thank you for choosing the De'Longhi Rivelia EXAM440.55.W Automatic Coffee Machine. This manual provides essential information for the safe and efficient use, maintenance, and troubleshooting of your appliance. Please read it thoroughly before operating the machine and keep it for future reference.
The De'Longhi Rivelia EXAM440.55.W is designed to deliver a wide variety of coffee and milk-based beverages with ease. Key features include the innovative Bean Switch system for alternating between different coffee bean types, LatteCrema Hot technology for automatic milk frothing, and a user-friendly 3.5-inch color touchscreen display for personalized coffee routines.

Image 1.1: De'Longhi Rivelia EXAM440.55.W Automatic Coffee Machine with accessories.
2. Important Safety Information
Please observe the following safety precautions to prevent injury or damage to the appliance:
- Read all instructions carefully before use.
- Do not immerse the appliance, power cord, or plug in water or other liquids.
- Keep the appliance out of reach of children.
- Do not operate the appliance if the power cord or plug is damaged. Contact authorized service personnel.
- Avoid contact with hot surfaces. Use handles or knobs.
- Unplug the machine from the outlet when not in use and before cleaning.
- Use only original De'Longhi spare parts and accessories.
- This appliance is for household use only. Do not use outdoors.
3. Product Overview
Familiarize yourself with the components of your De'Longhi Rivelia coffee machine:
- 3.5-inch Color Touchscreen Display: For navigating menus, selecting drinks, and customizing settings.
- Interchangeable Bean Hoppers (Bean Switch System): Two 250g containers allowing easy switching between different coffee bean varieties.
- LatteCrema Hot System: Automatic milk frother for preparing hot milk and milk foam.
- Water Tank: Removable tank for water supply (1.4 Liters capacity).
- Coffee Spouts: Adjustable height for various cup sizes.
- Drip Tray and Grounds Container: Collects excess water and used coffee grounds.
- Removable Brew Unit: For easy cleaning and maintenance.
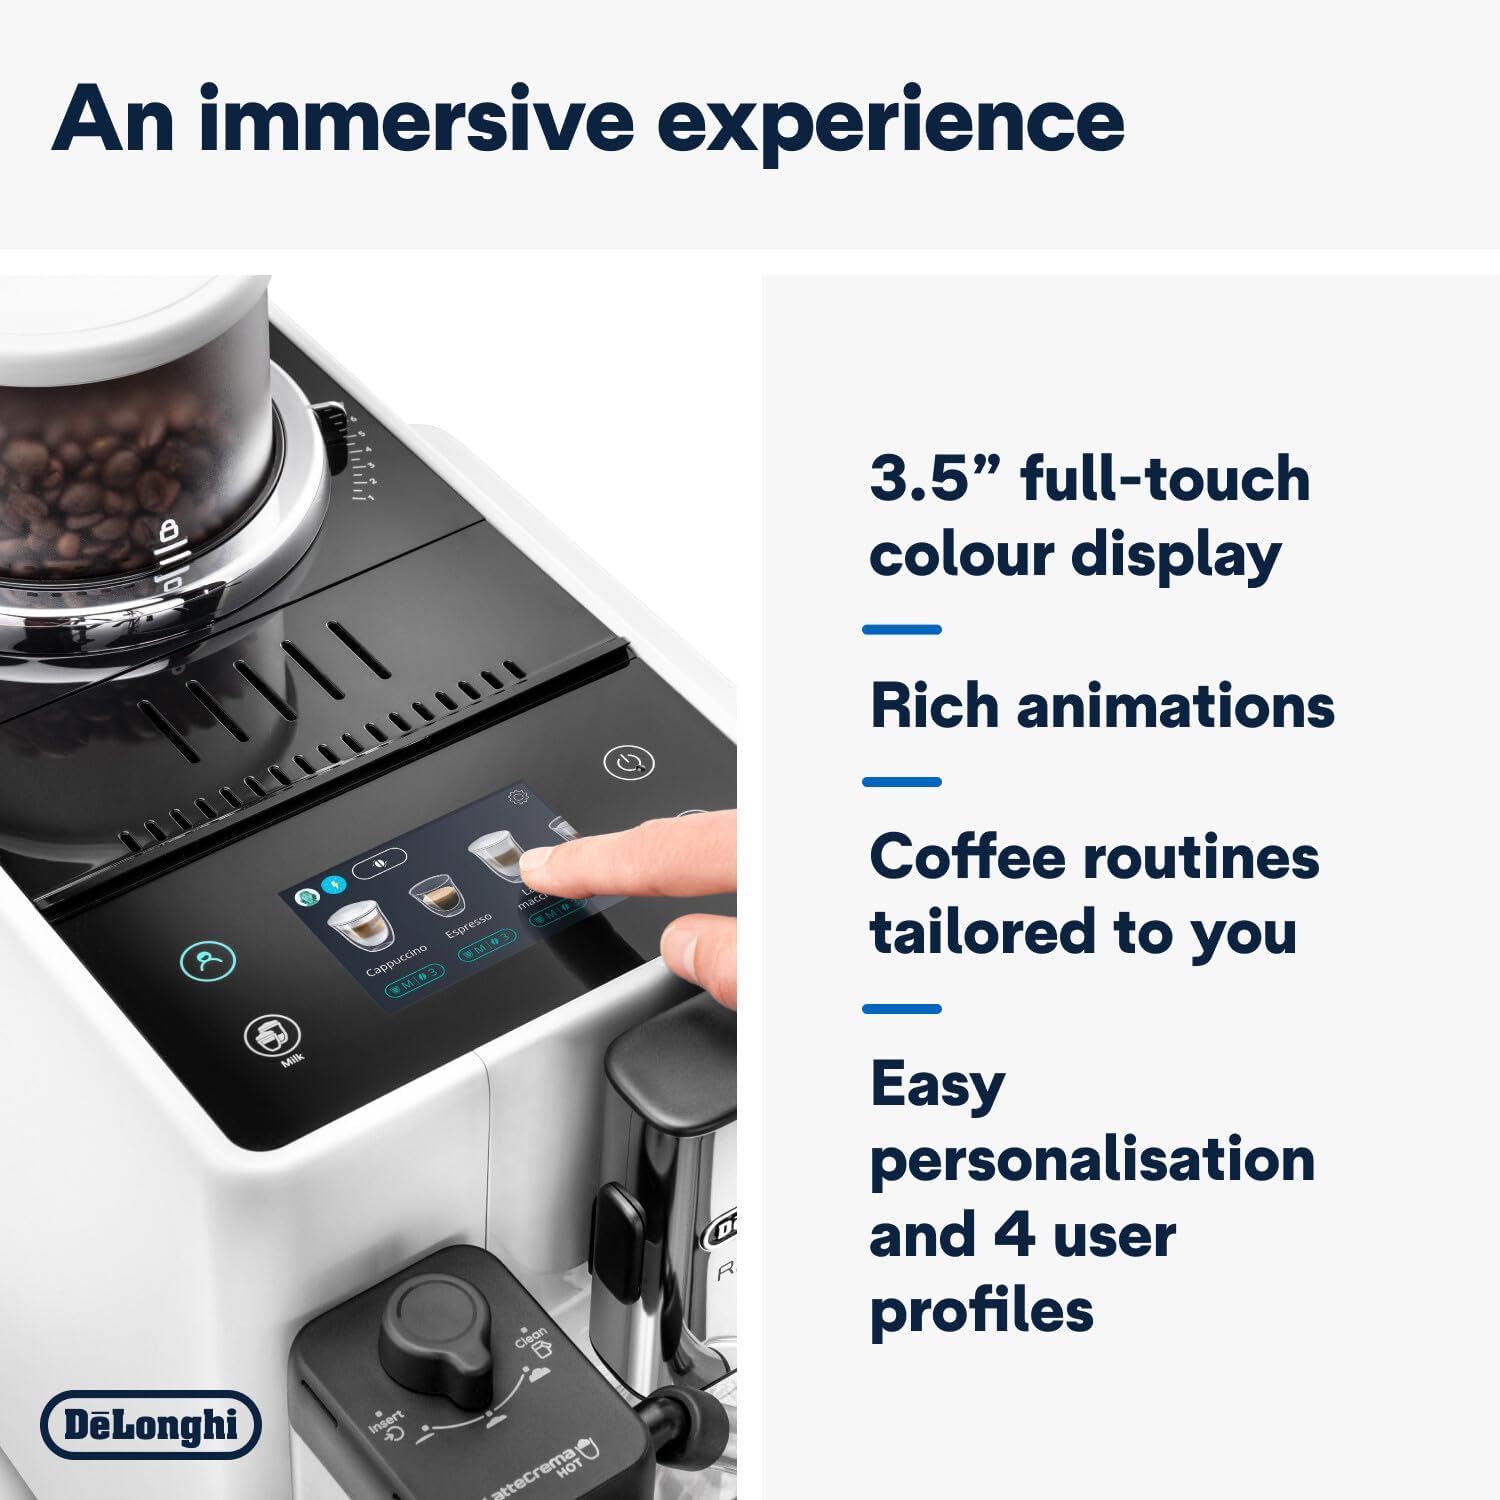
Image 3.1: Close-up of the 3.5-inch color touchscreen display.
4. Initial Setup
4.1 Unpacking and Positioning
- Remove all packaging materials from the machine.
- Place the machine on a stable, level surface, away from water splashes and heat sources.
- Ensure adequate space around the machine for ventilation and access.
4.2 Initial Rinse Cycle
- Fill the water tank with fresh tap water up to the MAX level.
- Place a container under the coffee spouts and the hot water spout.
- Follow the on-screen instructions to perform the initial rinse cycle. This primes the circuits and ensures optimal performance.
4.3 Adding Coffee Beans (Bean Switch System)
The Rivelia features two interchangeable bean hoppers. To add beans:
- Select the desired bean hopper.
- Remove the lid and pour fresh coffee beans into the hopper. Do not fill above the MAX line.
- Place the hopper onto the machine and twist to lock it into place.
- To switch beans, twist the current hopper to unlock, lift it off, and replace it with the other pre-filled hopper. The machine will guide you through the process of grinding out any remaining beans from the previous selection.

Image 4.1: Adding coffee beans to a hopper.

Image 4.2: Demonstrating the interchangeable bean hoppers.
4.4 Setting Up Milk Carafe
- Fill the milk carafe with fresh cold milk.
- Attach the carafe to the machine's milk frothing system.
5. Operating the Machine
5.1 Turning On/Off
Press the power button to turn the machine on or off. The machine will perform an automatic rinse cycle upon startup and shutdown.
5.2 Navigating the Touchscreen
The 3.5-inch color touchscreen provides intuitive control. Swipe left or right to browse drink options, tap to select, and use the on-screen buttons for customization and settings.

Image 5.1: Selecting a drink from the touchscreen menu.
5.3 Preparing Coffee Drinks
- Place a cup under the coffee spouts.
- Select your desired coffee drink (e.g., Espresso, Coffee, Long) from the touchscreen.
- You can customize the aroma intensity, coffee quantity, and temperature before brewing. The Bean Adapt technology automatically adjusts grinding and brewing parameters based on your bean selection.
- Press the 'Start' button to begin brewing.
5.4 Preparing Milk-Based Drinks (LatteCrema Hot)
- Ensure the milk carafe is filled and correctly attached.
- Place a suitable cup under the coffee and milk spouts.
- Select a milk-based drink (e.g., Cappuccino, Latte Macchiato) from the touchscreen.
- Adjust milk foam consistency using the dial on the milk carafe, if available.
- Press 'Start'. The machine will automatically prepare the milk and coffee.

Image 5.2: LatteCrema Hot system in action, frothing milk.
5.5 User Profiles
The machine supports up to 4 user profiles. You can personalize your favorite drinks and settings, and the machine will remember your preferences, adjusting the menu throughout the day based on your routine.
6. Cleaning and Maintenance
Regular cleaning ensures optimal performance and longevity of your machine.
6.1 Daily Cleaning
- Drip Tray and Grounds Container: Empty and rinse daily. The machine will prompt you when the grounds container needs emptying.
- Water Tank: Rinse daily and refill with fresh water.
- Coffee Spouts: Wipe with a damp cloth.
6.2 Cleaning the LatteCrema Hot System
After each milk preparation, the machine will prompt for a quick clean. For a thorough clean:
- Remove the milk carafe from the machine.
- Disassemble the components of the carafe.
- Wash all components with warm water and mild detergent. The milk carafe is dishwasher safe.
- Reassemble the carafe and store it in the refrigerator if it contains milk.
6.3 Cleaning the Brew Unit
The brew unit should be cleaned regularly (e.g., monthly) to remove coffee residues.
- Turn off the machine and unplug it.
- Open the service door and remove the brew unit by pressing the two red release buttons.
- Rinse the brew unit under running tap water until no coffee residue is visible.
- Allow it to air dry completely before reinserting.
6.4 Descaling
The machine will indicate when descaling is required. Use only De'Longhi descaling solution and follow the on-screen instructions carefully. Descaling removes mineral buildup and maintains machine efficiency.
7. Troubleshooting
Refer to this section for common issues and their solutions.
| Problem | Possible Cause | Solution |
|---|---|---|
| No coffee dispensed. | Water tank empty; coffee spout blocked; brew unit dirty. | Refill water tank; clean coffee spouts; clean brew unit. |
| Weak coffee. | Insufficient coffee quantity; coarse grind setting. | Increase coffee strength setting; adjust grinder to a finer setting. |
| Milk not frothing correctly. | Milk carafe dirty; milk type unsuitable; milk too warm. | Clean milk carafe thoroughly; use cold, fresh milk (dairy or plant-based suitable for frothing). |
| Machine displays an error message. | Specific internal issue. | Refer to the on-screen message for specific instructions or consult the full manual. If the problem persists, contact customer support. |
8. Technical Specifications
| Feature | Specification |
|---|---|
| Brand | De'Longhi |
| Model Number | EXAM440.55.W |
| Color | Arctic White |
| Dimensions (L x W x H) | 43 x 24.5 x 38.5 cm |
| Weight | 9.7 Kilograms |
| Water Tank Capacity | 1.4 Liters |
| Power | 1450 Watts |
| Voltage | 240V |
| Material | Plastic |
| Special Features | Coffee routines function, LatteCrema Hot, Bean Switch System |
| Auto-off Function | Yes |

Image 8.1: Product dimensions of the De'Longhi Rivelia.
9. Warranty and Support
9.1 Warranty Information
Your De'Longhi Rivelia EXAM440.55.W coffee machine is covered by a manufacturer's warranty. Please refer to the warranty card included with your product for specific terms, conditions, and duration. Keep your proof of purchase for warranty claims.
9.2 Customer Support
For technical assistance, spare parts, or service, please contact De'Longhi customer service. Contact details can typically be found on the official De'Longhi website or in the documentation provided with your appliance.