1. Introduction
The Mecpow G3 Pro Rotary Roller is designed to enhance your laser engraving capabilities, allowing for precise engraving on cylindrical and irregularly shaped objects. This manual provides detailed guidance to ensure safe and effective use of your rotary roller.
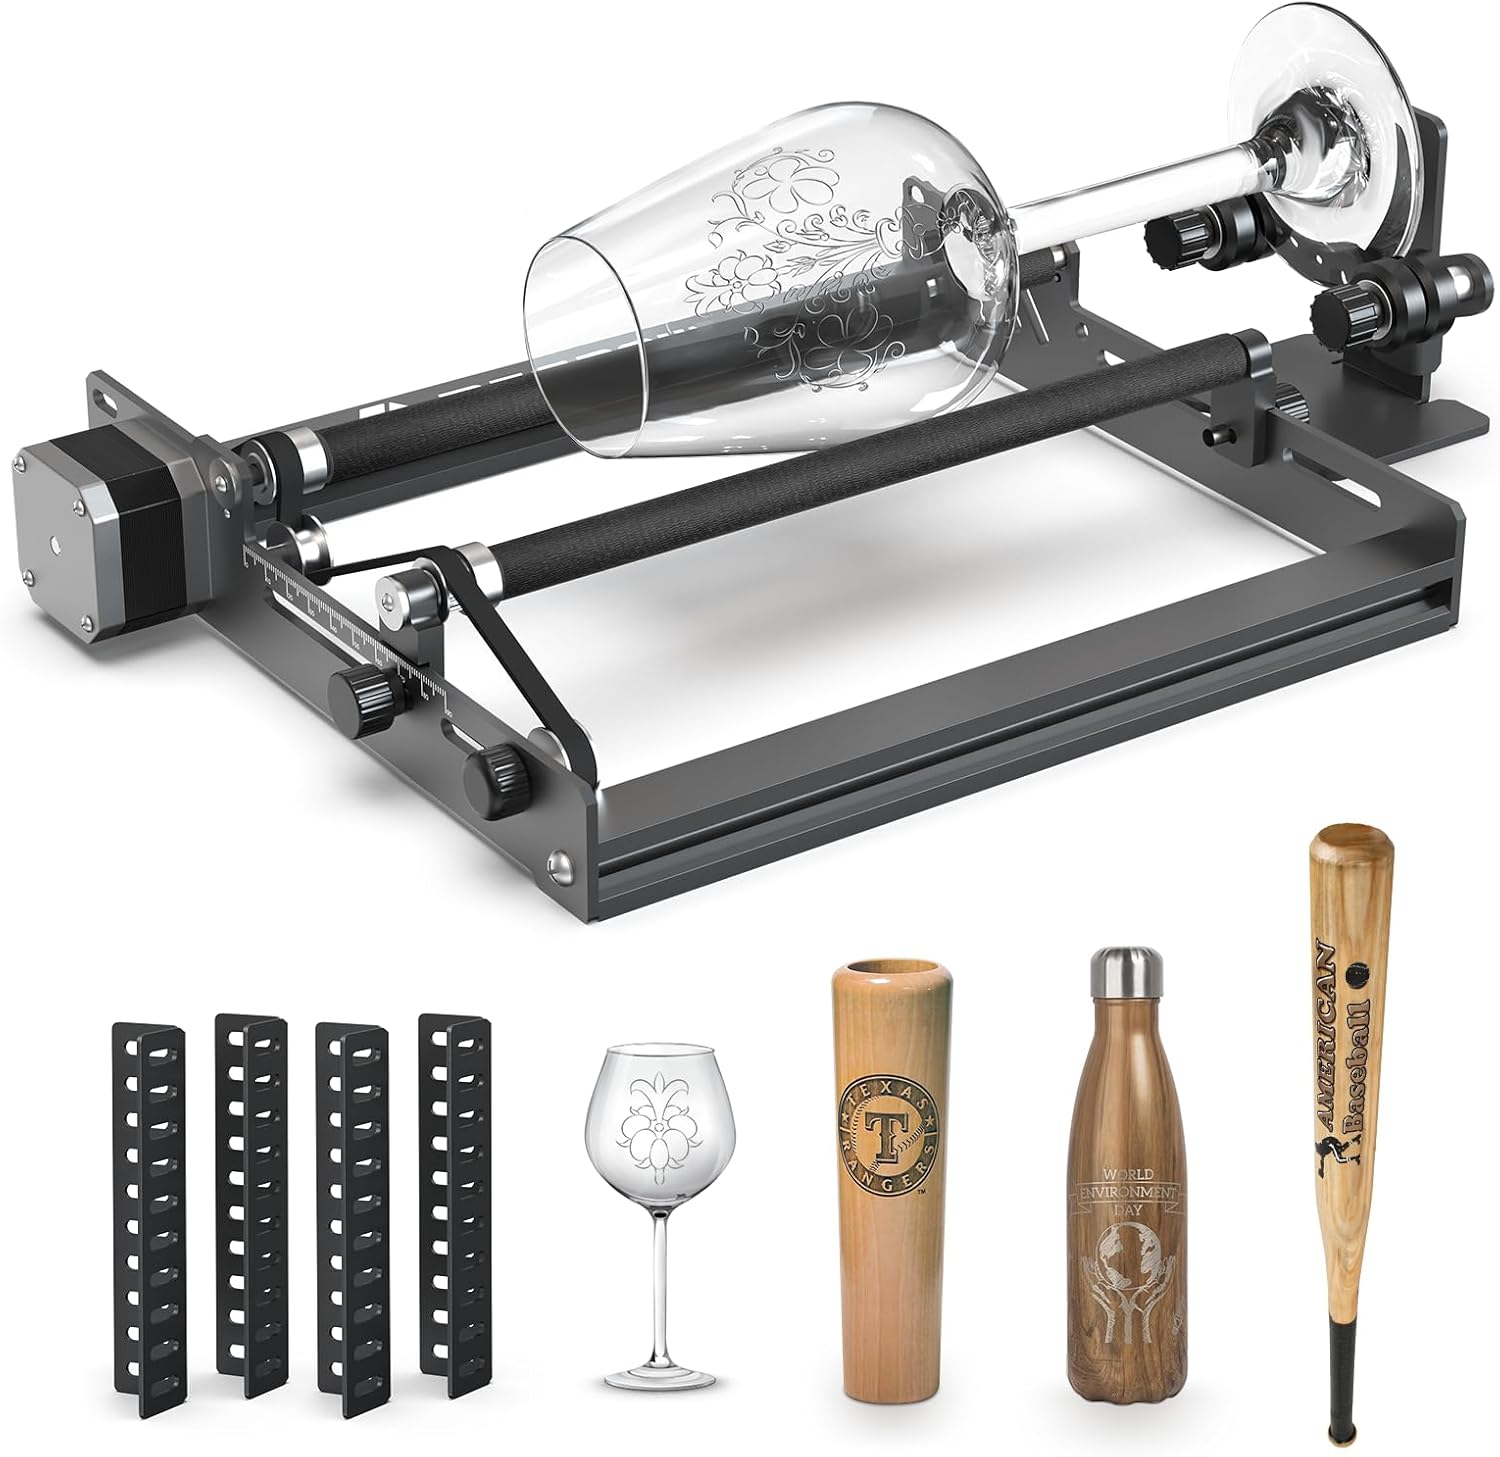
Figure 1: Mecpow G3 Pro Rotary Roller and included accessories.
2. Package Contents
Upon unboxing, verify that all components are present. Refer to the following list and the unboxing video for confirmation.
- Rotary Roller Module
- Y-Shaped Holder
- Heightening Brackets (4x)
- Anti-Slip Mats (4x)
- Screws (8x)
- Washers (8x)
- Nuts (8x)
- User Manual
- Tape Measure
- Spanner
- Cable with Black Connectors (for other brands)
- Cable with White Connectors (for Mecpow engravers)
Video 1: Unboxing of the Mecpow G3 Pro Rotary Roller, showing all included components.
3. Setup Instructions
3.1 Installing Heightening Brackets
To engrave larger objects, install the four heightening brackets onto the corners of your engraving machine. Secure them using the provided screws and nuts.

Figure 2: Installation of heightening brackets on a laser engraver.
3.2 Placing the Rotary Roller Module
Place the rotary roller module within the working area of your engraving machine. Ensure it is stable and level.
3.3 Connecting to the Engraving Machine
The Mecpow G3 Pro Rotary Roller connects to your laser engraver via the Y-axis motor port. Follow these steps:
- Loosen the screws on the protective cover of the Y-axis motor on your engraving machine.
- Remove the protective cover to access the Y-axis motor cables.
- Disconnect the existing Y-axis motor cables (left and right).
- Identify the correct connection cable for your engraver:
- Use the white connector cable for Mecpow engraving machines.
- Use the black connector cable for other brands.
- Connect the chosen cable from the rotary roller to the Y-axis motor port on your engraver.

Figure 3: Rotary roller connection cables for Mecpow and other brand engravers.
Video 2: Detailed installation and usage guide for the Mecpow G3 Rotary Roller, including connection steps.
4. Operating Instructions
4.1 Adjusting Roller Width
The rotary roller features an adjustable width mechanism (6mm to 88mm) to accommodate various cylindrical objects. Slide both axes to adjust the engraving length as needed. Use the 1mm fine adjustment mechanism for precise positioning.

Figure 4: Adjusting the width of the rotary roller.
4.2 Adjusting the Y-Bracket
The adjustable Y-bracket offers 5 angles to support irregularly shaped objects such as wine glasses, baseball bats, or pens. Adjust the width and height of the Y-bracket to ensure the object is balanced and securely held for engraving.

Figure 5: Examples of the adjustable Y-bracket supporting various objects.
4.3 Focusing the Laser Head
Before starting any engraving task, ensure the laser head is properly focused on the surface of the object. Use a focusing tool or follow your engraver's specific focusing procedure to achieve optimal results.
4.4 Starting Engraving
Once the object is secured, the roller width is adjusted, and the laser is focused, you can initiate the engraving process through your laser engraver's software. The rotary roller will automatically rotate the object for 360° engraving.

Figure 6: 360-degree rotational engraving in progress.
5. Maintenance
Regular maintenance ensures the longevity and optimal performance of your Mecpow G3 Pro Rotary Roller.
- Cleaning: Periodically clean the rollers and the module frame to remove dust and debris that may accumulate during engraving. Use a soft, dry cloth.
- Belt Tension: Check the drive belts for proper tension. They should be taut but not overly tight. Adjust if necessary according to your engraver's general maintenance guidelines.
- Roller Condition: Inspect the non-slip rubber shaft for wear or damage. The one-piece rubber roller is designed for high friction and durability.

Figure 7: Non-slip rubber shaft and aluminum alloy frame for stable operation.
6. Troubleshooting
This section addresses common issues you might encounter.
- Engraving is distorted or not rotating correctly:
- Ensure the object is securely placed and balanced on the rollers and Y-bracket.
- Verify the roller width is correctly adjusted for the object's diameter.
- Check the connection cable to the Y-axis motor. Ensure it is firmly connected.
- Software Setting Correction: If using Lightburn or similar software, ensure the correct axis is configured for the rotary. A common error in some manuals suggests changing variable $101 for Y-axis step control. The correct variable for Y-axis step control is typically $100. Adjust $100 to the value determined by the formula: 1000 / D (where D is the diameter of your object to engrave).
- Object slippage during engraving:
- Ensure the object's surface is clean and free of oils or debris that could reduce friction.
- Verify the non-slip rubber rollers are clean and in good condition.
- Adjust the pressure or stability of the Y-bracket if applicable to provide more secure holding.
- Rotary roller not recognized by engraver:
- Confirm the correct connection cable (white for Mecpow, black for others) is used and properly connected.
- Restart both the engraver and the computer/software.
- Consult your engraver's specific manual for rotary attachment setup.
7. Specifications
| Product Dimensions | 13.78 x 10.23 x 4.13 inches |
| Item Model Number | G3 |
| Item Weight | 3.8 pounds |
| Manufacturer | CHENGDU XINHONGJIN TECHNOLOGY CO,. LTD. |
| First Available | August 1, 2023 |
8. Warranty and Support
Mecpow products come with a 1-year warranty. For technical assistance, troubleshooting, or any inquiries, please contact Mecpow customer support. We offer 24-hour service to assist you.
Visit the official Mecpow store for more information and support: Mecpow Store


