1. Introduction
The SEVEKO JH-N1-Y EMS (Electrical Muscle Stimulation) Abdominal Muscle Stimulator is designed to provide effective muscle training through advanced EMS technology. This device sends electrical signals directly to your muscles, causing them to contract and relax, mimicking the natural process of muscle exercise. It is suitable for various muscle groups, offering a convenient way to support your fitness goals.
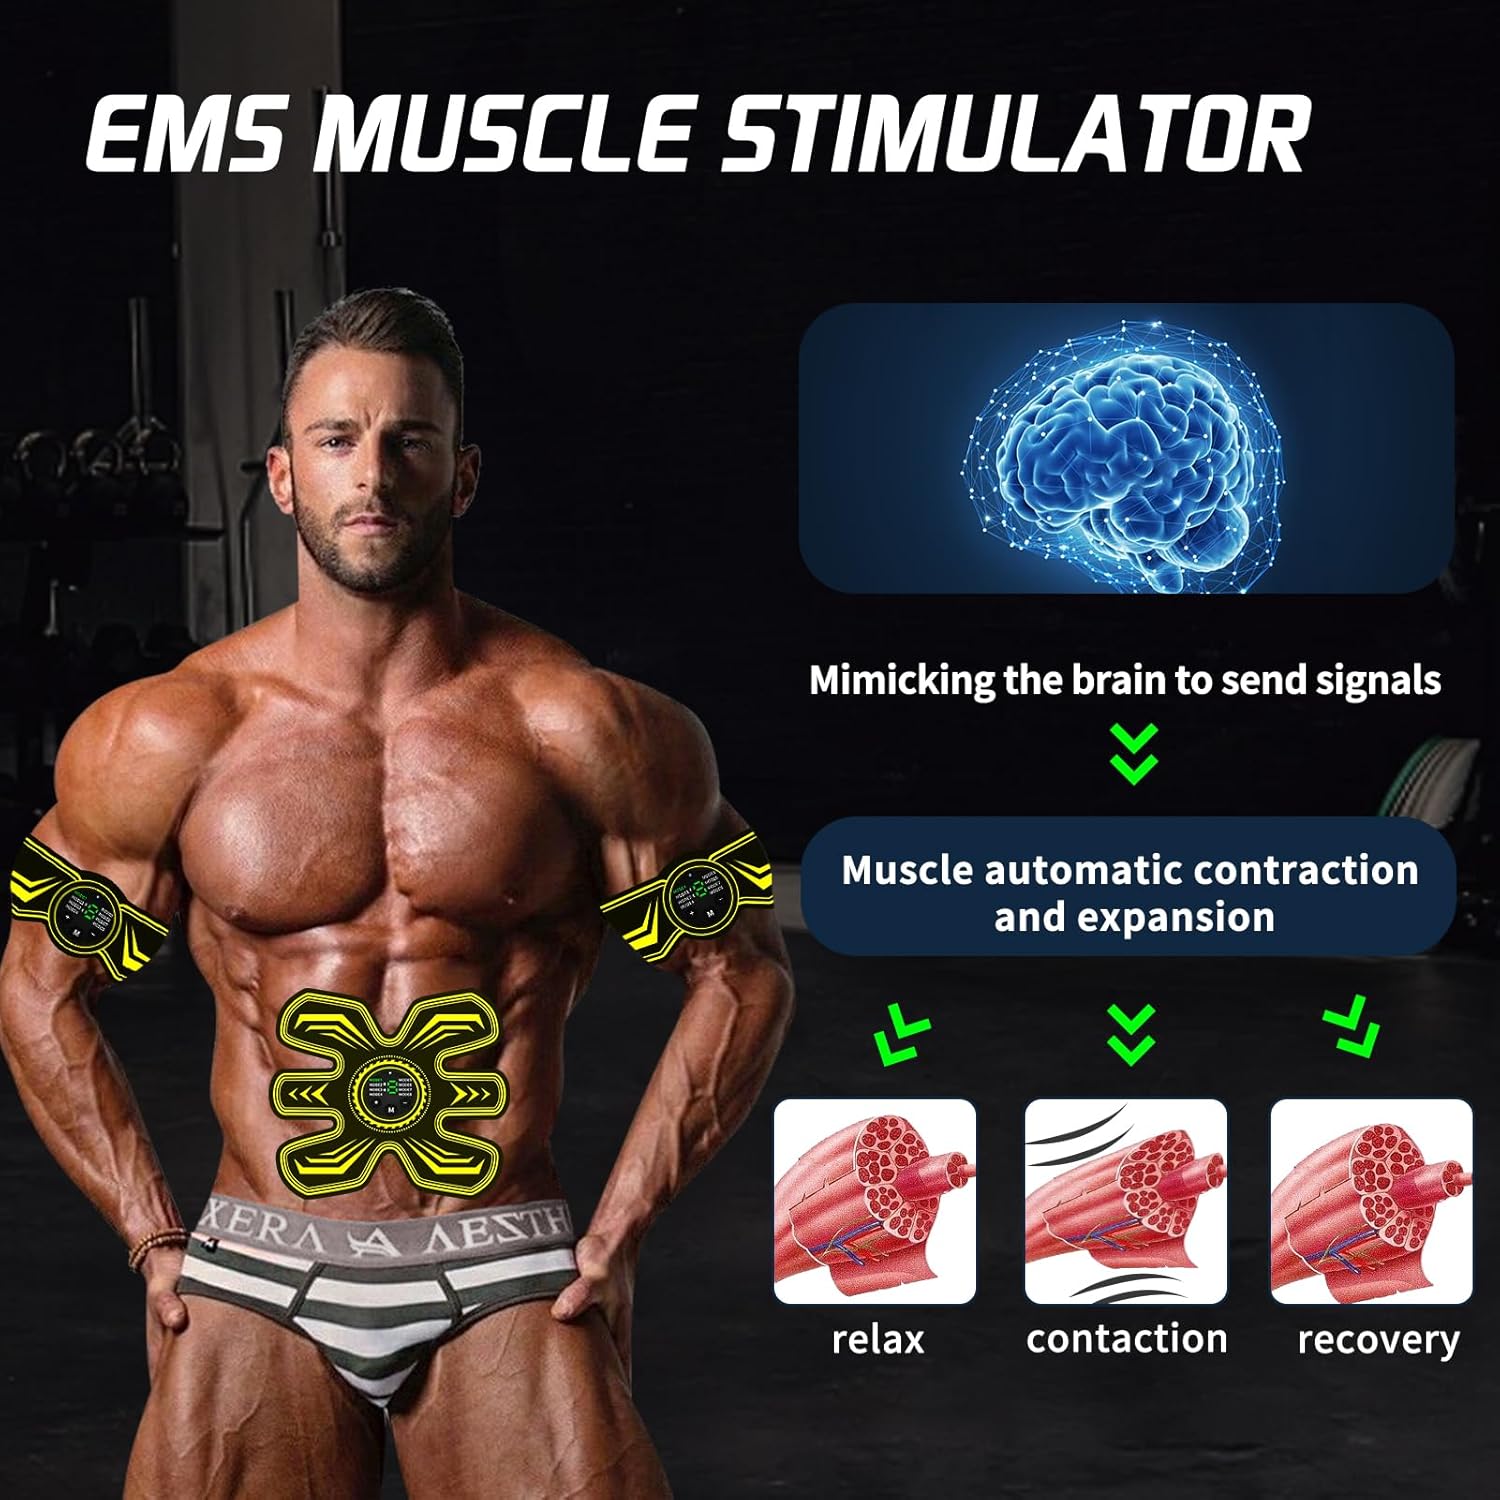
This image illustrates the SEVEKO EMS muscle stimulator in use, showing the main abdominal pad and two smaller arm pads attached to a person's body. The diagram also explains the EMS process: mimicking brain signals, leading to muscle contraction and expansion, followed by relaxation, contraction, and recovery phases.
2. Safety Information
Please read all safety instructions carefully before using the SEVEKO JH-N1-Y EMS Abdominal Muscle Stimulator. Improper use may result in injury or device malfunction.
- Consult your physician before use if you have any pre-existing medical conditions, especially heart conditions, epilepsy, or if you are pregnant.
- Do not use this device if you have a pacemaker, implanted defibrillator, or any other electronic medical device.
- Do not apply the pads to broken, irritated, or sensitive skin. Avoid areas with rashes, wounds, or recent scars.
- Keep out of reach of children.
- Do not use while sleeping, driving, or operating heavy machinery.
- Discontinue use immediately if you experience any discomfort, pain, or adverse reactions.
- Only use the provided charging cable and power adapter.
- Do not immerse the control unit in water or expose it to excessive moisture.
3. Package Contents
Ensure all items are present in your package:
- 1 x Abdominal Muscle Training Set (main pad)
- 2 x Arm/Leg Muscle Training Pads
- 3 x Control Hosts (main units)
- 10 x Hydrogel Replacement Bearings (pads)
- 1 x USB Charging Cable
- 1 x Instruction Manual

An image displaying the SEVEKO EMS muscle stimulator kit, including its packaging box, the main abdominal pad, two smaller arm/leg pads, three control units, replacement hydrogel pads, and USB charging cables. The image also shows the product being placed into a gym bag, emphasizing its portability.
4. Setup
Follow these steps to prepare your EMS stimulator for use:
- Attach Hydrogel Pads: Carefully peel off one side of the protective film from a new hydrogel pad. Align and firmly press the sticky side onto the electrode area of the muscle training pad.
- Attach Control Unit: Snap the control host onto the designated connectors on the muscle training pad. Ensure it is securely fastened.
- Prepare for Application: Peel off the remaining protective film from the hydrogel pad. The device is now ready to be applied to your skin.

A visual guide showing three steps for preparing the EMS device for use: 1. Peeling off the protective film from a new hydrogel pad. 2. Attaching the hydrogel pad to the electrode area of the stimulator. 3. Removing the second protective film from the hydrogel pad, ready for skin application.
5. Charging
Before first use, fully charge all control units. To charge:
- Connect the USB charging cable to the charging port on each control unit.
- Plug the other end of the USB cable into a standard USB power adapter (not included) or a computer USB port.
- The indicator light on the control unit will illuminate during charging and change color or turn off when fully charged.
A full charge takes approximately 1 hour and provides about 4 hours of use, which translates to roughly 12 sessions (based on 20-minute sessions).

A detailed view of the SEVEKO EMS control unit, highlighting its features: an indicator light, 'ON/Increase' and 'OFF/Decrease' buttons, and a mode selection button. The display shows 8 distinct modes (MODE1 to MODE8) and indicates 15 intensity levels. It also notes an automatic power-off feature after 22 minutes of use and that one hour of charging provides four hours of use, approximately 12 sessions.
6. Operating Instructions
Once the hydrogel pads are attached and the control unit is charged, you can begin your training session.
- Apply to Skin: Firmly press the muscle training pad onto the desired clean, dry skin area.
- Power On: Press and hold the 'ON/Increase' button (+) on the control unit for a few seconds to turn it on. The indicator light will illuminate, and the device will start in Mode 1 with a low intensity.
- Select Mode: Press the 'M' button to cycle through the 8 available modes (MODE1 to MODE8). Each mode offers a different stimulation pattern. Choose the mode that feels most comfortable and effective for you.
- Adjust Intensity: Use the 'ON/Increase' button (+) to increase the intensity and the 'OFF/Decrease' button (-) to decrease the intensity. There are 15 intensity levels. Start with a low intensity and gradually increase it until you feel a comfortable, yet strong, muscle contraction. Avoid setting the intensity too high, which can cause discomfort.
- Session Duration: Each session automatically runs for approximately 22 minutes before the device powers off. You can manually turn it off at any time by pressing and holding the 'OFF/Decrease' button (-).
- After Use: Gently peel the pad off your skin. Reattach the protective film to the hydrogel pads to preserve their adhesive quality and longevity.

A close-up image of the SEVEKO EMS control unit, clearly showing the digital display for modes (MODE1-MODE8) and intensity levels (1-15). The '+' and '-' buttons for intensity adjustment and the 'M' button for mode selection are also visible.
7. Full-Body Application
The SEVEKO JH-N1-Y EMS stimulator is versatile and can be used on various muscle groups for a comprehensive workout. Common application areas include:
- Abdomen: Use the large abdominal pad for core muscle stimulation.
- Arms: Apply the smaller pads to biceps or triceps.
- Legs/Thighs: Use the smaller pads on quadriceps or hamstrings.
- Waist/Back: The abdominal pad can also be positioned on the lower back or sides of the waist.
- Buttocks: The smaller pads can be used on the gluteal muscles.
For optimal results, ensure the skin is clean and dry before applying the pads. It is recommended to use the device for about 15-20 minutes per session, once or twice a day.

A collage demonstrating the versatility of the SEVEKO EMS stimulator, showing its application on different muscle groups: Abs, Waist, Back, Arm, Leg, and Hip. This illustrates how the device can be used for a comprehensive full-body workout.
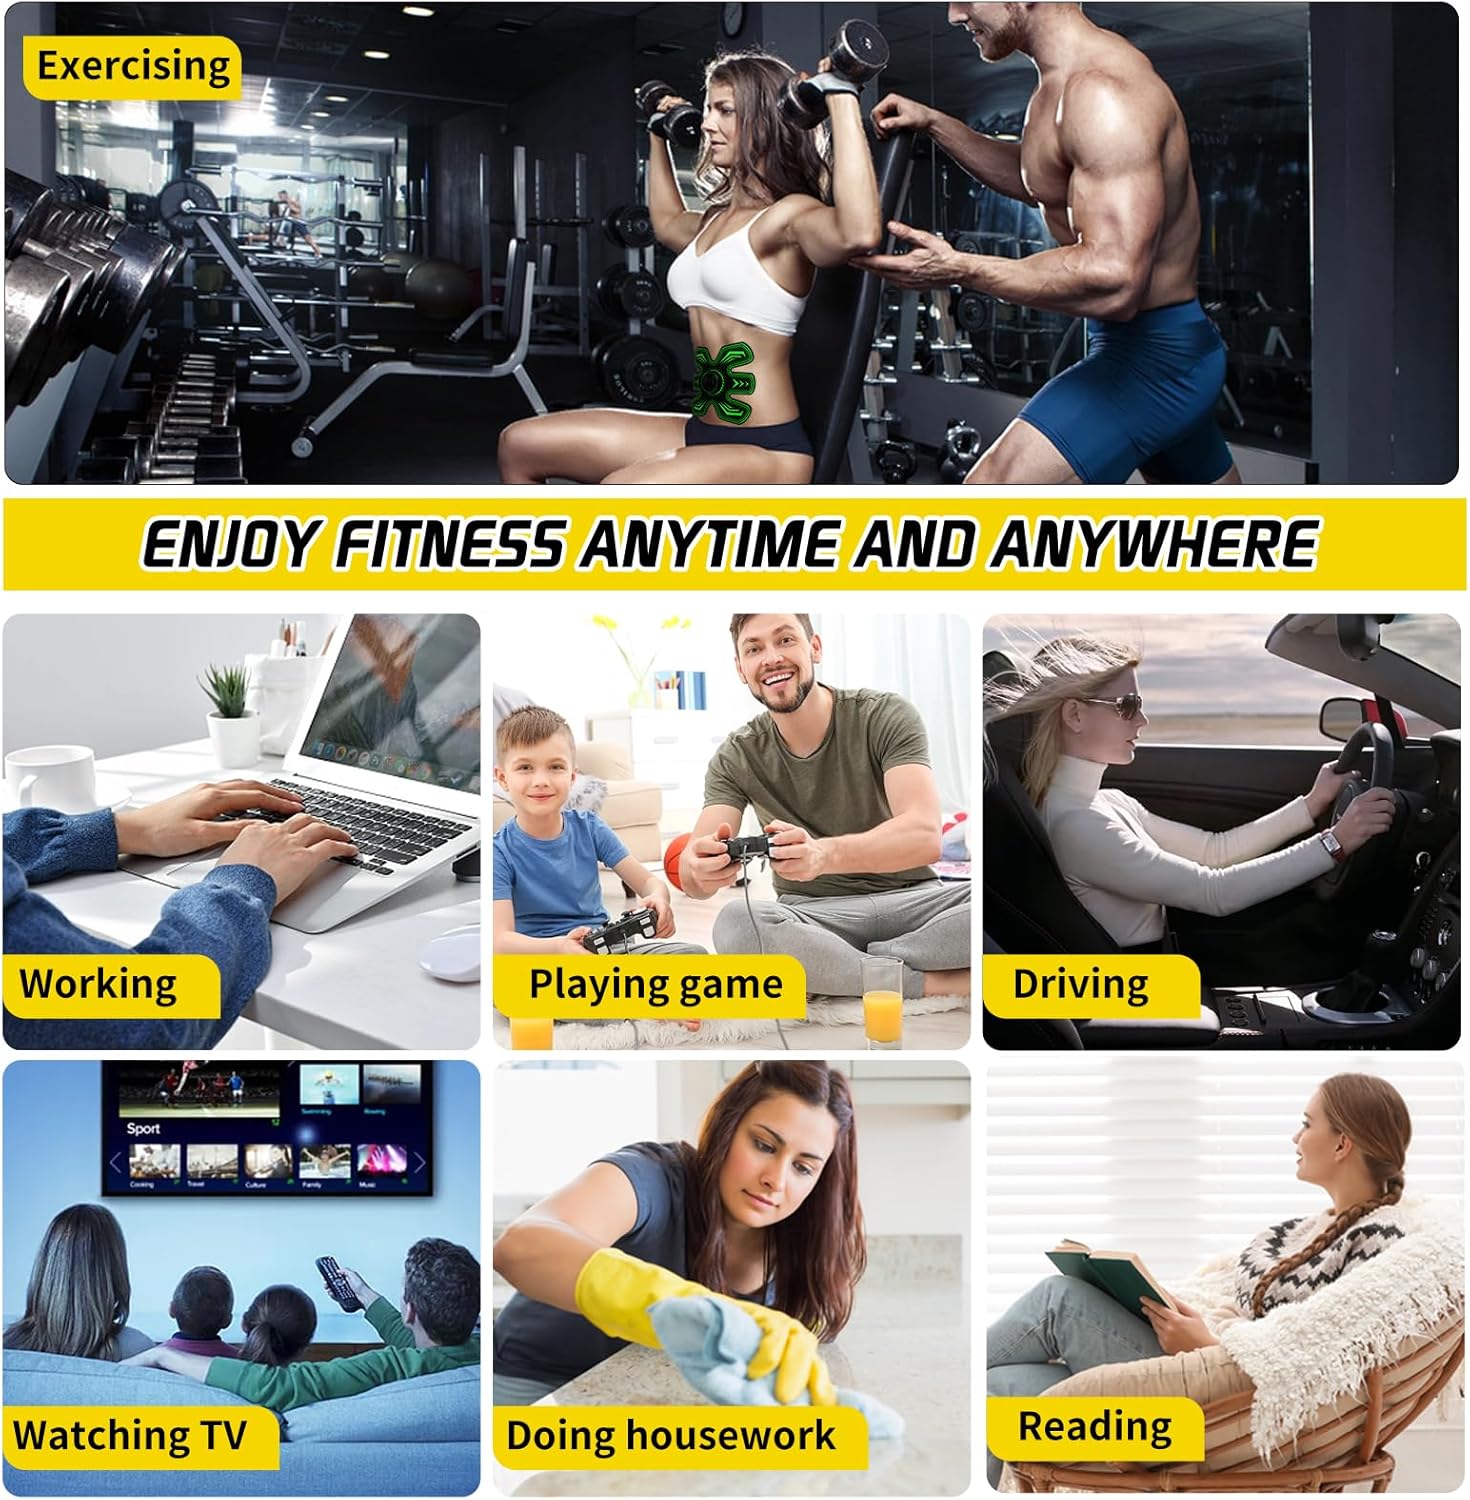
This image showcases the portability and convenience of the SEVEKO EMS stimulator, depicting individuals using the device while exercising at the gym, working on a laptop, playing video games, driving, watching TV, doing housework, and reading. This highlights the ability to integrate muscle stimulation into everyday routines.
8. Maintenance and Storage
Proper care ensures the longevity and effectiveness of your EMS stimulator.
- Cleaning Pads: After each use, reattach the protective film to the hydrogel pads. If the pads lose their stickiness, gently wipe the adhesive surface with a damp cloth and let it air dry. Do not use harsh chemicals.
- Replacing Hydrogel Pads: Hydrogel pads are consumable and will need to be replaced when they lose their adhesive quality or become dirty. Replace them with genuine SEVEKO replacement pads for optimal performance.
- Cleaning Control Units: Wipe the control units with a soft, dry cloth. Do not use water or cleaning agents.
- Storage: Store the device and pads in a cool, dry place, away from direct sunlight and extreme temperatures. Keep them in their original packaging or a clean, sealed bag to prevent dust accumulation.
9. Troubleshooting
If you encounter any issues, refer to the following common problems and solutions:
- Device does not turn on: Ensure the control unit is fully charged. Connect it to the USB charging cable and allow it to charge for at least 1 hour.
- No sensation or weak sensation:
- Check if the hydrogel pads are firmly attached to your skin and the control unit.
- Increase the intensity level using the '+' button.
- Ensure the hydrogel pads are not worn out. Replace them if they have lost their stickiness.
- Make sure your skin is clean and dry where the pads are applied.
- Pads do not stick: The hydrogel pads may be dirty or worn out. Clean them as described in the Maintenance section or replace them with new ones.
- Discomfort or skin irritation: Reduce the intensity level. Ensure the pads are applied to clean, healthy skin. If irritation persists, discontinue use and consult a physician.
10. Specifications
| Feature | Specification | ||
|---|---|---|---|
| Model Number | JH-N1-Y | ||
| Modes | 8 | ||
| Intensity Levels | 15 | ||
| Battery Type | 1 Lithium-ion (included) | ||
| Charging Time | Usage Time (per charge) | Approx. 4 hours | |
| Automatic Shut-off | 22 minutes | ||
| Dimensions (Package) | 26.5 x 26.3 x 3 cm | ||
| Weight (Package) | 300 grams |
11. Warranty and Support
For warranty information or technical support, please contact SEVEKO customer service through the retailer where you purchased the product or refer to the contact details provided in your product packaging. Please retain your proof of purchase for warranty claims.


