
Ubiquiti Networks UVC-G5-Pro
Ubiquiti UVC-G5-PRO IP Security Camera User Manual
Model: UVC-G5-Pro | Brand: Ubiquiti Networks
1. Introduction
This manual provides comprehensive instructions for the installation, operation, and maintenance of your Ubiquiti UVC-G5-PRO IP Security Camera. Please read this manual thoroughly before using the device to ensure proper functionality and safety.
2. Safety Information
Always adhere to the following safety guidelines:
- Ensure the power source matches the camera's requirements (240 Volts, 50 watts).
- Do not expose the camera to extreme temperatures or humidity beyond its operating range.
- Installation should be performed by qualified personnel if working with electrical wiring.
- Protect cables from being pinched or walked on.
- This device is rated IP67 for outdoor use, providing protection against dust and temporary immersion in water.
3. Package Contents
Verify that all items are present in the package:
- Ubiquiti UVC-G5-PRO IP Security Camera
- Mounting Hardware (screws, anchors)
- Quick Start Guide (if applicable)
- Networking Accessories
4. Product Overview
The Ubiquiti UVC-G5-PRO is a professional-grade IP security camera designed for both indoor and outdoor surveillance. It features a bullet form factor, 8 MP video capture resolution, 3x optical zoom, and Night Color low-light technology.
4.1. Camera Components

Figure 4.1: Front view of the Ubiquiti UVC-G5-PRO camera, showing the lens and main body. The camera is white with a black lens housing.
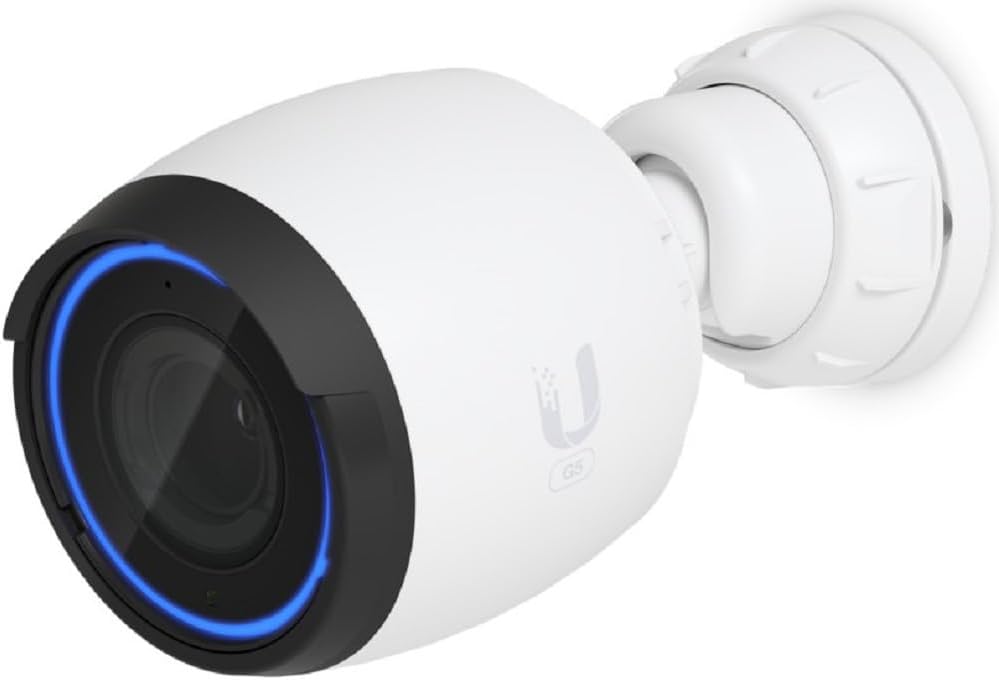
Figure 4.2: Angled view of the Ubiquiti UVC-G5-PRO camera, highlighting the lens and a blue indicator light, suggesting active status or night vision. The camera is white with a black lens housing.
The camera features an adjustable mount for flexible positioning and a robust casing suitable for outdoor environments.
5. Setup and Installation
This section outlines the steps for physically installing and connecting your UVC-G5-PRO camera.
5.1. Mounting Location
The UVC-G5-PRO is designed for outdoor use and can be mounted on ceilings, walls, or rods. Choose a location that provides the desired field of view and is within reach of network cabling.
- Ensure the mounting surface is sturdy enough to support the camera's weight (approximately 2.1 pounds).
- Consider potential obstructions that might block the camera's view.
- For optimal night vision, avoid placing the camera directly facing strong light sources.
5.2. Physical Installation
- Mark the drilling points using the provided mounting template (if included).
- Drill pilot holes and insert wall anchors if necessary.
- Secure the mounting bracket to the chosen surface using the provided screws.
- Attach the camera to the mounting bracket, ensuring it is firmly locked in place.
- Adjust the camera's angle to achieve the desired coverage.
5.3. Network and Power Connection
The UVC-G5-PRO connects via wired transmission technology and supports Wi-Fi connectivity. It requires a 240V power source.
- Connect an Ethernet cable from your network switch or router to the camera's Ethernet port. This provides both data and Power over Ethernet (PoE) if your switch supports it.
- If PoE is not available, connect the camera to a compatible 240V power adapter (not always included, check package contents).
- Once connected, the camera will power on and attempt to connect to your network.
6. Operating the Camera
After successful installation, configure and operate your UVC-G5-PRO using the Ubiquiti UniFi Protect software or mobile application.
6.1. Initial Configuration
- Launch the UniFi Protect application on your computer or mobile device.
- The application should automatically discover the new camera on your network.
- Follow the on-screen prompts to adopt the camera into your UniFi Protect system.
- Set a strong password for the camera for security purposes.
6.2. Live View and Recording
Access the live video feed and manage recording settings through the UniFi Protect interface.
- Navigate to the "Devices" section to view your camera list.
- Click on the UVC-G5-PRO to access its live view.
- Configure recording modes (e.g., continuous, motion-triggered, scheduled) in the camera settings.
- Utilize the 3x optical zoom feature to focus on specific areas within the frame.
6.3. Advanced Features
The UVC-G5-PRO offers advanced features for enhanced surveillance:
- Night Color Technology: Provides improved color images in low-light conditions.
- Motion Detection Zones: Define specific areas within the camera's view to trigger motion alerts and recordings.
- Privacy Zones: Mask out areas of the video feed that should not be recorded for privacy compliance.
7. Maintenance
Regular maintenance ensures optimal performance and longevity of your UVC-G5-PRO camera.
7.1. Cleaning
- Gently wipe the camera lens with a soft, lint-free cloth to remove dust and smudges.
- For stubborn dirt, use a mild lens cleaning solution applied to the cloth, not directly to the lens.
- Clean the camera body with a damp cloth. Avoid abrasive cleaners or solvents.
7.2. Firmware Updates
Ubiquiti regularly releases firmware updates to improve performance, add features, and address security vulnerabilities. It is recommended to keep your camera's firmware up to date.
- Check for firmware updates through the UniFi Protect application or controller interface.
- Follow the on-screen instructions to perform the update. Ensure a stable power supply during the update process.
8. Troubleshooting
This section addresses common issues you might encounter with your UVC-G5-PRO camera.
8.1. No Video Feed
- Check Power: Ensure the camera is receiving power (PoE or external adapter). Look for indicator lights on the camera.
- Check Network Connection: Verify the Ethernet cable is securely connected at both ends and that the network switch port is active.
- Network Configuration: Confirm the camera is on the same network segment as your UniFi Protect controller.
- Reboot: Power cycle the camera and the network switch.
8.2. Poor Image Quality
- Clean Lens: Ensure the camera lens is clean and free from smudges or dirt.
- Lighting Conditions: Verify adequate lighting. For low-light, ensure Night Color is enabled.
- Focus Adjustment: If the image appears blurry, check the focus settings within the UniFi Protect software.
8.3. Camera Not Detected by UniFi Protect
- Network Connectivity: Confirm the camera has network access.
- Firewall: Ensure no firewall rules are blocking communication between the camera and the UniFi Protect controller.
- Reset Camera: As a last resort, perform a factory reset on the camera (refer to manufacturer's specific instructions for reset button location and procedure).
9. Specifications
Key technical specifications for the Ubiquiti UVC-G5-PRO IP Security Camera:
| Feature | Specification |
|---|---|
| Model Name | UVC-G5-Pro |
| Brand | Ubiquiti Networks |
| Indoor/Outdoor Usage | Outdoor |
| Mounting Type | Ceiling Mount (also Wall/Rod) |
| Video Capture Resolution | 2160p (8 MP) |
| Color | Black (Product description mentions White, but specifications list Black) |
| Item Weight | 2.1 Pounds |
| Low Light Technology | Night Color |
| Zoom Type | Optical Zoom (3x) |
| International Protection Rating | IP67 |
| Frame Rate | 30 frames_per_second |
| Voltage | 240 Volts |
| Wattage | 50 watts |
| Connectivity Technology | Wireless (also supports Wired transmission) |
| Form Factor | Bullet |
| UPC | 810084690246 |
10. Warranty and Support
For warranty information and technical support, please refer to the official Ubiquiti Networks website or contact their customer service directly. Specific warranty terms may vary by region and retailer.
Online resources and support forums are also available for common queries and community assistance.
Related documentsUVC-G5-Pro


Ask a question about this manual
Ask about setup, troubleshooting, compatibility, parts, safety, or missing instructions. Manuals+ will review the question and use this page’s manual context to help answer it.