1. Introduction
This manual provides detailed instructions for the installation, operation, and maintenance of your EKAT Android Car Radio. Please read this manual thoroughly before installation and use to ensure proper function and to prevent damage. Keep this manual for future reference.
2. Product Overview
The EKAT Android Car Radio is a 9-inch touchscreen multimedia system designed for Chrysler 300 models from 2005 to 2010. It features an Android operating system, offering functionalities such as wireless CarPlay and Android Auto, Bluetooth connectivity, WiFi hotspot support, GPS navigation, AHD backup camera input, and steering wheel control integration.
3. Compatibility
This car radio is specifically designed to fit Chrysler 300 models manufactured between 2005 and 2010. Ensure your vehicle's dashboard matches the compatible configuration shown below.

Image: This image illustrates the dashboard compatibility. The top left shows a 'Not Fit' configuration, the top right shows a 'Fit' configuration, and the bottom image displays the EKAT Android Car Radio installed in a compatible Chrysler 300 dashboard (2005-2010).
4. Package Contents
Verify that all items listed below are included in your package:

Image: This image displays the EKAT Android Car Radio unit and its accessories. The package typically includes the main head unit, radio antenna, CANbus decoder, power cable, RCA cable, GPS antenna, 2 USB cables, microphone, AHD camera, camera input cable, and installation tools.
- EKAT Android Car Radio Head Unit
- Radio Antenna
- CANbus Decoder
- Power Cable
- RCA Cable
- GPS Antenna
- 2x USB Cables
- External Microphone (MIC)
- AHD Backup Camera
- Camera Input Cable
- Installation Tools
5. Setup and Installation
5.1 General Installation
Professional installation is recommended. Ensure the vehicle's battery is disconnected before beginning installation. Refer to your vehicle's service manual for specific dashboard removal and wiring diagrams.
5.2 Backup Camera Wiring
Proper connection of the backup camera is crucial for its functionality. The reversing input must be plugged in even if the camera is not immediately used.

Image: This diagram illustrates the wiring for the AHD backup camera. The red cable (1) connects to the positive pole of the car's reversing light cable. The black cable (2) connects to the negative pole of the car's reversing light cable. The other two red extension cables (3 and 4) do not need to be connected.
- Red Cable (1): Connect to the positive pole of the car reversing light cable.
- Black Cable (2): Connect to the negative pole of the car reversing light cable.
- The two additional red extension cables (3 & 4) are typically not required for standard installation.
5.3 Steering Wheel Control (CANbus Setup)
After connecting the CANbus, you need to configure it in the system settings to enable steering wheel controls.

Image: This image shows the car radio interface with a note on setting up steering wheel controls. It indicates that after connecting the CANbus, users need to go to 'Settings' -> 'Factory Setup', input password '1234', choose 'Car Settings', and then select 'Luzheng' and the year and model of the car.
- Connect the CANbus module correctly.
- Go to Settings on the head unit.
- Select Factory Setup.
- Enter the password: 1234.
- Choose Car Settings.
- Select Luzheng and then specify the year and model of your Chrysler 300.
6. Operating Instructions
6.1 Power On/Off and Basic Navigation
Press the power button to turn the unit on or off. Navigate through the Android interface using the touchscreen. Swipe left/right to access different app screens.
6.2 WiFi Hotspot Connection
Connect the head unit to a WiFi network or mobile hotspot to access online features and download apps.
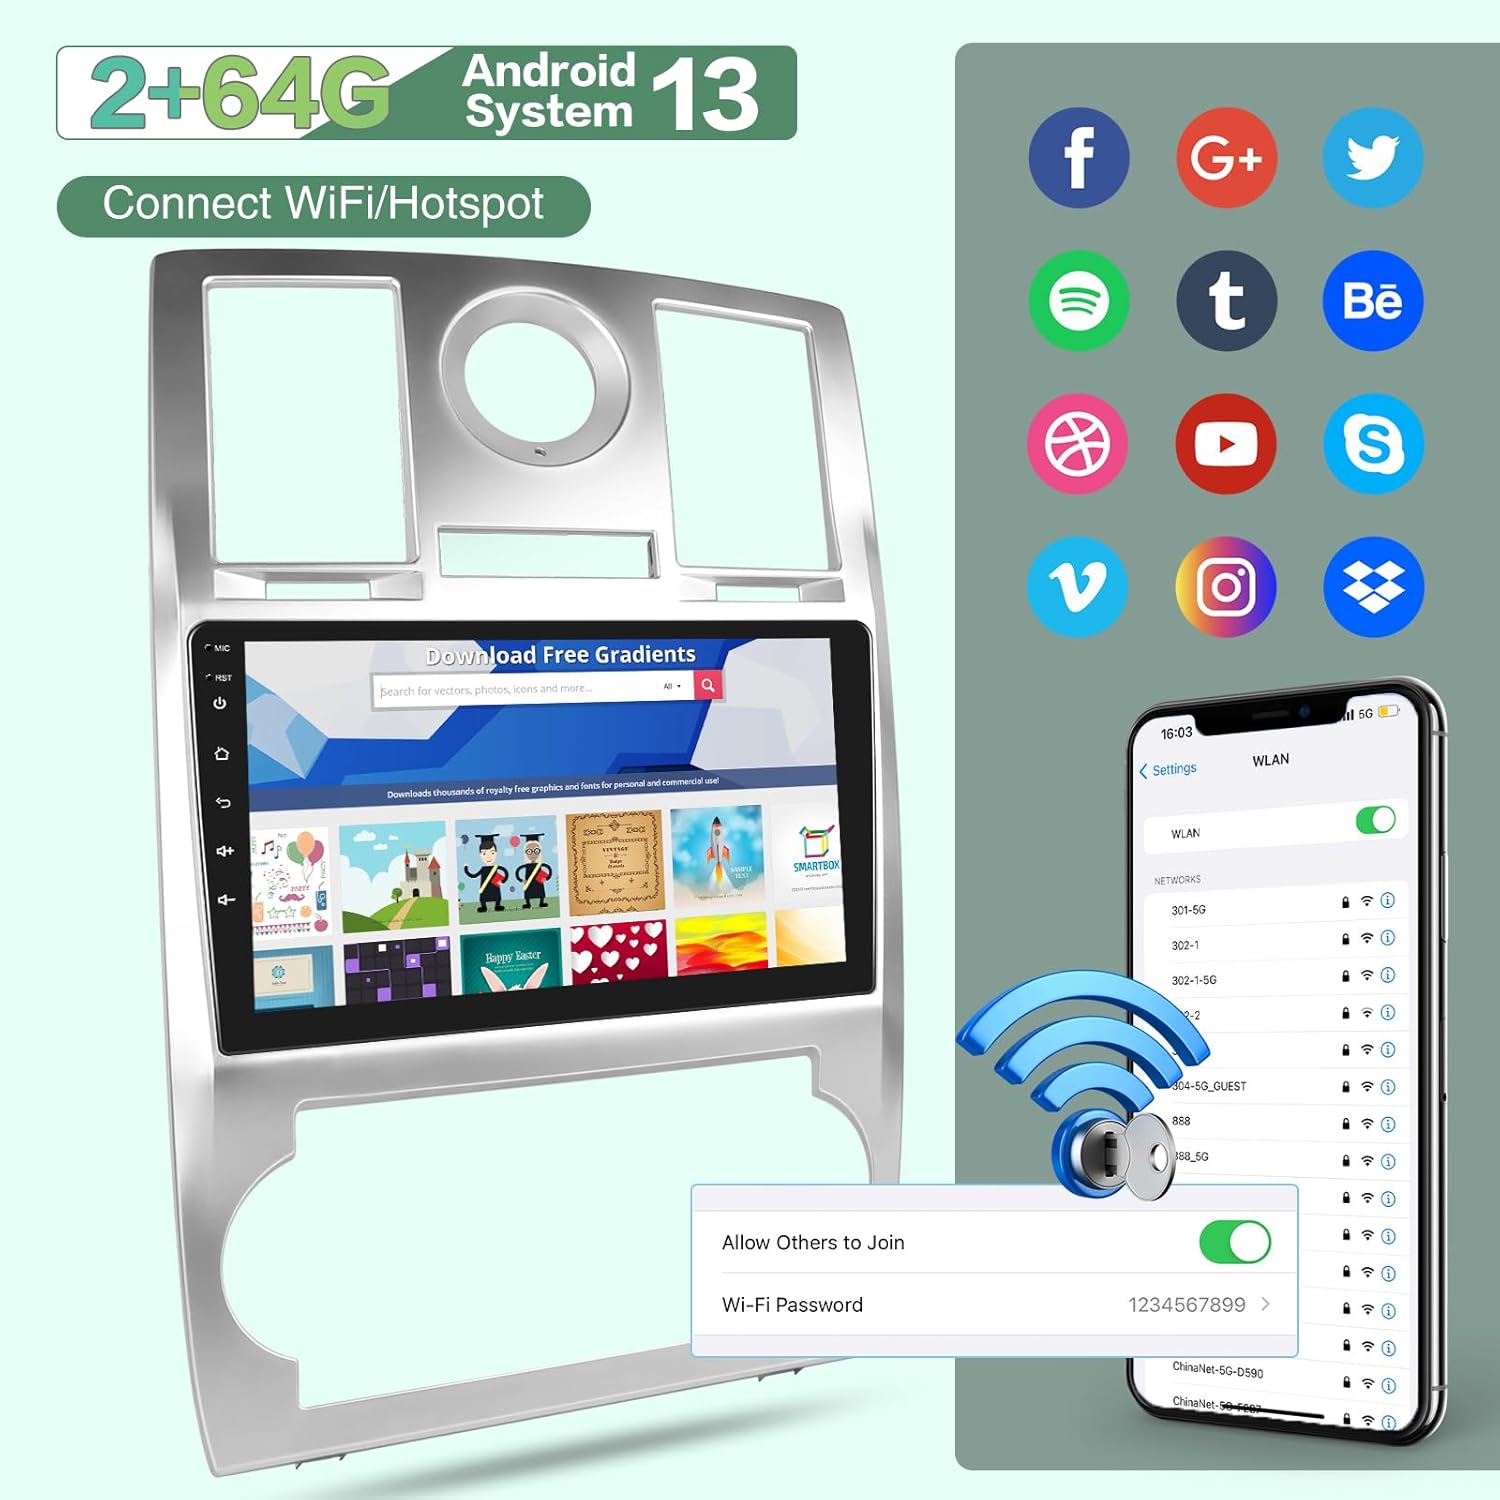
Image: This image shows the car radio's screen displaying a web browser and a mobile phone screen demonstrating WiFi connection settings, including entering a WiFi password. It highlights the ability to connect to WiFi/Hotspot for internet access and app downloads.
- Go to Settings.
- Select Network & Internet or WiFi.
- Turn on WiFi and select your desired network.
- Enter the password if prompted.
6.3 Wired & Wireless CarPlay/Android Auto
Connect your smartphone for seamless integration of navigation, music, calls, and messaging.

Image: This image displays the car radio's screen showing both Apple CarPlay and Android Auto interfaces, with common apps like Phone, Spotify, Maps, and Messages. It also shows voice command examples like "Hey Siri. Play music" and "Hey Siri. Open the map."
- For Wireless Connection: Ensure Bluetooth and WiFi are enabled on your phone and the head unit. Follow the on-screen prompts to pair.
- For Wired Connection: Connect your phone to the head unit's USB port using a compatible USB cable.
- Once connected, the CarPlay or Android Auto interface will appear, allowing access to supported apps.
6.4 Bluetooth Connectivity
Pair your phone via Bluetooth for hands-free calling and audio streaming.

Image: This image is a collage showing four features. The top right quadrant specifically shows the Bluetooth interface on the car radio, displaying a list of paired devices and music playback controls.
- Go to Settings and select Bluetooth.
- Turn on Bluetooth on both the head unit and your phone.
- Search for available devices on your phone and select the head unit (e.g., "EKAT Car Radio").
- Confirm the pairing code if prompted.
6.5 GPS Navigation
Utilize the built-in GPS for navigation. Pre-installed maps or online maps via WiFi can be used.
Image: This image is a collage showing four features. The bottom left quadrant specifically shows the GPS navigation interface on the car radio, displaying a map with a route and location pins.
- Open the Navigation app from the main menu.
- Enter your destination or select a point of interest.
- Follow the on-screen directions and voice prompts.
6.6 AHD Backup Camera
The included AHD backup camera provides a clear view of the area behind your vehicle when reversing.
Image: This image is a collage showing four features. The top left quadrant specifically shows the AHD backup camera view on the car radio, displaying a parking lot scene with dynamic guidelines.
- When the vehicle is shifted into reverse, the camera view will automatically display on the screen.
- Parking guidelines may appear to assist with maneuvering.
6.7 Steering Wheel Control
Control various functions of the head unit directly from your steering wheel buttons after proper CANbus setup.
Image: This image is a collage showing four features. The bottom right quadrant specifically shows the steering wheel control learning interface on the car radio, allowing users to assign functions like volume, track skip, and mode to physical steering wheel buttons.
- Use the steering wheel buttons to adjust volume, change tracks, answer calls, and switch modes without taking your hands off the wheel.
6.8 Mirror Link
Mirror your smartphone screen directly onto the car radio display.

Image: This image shows the car radio displaying a mirrored smartphone screen, with various app icons visible. A hand holding a smartphone is also shown, emphasizing the Mirror Link functionality.
- Open the Mirror Link app on the head unit.
- Follow the instructions to connect your smartphone (wired or wireless, depending on phone model).
6.9 FM RDS Radio
Listen to FM radio with RDS (Radio Data System) for station information.

Image: This image is a collage showing three features. The top right quadrant specifically shows the FM RDS Radio interface on the car radio, displaying radio frequencies and station information.
- Open the Radio app.
- Tune to your desired frequency manually or use the auto-scan function.
- RDS will display station names and other broadcast information where available.
6.10 Split Screen
Run two applications simultaneously on the screen for enhanced multitasking.
Image: This image is a collage showing three features. The middle right quadrant specifically shows the Split Screen feature on the car radio, displaying two applications (e.g., radio and navigation) side-by-side.
- While an app is open, long-press the recent apps button or drag an app to one side of the screen to activate split-screen mode.
- Select a second app to occupy the other half of the screen.
6.11 EQ Setting
Adjust audio equalization settings to customize your listening experience.

Image: This image is a collage showing three features. The bottom right quadrant specifically shows the EQ Setting interface on the car radio, displaying a graphic equalizer with adjustable frequency bands.
- Access the EQ or Sound Settings app.
- Adjust the frequency bands and other audio parameters to suit your preferences.
7. Maintenance
- Cleaning: Use a soft, dry cloth to clean the screen and unit. Avoid abrasive cleaners or solvents.
- Software Updates: Periodically check for software updates via the system settings to ensure optimal performance and access to new features. Connect to a stable WiFi network for updates.
- Temperature: Avoid exposing the unit to extreme temperatures.
8. Troubleshooting
If you encounter issues, refer to the following common problems and solutions:
| Problem | Possible Solution |
|---|---|
| Unit does not power on. | Check power cable connections and vehicle's fuse box. Ensure proper wiring. |
| Bluetooth connection drops frequently. | Ensure your phone is within range. Try unpairing and re-pairing the device. Check for system updates. |
| WiFi connection is unstable or disconnects. | Ensure the WiFi hotspot is strong and stable. Try restarting the head unit and the hotspot device. Check for system updates. |
| Steering wheel controls not working. | Verify CANbus connection and ensure the steering wheel control settings are correctly configured in Factory Setup (refer to Section 5.3). |
| Backup camera not displaying. | Check the camera wiring (refer to Section 5.2). Ensure the camera is receiving power and the video input cable is securely connected. |
| System is slow or buggy. | Restart the unit. Clear cache of frequently used apps. Check for and install any available system updates. If issues persist, a factory reset may be necessary (note: this will erase all user data). |
9. Specifications
| Feature | Detail |
|---|---|
| Operating System | Android |
| Display Size | 9 Inches |
| Resolution | 1080p |
| Connectivity Technology | Bluetooth, WiFi |
| Special Features | CarPlay, Android Auto, AHD Backup Camera, GPS Navigation, Steering Wheel Control, Mirror Link, FM RDS Radio, Split Screen, EQ Setting, Spotify |
| Audio Output Mode | Stereo |
| Mounting Type | Dashboard Mount |
| Item Weight | 3.63 pounds |
| Package Dimensions | 16.42 x 12.13 x 3.43 inches |
10. Warranty and Support
EKAT provides comprehensive support for your product:
Image: This image displays EKAT's customer support commitments, including 7*24 hours of after-sales technical support, a 30-day money-back service, and 2 years of after-sales support.
- Technical Support: 7 days a week, 24 hours a day after-sales technical support is available.
- Money Back Guarantee: Enjoy a 30-day money-back service from the date of purchase.
- Product Warranty: The product is covered by a 2-year after-sales support warranty.
For further assistance, please contact EKAT customer service through the platform where you purchased the product.