Important Safety Information
Please read and understand all safety instructions before assembling or operating your KAER 10-12 Gun Safe. Failure to follow these instructions may result in injury or damage.
- Always keep firearms unloaded and pointed in a safe direction.
- Use proper installation techniques to prevent tipping.
- Be cautious of pinch points during assembly and use.
- Always follow local laws and regulations regarding firearm storage and safety.
- Keep keys and digital codes in a secure location, away from children and unauthorized individuals.
Product Overview
The KAER 10-12 Gun Safe is designed to provide secure storage for your firearms and valuables. It features a robust alloy steel construction, a digital keypad, and adjustable internal storage options.

Image: The KAER 10-12 Gun Safe in grey, shown both closed and with its main door open, revealing internal storage for multiple rifles and a separate top compartment.
Components Included
- 1 x Rifle Gun Safe Cabinet
- 2 x Backup Keys (for main door)
- 2 x Keys (for top compartment)
- 4 x Anchor Bolts (for mounting)
- 1 x Emergency Battery Pack
- 1 x Instruction Manual
- 18 x Self-tapping Screws
- 10 x Cross Head Screws
- 6 x Rivets
- 4 x Fixing Screws
- 3 x Gun Mounts
- 3 x Gun Stocks
- 1 x Screwdriver
- 1 x Pair of Gloves
- 1 x Pile Blanket (for base)
Product Dimensions
The external dimensions of the KAER 10-12 Gun Safe are approximately 14.96 inches (D) x 18.1 inches (W) x 56.96 inches (H).

Image: A detailed diagram illustrating the external and internal measurements of the gun safe, alongside an organized display of all included accessories for assembly and use.
Setup and Assembly
The KAER 10-12 Gun Safe is designed for quick assembly. Follow these steps carefully to ensure proper setup.

Image: An 8-step visual guide detailing the assembly process of the gun safe, from connecting the main panels to installing internal components like shelves and gun racks.
Assembly Steps
- Attach Side Panels to Back Plate: Connect the two side panels to the back plate using the provided self-tapping screws. Ensure all tabs and slots align correctly.
- Attach Door Frame: Secure the door frame to the assembled side and back panels using cross head screws.
- Install Top Plate: Place the top plate onto the assembled structure and secure it with self-tapping screws.
- Install Bottom Plate: Insert the bottom plate into the base of the safe, ensuring it sits flush. Secure with fixing screws.
- Install Internal Shelves and Panels: Insert the main shelf and the back mesh panel into their designated slots. Secure the back mesh panel with self-tapping screws.
- Install Side Mesh Panels: Place the two side mesh panels into the interior of the main compartment. Secure them with self-tapping screws.
- Attach Gun Racks: Secure the gun mounts and gun stocks to the interior mesh panels using the provided rivets. Adjust their positions as needed for your firearms.
- Place Pile Blanket: Lay the pile blanket on the bottom of the main compartment to protect your firearms.
Mounting the Safe
For added security, it is recommended to mount the safe to a wall or floor using the provided anchor bolts. Locate suitable studs in your wall or a solid floor surface. Drill pilot holes and secure the safe firmly.
Operating Instructions
Locking System Overview
The KAER 10-12 Gun Safe offers multiple methods for access and security:
- Digital Keypad + Knob
- Key + Knob
- Emergency Battery Box + Knob (for power failure)
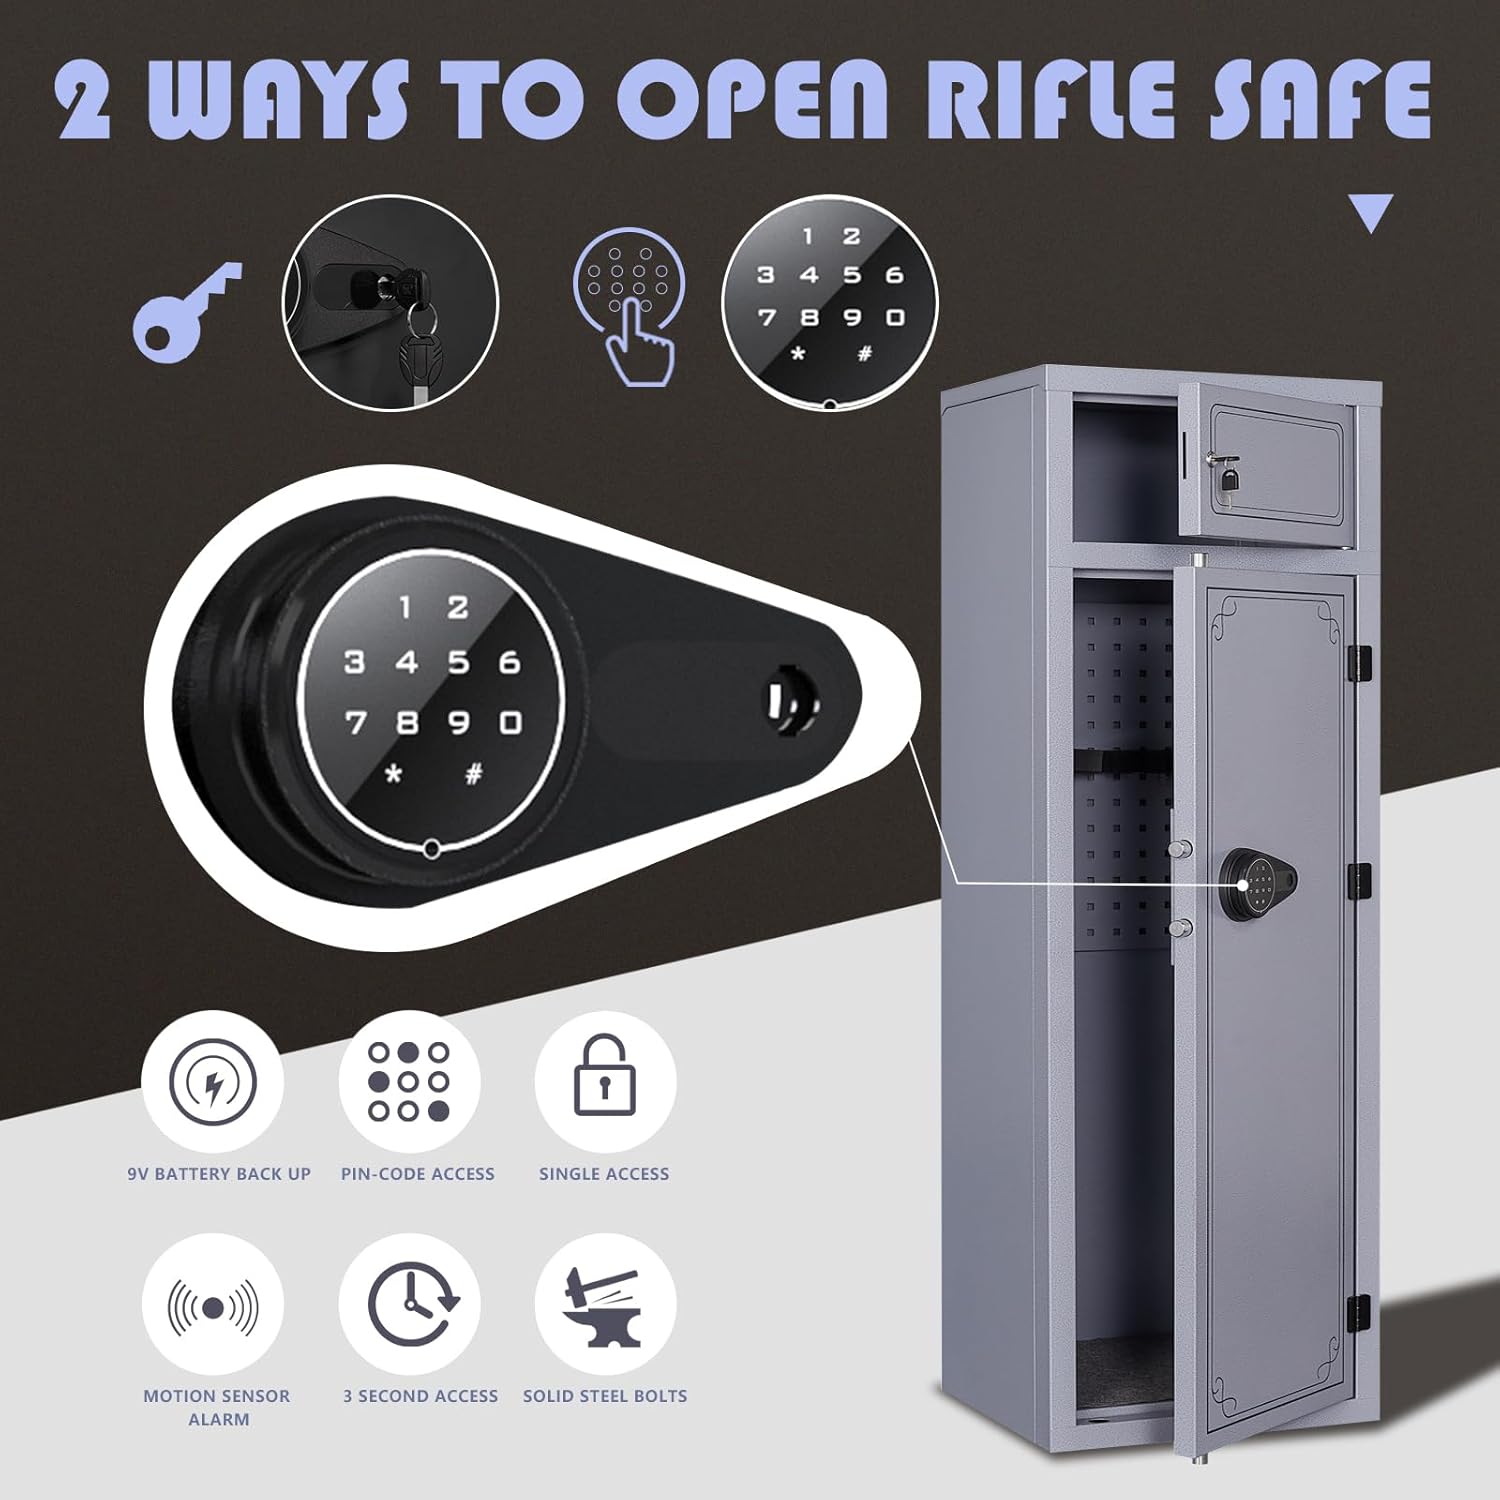
Image: A visual representation of the safe's dual-access system, showing both key and digital keypad options, along with key security features.
Setting the Electronic Password
Before first use, you must set your personal digital password.

Image: A step-by-step guide on setting the electronic password, including battery insertion and keypad programming.
- Insert Batteries: Open the battery compartment on the inside of the door and insert 4*AA alkaline batteries.
- Press Set Button: With the door open, locate and press the red 'SET' button inside the battery compartment. You will hear a 'di' sound, and the keypad light will turn on.
- Enter New Password: On the digital keypad, press the '#' key, then enter your desired 1-8 digit password. Press the '#' key again.
- Confirm Password: Re-enter the same 1-8 digit password and press the '#' key one more time. You will hear a long 'di~~~' sound, indicating the electronic password has been successfully set.
Opening the Safe with Digital Keypad
- Wake Up Keypad: Press the '#' key to activate the keypad.
- Enter Password: Enter your previously set 1-8 digit password.
- Confirm: Press the '#' key. If the password is correct, you will hear a 'di' sound and the green light will illuminate.
- Rotate Knob: Within 5 seconds, rotate the knob clockwise to open the safe door.
Opening the Safe with Key
- Insert Key: Insert the backup key into the keyhole located on the digital keypad.
- Turn Key: Turn the key clockwise.
- Rotate Knob: Simultaneously rotate the knob clockwise to open the safe door.
Using the Emergency Battery Box
In case of battery depletion, the emergency battery box can be used to power the keypad temporarily.
- Connect Emergency Box: Plug the emergency battery box into the port located on the digital keypad.
- Enter Password: Use the digital keypad as usual to enter your password and open the safe.
- Replace Batteries: Once the safe is open, replace the internal AA batteries immediately.
Silent Mode Activation
To operate the safe silently, long press the '*' (star) button on the digital keypad. This will disable keypad sounds for quiet access.
Lockout Feature
For security, if an incorrect password is entered 5 consecutive times, the gun safe will enter a lockout mode, preventing further attempts for a short period.
Maintenance
Regular maintenance ensures the longevity and proper functioning of your gun safe.
- Battery Replacement: Replace the 4*AA alkaline batteries in the digital keypad annually, or immediately if the low battery indicator appears.
- Cleaning: Clean the exterior and interior of the safe with a soft, dry cloth. Avoid abrasive cleaners or solvents that could damage the finish.
- Inspection: Periodically check all locking mechanisms, hinges, and mounting bolts for any signs of wear or loosening. Ensure the door closes and locks smoothly.
Troubleshooting
If you encounter issues with your KAER 10-12 Gun Safe, refer to the following common problems and solutions:
- Safe not opening with digital code
- Ensure batteries are fresh and correctly installed. Use the emergency battery box if needed.
- Verify you are entering the correct 1-8 digit password followed by the '#' key.
- Check if the safe is in lockout mode due to multiple incorrect entries. Wait for the lockout period to expire.
- Keys not working
- Ensure you are using the correct key for the main door or top compartment.
- Check for any obstructions in the keyhole.
- If the key turns but the door doesn't open, ensure the digital keypad knob is also turned correctly.
- Alarm sounds unexpectedly
- The safe has a motion sensor alarm. Ensure the safe is stable and not being disturbed.
- Check if the lockout feature has been triggered.
- Door does not close or latch properly
- Ensure no items inside the safe are obstructing the door's closing path.
- Check if the safe is on a level surface. Adjust the feet if necessary.
- Inspect the locking bolts for any damage or misalignment.
Specifications
| Feature | Detail |
|---|---|
| Brand | KAER |
| Model | 10-12 Gun Safe |
| Color | Grey |
| Product Dimensions | 14.96"D x 18.1"W x 56.96"H |
| Item Weight | 78 Pounds |
| Material | Alloy Steel |
| Lock Type | Electronic, Key |
| Number of Shelves | 2 (adjustable) |
| Mounting Type | Floor Mount |
| Assembly Required | Yes |
Warranty and Support
For specific warranty details, product support, or any questions regarding your KAER 10-12 Gun Safe, please contact KAER customer service directly. Our team is dedicated to providing a satisfying solution for you.


