1. Introduction
Thank you for choosing the Fakir WD 7 Pure Clean Wet & Dry Cordless Vertical Vacuum Cleaner. This manual provides important information on the safe operation, maintenance, and troubleshooting of your appliance. Please read this manual thoroughly before using the product and keep it for future reference.
2. Safety Instructions
Always follow basic safety precautions when using electrical appliances to reduce the risk of fire, electric shock, or injury.
- Read all instructions before using the appliance.
- Do not immerse the appliance, charging base, or adapter in water or other liquids.
- This appliance is for household use only. Do not use outdoors or on wet surfaces other than those intended for wet cleaning.
- Do not allow children to operate the vacuum cleaner. Close supervision is necessary when used near children.
- Use only manufacturer-recommended attachments and accessories.
- Do not pick up flammable or combustible liquids, such as gasoline, or use in areas where they may be present.
- Do not pick up anything that is burning or smoking, such as cigarettes, matches, or hot ashes.
- Turn off the appliance before performing any maintenance or cleaning.
- If the power cord or adapter is damaged, it must be replaced by the manufacturer, its service agent, or similarly qualified persons to avoid a hazard.
3. Package Contents
Please check the contents of your package. If any items are missing or damaged, contact your retailer.
- Fakir WD 7 Pure Clean Main Unit
- Handle Assembly
- Charging Base
- Power Adapter
- Cleaning Brush
- User Manual
4. Product Overview
Familiarize yourself with the components of your Fakir WD 7 Pure Clean vacuum cleaner.
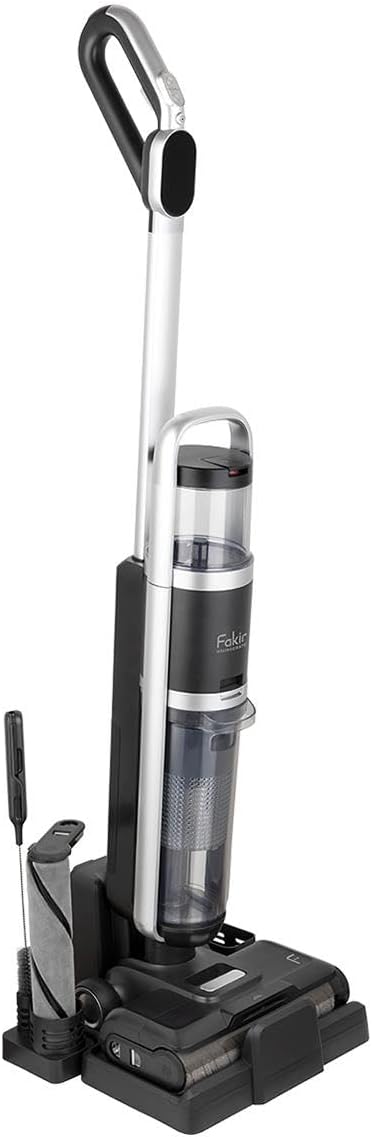
Figure 4.1: Overall view of the Fakir WD 7 Pure Clean vacuum cleaner, showing the main unit, handle, and the charging/storage base with the cleaning brush accessory.
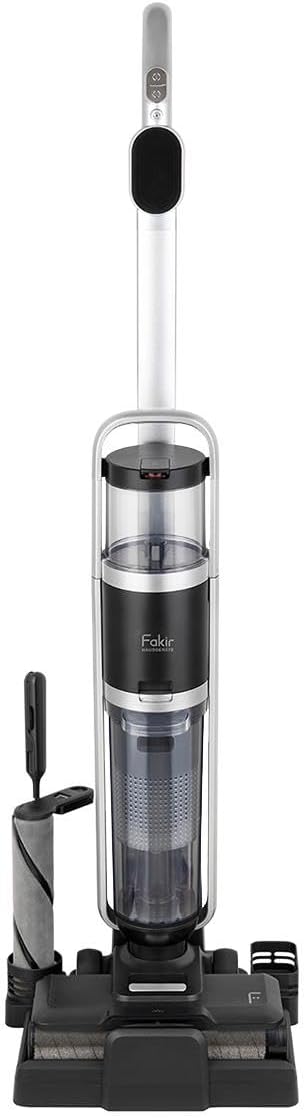
Figure 4.2: Front view of the vacuum cleaner, highlighting the clean water tank (top), dirty water tank (bottom), and the main brush head.

Figure 4.3: Angled view demonstrating the vacuum cleaner's maneuverability and upright design during use.

Figure 4.4: Side profile of the vacuum cleaner, showing the slim design and the placement of the water tanks.

Figure 4.5: Close-up front view, highlighting the digital display on the handle, which shows battery status and operating modes.
5. Setup
5.1 Assembly
- Carefully unpack all components from the box.
- Insert the handle assembly into the main unit until it clicks securely into place.
- Place the charging base on a flat, stable surface near a power outlet.
- Connect the power adapter to the charging base and plug it into a wall outlet.
5.2 Charging the Battery
Before first use, fully charge the vacuum cleaner for approximately 4-5 hours. The battery indicator on the display will show charging progress.
- Place the vacuum cleaner onto the charging base, ensuring the charging contacts align.
- The display will illuminate, indicating that charging has begun.
- Once fully charged, the indicator will change, and the unit is ready for use.
6. Operating Instructions
6.1 Filling the Clean Water Tank (Wet Cleaning)
- Remove the clean water tank from the main unit.
- Open the tank cap and fill with clean tap water. For enhanced cleaning, a small amount of non-foaming, compatible cleaning solution can be added (refer to solution instructions). Do not overfill.
- Close the cap securely and reinsert the tank into the vacuum cleaner until it clicks.
6.2 Starting and Selecting Modes
- Press the Power button on the handle to turn on the vacuum cleaner.
- Use the Mode button to switch between cleaning modes (e.g., Wet, Dry, Auto). The selected mode will be displayed on the screen.
- For wet cleaning, ensure the clean water tank is filled. The vacuum will automatically dispense water and suction dirty water.
- For dry cleaning, ensure the dirty water tank is empty and the filter is clean.
6.3 Cleaning
Move the vacuum cleaner slowly and steadily over the surface to be cleaned. For wet cleaning, overlap passes slightly to ensure thorough coverage. The automatic suction power feature adjusts to different surfaces.
7. Maintenance
Regular maintenance ensures optimal performance and extends the life of your appliance.
7.1 Emptying and Cleaning the Dirty Water Tank
- After each wet cleaning session, or when the dirty water tank is full, remove it from the unit.
- Open the tank and dispose of the dirty water.
- Rinse the tank thoroughly with clean water and allow it to air dry completely before reattaching.
7.2 Cleaning the HEPA Filter
- The HEPA filter is located within the dirty water tank assembly. Remove it.
- Tap the filter gently to remove loose debris. If necessary, rinse under cool running water.
- Important: Allow the HEPA filter to air dry completely for at least 24 hours before reinserting. Do not use the vacuum with a wet filter.
7.3 Cleaning the Brush Roll
- Turn off and unplug the vacuum cleaner.
- Access the brush roll compartment (refer to diagram in Product Overview if needed).
- Remove any hair, threads, or debris wrapped around the brush roll using the provided cleaning brush or scissors.
- Wipe the brush roll and its housing with a damp cloth.
- Ensure the brush roll is dry before reassembling.
8. Troubleshooting
If you encounter issues with your vacuum cleaner, refer to the table below for common problems and solutions.
| Problem | Possible Cause | Solution |
|---|---|---|
| Vacuum does not turn on. | Battery is depleted. | Charge the battery fully. |
| Low suction power. | Dirty water tank is full. Filter is clogged. Brush roll is obstructed. | Empty and clean the dirty water tank. Clean or replace the HEPA filter. Remove obstructions from the brush roll. |
| Water not dispensing (wet mode). | Clean water tank is empty. Nozzle/water path is clogged. | Refill the clean water tank. Check for and clear any blockages in the water dispensing path. |
| Leaking water. | Tanks not properly seated. Tank caps not closed securely. | Ensure both clean and dirty water tanks are correctly inserted and locked into place. Check that all tank caps are tightly closed. |
9. Specifications
| Feature | Detail |
|---|---|
| Brand | Fakir |
| Power | 300 W |
| Special Feature | Wet/Dry, Automatic Suction Power |
| Filter Type | HEPA Filter |
| Surface Recommendation | Hard Floor |
| Power Source | Battery Powered |
10. Warranty and Support
Fakir products are manufactured to the highest quality standards. For information regarding warranty coverage, technical support, or service, please refer to the warranty card included with your purchase or visit the official Fakir website. Keep your proof of purchase for warranty claims.
For further assistance, please contact Fakir customer service.


