Thank you for choosing the DORBOKER 30 Inch Real Moving Gears Wall Clock. This manual provides essential information for the proper setup, operation, and maintenance of your new clock. Please read it thoroughly before installation and keep it for future reference.
2. Safety Information
Please observe the following safety precautions to ensure safe and proper use of the clock:
Stay away from the source of fire: Do not place the clock near open flames or high heat sources.
Prevent electric shock: This device is battery-powered. Do not attempt to open or modify the electrical components.
Beware of being overweight: Ensure the mounting surface can safely support the clock's weight (approximately 22 pounds or 10 kg).
Keep out of reach of children.
Do not expose to excessive moisture or direct water.
Image: Warning label indicating fire, electric shock, and weight precautions.
3. Package Contents
Verify that all items are present and in good condition:
DORBOKER 30 Inch Real Moving Gears Wall Clock (1 unit)
Instruction Manual (this document)
Mounting hardware (screws/wall plugs)
Spare hour and minute hands (may be included for protection during shipping)
4. Product Overview
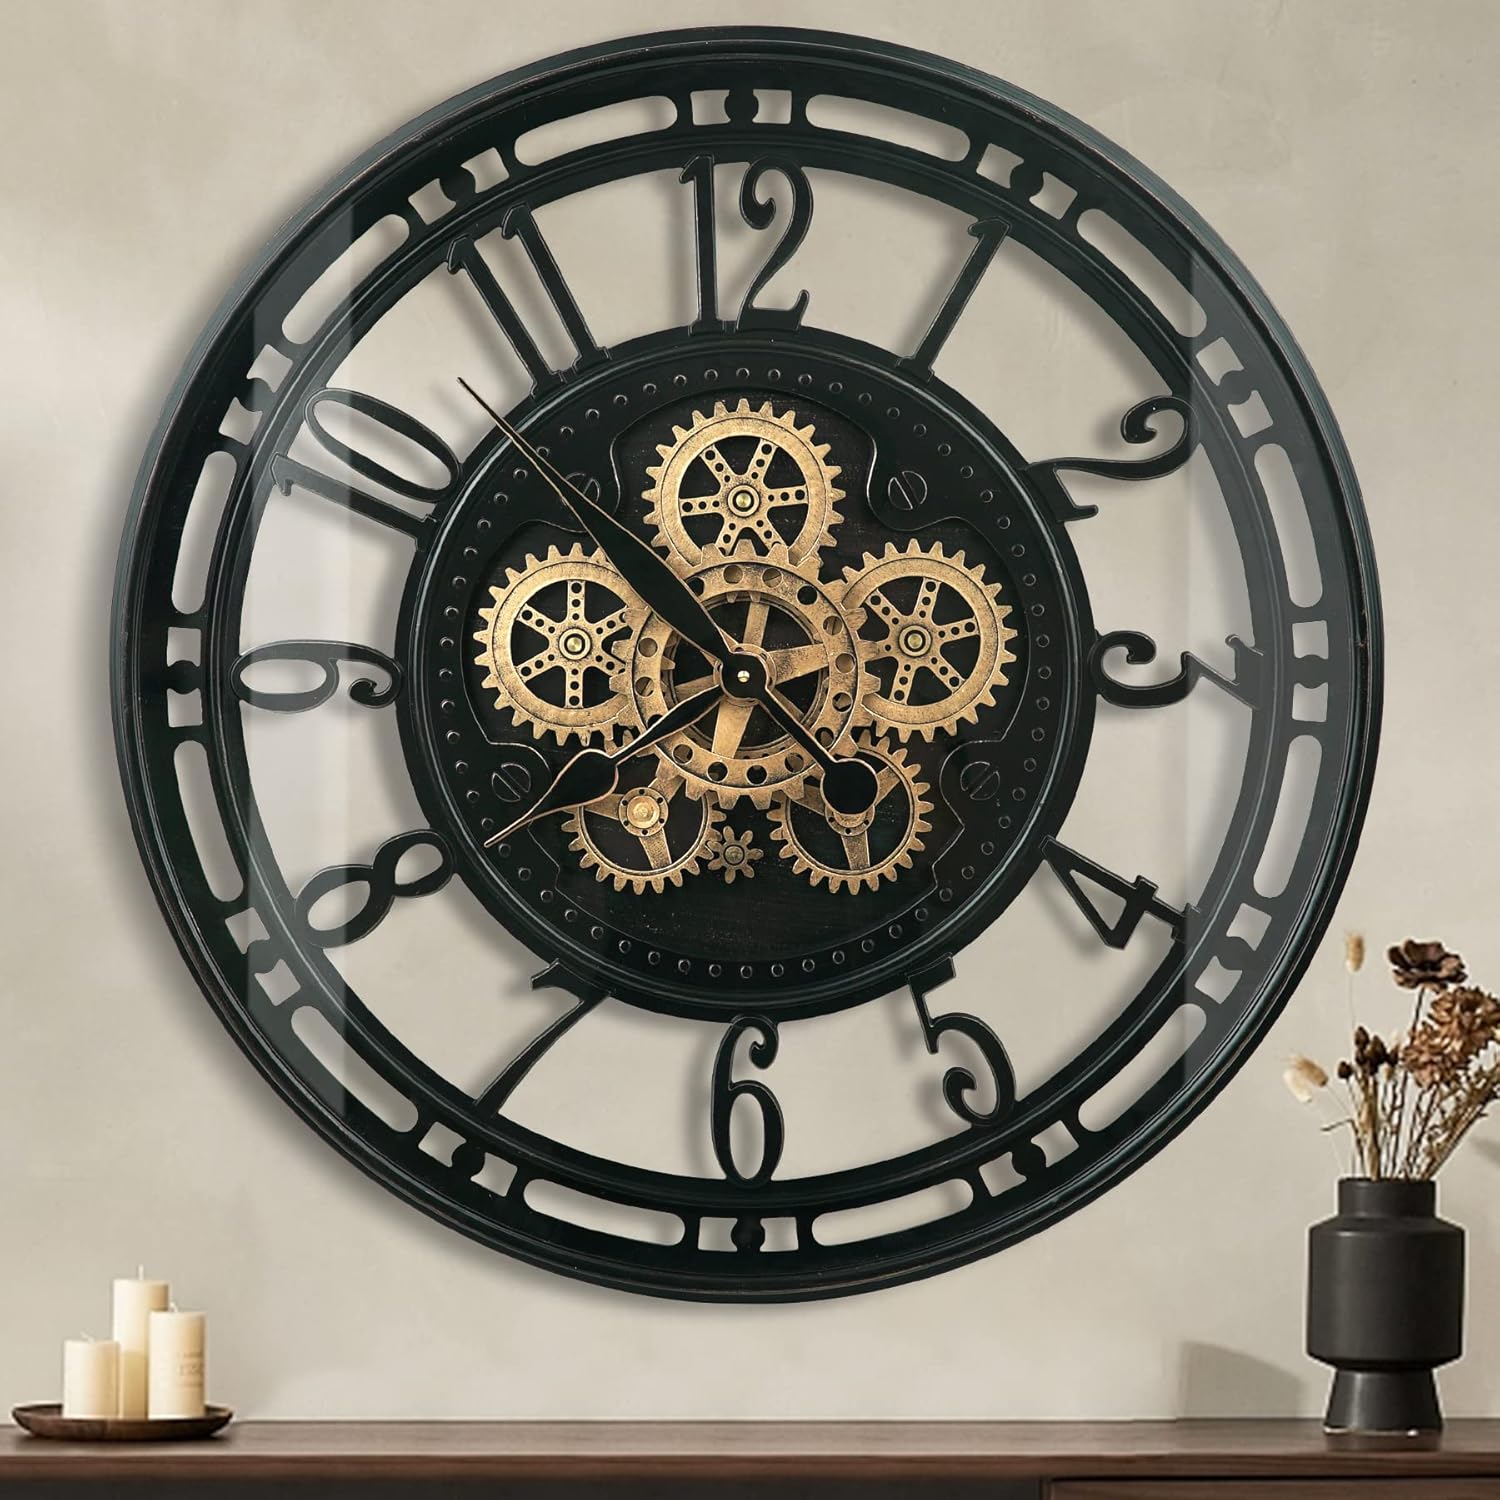
The DORBOKER Wall Clock features a unique industrial steampunk design with real moving gears. It is crafted from metal with a black gold Arabic finish and protected by a tempered glass lens.
Image: Angled view of the DORBOKER 30 Inch Real Moving Gears Wall Clock, showcasing its metal frame, Arabic numerals, and visible internal gears.
Image: The 30-inch wall clock displayed in a living room setting, demonstrating its large size and decorative impact.
Key Features:
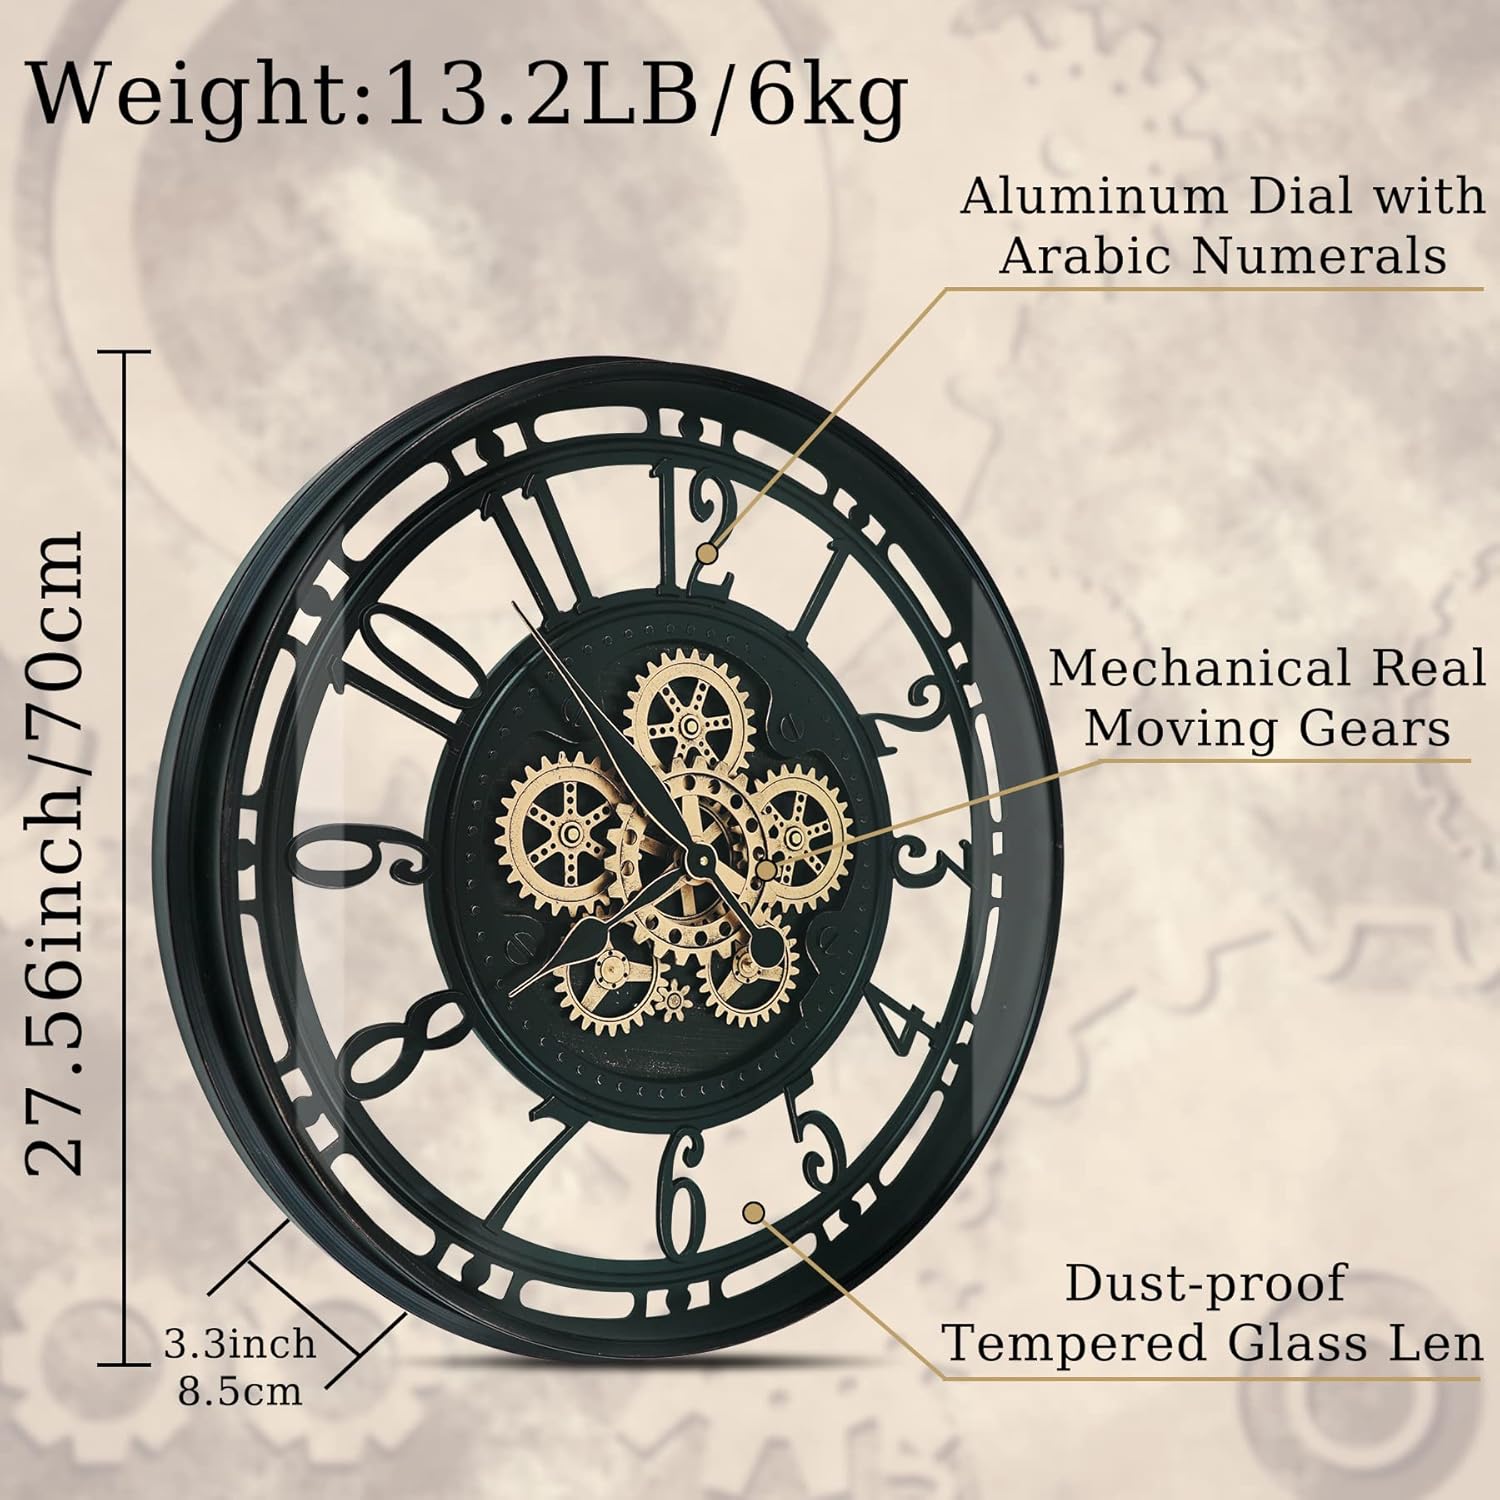
Large Diameter: 30 inches (76cm) with a depth of 3.3 inches (8.5cm).
Real Moving Gears: Multiple exposed gears in the central mechanism rotate independently when powered.
Durable Construction: Metal frame with an aluminum dial and tempered glass lens for dust protection.
Accurate Timekeeping: High-quality quartz movement ensures precise time.
Silent Operation: Designed for quiet performance, minimizing ticking sounds.
Easy to Read: Large Arabic numerals are clearly visible from various angles.
Image: A diagram highlighting the clock's dimensions (27.56 inches / 70cm height, 3.3 inches / 8.5cm depth) and key components like the aluminum dial, mechanical moving gears, and dust-proof tempered glass lens.
Image: A detailed close-up of the clock's central mechanism, showing the intricate design of the mechanical real moving gears.
5. Setup
5.1. Battery Installation
The clock requires three (3) AA batteries (not included) for full functionality:
Locate the battery compartments on the back of the clock.
Insert one (1) AA battery into the compartment for the clock movement (timekeeping).
Insert two (2) additional AA batteries into the compartment for the mechanical gears rotation.
Ensure batteries are inserted with correct polarity (+/-).
Image: The rear view of the clock, illustrating the separate battery compartments for the clock hands (1 AA battery) and the moving gears (2 AA batteries).
5.2. Mounting the Clock
The clock is designed for wall mounting. A keyhole bracket is provided on the back for easy installation.
Choose a suitable location on a sturdy wall that can support the clock's weight.
Mark the desired hanging point on the wall.
Install a screw (and wall anchor if necessary) at the marked point, ensuring it protrudes enough to securely hold the clock.
Carefully hang the clock using the keyhole bracket on the back.
Ensure the clock is level and securely fastened to prevent accidental falls.
Image: A close-up view of the keyhole bracket located on the back of the clock, designed for secure wall mounting.
6. Operating Instructions
6.1. Setting the Time
To set the time, locate the time-setting knob on the back of the clock's movement mechanism. Gently turn the knob to adjust the hour and minute hands to the correct time. Do not attempt to move the hands directly.
6.2. Moving Gears Function
Once the two (2) AA batteries for the gears are installed, the internal gears will begin to rotate continuously. This movement is independent of the clock's timekeeping function. The gears are designed to operate quietly, providing a dynamic visual element.
7. Maintenance
7.1. Cleaning
To clean the clock, gently wipe the tempered glass lens and metal frame with a soft, dry, lint-free cloth. Do not use abrasive cleaners, solvents, or spray directly onto the clock.
7.2. Oiling the Gears
Over time, the moving gears may develop a slight whining or grinding sound. This is normal for mechanical parts and can be remedied by applying a small amount of light machine oil (e.g., clock oil or sewing machine oil) to the gear mechanisms. Refer to the manufacturer's guidelines for specific oiling points if available. If no specific points are indicated, apply sparingly to visible moving contact points of the gears.
Note: If you are uncomfortable performing this maintenance, consider consulting a professional or contacting customer support.
8. Troubleshooting
Problem
Possible Cause
Solution
Clock hands not moving / Incorrect time
Dead or incorrectly installed AA battery for clock movement.
Replace the AA battery for the clock movement, ensuring correct polarity.
Gears not moving
Dead or incorrectly installed AA batteries for gear movement.
Replace the two AA batteries for the gear movement, ensuring correct polarity.
Gears making noise (whining/grinding)
Lack of lubrication on moving gear parts.
Apply a small amount of light machine oil to the moving gear mechanisms (refer to Maintenance section).
Clock not hanging straight
Mounting screw/anchor not level; hanging bracket slightly off-center.
Adjust the mounting screw/anchor to be perfectly level. If the bracket is slightly off, the clock face can sometimes be unclipped and repositioned to compensate.
Hands are bent or damaged
Accidental impact or improper handling.
Gently straighten the hands if possible. If spare hands were included, replace them. Contact customer support for replacement parts if needed.
9. Specifications
Brand
DORBOKER
Model Number
B0CCY9C2BW
Color
Black Gold Arabic
Display Type
Analog
Style
Modern, Industrial Steampunk
Special Feature
Illuminated (implied by design, though not explicitly stated as LED), Silent Clock, Real Moving Gears
Product Dimensions
30"W x 30"H (76cm / 30 Inch)
Power Source
Battery Powered (3 x AA batteries, not included)
Room Type
Living Room, Dining Room, Kitchen, Office, Farmhouse, etc.
Shape
Round
Indoor/Outdoor Usage
Indoor
Material
Metal (Frame Material)
Watch Movement
Quartz
Item Weight
22 pounds (approx. 10 kg)
10. Warranty and Support
For any questions, concerns, or support regarding your DORBOKER 30 Inch Real Moving Gears Wall Clock, please contact DORBOKER customer service. Refer to your purchase documentation or the seller's information for specific contact details and warranty terms.
It is recommended to keep your proof of purchase for warranty claims.
Instructions for Large Gear Wall Clock Detailed instructions for inserting batteries, setting time, and disassembling/reassembling a large gear wall clock. Includes troubleshooting tips for common issues.